
Sew a simple tank top for yourself or a family member. Get a free sewing pattern and video tutorial for the project here.
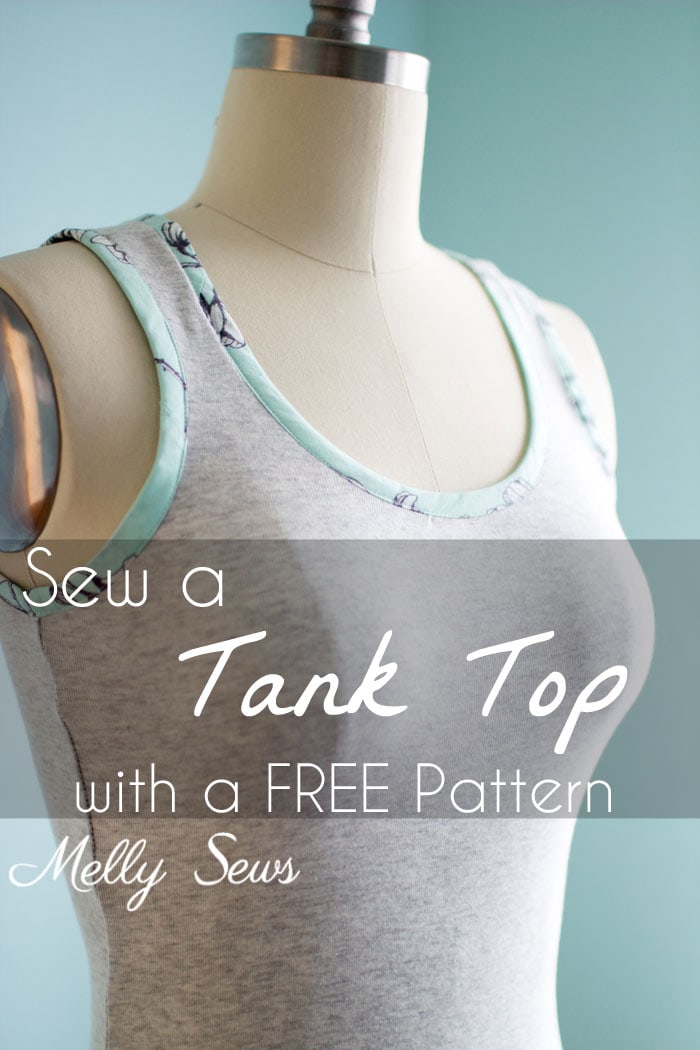
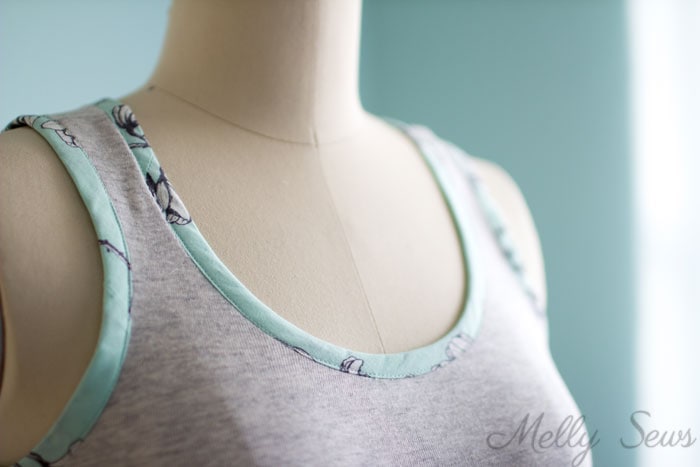
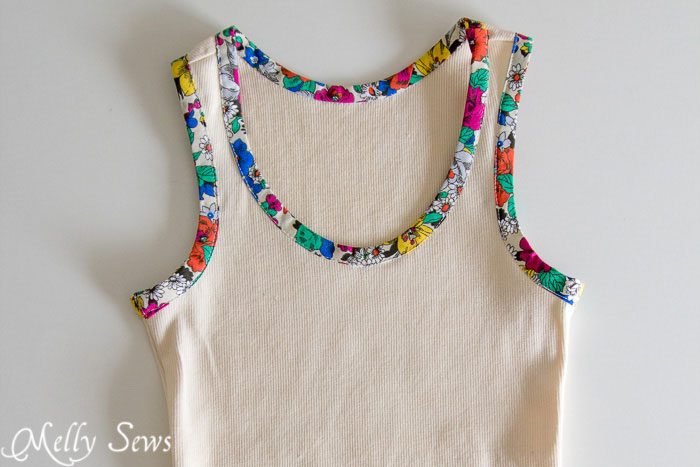
Hey y’all, today’s project is a video update of a popular older tutorial on how to sew a tank top. This is a knit tank top pattern that you can finish with woven fabric bias tape trim, and I love the little pop of color and contrast the bias tape adds.
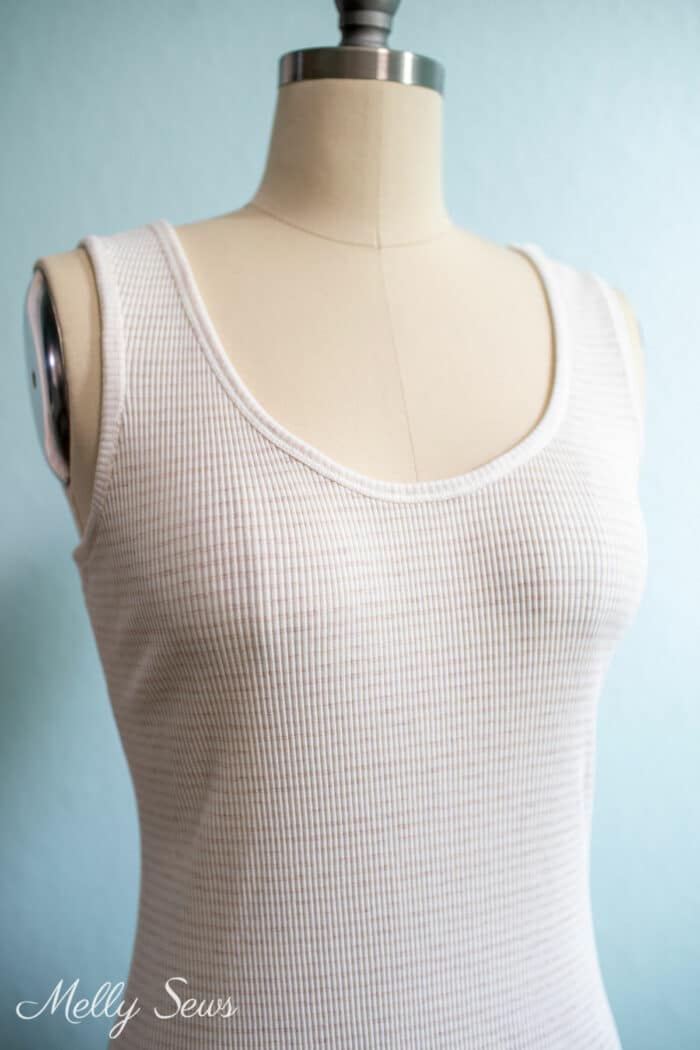
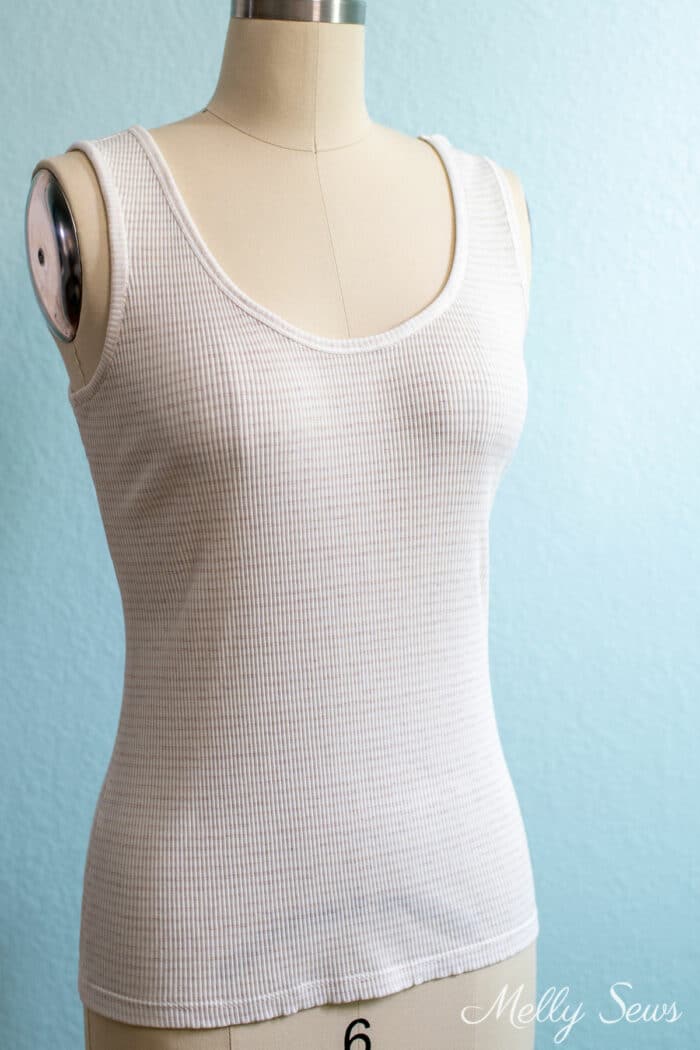
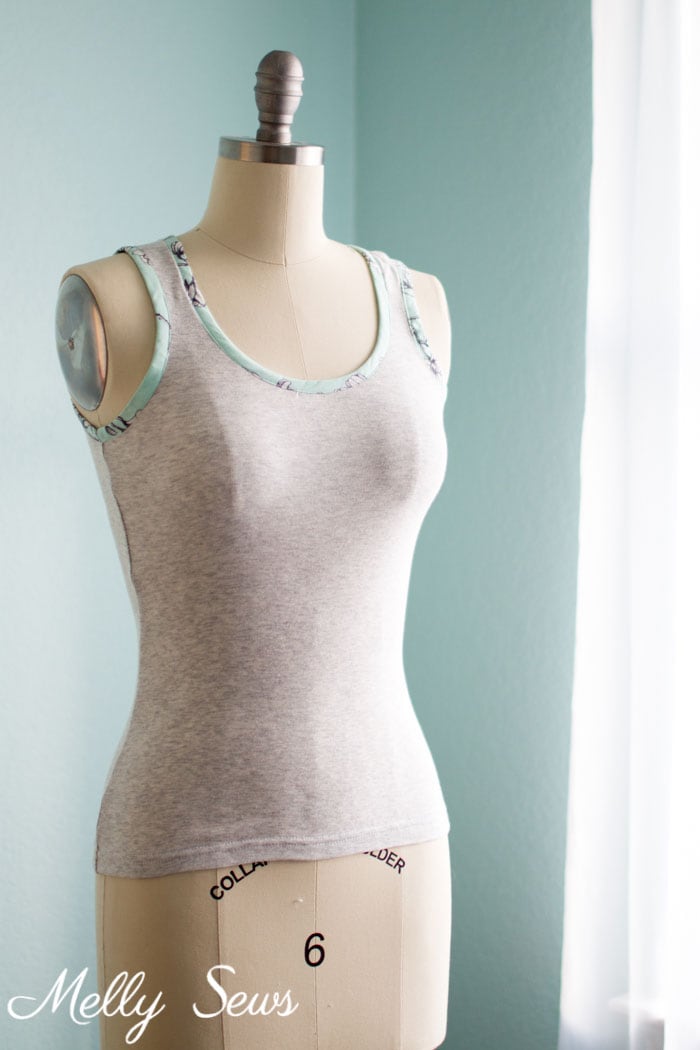
You can also finish this tank with knit bands, like the one shown below. And this post has directions for both edge finishes.

This is exactly the type of classic tank top I like to sleep in year round, though there’s no reason this top has to be for bedtime only. Wear it with these boxer pajama shorts or with jeans. It’s a great pattern for warmer weather or under a cardigan when it gets cooler – a wardrobe workhorse. In fact, it might be tempting to make a closet full of tanks using this pdf sewing pattern.
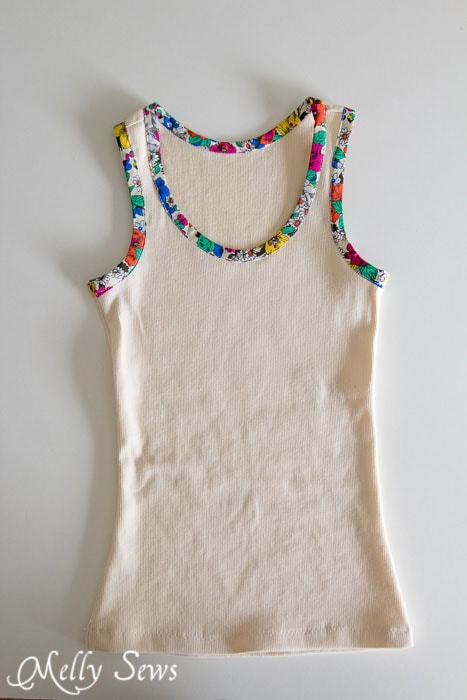
Now you might think that sewing woven bias tape to a stretchy knit tank won’t work, but it totally does. You just need a few tricks that I’ll show you in the video below and you can have a fun print at the neckline and armholes of this tank. While I wouldn’t call this a beginner-friendly pattern or recommend this project for absolute beginners, an adventurous sewist with a few makes under their belt can tackle this. The fact that this free pattern has only 2 pieces is probably why it’s one of my top sewing patterns on this site. And this stitches up quickly, so this is a sewing project you can make a bunch of.
Supplies to make a tank top
Want to make your own cute tank top? You’ll need
- 2/3 to 1 yd of knit for your main fabric. Cotton spandex rib knit or cotton spandex jersey is my favorite for this pattern, though I’ve also used rayon spandex blend. You want the knit to have at least 50% stretch and good recovery. That means that you should be able to stretch a 10″ long piece to 15″ and have it snap back to 10″ long. I also like a medium weight fabric for mine. Learn more about knit fabric here.
- 1/2″ wide double fold bias tape, about 1 1/2 yards of it. I made my own and you can too. See the bias tape tutorial here. Your bias tape can by polyester, linen, cotton, pretty much whatever type of woven fabric you feel like working with, though quilting cotton is the easiest. Alternately, you can cut rib knit to make neck bands and armscye bands.
- Basic sewing supplies: sewing machine that can do a zig zag, scissors, pins, thread, etc
- The pattern, see below for info on sizing and how to get my free pdf patterns.
How to get the tank top sewing pattern
The free tank pattern has two sizes. This smaller size pattern fits up to a 34″ bust. The larger size fits up to a 60 inch bust. The tank fits an upper hips area equal to the bust size and the tank hem hits at the high hip. Note that the larger size has only been tested on my dress form, not a person, so please do a lot of measuring on yourself before cutting out the good fabric. Also note that the DIY tank top pattern is drafted with about 20% negative ease (see this post for more information about ease) and only works with stretch knits. The recommended stretch percentage is 50% or more. If you need to make the pattern bigger or smaller, check out this post.
To get this pattern, you must either be a free newsletter subscriber or have purchased a gallery access pass. Then click your preferred option from the buttons below. Existing newsletter subscribers should look at the bottom of the most recent Friday newsletter for the current free pattern gallery password. If you purchased the all access pass you’ll log in to your shop account to download the pattern. Note that the free version of the pattern does not have printable instructions so you’ll need to refer to this post for instructions.
 |  |  |
Please note that all my free patterns are licensed for personal use only (no selling items made from this unless you purchase it) and by downloading you are agreeing to this license.
Sewing and Construction
When you print the pattern, print pages 1-6 for the smaller size and pages 1-12 for the larger size.
To sew, watch the video below. Or, if it doesn’t load for some reason you can watch it on YouTube here. If you prefer a written tutorial with pictures, I’ve got one here. If you just want a construction cheat sheet, I’ve got that below the video.
How to Make a Tank Top with Knit Bands
The process for making the tank top with knit bands instead of bias tape is basically the same as the bias tape, except that you will want to cut the bands shorter than the armscye and neckline. You’ll measure the armscye or neckband and then multiply that number by 0.85 to determine the band length. Then make the bands 3x as wide as you want the finished band plus 1/4 inch. So if you want 3/8″ finished bands, you’d do 3/8 x 3 = 9/8 which simplifies to 1 1/8. Then you’d add 1/4 which is the same as 2/8 and you’d want to cut the bands 1 3/8 inches wide (1 1/8 + 2/8).
You can watch a short video of how to sew on the bands below or on YouTube here. Note that I prefer to sew one shoulder, then sew on the neckband and one armscye, then sew the other shoulder closed and sew the second armscye before sewing the side seams. Also not that it’s important to sew the bands on with a stretch stitch.
Time needed: 1 hour and 30 minutes
How to Sew a Tank Top
- Print and assemble the pattern
See this post for help with pattern downloads and see this post to help with pattern printing and assembly. Cut out the front and back pattern pieces.
- Cut out of fabric
Cut one front and one back, making sure there is at least 50% stretch horizontally across the tank.
- Stitch shoulder straps and side seams
Place the front and back right sides together and stitch across shoulders and down side seams using a stretch stitch. *See section above to modify this for knit bands instead of bias tape
- Steam iron bias tape into curves
It helps if you watch the video above for this step – you’re going to pre-shape your bias tape to follow the curves of the neckline and armholes, then pin it on.
- Stitch the bias bindings on
Unfold the bias tape, keeping the curves in the same places, and then stitch on to the back neck, front neckline and arms to finish those raw edges. You can use a straight stitch for this step.
- Hem the bottom.
Check out this post for knit hem ideas.
Once you’re done sewing this easy tank, it’s time to wear it on a hot summer day!
Lou Ann Rice
Hi, Melly.
I’ve been following your blog for years. I just watched your tank top video. I can’t believe I never heard about steaming in the bias tape before! That will save me from future stretched out necklines.
Question – on the sleeves, why do you choose to sew the side seams together rather than flat construction? I’m wondering when it is OK the sew a binding or a sleeve before the side seams are sewn and when the side seams need to be sewn first for best results.
Thanks, Melly, from a fellow Texan.
Deborah
This was a great tutorial and my mind is churning with ideas! Thank you for posting!
Katie
I have been looking for a tank top just like this! I will make it and post my finished top on my blog with a link back to yours. 🙂