
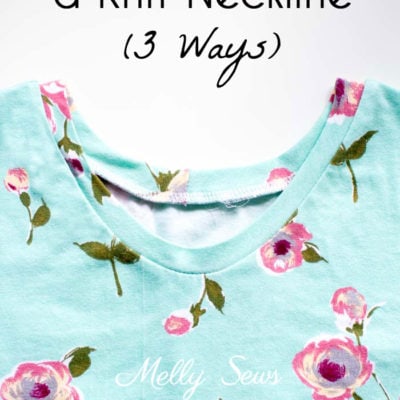
Hey y’all – today we’re talking about how to sew a knit hem. There are lots of ways to do this, including some you can do on a regular sewing machine and one you do on a serger. I won’t be covering the cover stitch machine, but I do have links to info about cover stitching at the bottom of the post.
First, let me show you my secret weapons for hemming knits: spray starch and stay tape.
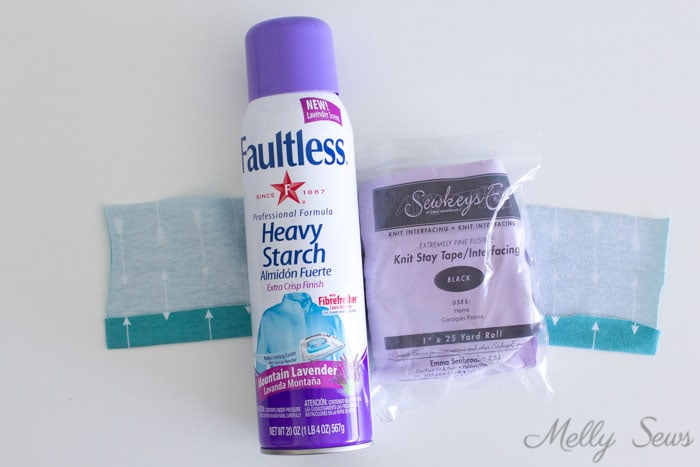
Spray starch is all I use most of the time to wrangle my knits. On light to medium weight cottons, it eliminates the need for pinning the hems, as well as helping them to feed more smoothly in the sewing machine. Note that since knits don’t unravel like wovens, you only have to turn the hem up once, not twice.
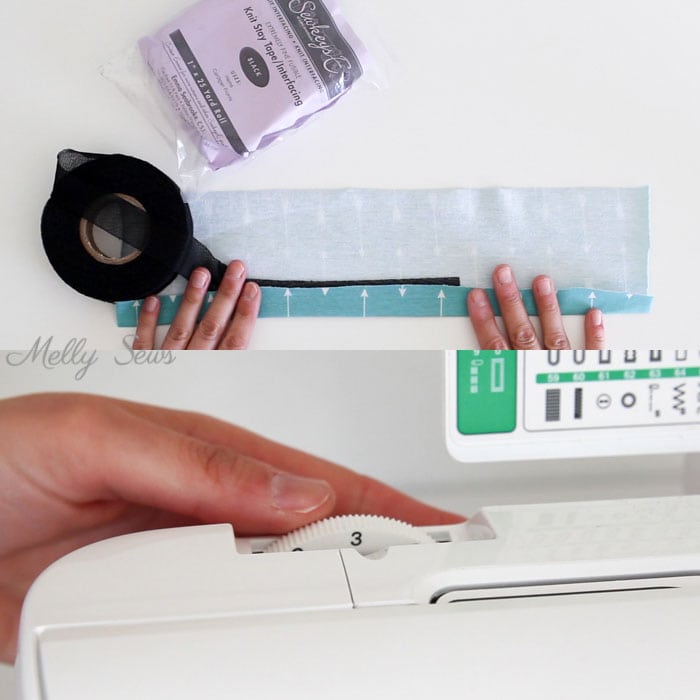
However, when working with very lightweight or slinky knits, I like the Sewkeys E tape, which you can find here. When sewing with it, I put it between the layers of my knit hem and press. It doesn’t hold the layers together, because it only has fusible glue on one side, but it does press the crease for the hem at the same time. And if you have trouble with your knit hems flipping out to the right side, stay tape also helps with that.
Another tip is to reduce the presser foot pressure on your machine when sewing knits. My normal machine setting is 2-3, so when I’m sewing knits I turn it down to 1-2. This helps with rippling or bumpy hems.
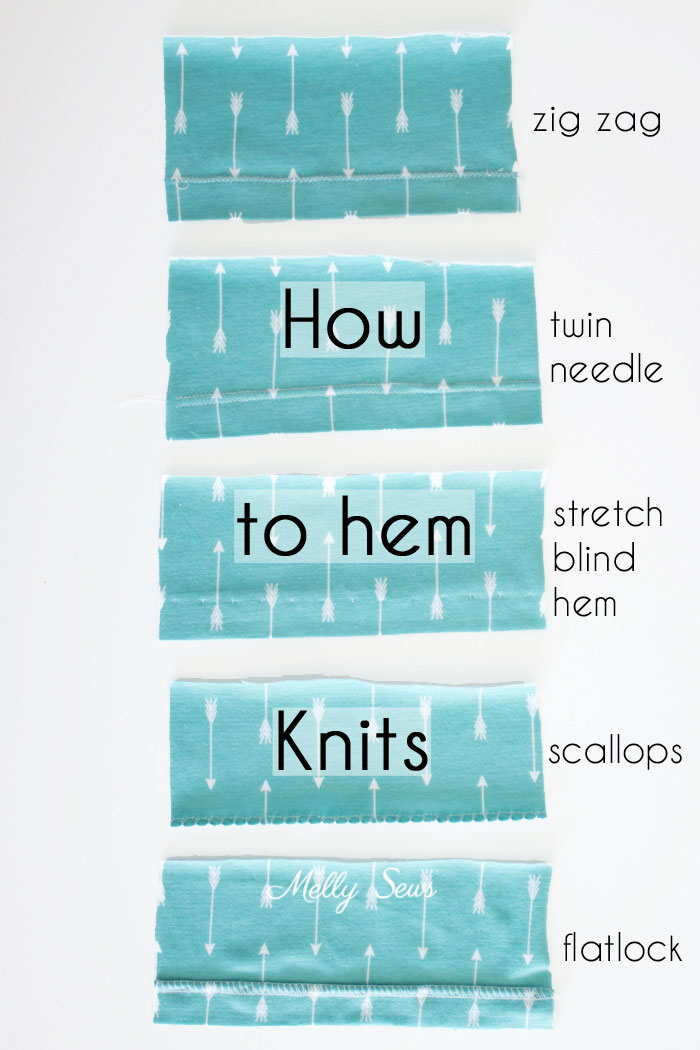
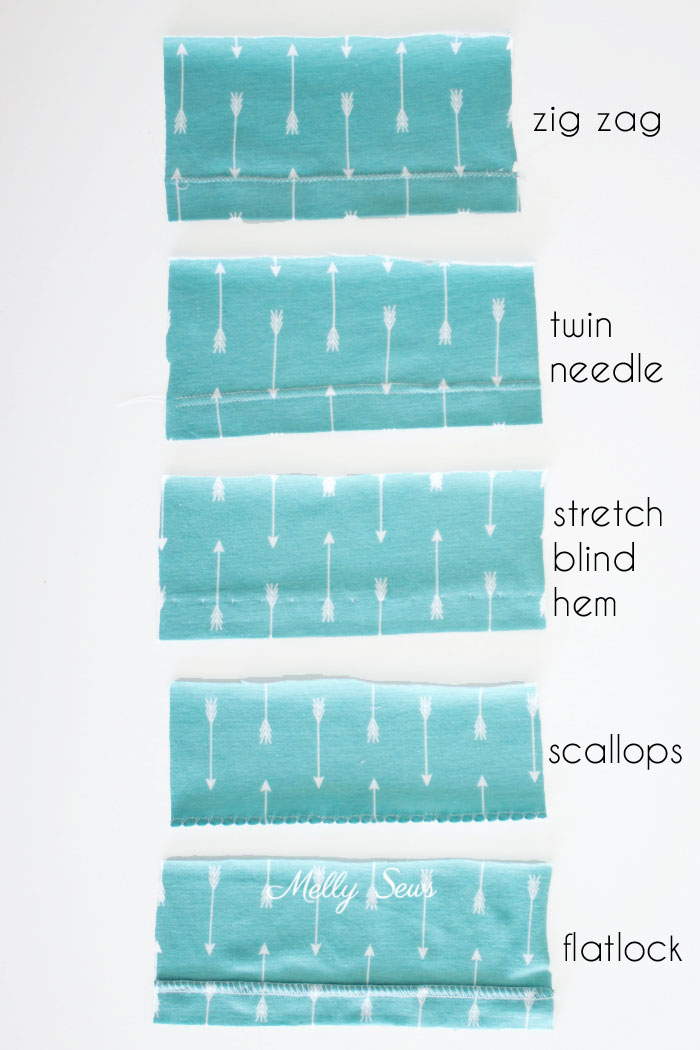
Below are the 5 types of hems I’m going to cover.
So here’s the video that covers all of these methods. If it won’t load for some reason, you can also watch on YouTube here. And below the video I’ve got more written instructions.
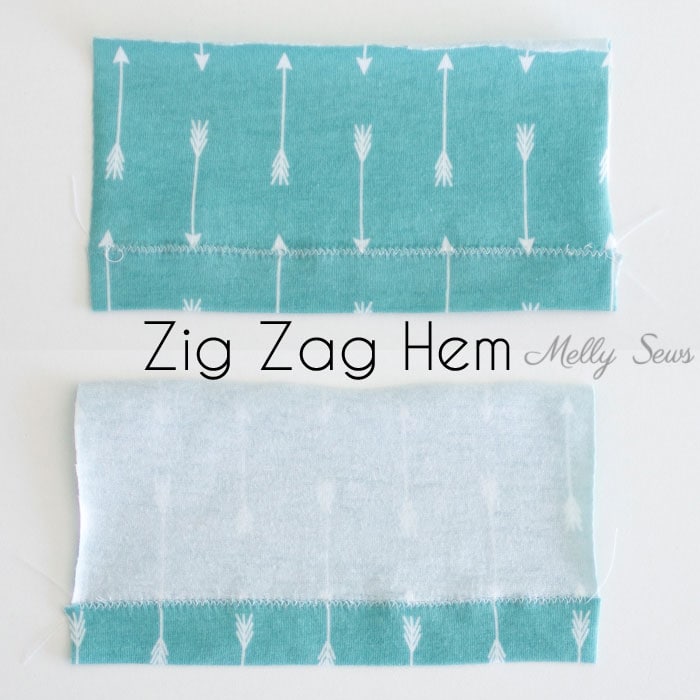
Zig Zag Hems
Even the most basic machine can typically do a zig zag stitch, so that’s the first one I’ll cover. When doing a zig zag stitched hem, set your machine to a medium width and small-medium length stitch. Check the bobbin thread color before starting, because this is the side that is going to show. 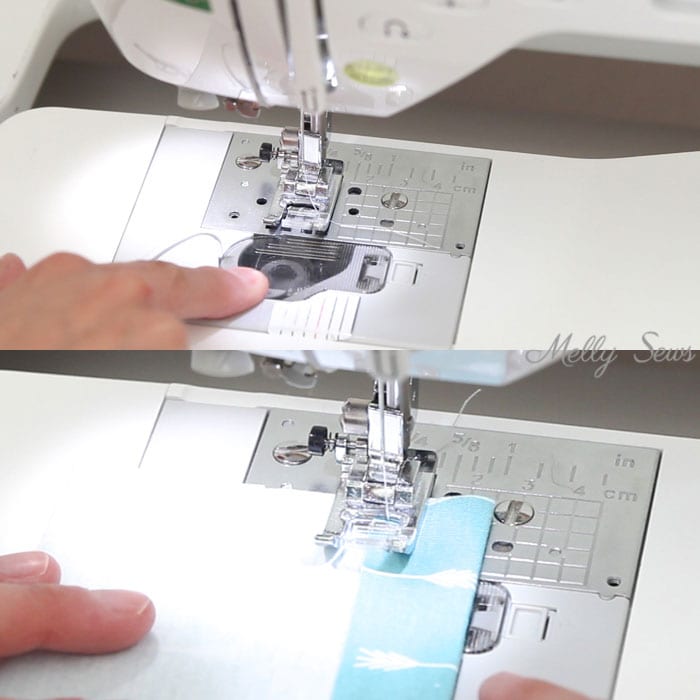
Center the raw edge of your hem with the presser foot and stitch; one side of the stitch will gov on the garment, the other onto the hem, and the raw edge will get covered.
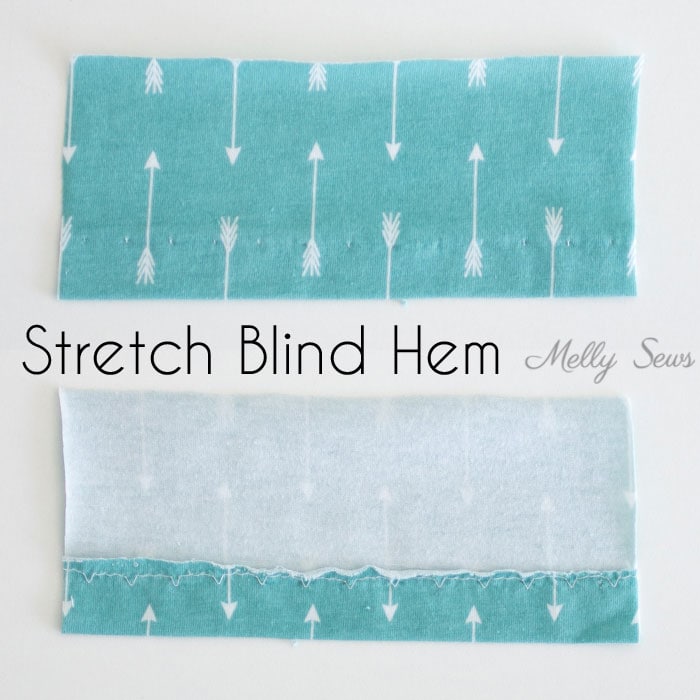
Stretch Blind Hem
Blind hemming might not be the first technique you think of for hemming knits, but it can work well. The regular blind hem (number 17 on the stitch guide from my machine below) has a small amount of stretch, so it’s only good for very stable items that won’t need to stretch much to put on. However, if your machine has a stretch blind hem stitch (the one my finger is pointing at, number 18), you can use these on any knits. For knits that tend to roll, I do recommend stay tape fused the the hem side of the fabric before doing this.
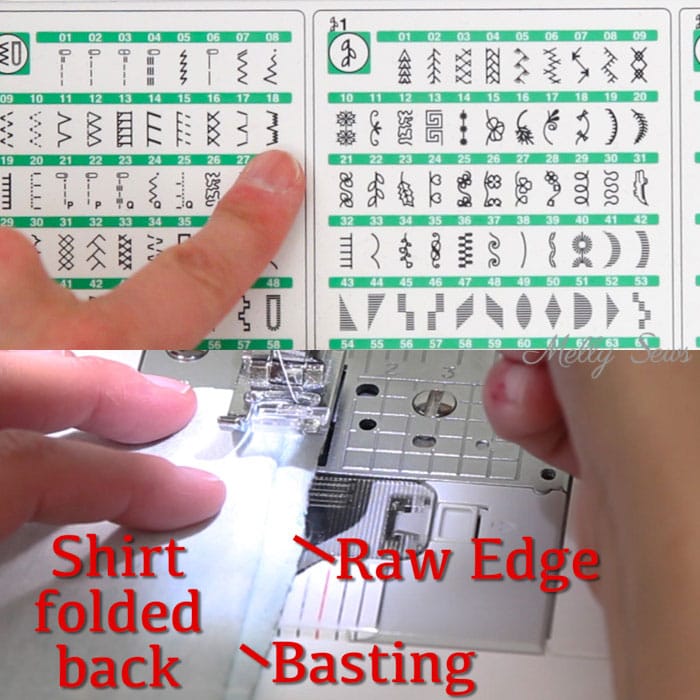
To blind stitch, you first have to baste the hem, so that you can turn it back under and do the blind stitch. I have a post all about blind hemming here, and the process is the same on knits.
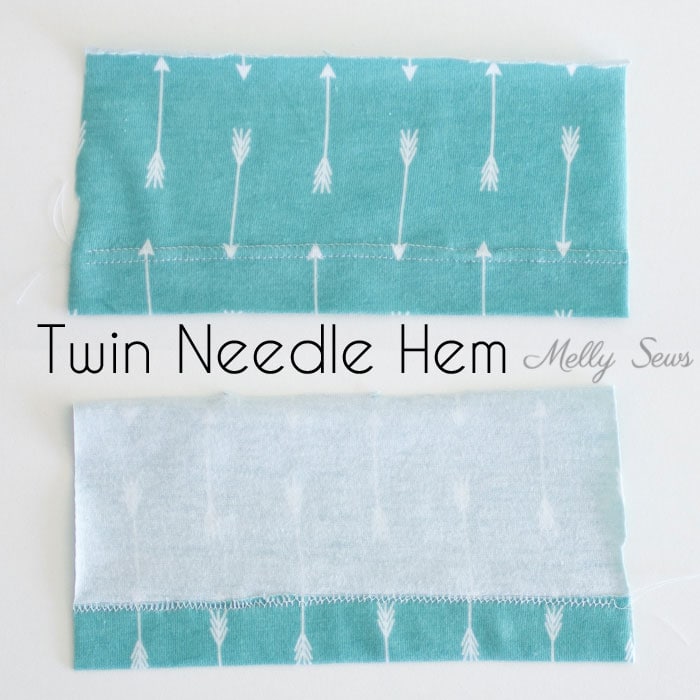
Twin Needle Hem
Twin needles are also a great option for hemming knits. I have an entire post about using a twin needle to hem here, so I won’t go into details in this post.
Scalloped Hem
If your machine has more stitch options, you might have an overcast or lingerie stitch that you can use to make this decorative stretch hem. I’m pointing at what the stitch diagram looks like on my machine to create this effect. To make the scallops, it also helps to increase the tension almost as high as it can go. 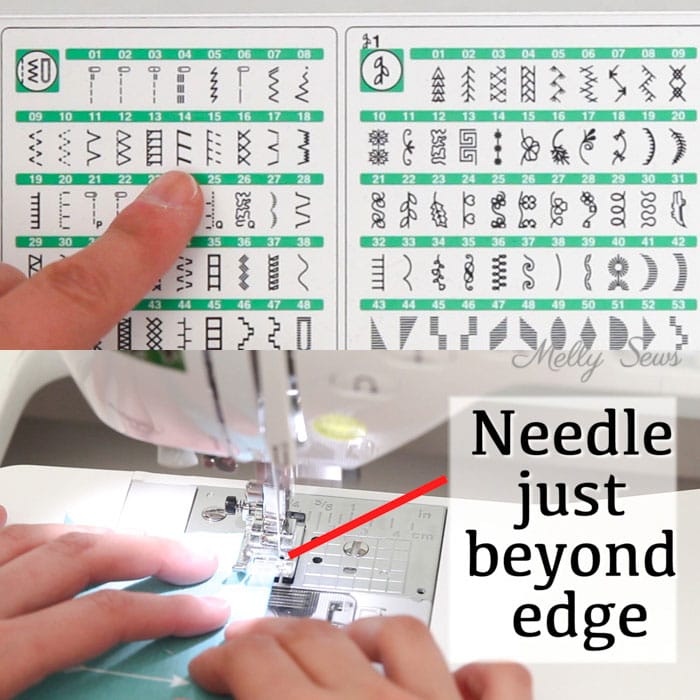
Adjust the stitch settings to the longest, widest stitch the machine will do. Set your needle to hit just beyond the edge of the fabric for this hem.
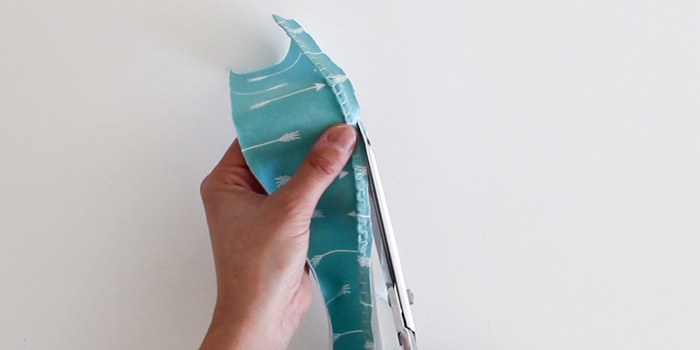
After stitching, trim off the excess fabric on the wrong side of the fabric, being careful not to cut the right side of the fabric.
And here’s what the finished hem looks like.

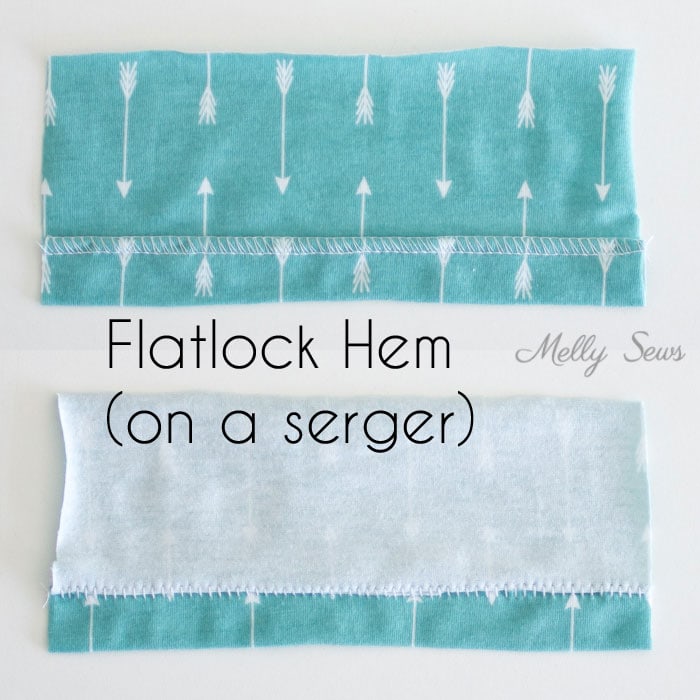
Flatlock Hem
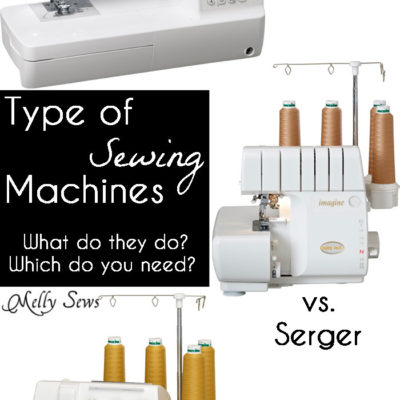
Finally, here’s one kind of hem you can sew on your serger – a flatlock hem. To do a flatlock, you’ll remove the left needle from machine, then adjust the tension and lock or remove the knife. Every machine varies, so you will need to consult your manual for the specific settings for your machine.
For this hem, you’ll fold the fabric twice, then sew on the fold. The first fold (on the left below) will be the edge of your garment, the second is where the hem will be.
Stitch along the fold, feeding the fabric next to the the knife, but being careful not to go beyond the knife edge as this will cause rolling.
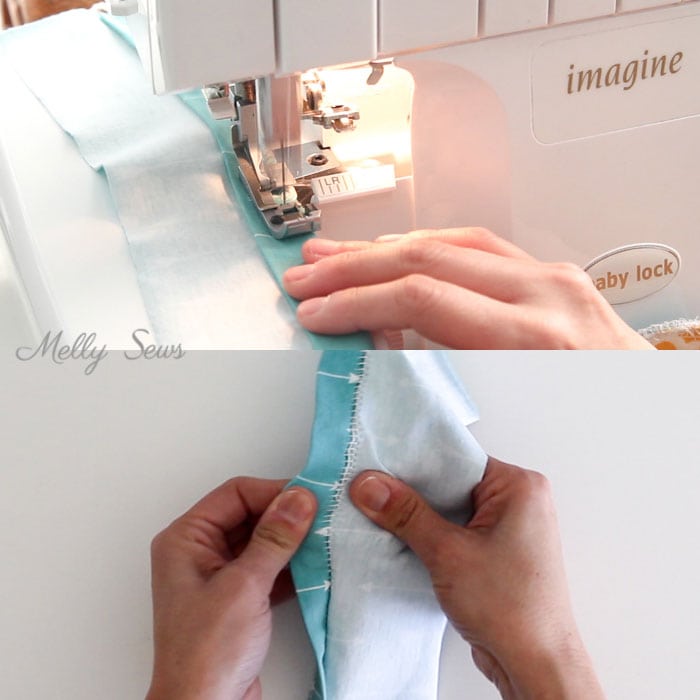
After stitching, you’ll pull on the hem to flatten it; this is the “flatlocking” part.
So there you go, 5 ways to sew a knit hem!
Want to read more about sewing with knits? See these posts:


Dalia
One of my sons RTW-T-Shirts has a hem that looks like the “wrong” side of the flatlock shown here. Is that possible? Would you just turn the shirt around?
Melissa Mora
Yes, you could do that.
Anne
Hemming knits can be tricky! Thanks for all these tips! I’ve got a Craft Gossip post scheduled for this afternoon that features your tutorial: http://sewing.craftgossip.com/?p=91887 –Anne
Leigh Rollins
I’ll be sure to try the spray starch! Ive used the double=sided SewKeys tape with good results although I always stitch the hem to make sure it stays.
The lessening of the pressure on the foot really does make a difference; I’m really trying to embrace sewing knits.?
Thanks for posting your many helpful hints!
hasina
Thank you so much 🙂 always wondered how to use the flatlock stitch.
Emily
Love knit stay tape!! I will have to try starch too! Excellent tips!!
Barbara Johnson
Where has the stay tape been hiding all of my life! This is the first time in 50+ years of sewing that I hemmed a knit top beautifully. No more bunching of fabric, too tight stitches etc.
I did as another Pin suggested and first starched and turned under my hem. Then I ironed on the stay tape on the shirt portion that the hem would cover. Put my zig zag stitches to a wide width, then sewed around at the edge of the hem.
Thanks for sharing such great hints!
Chrysanthemum
I’m sewing knits quite regularly, since my daughter doesn’t use the iron and cotton outfits needs to be ironed… Thamks for the great tute!
Pherbia
I am glad to know about hemming your way. I will be purchasing your tape. I sew for needy children and this will be a big help in many ways.