
Learn how to create a perfect, mitered corner on a project with bias tape in this tutorial.
Hey y’all – today I’m going to show you a sewing technique – how to sew bias tape mitered corners. This is useful everywhere from edging things like placemats, table cloths, towels and napkins to finishing hems and edges on garments. A mitered corner forms a diagonal line across the width of the bias tape and is a neat way finish than trying to square off the corners.
If you’ve never sewn bias tape before, start with this post to see how to use bias tape to finish the edges of the fabric in your project. If you have sewn bias tape, read on to see this mitered corner technique.
How to Sew Mitered Bias Tape Corners
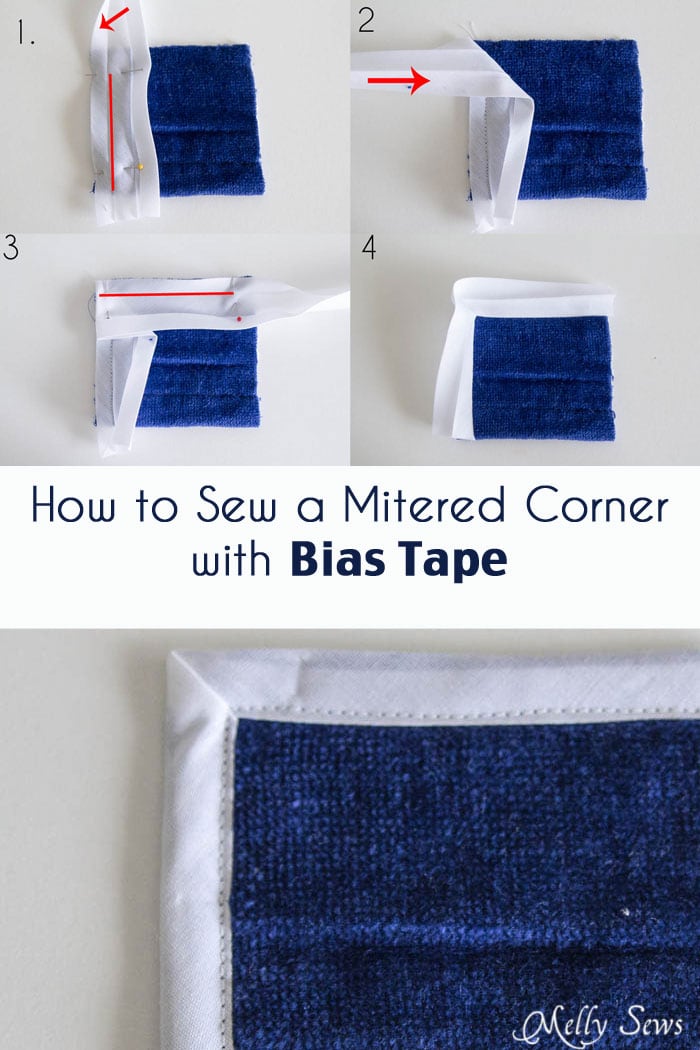
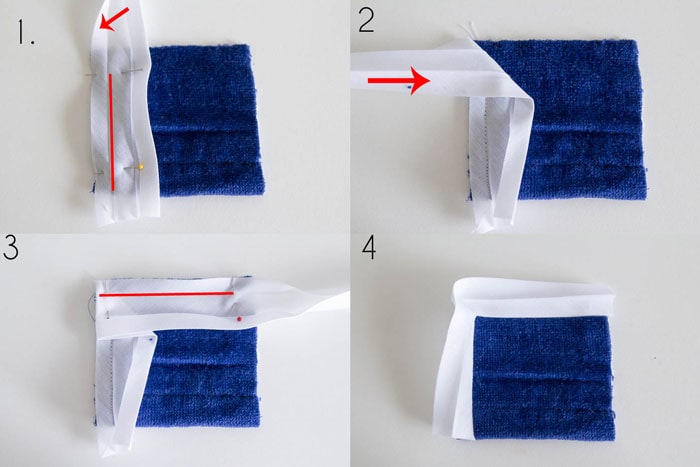
- Unfold bias tape and pin to right side of fabric. Stitch in fold nearest raw edge, stopping 3/8″ before the corner. Fold the bias tape out away from the fabric to form a 45-degree angle as shown in step 2.
- Hold the diagonal fold, then fold the bias again tape toward the fabric so that the wrong side is once again face up.
- Stitch over the corner and to the next corner, stopping again 3/8″ before the corner.
- When you unpin, this is what your corner will look like; see image below to continue.
On the wrong side, this is what your tape will look like when you’ve folded the raw edges back under on the creases.
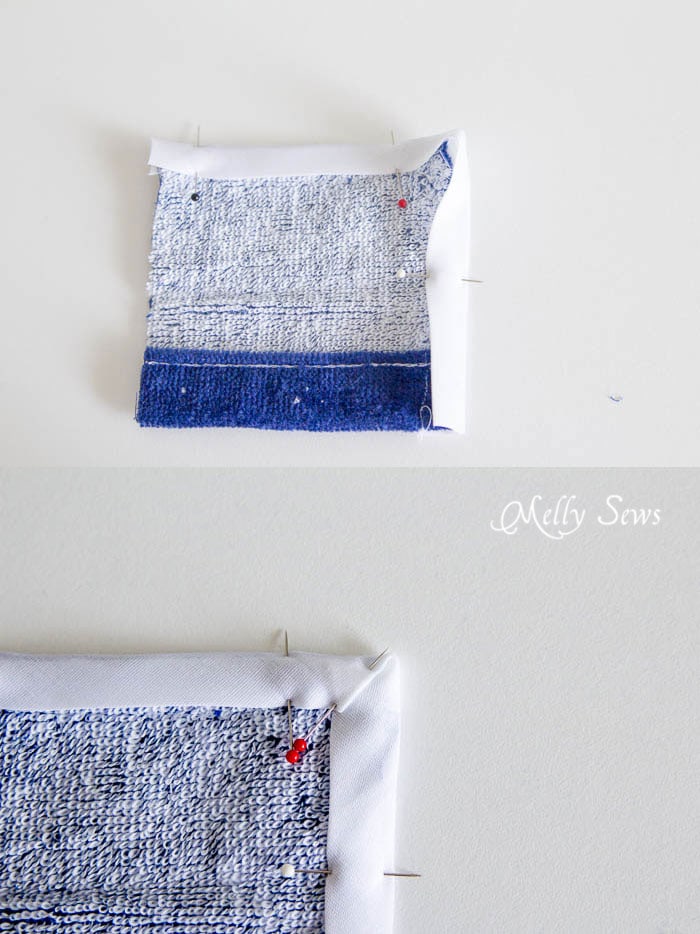
Fold and press the excess tape at the corner in to form a mitered corner on the back, as shown above. You’ll do this by folding the loose tape at a 45 degree angle away from the fabric, then folding the triangle that sticks beyond the fabric in a diagonal crease back toward the fabric. You might want to fiddle with the pressed fold just a bit to get it right at the corner of the fabric.
On the right side, topstitch close to the edge of the tape, catching the tape on the wrong side of the fabric to secure in place. Make sure to use thread that matches the binding for this step. Below is what your mitered corner will look like on the front side, with the stitching line close to the folded inner edge of the tape. A tip for this step is to keep the presser foot centered over the tape and move the needle to the edge of the bias tape.
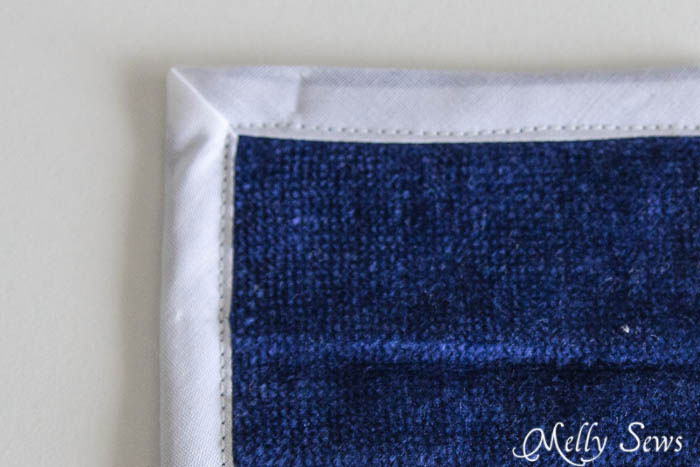
And you’re done with a nice mitered corner!
Rebecca
Thank you so much for the tutorial. I often use bias tape on straight and curved edges but my current project needs mitered corners. I’m going to try this when I get home. You’ve made it look very easy.