Learn how to sew bias tape to finish edges on clothing and craft projects.
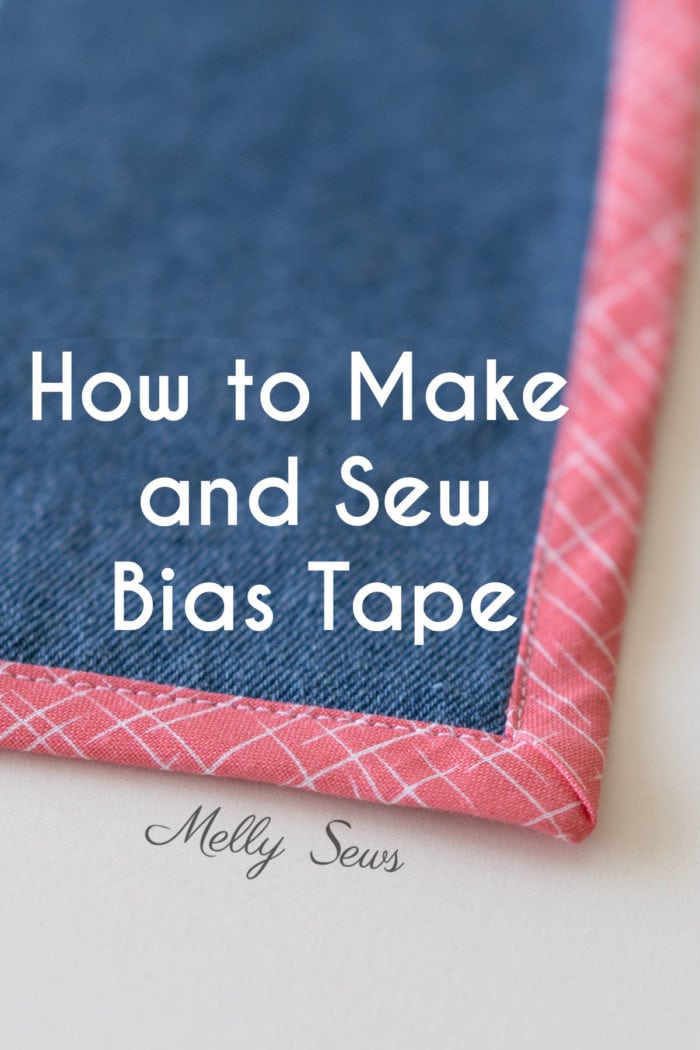
I spent years of my sewing life hating bias tape. It was fiddly and took patience and attention to detail to sew it on correctly. And I never sewed it on correctly because I was trying to go fast. So instead of sewing in two passes, I’d sandwich it over the fabric edge and that just never turns out pretty. Unless you have the special presser foot for your machine, which I didn’t. But now that I’ve gotten older and more patient I’ve learned to love bias tape. It adds a great detail, like on these Coastal Cargos (my pattern).
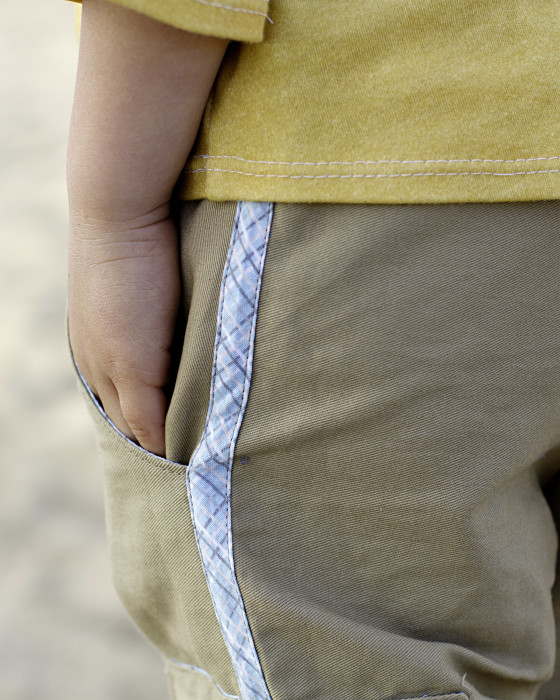
And of course you can’t get that kind of fabric when you buy pre-packaged tape, so I’ve also learned to make my own, which I will show you today.
What Is Bias Tape?
So, what is bias tape? Let’s go back to thinking about grainlines. Bias tape is fabric that is cut on the bias grain.
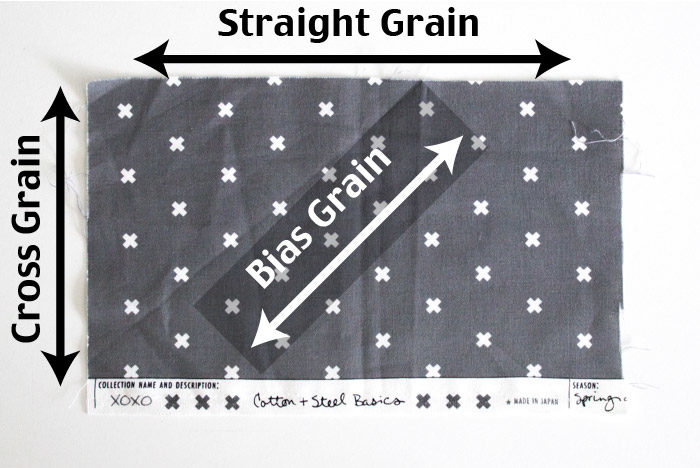
Then it has the raw edges folded and pre-pressed to the wrong side. Sometimes the tape is folded in half a second time to make double fold bias tape. Because it is cut on the bias, it can stretch a little, even though it’s typically made of woven fabric. The bias grain also allows the tape to be pressed into curved shapes. This means it’s good for finishing curved edges like necklines. It can also be a nice decorative touch of contrast. It can be used to finish seams, hems and raw edges or add a decorative touch to a garment, or both. Below are some examples of how I’ve used bias tape.
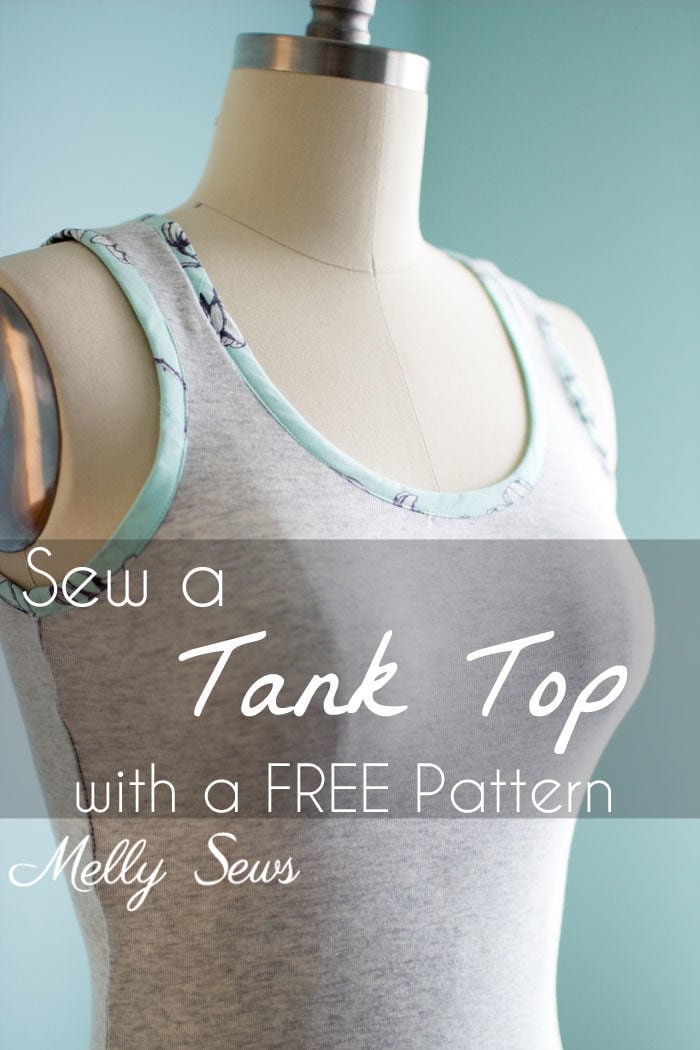
The tank top pictured above features a neckline and armholes finished with double fold bias tape. And yes, you can use woven fabric bias tape to finish a knit garment.
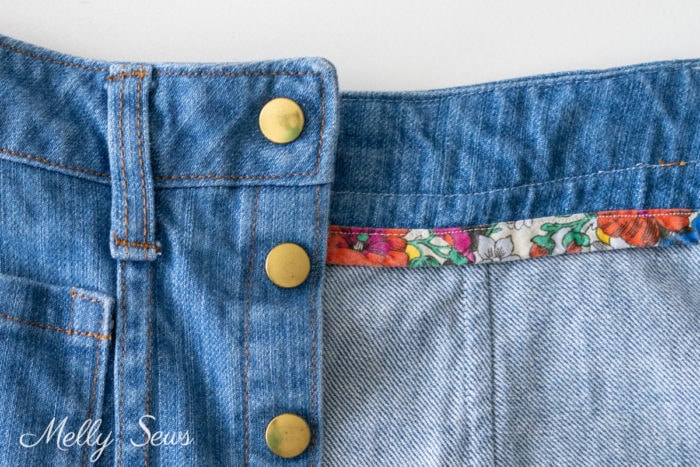
The insides of my Tillery Skirt pictured above also feature double fold bias tape to finish the waistband. This method results in less bulk than turning the seam allowance of the denim to the wrong side.
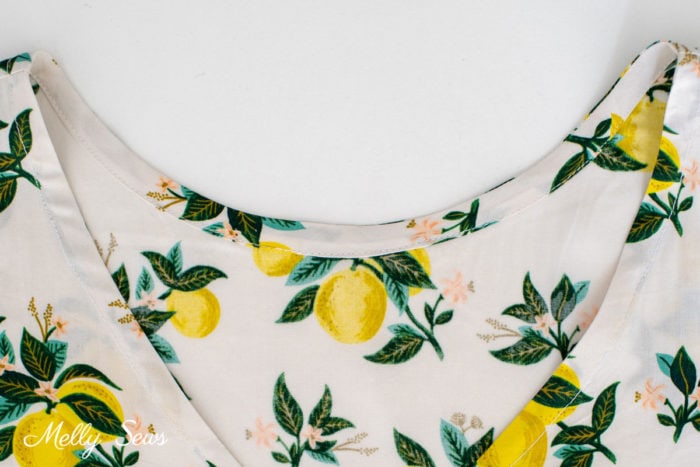
And the neckline of the Hathaway Tank above is finished with single fold bias tape for a thin width and clean finish that doesn’t require a facing.
Types – Single and Double Fold
Since there are examples of both single and double fold bias tape above, let’s talk about the differences between the two. Single fold bias tape has the edges folded once, double fold has the edges folded twice. You can see examples of each below.
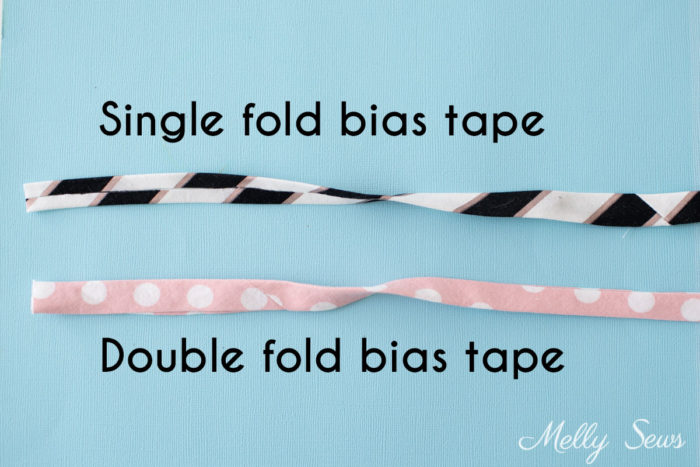
Essentially, double fold bias tape starts out as single fold tape, and then you fold it in half and press again to get the double fold. A main difference between the two is that in order to use the double fold type, you want to make sure there is no seam allowance, as the tape will finish right to the raw edge of the main fabric. With single fold tape you need a seam allowance equal to half the width of the tape.
Make Your Own
Bias tape is sold in packages at the fabric store, but lately I have really enjoyed making my own. It’s especially satisfying once you learn the continuous method to cut the fabric into bias strips. You can get yards of bias tape out of a fat quarter with this method, and you only need to sew two seams! You’ll also need a ruler, fabric marker, scissors and an iron. Watch the video below or on YouTube here to see how that’s done, scroll below for written instructions.
How to Make Continuous Tape
This is a method to make bias tape and only have to sew two seams for yards of tape. I usually use a fat quarter of fabric, and from that I can get 4 yards of 1/2″ double fold tape or 8 yards of 1/2″ single fold.
Start by folding your fabric on the bias. I learned this method to make a square out of a rectangular piece of paper in elementary school. I always iron my fabric on the fold to mark it. Then, cut along the bias fold.
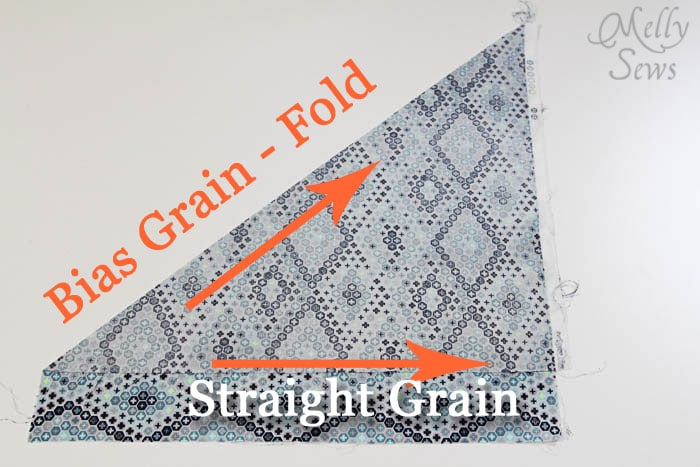
Match two straight grain edges right sides together like this and sew. I use a 1/4″ seam when I do this.
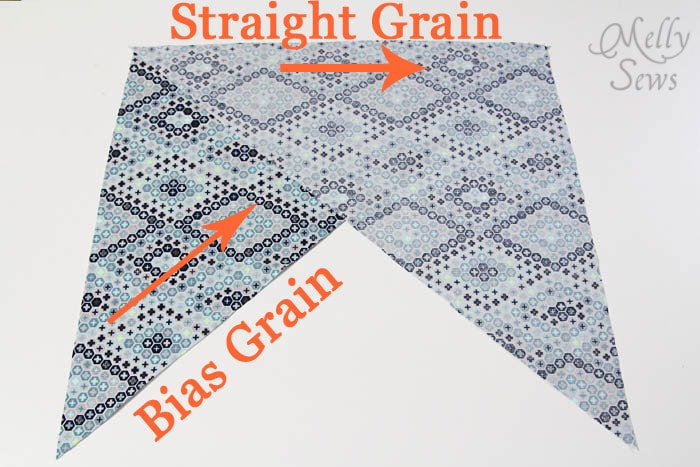
Press the seam open. Your piece will look like this now, with the seam in the middle and the arrow marking the bias grain.
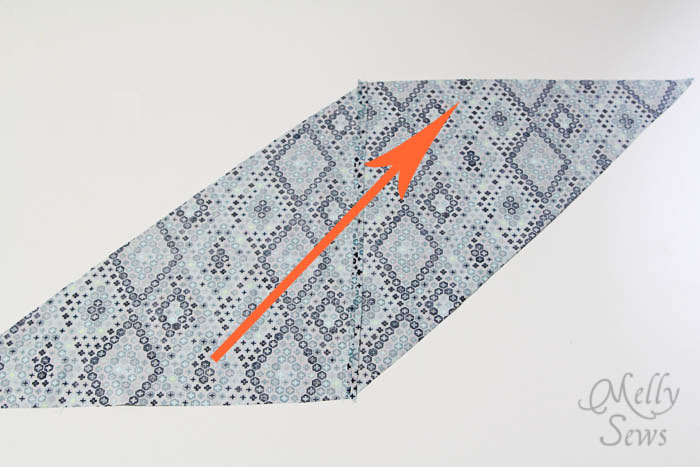
Using a ruler, mark lines on the bias grain of the fabric on the wrong side. When making double fold tape, your lines should be 4 x the final width apart (ie if you want 1/2″ tape at the end, your lines need to be 1/2″ x 4 = 2″ apart). If you want single fold tape, your lines should be double the width of the final tape width apart (ie if you want 1/2″ single fold tape you do 1/2″ x 2 = 1″ apart).
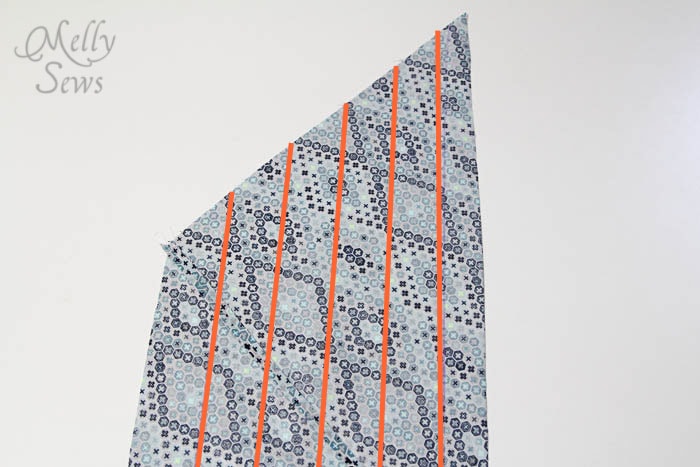
Fold your fabric, imagining that the spaces are numbered like this on one side. On the other side, imagine the numbers start with 1 instead of 0. You’ll match the edges, so you’re pinning the #1 space on one edge to the #1 space on the other side. The arrow shows where the #4’s would line up. Stitch this seam with a 1/4″ seam allowance, and press open.
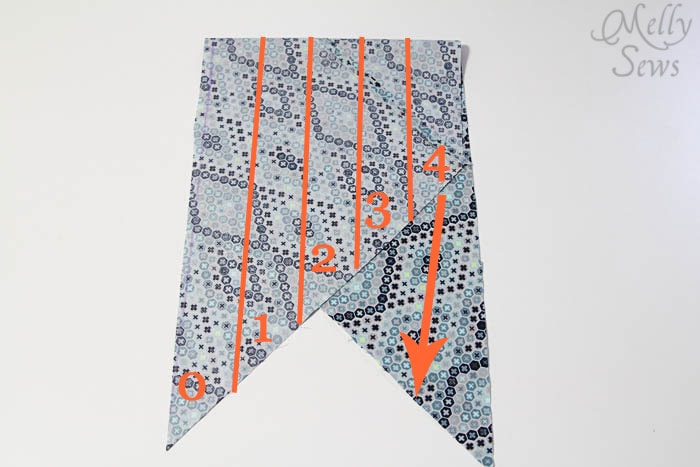
Your sewn tube will look like this – one row on each side is offset a little.
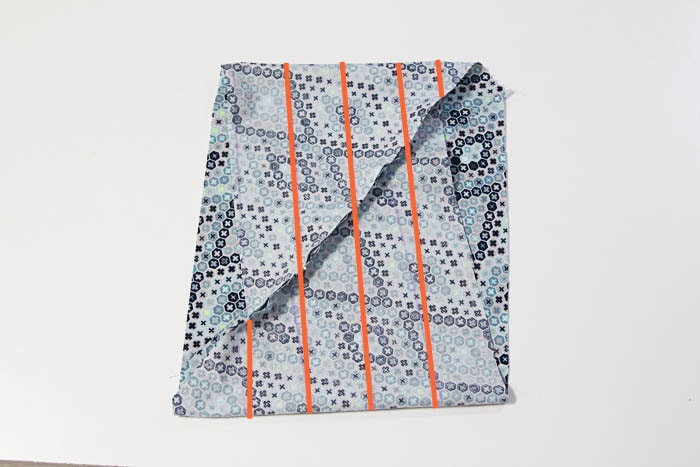
Now start cutting on your lines. I use scissors and go slowly. You could try a rotary cutter, just be careful not to cut through the bottom layer.
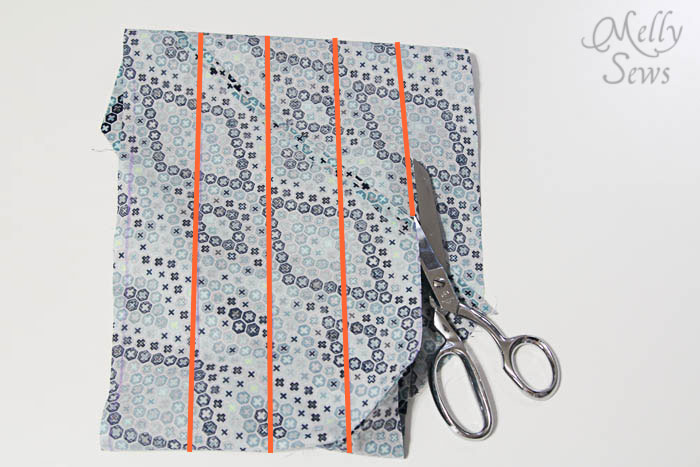
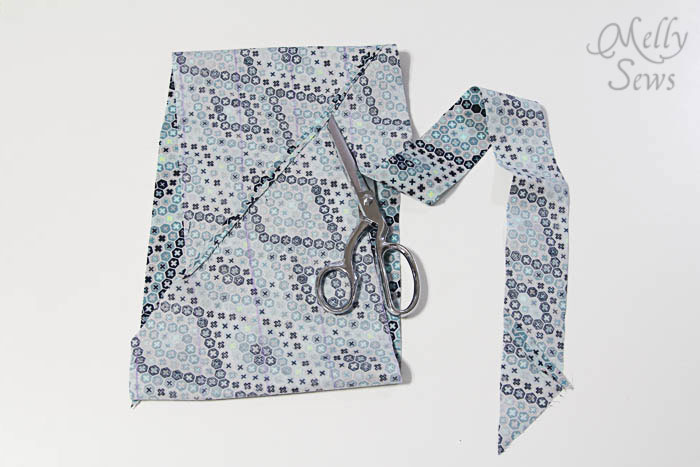
Continue cutting until you have a pile of unfolded bias tape.
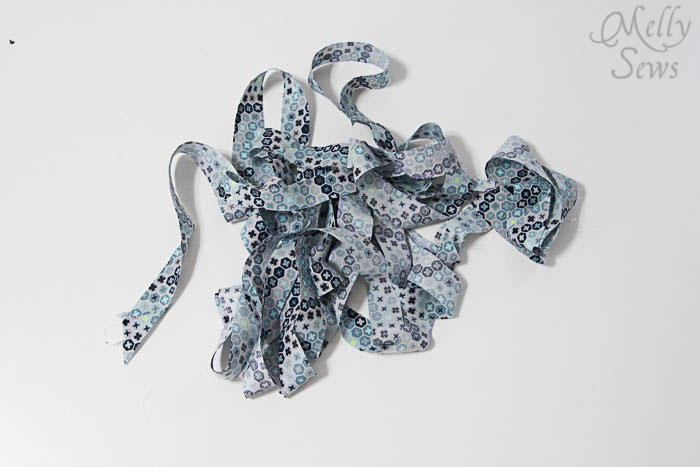
Next you’ll need to fold in the edges of your bias tape and press it. See the section below for some methods to do that.
Bias Tape Tools and Notions
This post contains affiliate links. As an Amazon Associate I earn from qualifying purchases. All affiliate links are identified with (affiliate link) after the link or a commissions earned statement above the link(s).
I have some of these Clover bias tips (affiliate link) and I love how they help me quickly iron my cut strips into folded bias binding.
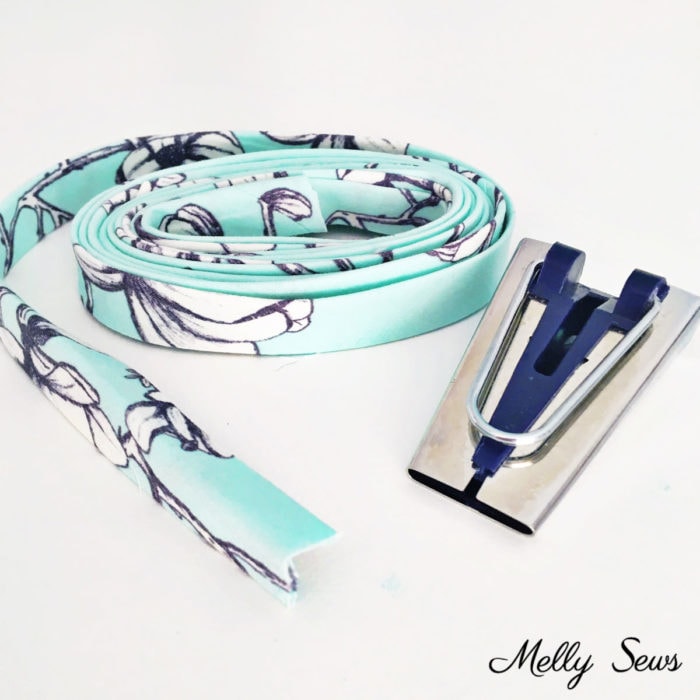
Bias tape makers like these are usually available in the quilting tools section of the fabric store and easy to find online.
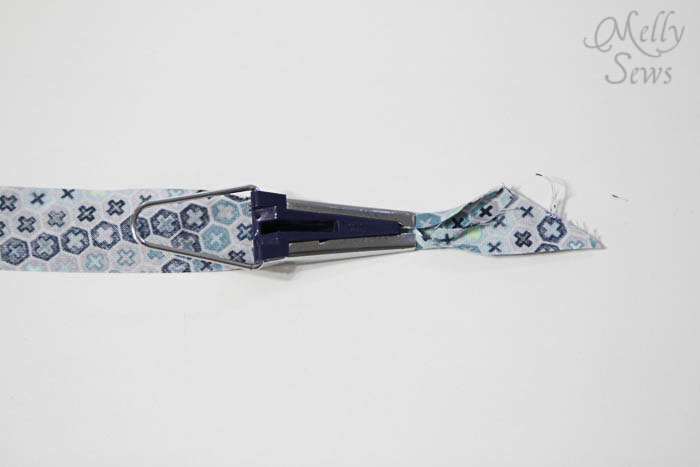
To iron the folds into the tape, you feed the bias tape through and then iron as you pull the tip away from the iron.
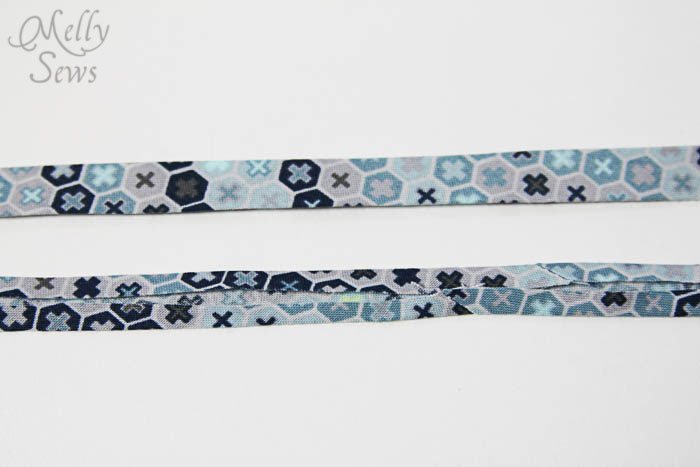
When you finish ironing (which goes by pretty fast) the tape looks like this (right side on top, wrong side on bottom).
To make double fold tape you would first make single fold tape, then you fold the single fold in half and line up the folded edges and iron again. I don’t use a jig or a tip for this part, it’s not too hard to iron in one fold on a long strip.
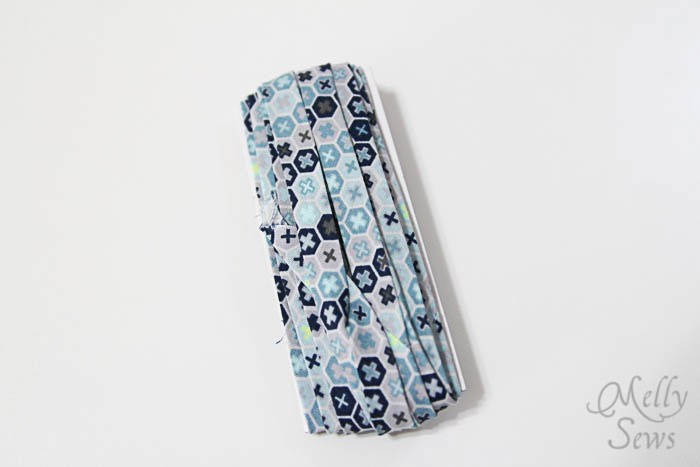
I save the little cardboards from my store bought bias tape and wrap the handmade tape on them.
Now that I understand how bias tape makers work, I got to thinking – what if you don’t have one? Or what if you need a non-standard size of bias tape?
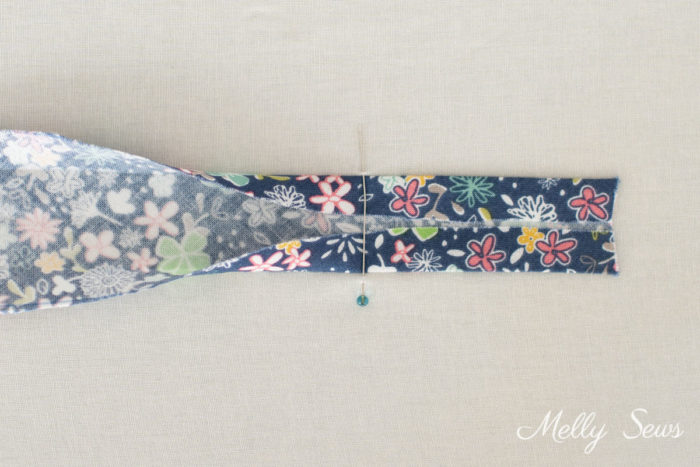
The easiest tip I’ve seen is to use a long straight pin, and pin it through the fabric of your ironing board at the finished width you need. The thread the bias strip under the pin and it will help fold the fabric as you pull it through and iron it. Make sure the pin you use had a pin head that will not melt near the iron. See the example below with my favorite type of glass head pins (affiliate link).
How to Sew Double Fold Bias Tape
First I’m going to show you how to use double fold bias tape. This type of tape wraps around the cut edge of the fabric. Because of that, you don’t need a seam allowance to use this as a finish. I made a video which you can watch below or on YouTube here showing how to sew double fold tape.
Time needed: 10 minutes
Sewing Double Fold Bias Tape
- Pin the tape to the fabric
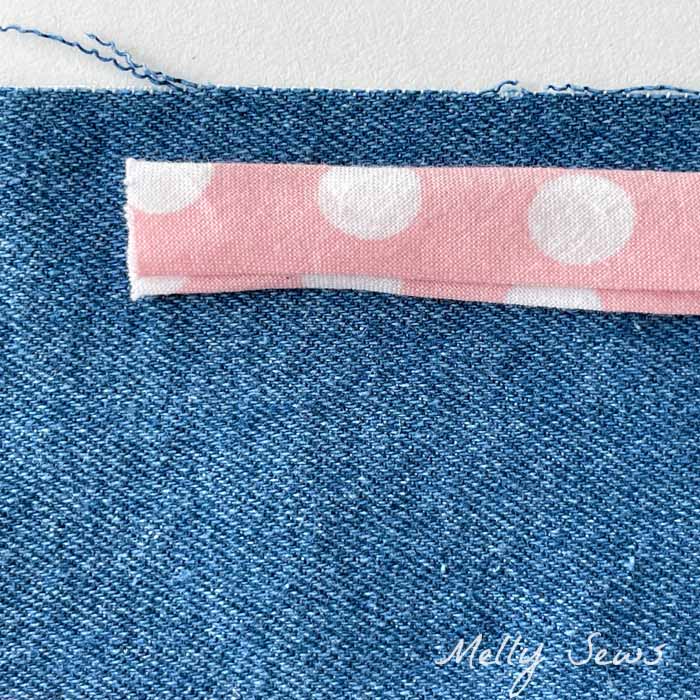
Start by unfolding the tape and pinning it to the right side of the fabric with the raw edges even. Notice that one side of the tape when folded is wider than the other side. You want to pin the shallower side in this step.
- Stitch in the fold
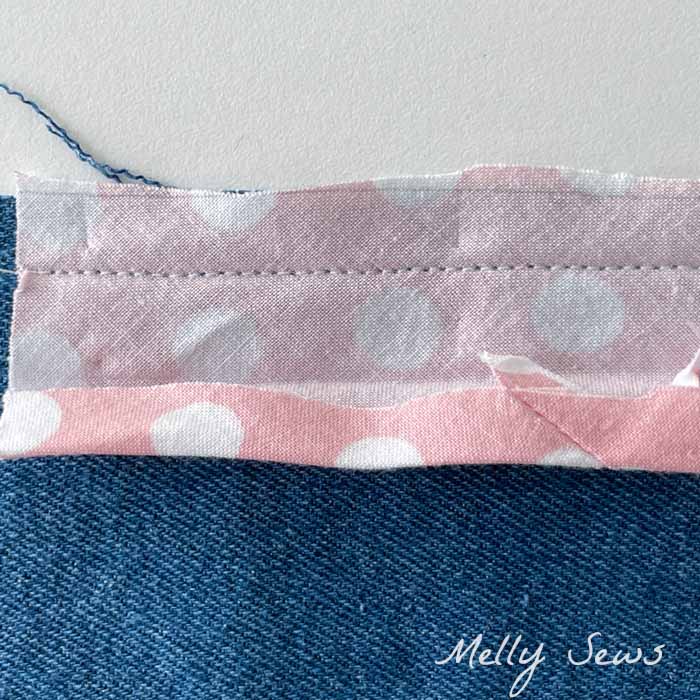
Sew in the fold of the bias tape closest to the raw edge of the fabric.
- Wrap the raw edges of the fabric
Wrap the tape to the wrong side of the fabric and pin, just covering the stitching line with the folded edge of the tape.
- Stitch again
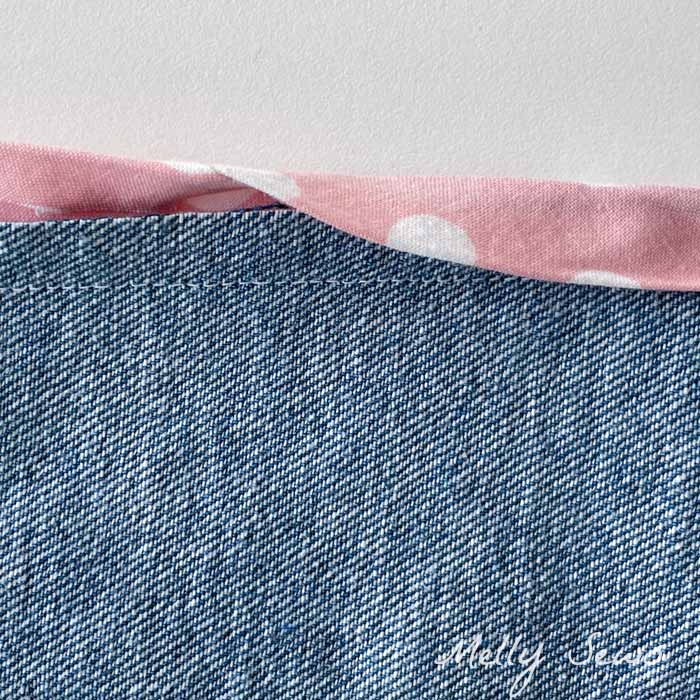
Stitch very close to the edge of the tape on the right side.
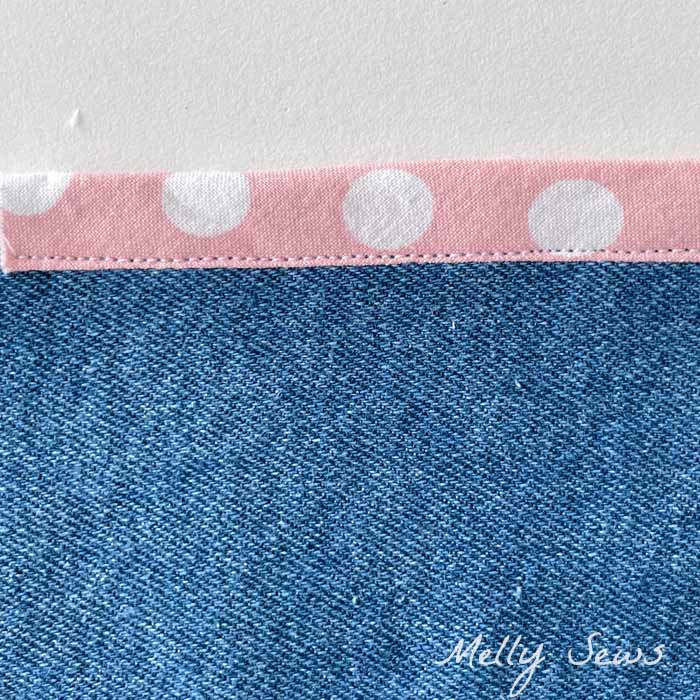
- Check the wrong side
Make sure the stitching has caught the edge of the tape on the wrong side.
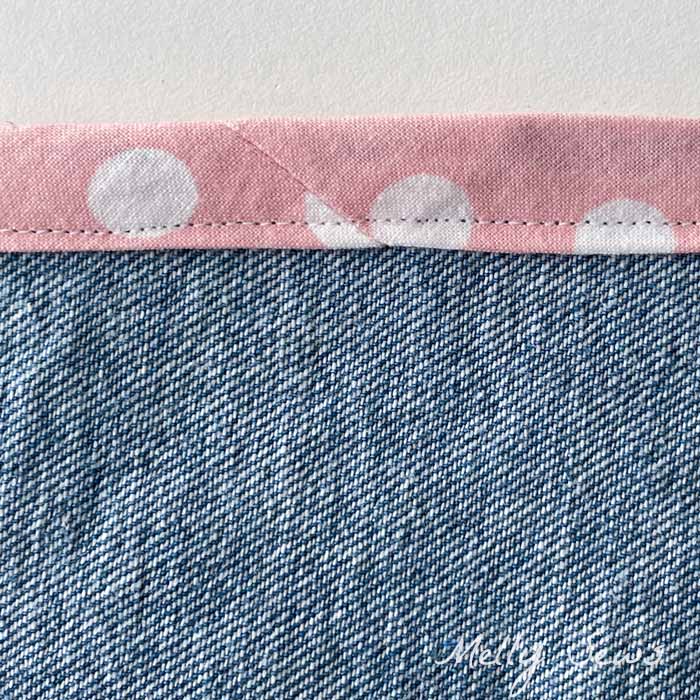
How to miter corners
The double fold tape video above shows how to miter around a corner with your binding, but here’s a still image visual too. Basically you sew close to the corner, then fold at a 45-degree angle, then continue stitching.
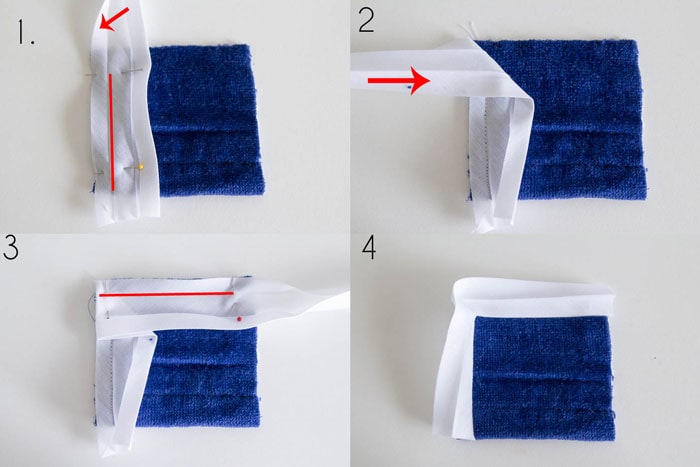
Your can also find a written tutorial for bias corners in this post.
How to Sew Single Fold Bias Tape
Sewing single fold tape is slightly different. Because you’ll be folding in the raw edge of the fabric under the tape, you do need a seam allowance equal to half the width of the tape. Here’s a video showing how to do it, which you can also watch on YouTube here. If you prefer a written tutorial, check out this post.
What if you need to sew around a curved edge? This is a little trickier than a straight edge, but it’s also one of my favorite ways to hem curves. In the video above I show how to handle a curve by steaming the bias tape into shape before sewing it. The process is the same with double fold bias tape.
Now have some fun making your own bias tape and using it to add a professional looking finish and a pop of color and pattern to your sewing! Until next time, happy sewing!

Jennifer Lachman
I recently made my own bias time and loved the way it turned out. I used a green polka dot fabric and it was adorable. However I can’t really say I enjoyed the process of making it. I got a pit frustrated so next time i will probably just go with the plain store bought stuff.
Samina
Your bias tape jig is very clever! Will use it next time I need bias tape in a non-standard width. Love it.
Ann
I am loving that little cardboard jig! I have two metal ones and I never seem to want bias tape cut to either of their sizes. Weird!
Rebecca
I love this! I shared it over on my blog – http://rockthestitch.blogspot.com/2013/05/battle-wounds-and-bias-tape.html
I also used your tutorial on how to make blog buttons so I could show your picture and have it link back to you. I hope that was okay. If it isn’t for any reason just let me know and I will change it. Thanks!
Cerise
This might be the easiest tutorial for bias tape I’ve found. Can’t wait to try it out. Thanks!
emilia
this looks pretty cool…
http://scientificseamstress.blogspot.com/2011/10/printable-bias-tape-maker.html
Ajaire
So so smart!
NPFarmer
This was a really helpful tutorial, thanks! I did 2 150′ long sections. The first one was quick and easy to iron and the second just wouldn’t hold the fold, same fabric and everything I was baffled and a bit frustrated. All in all I now have 300′ of very cute pink and white striped bias tape for flag bunting for our baby shower.
bobbie
You just made my life so much easier, love it!
Diane
Outstanding idea!
Jaclyn
Thank you, that was very helpful.
Cynthia
HA! talk about upcycling! AWESOMENESS! this was great! thank you SO much for posting! ^_^
Melanie
A beginner sewer, but I’m not quite so afraid of bias now. The way you write your tutorials and the included pictures mesh well with my learning style. Grateful to have found your site. Thanks!!
Joni LeBlanc
Thank you, thank you. I love to make bias tape and had a maker that I made years ago with unbleached muslin and embroidery thread, but I have misplaced it and have looked long and hard to buy one of the commercial ones, but knew I could do it myself. I was lying in bed and thought,, “what if I can find one online?” Wa-la here you are with a simple cardboard one. It is the middle of the night or I would be out in my craft-room making one right now. I am making several denim aprons and want to trim them in cute bias tape. I also am so grateful to you for the instruction on cutting continuous bias tape. I have always cut up little scraps and had to sew them together. I am going to try all of these new tricks in the morning. Thanks for being my new best sewing friend.
Jane
So timely! I use the metal binding tool just fine, but I need several for our sewing ministry. This is just perfect for the binding on the pillowcase dresses. Many thanks and blessings!
nik
thanx for the tutorial its very easy to follow
Naomi Nemeth
Thank you so much for all your tutorials! I’ve been getting back into sewing over the past couple of years and have been using your tutorials as my weekly ‘sewing lessons’. If I had known most of these tips many years ago when I started to sew, I probably would have sworn less (under my breath of course..there were small children present) and needed the seam ripper much less. Your tutorials and patterns have inspired me to make some clothing that I would never have attempted with my skill level. And the clothing actually fits!
Julia McCullough
Dear Melly, Thank you so much for the straight pin idea for make bias tape. You are wonderful!! I’m afraid to mess around with the bias tape maker, and in any case, the size is too small.
Thank you,
Julia
Elena Vranich
Great hints on making one’s own bias tape. Thank you. Will sign up for. more!