
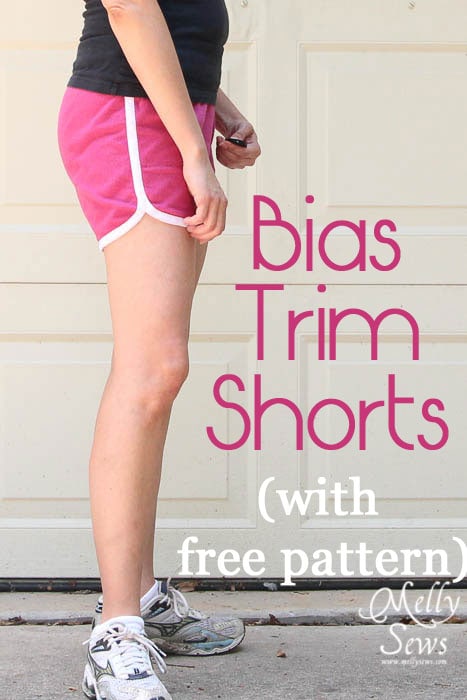
Learn how to sew retro gym shorts with contrast binding in this DIY tutorial

Hey y’all, today I’m sharing how to sew the retro gym shorts with contrast binding. The pair of bias trim shorts I’m wearing in the image below was made almost 10 years ago, inspired by shorts I owned as a kid.
These gym shorts are one of the me-made items from that long ago still in my wardrobe. Below is a picture of what these shorts look like now.
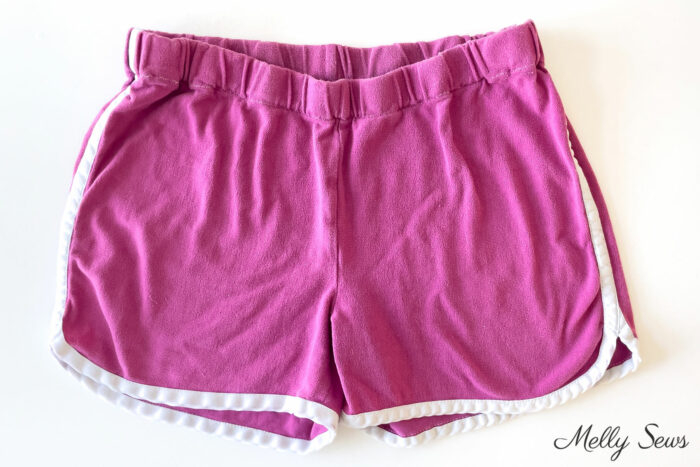
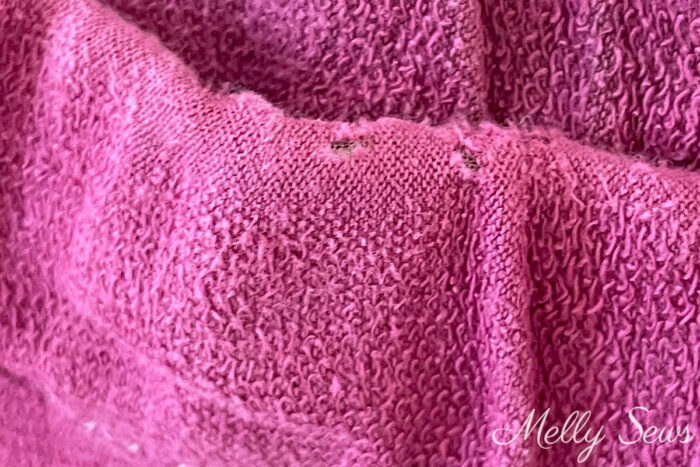
If you look closely, you can see that the fabric is fraying into holes along the waistband in a few places, but otherwise they still look pretty good.
I wear them often on the weekends, but I don’t usually wear them outside the house anymore because they don’t have pockets. So I’ve updated the free pattern here and included video instructions, and I made myself new ones for that video. And of course the new pattern features pockets!
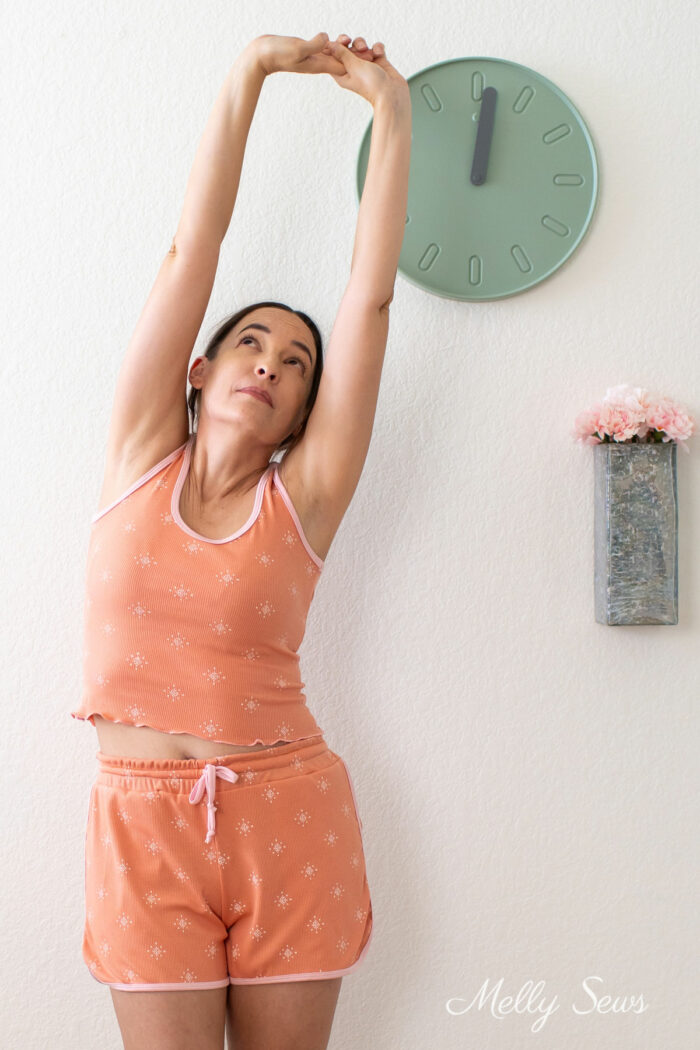
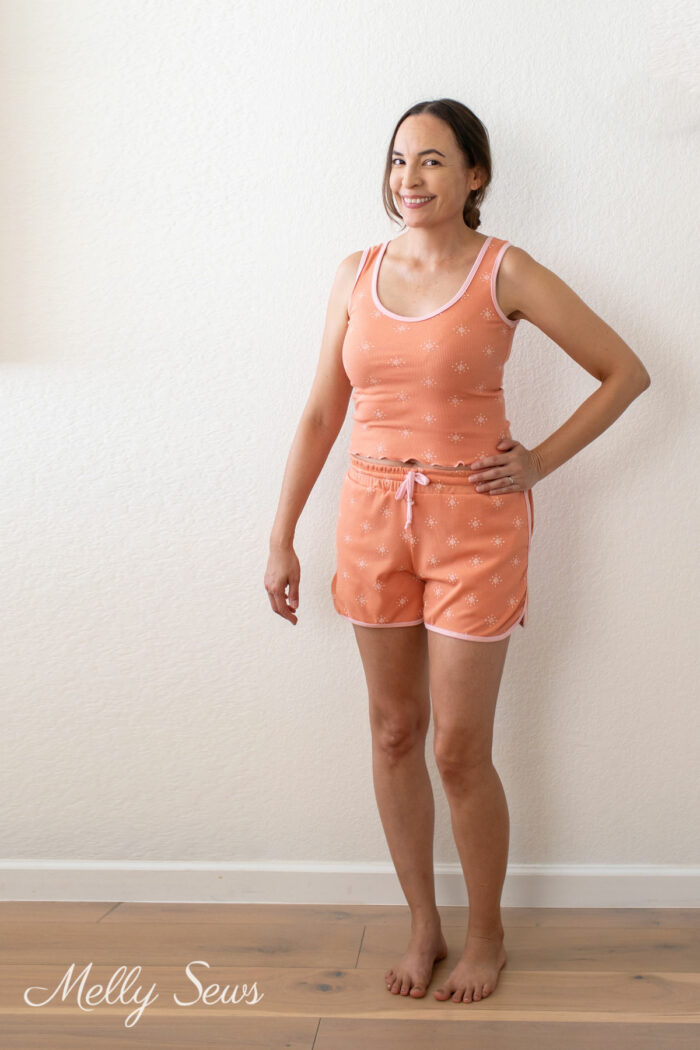
I matched them to the Bias Trim Tank Top I made as well, though I cropped the tank a few inches, added a lettuce hem, and used my cover stitch binder for the contrast trim.
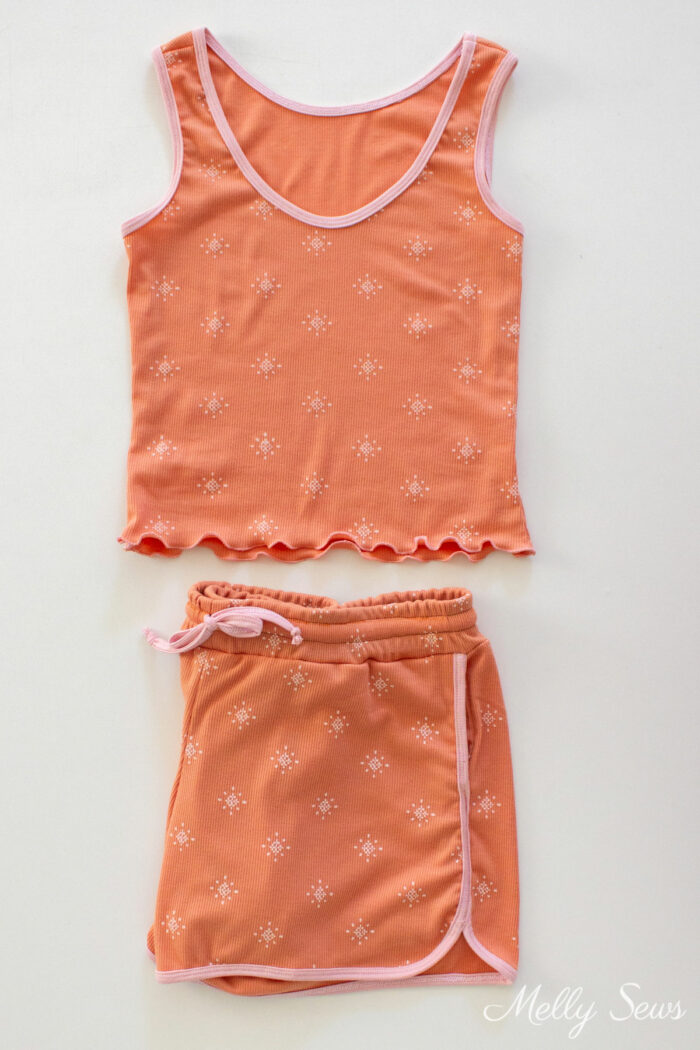
I love how these shorts have a fun retro vibe with that contrast trim and I love to mix and match fabrics and play with the contrasting colors in them. There are several pairs with the pockets in my closet and I feel like this is the perfect pattern for me now. I shorts from this pattern all the time during warm weather (which is at least half the year here in Texas). It’s a comfortable style for football games or to throw on over my swimsuit.
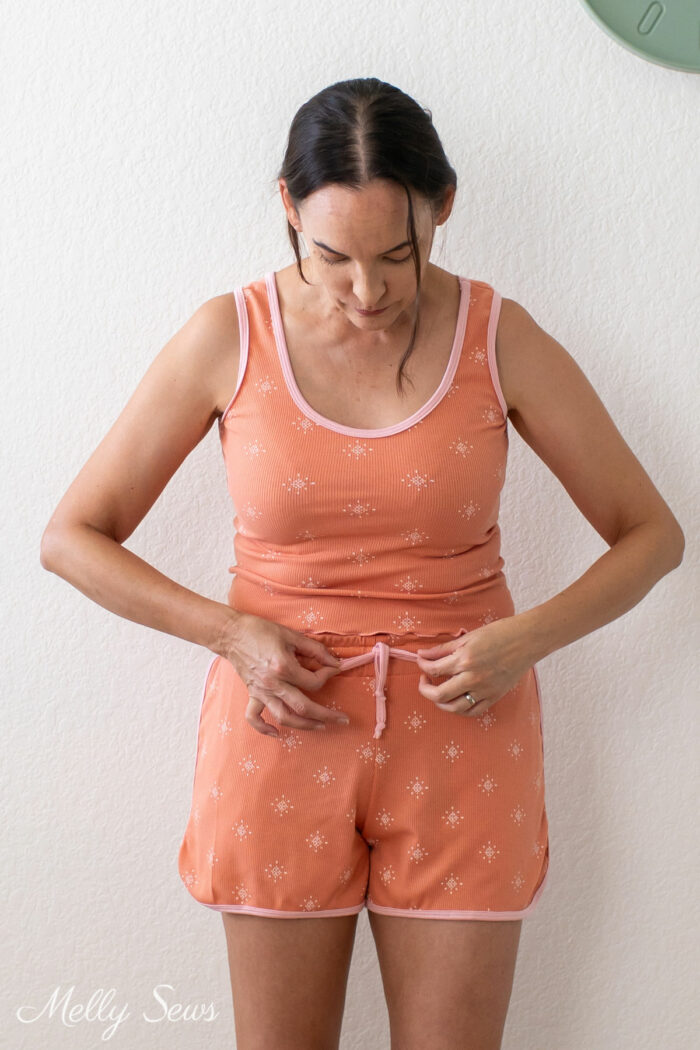
You’ll also notice in my newer pair that I added a drawstring waistband. I’ll share a post showing how you can add that detail as well.
Fabric And Notions
Want to make yourself some shorts from this fabulous pattern? You’ll need:
- 1/2 yard of knit fabric. I used stretch French terry for the dark pink pair and printed rib knit for the orange and pink pair. Both fabrics are cotton blends, as are the other pairs in my drawer.
- 3 yards (smallest size) or 4 yards (largest size) of 1/2″ (extra wide) double-fold bias tape or strips of knit fabric for binding (width dependent on your binder attachment requirements)
- 1″ (25mm) wide elastic to equal your waist measurement.
- If you’d like to add a drawstring, a good rule of thumb is to make it your waist measurement in length plus 18-24 inches depending on how long you want the ties to be.
How to Get the Pattern
The pattern is in a women’s size XS (36″ hips) and a women’s size 5x (62″ hips). It is important to note that the size 5x has only been tested on my dress form, so make sure to measure the pattern and compare to your body before cutting into your good fabric. More about figuring out fit before you cut in this post. Note that for the free pattern size XS you’ll print pages 1-11, for the 5x size you’ll print pages 1-15.
To get the pattern, click your preferred option below to get the free pattern only as a newsletter subscriber. Or you can purchase the full Barton Shorts digital pattern + printable instructions in sizes XXS-3X. Please note that the purchased pattern has more inseam length and side seam options and the largest sizes is for 55″ hips.
 |  |  |
Please note that all my free sewing patterns are licensed for personal use only (no selling items made from this unless you purchase it) and by downloading you are agreeing to this license.
Tutorial to Sew Retro Gym Shorts with Bias Binding And Pockets
Check out the video below or on YouTube here to see how to sew up these shorts with the pockets.
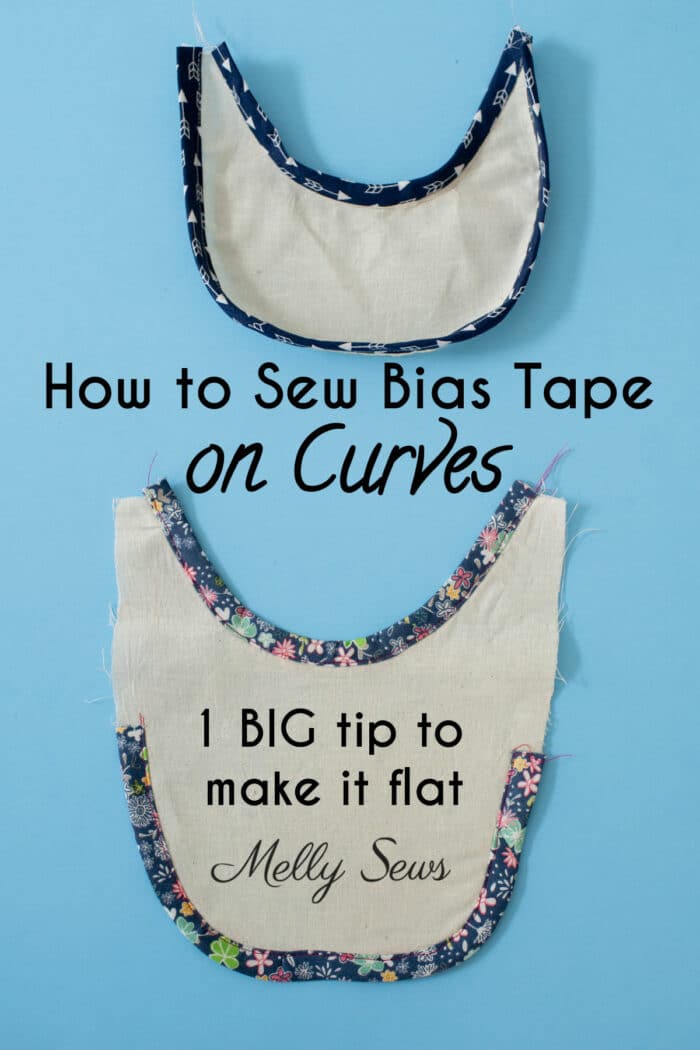
How to Sew Bias Tape Around Curves
If you’re using bias tape as your contrast binding, this simple trick will help you get it to lay flat around the curves. Make sure to check out this post that shows how.
Use a Binder Attachment
For the orange/pink pair of shorts in this post, I used knit fabric and my cover stitch binder attachment to sew on the trim material. If you’d like to see how to add the contrast binding that way, check out this post.

How to Sew a Basic Elastic Waistband
The pajama video in this post goes more into detail on how to sew a separate elastic waistband and thread elastic through it. Use the same technique for a basic elastic waistband on these shorts.
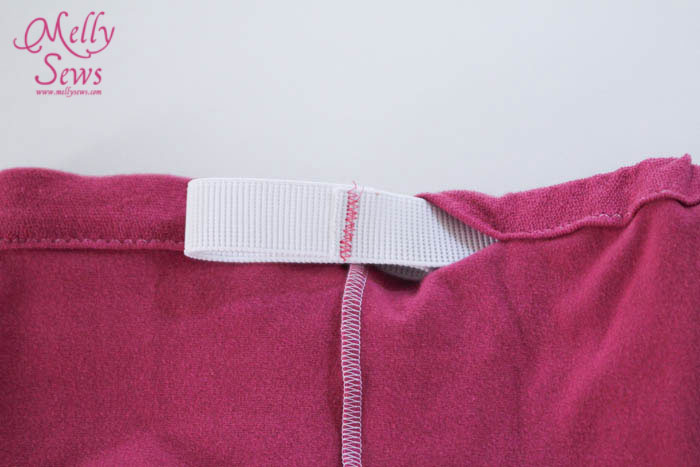
Make a Drawstring Elastic Waistband
If instead you’d like the drawstring detail, you can check out this jogger pants drawstring waistband that uses the same technique.
Written Instructions to Make Contrast Trim Shorts
Below you’ll find written instructions to make these shorts WITHOUT the pockets. If you’d like to make the pockets, see the video above.
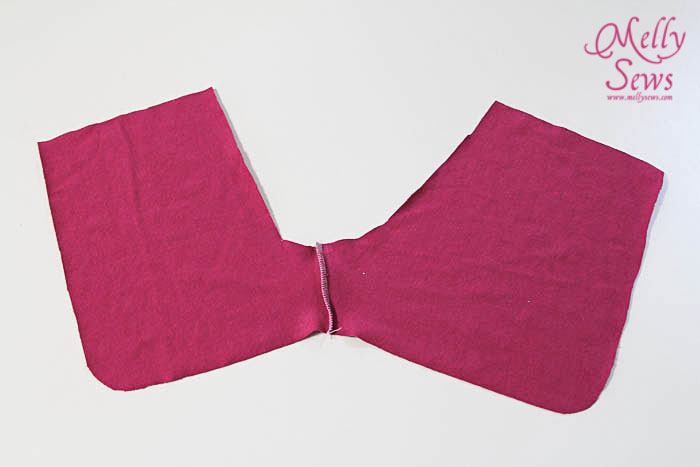
After printing, taping and cutting out the pattern, you’ll take one front and one back and sew them right sides together at the inseam. Use a 1/2″ (12mm) seam allowance and a stretch stitch. For my original pair I used both a serger stitch and a basic zig-zag stitch. When you open the shorts out flat, they’ll look like the picture shown below.
Repeat with the other front and back piece inner leg seams. Then you’re going to pin bias tape on. (Want to make your own bias tape? Check this post.) With wrong side up and the bias tape opened flat, pin around the edge as shown below. The unfolded side of the bias tape should be even with the raw edge of the fabric. It doesn’t look like that in the picture because it was curling, but it is.
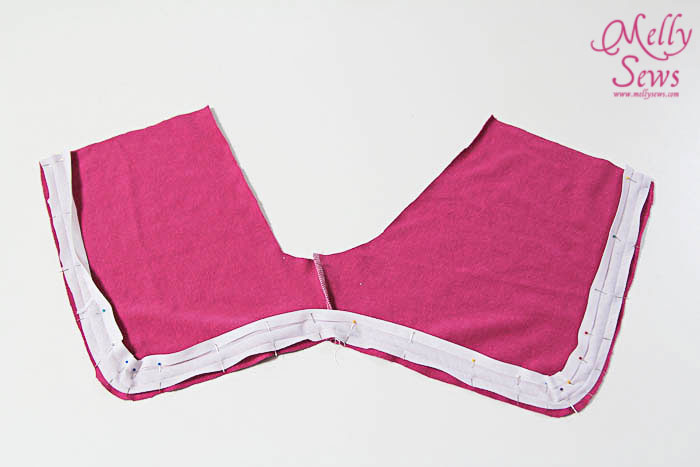
At the curves, it helps to steam the bias tape into shape first to make sure the tape is flat.
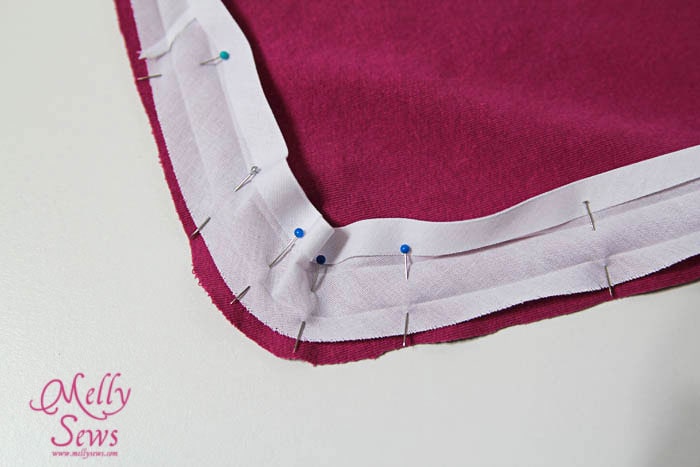
Stitch on the fold line of the bias tape that is closest to the edge of the fabric. Repeat this on the other leg.

Fold the bias tape onto the right side of the fabric, covering your first stitching line. Next, top stitch it down close to the edge. Your bias tape should now be securely wrapped around the raw fabric edge to create a finished edge.
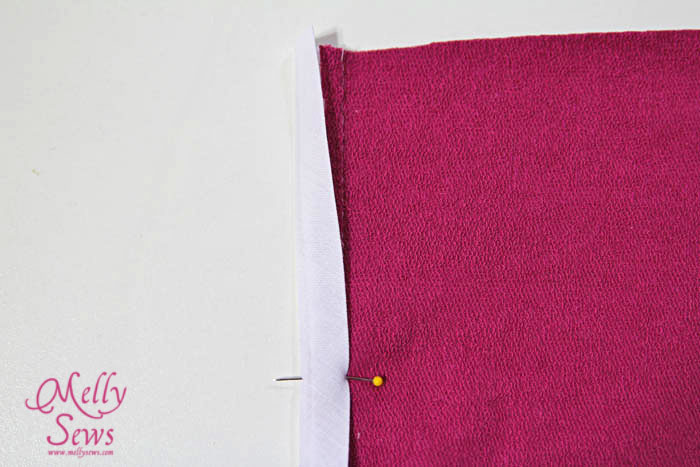
Now place bias tape on the side seam of the front side of the shorts over the bias tape on the side seam of the back side of the shorts with right side out. Pin in place to the beginning of the curve at the hem edge. Stitch down the unstitched edge of the bias tape on the front piece to secure the side leg seam in place. Repeat with the other shorts leg. Be careful not to sew through the other side of the leg as you sew the bias tape edges on top of each other.
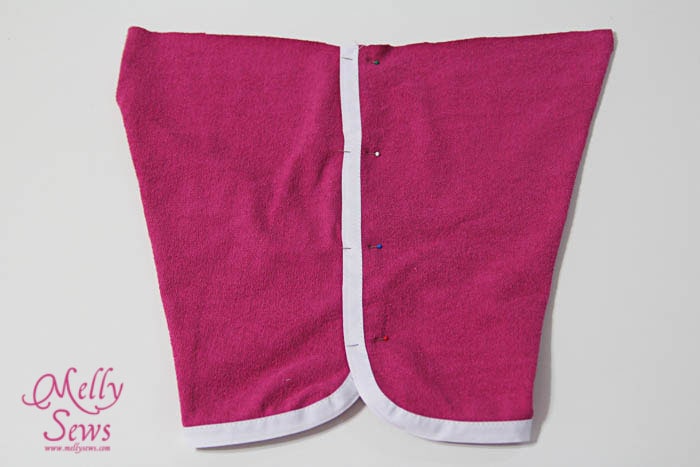
Place one shorts leg wrong side out, with the curved raw edge side facing right.
Place one shorts leg right side out with the curved raw edge side facing right.
Put the right side out leg INSIDE the wrong side out leg.
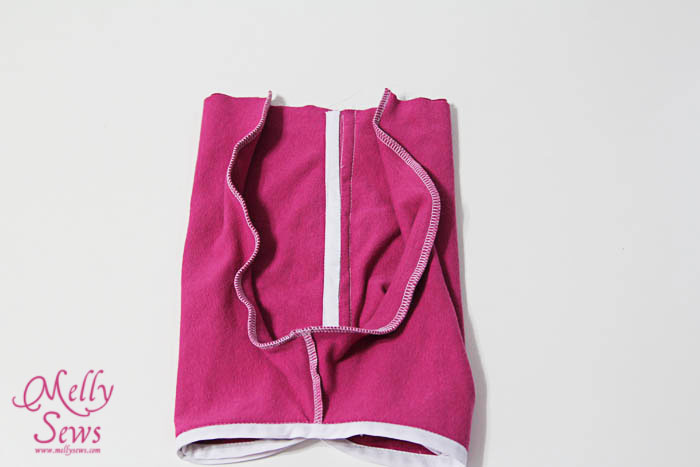
Match the curved raw edges in a U shape to form the center seams. Sew them, creating the center crotch seam.
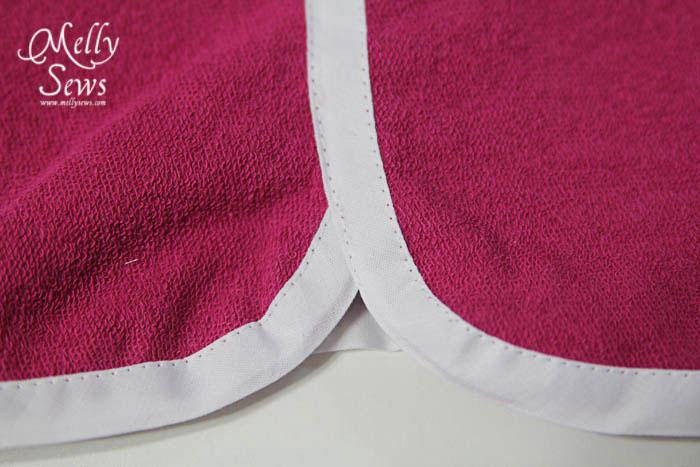
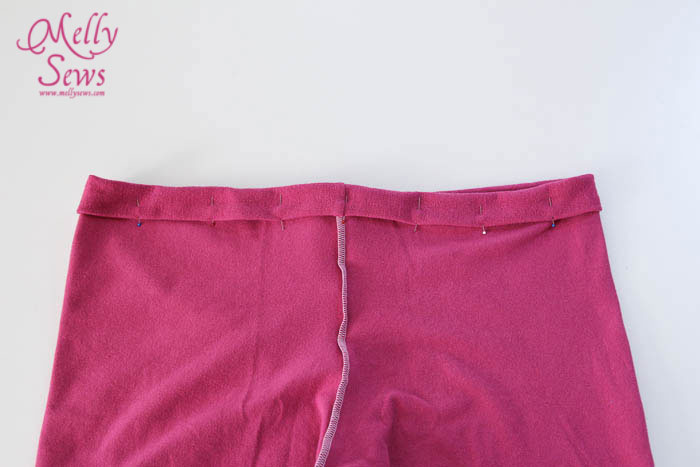
Turn shorts right side out and sew the waistband on; see sections above to choose the waistband option you prefer.
Fold down the waistband and pin. Next, stitch the bottom edge to form a casing for the elastic. The casing might be rather thick at the side seams where the bias tape is – you might want to hand crank your machine here. Leave an opening in the casing so you can insert the elastic.
Use a safety pin to feed the elastic through the casing, being careful not to twist it. Sew the elastic ends together, then sew the casing closed.
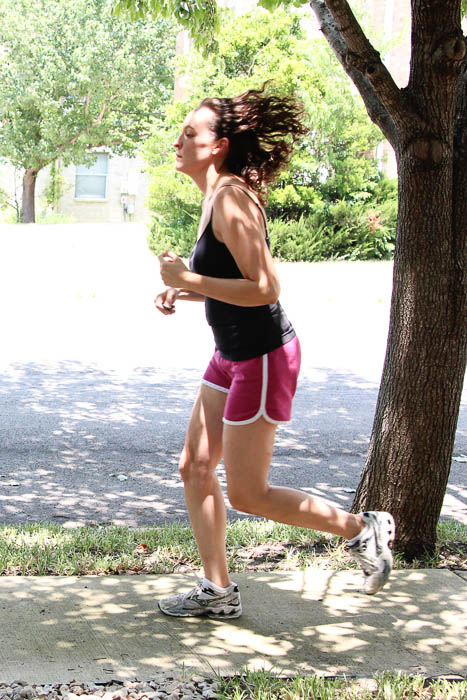
Finished Shorts
Now you can take them out for a run if you’d like! (Note – I totally did my hair and makeup for this picture. I typically run with a ponytail and a VERY red face).
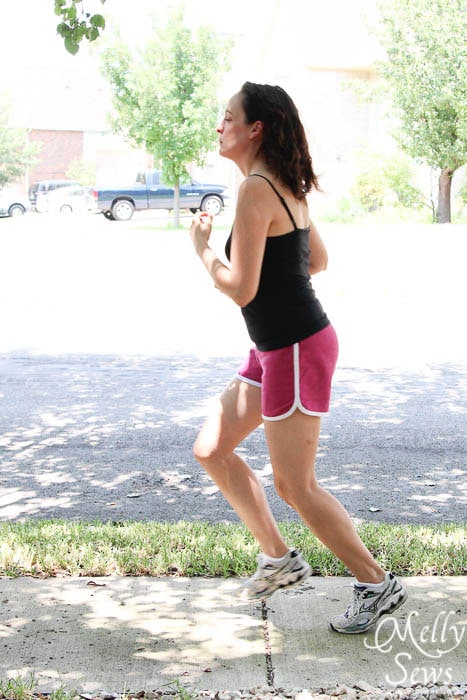
Also, these shorts might have magical faster running properties – look at my hair fly, ha!
Alternatively, you can make a matching tank and put this set on to wear to bed.
Ajaire
These are my favorite kind of shorts. I’m so glad they’re back in style 🙂
Teresa
These shorts are great! I better try them if they will make me a faster runner!
johanna@projects by me
Such cute shorts! I love the colour of yours! Thanks for the pattern and tutorial.
Melissa
I’m so happy that my hiney is in the same range as yours 😉 I can’t wait to make some up…a romper I probably couldn’t pull off, but these, heck yeah 😉
kristin
I tried to draft some of these on my own and the pattern looked really weird, so I gave up. Might need to widen them a bit for my booty, but thank you for the starting point!!! 🙂
Amy
Love these! I always “need” more running shorts 🙂 I want to try them in a fun, bright color!
Becky PS
Awesome! My 25 year old daughter was just asking for some of these shorts!
Thank you!
P.S. Glad you didn’t go for the romper 😉
Bethany
I was so happy to see your post! I went into target at the beginning of summer looking for shorts and maybe found 3 styles! All super short or tight and not what I was looking for! I cannot wait to make myself a few pair that can be custom just for me! Thanks so much!
Anne
Ahh, finally! Just what I’ve been searching for. Thanks for giving out the pattern for free. Another easy peasy tutorial! Awesome! 🙂
Abi
Thankyou so much for this:) It’s so useful and easy to follow. 🙂
Kristin
I want to make some of these for my family! What kind of thread do you recommend for making such items? I seem to buy the wrong thread that breaks when people wear the clothes, even when they are loose fitting.
Marianne
Kristin, Maybe the thread is not the issue, but the stiches. For stretchy fabric you cannot use straight stitches, for the fabric will the strech and the stitches will not. So you need to use a ‘zigzag’ or something more sophisticated.
naehfreundin
Hi!
I found Your tutorial via Pinterest and absolutely plan to make it for the summer!
Is the 12 mm Seam Allowance already included in the pattern or do I have to add it when cutting the fabric?
Brenda Melahn
HELP — I can not figure out how you get the front and back center seams sewn — I got the first join of front and back at inseam in Step 1 — bias tape done no problems — try to figure out how to put one leg in another and join the center seam (not sure if this is front and back center … just front center … not sure). I have spent 3 days working on this and can not figure it out. Is there any clearer way to say this?
charlottemakes
I have started making a pair of these shorts, but for some reason I am really struggling with this step:
Place one shorts leg wrong side out and one right side out. Put the right side out leg inside the wrong side out leg and match the center seams in a U shape. Sew the center seam.
I keep thinking I have missed a step, or maybe put two of the pieces together wrong, but going through the steps before everything else seems fine and it matches the pictures. My shorts just currently look like a skirt. Any help/guidance would be most excellent.
Thank you!
Kelly
Thanks so much for the free pattern and tutorial. I hope you don’t mind, but I was needing Pajama shorts without bias trim, so I cornered the rounded parts and made them without the bias trim and they’re PERFECT! The only thing that isn’t good is that because of the slinky fabric I used, and it’s tendency to get runs in it, I stitched the elastic to fabric, and the elastic should have been 3 inches shorter. Maybe somehow I can insert a drawstring to take up the little bit of slack…
Either way, I really appreciate the pattern. Also I up sized them the way you showed, and they fit perfectly. And I’ve never sewn any bottoms of any kind before!!!!!
Mark
Any idea how I can modify these to fit a guy, or where I can find a men’s pattern? I need to make some in silver lame for a halloween costume… and also to wear and look AWESOME in. Of course I’m no small guy either, so there’s no way I could just make the women’s ones and have them fit all the areas right. Any advice?
Melissa Mora
You would probably need to combine with some of the techniques in this post:
http://mellysews.com/2014/05/draft-mens-shorts-pattern.html
though that pair is much looser than this pair. So I’d also find some cheap fabric to make a sample pair (or more) before cutting into the lame.
Mark
Thanks for the reply!
I ended up heavily modifying a boxer short pattern and thought through the measurements for how we wanted them to sit and hang. I actually had better luck with the bias tape when I didn’t pin it, rather I just lined it up as I went. When I pined it it would almost always wrinkle and I’d have to rip stitches out and redo it.
What’s really funny is a compared my final pattern (which is probably a Men’s XL) to your pattern… it’s almost twice as wide… which I expected… but it’s only half as tall. Although some of that probably has to do with the fact that guys wear their shorts on their hips rather than their waist. That, and they’re pretty short by design lol.
Ultimately the shorts came out awesome and I can’t wait to make a second pair from the pattern once I’m done with all the costume stuff I’m working on. Thanks for the inspiration!
Serine
A fairly easy sew with my knit material and it fits 🙂
Shannon
I made these last night and they are amazing! Super comfy and a great fit, thank you for the wonderful patterns!