
Here are the simple steps to use a coverstitch binder attachment for finishing raw edges

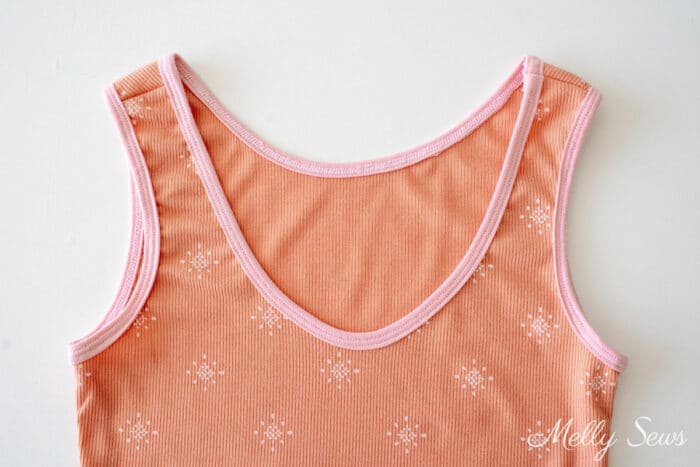
Hey y’all, today I’m going to be showing you my favorite new sewing toy – a coverstitch binder attachment for my cover stitch machine. I’ve been having fun playing with binding finishes on swimwear and active wear for myself, like the tank top pictured below.
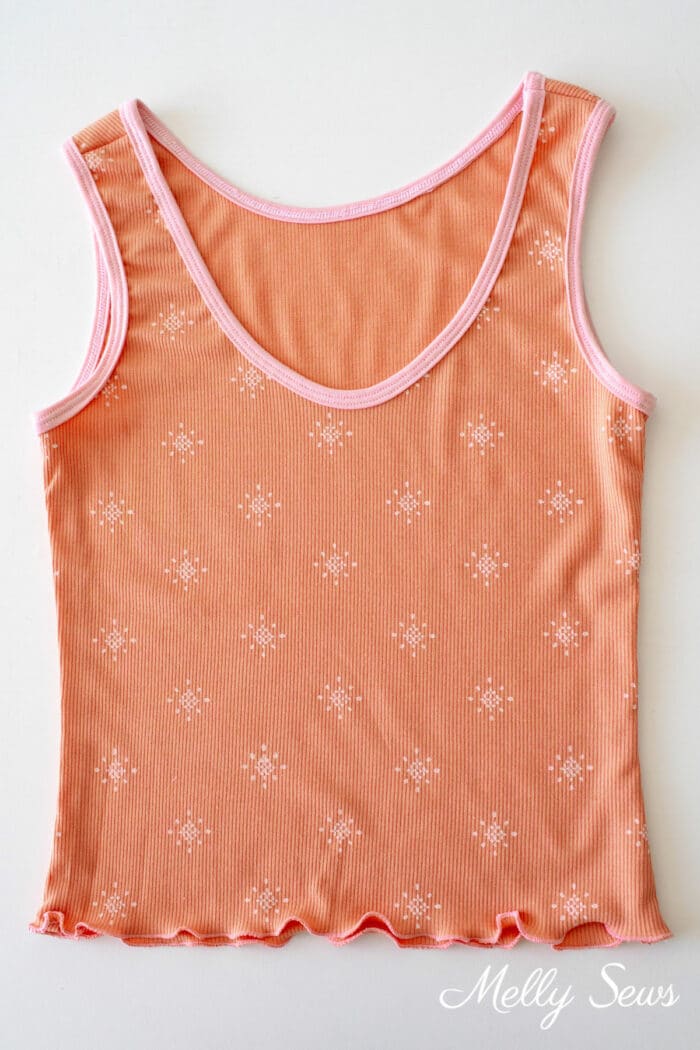
To make this tank top, I used the free tank pattern in this post, my coverstitch machine binder to finish the arm-holes and neckline, and this technique to stitch the lettuce hem. I’m planning to make some bias trim shorts to match so this can be a complete pajama set.
What Does a Double Fold Binder Attachment Do?
This double fold binder accessory folds strips of fabric twice and attaches them to the raw edge of my garment all in one step. This finish is often seen on store bought tank tops. It’s a great clean finish of the edges on knits. The right side of the fabric has straight line stitching, and the wrong side has the looper thread. The top and bottom fabric edge should end up even with each other after going through the cover stitch binder, with the main fabric of the garment sandwiched in between.
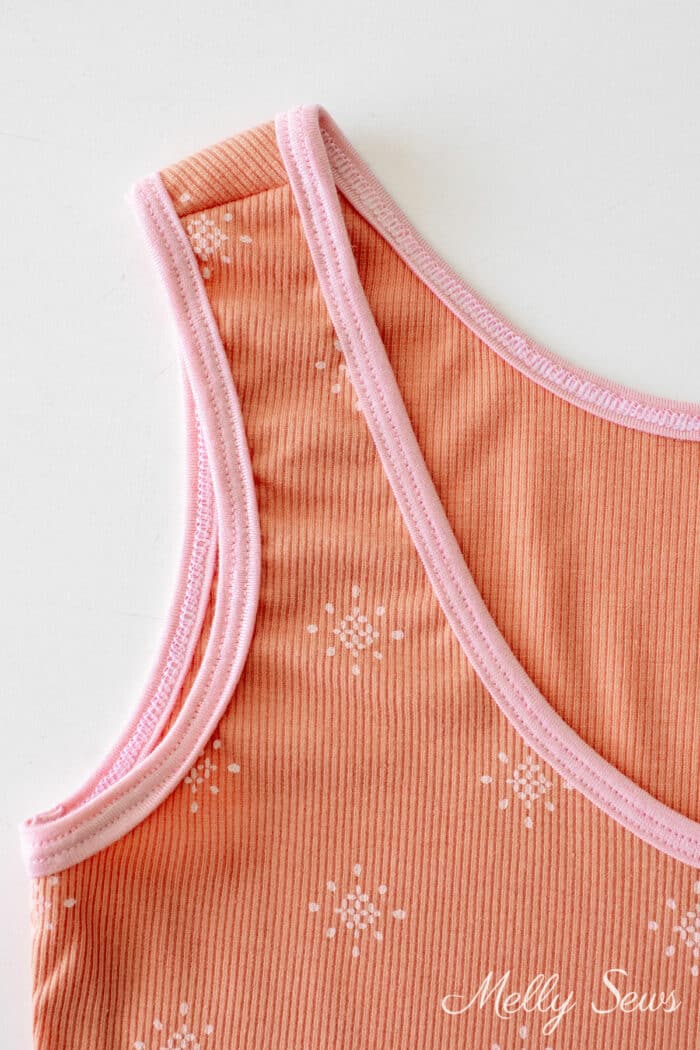
Note that this is a different type of binder than a single fold binder, which leaves a raw edge of the binding exposed. Think about the difference between single fold and double fold bias tape. The tool I’m using here creates double fold bias tape or knit tape and attaches it to the edge so that no raw edges are left visible.
Double fold binders come in different widths. The widths refer to the finished width of binding once it’s sewn. The one shown in this post is a 10mm binder, which is about 3/8 of an inch wide. My machine also has options for 8mm and 15mm binders.
Watch the video below or on YouTube here to see how the coverstitch binder in action.
Attaching the Coverstitch Binder
So how do you attach the accessory to your machine? This process might vary slightly in the specifics for different machines, so consult your manual. For my Baby Lock Cover Stitch BLCS machine, the first step is to find the accessory screws.
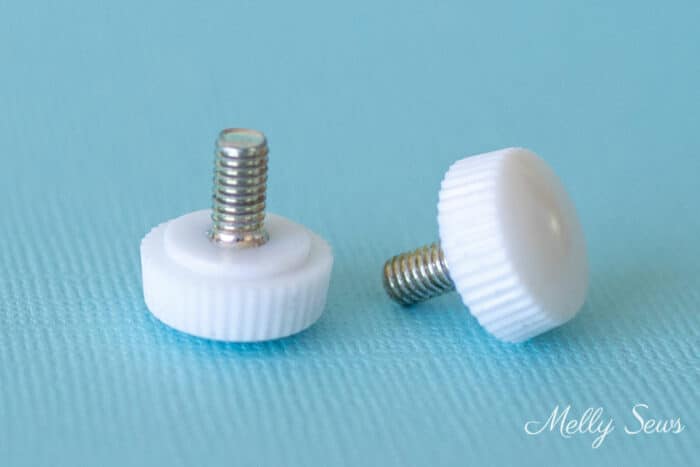
Next, find the screw holes on your machine. My manual says to use the front attachment points for this accessory.
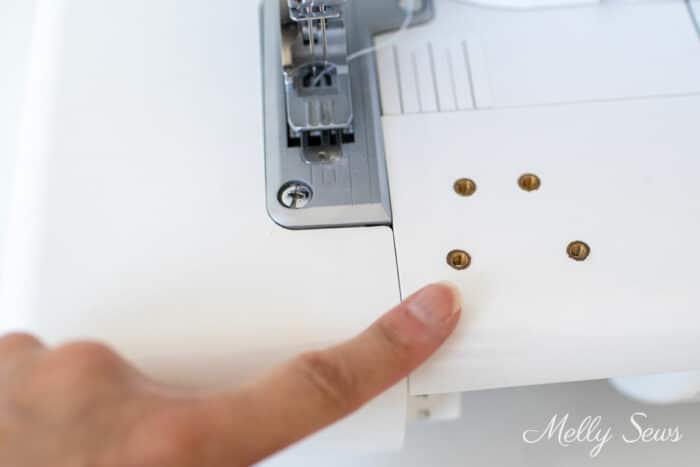
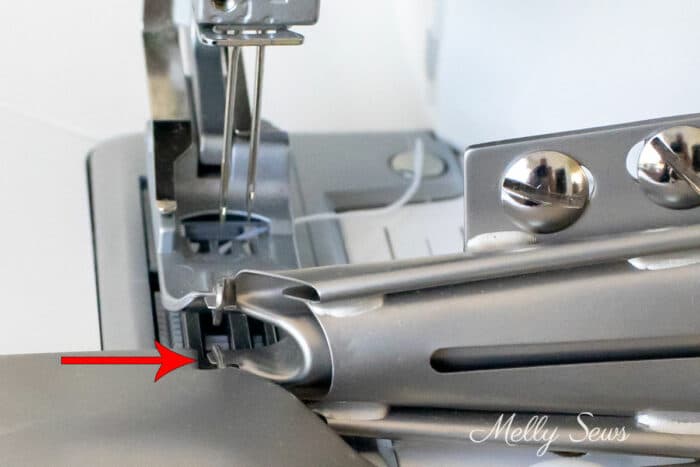
Use the binder screws through the hole on the binder to attach it to the machine. On my machine, the accessory hole is wide, so you can move the attachment left and right on the machine.

This is important because you need to position the edge of the binder just to the left of the left-most needle on the front of the coverstitch machine. See the close up below, the groove with the red arrow pointing to it has to be to the left of the needle. If it’s not, the stitching won’t land on the top edge of the fabric strip, it will land on the garment instead.
The last step before you start stitching is to thread the binding fabric through the binder. The video above shows how I get my 36mm wide strip of light weight knit fabric into the binder. You want the wrong side of the fabric to be facing you. I find serger tweezers very helpful to get the fabric strip threaded.
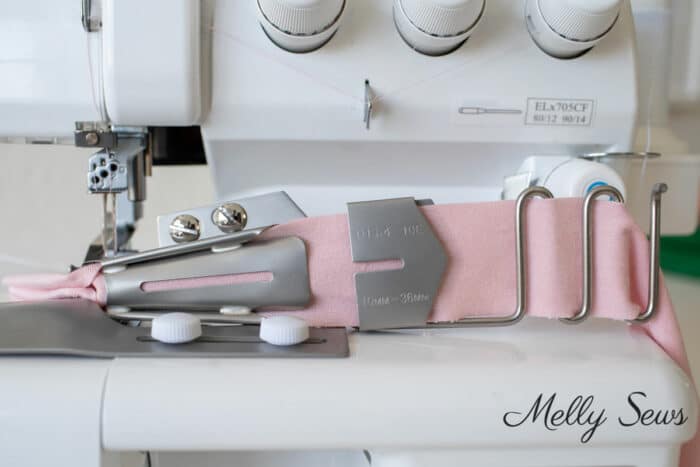
Your binder attachment should specify the width of fabric you should use in your machine. For my 10mm binder I cut 36mm wide strips of binding.
Choosing Your Binding Fabric
First, when you’re choosing the type of material to use for the binding strips, think lighter weights. I’ve found light weight jersey like cotton or cotton spandex to be the easiest to use. Thicker fabrics like swimwear spandex or interlock have given me more trouble. And thinner fabrics like rayon jersey (which is the pink fabric on the tank top in this post) can also be trickier.
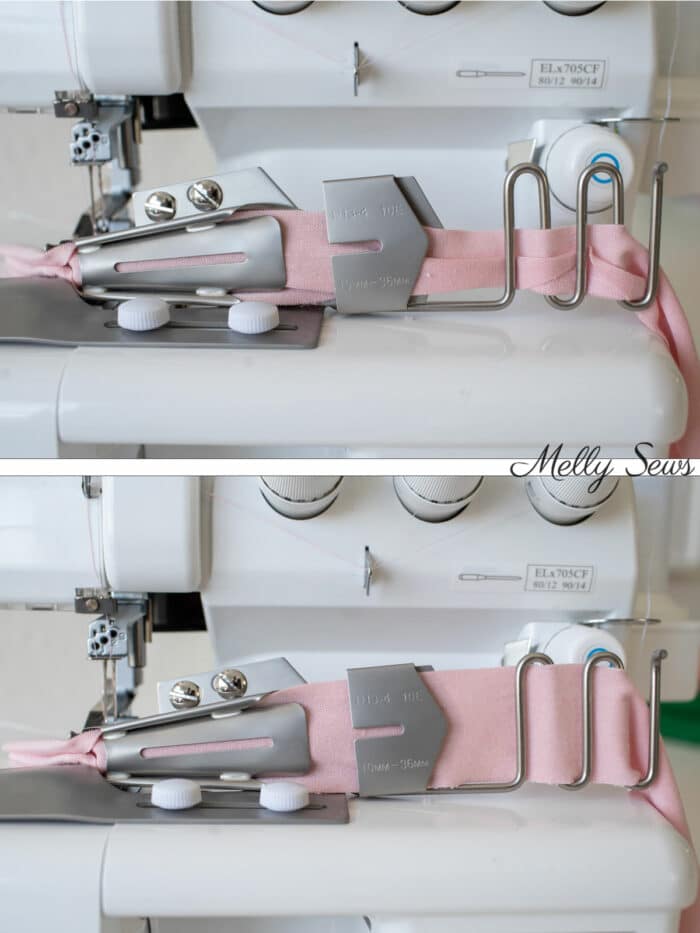
Thicker fabrics have a tendency not to fold all the way. Thinner fabrics like rayon jersey have a tendency to slump and then twist. So another tip is to watch the fabric as it goes through the serpentine part of the binder. Make sure it’s not twisting. You don’t want it to look like the top photo of the two below.
Just like other times I work with rayon jersey and what I like to call “slinky knits“, spray starch can be very helpful. It can help the fabric stay standing in the serpentine instead of slumping and twisting.
Tips for Success with One Step Binding
It’s taken me a while to get used to using this tool. So here are some tips and discoveries I’ve made.
Keep in mind that you use several inches of binding strip to get started before the edge of the fabric gets under the needle. So your binding strips should be cut longer than your neckline or whatever you’re binding.
Another tip is to think about your order of construction. Often if you are sewing neckbands or armbands to a top they are the last step. When using a binder these edges are finished much sooner.
For this tank top, I sewed one shoulder seam. Next I sewed the neckline binding and the armhole binding on the side with the shoulder seam sewn. Once that was done, I sewed the other shoulder seam. Then I was able to bind the other armscye. After that I proceeded with side seams and hems.
Take time to match the edges of the binding when sewing the bound shoulder seam and side seams. It can be helpful to baste those seams, but at the very least I pin them carefully.
If you want the binding to gather in the edge like a neckband would, you’ll need to use the differential feed on your machine to stretch the binding as it is applied. Don’t use your hand to stretch the fabric going into the binder. That will just make it more prone to twisting.
Finally, go slowly. This gives you time to make sure that the fabric isn’t twisting, and that the edge of the garment is feeding without wrinkles.
Wendy Lutz
Thanks for such a thorough post on binders! I have the same coverstitch machine and have been scared to even try a binder attachment, having heard horror stories about how hard they are to use!
Also, thanks so much for all your great posts and well thought out patterns. I have made quite a number of your designs. The Baja shirt is my absolute favourite! And of all the sewists I follow, your posts are the ones I ALWAYS stop and read because they are so well written and engaging!
Karen
What fun! I don’t own a cover stitch machine, but this post was absolutely mesmerizing 🙂 I always wondered how you got such great results on the knits you sew. I learn something from you so often! Turns out you can teach this old dog a new trick!! Thanks, Melly 🙂
Patt
The very best video and instructions I’ve seen for using a binder attachment on a coverstitch machine. Thank you!