
Learn how to sew bias binding around curves in this step by step video and article.
Hey ya’ll, today we’re going to talk about how to sew bias tape on curves. While I have a very detailed post on bias tape here, I realized it doesn’t specifically address this issue in it. So I’ll include this information in that post as well as here in a standalone post so the information is easy to find.
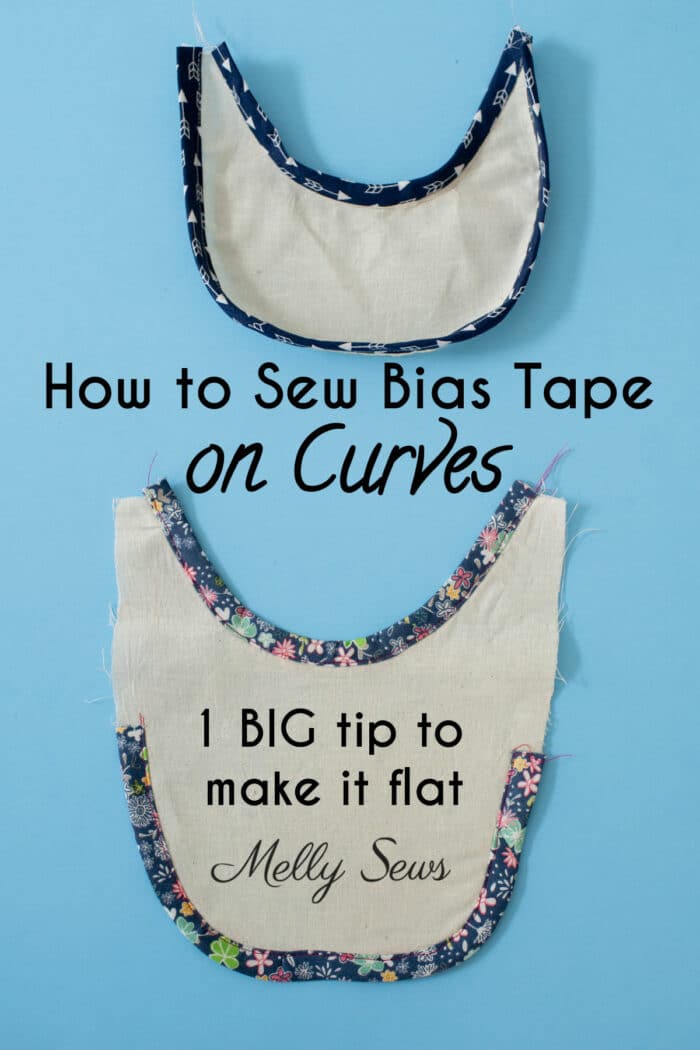
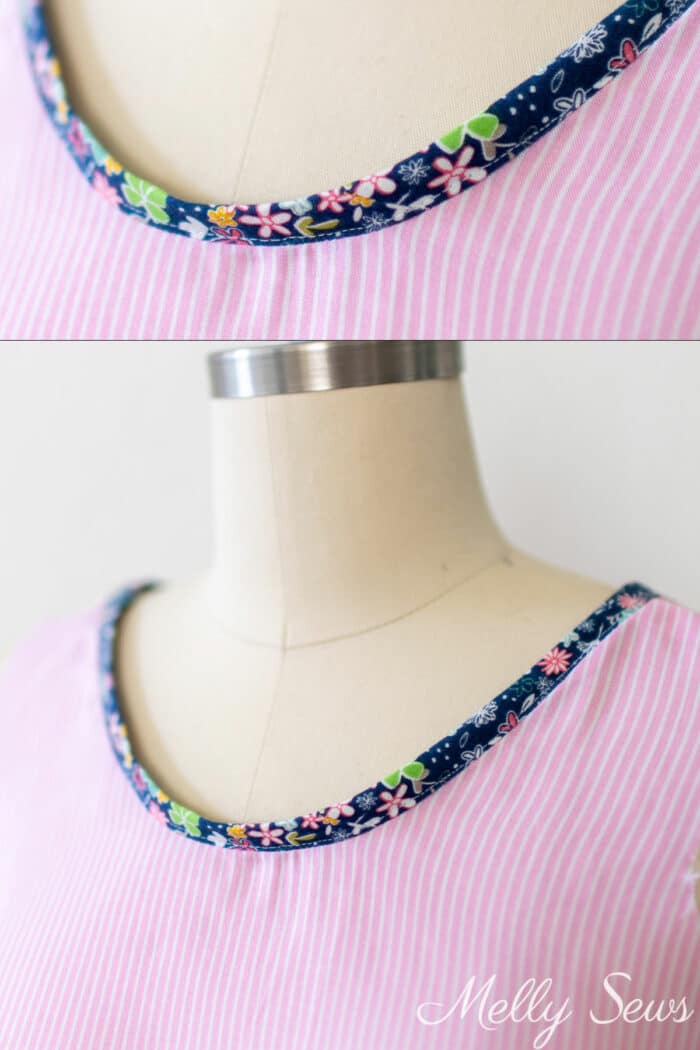
I love to use bias tape to finish necklines, but if you’re a beginner it can be tricky to do this AND get the binding to lay flat. So if you’re new to this technique, you might end up with a neckline like the one below, where no matter what you do the bias tape stands away from the body. How frustrating!
Why Bias Tape Doesn’t Lay Flat on a Neckline or Armhole
In order to understand why this happens, we need to know what fabric grainline is. Note that this applies to woven fabrics, knit fabrics are a whole different ball game due to different construction. See more about how knit fabrics are made in this post.
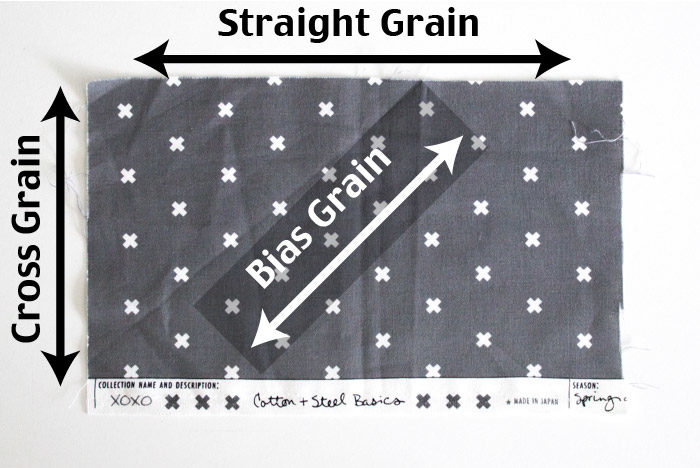
Machines or people weave threads over and under each other perpendicularly to create woven fabric. The long warp threads on the loom are the straight grain, the shorter weft threads that go side to side make up the cross grain, and if you rotate at a 45-degree angle that is the bias grain.
Even woven, non-stretch fabric has a little bit of stretch or give along the bias grain. Loosely woven fabrics and fabrics made from thinner threads stretch more, tightly woven ones and fabrics made from thicker threads stretch less.
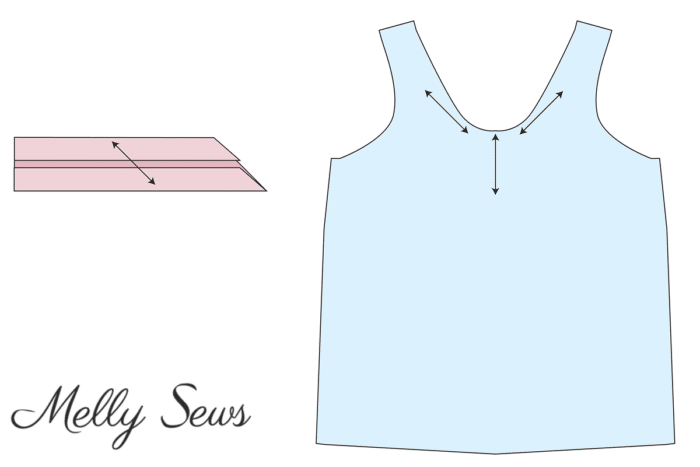
That element of stretch is why the bias tape might not lay flat if you’re not careful. In addition, parts of the neckline are also cut on the bias grain of the fabric, as shown below.
Even if you stay stitch your neckline, it is very, very easy to stretch the bias tape as you sew it around the neckline curve. That stretching can make it not lay flat. So how do you counteract this? Luckily, there is one pretty easy thing to do.
The Trick to Flat Binding on Curves
You can watch the video tutorial below or on YouTube here to see how I apply bias tape on curves. If you prefer written instructions, scroll below the video. The best trick I’ve found is to pre-steam the bias tape into the shape of the curve, as you’ll see.
How to Sew Bias Tape on a Curve
I steam my bias tape into shape using glass head pins and my iron on the steam setting. This works for both single fold bias tape and double fold bias tape. The video above and the image below show double fold bias tape.
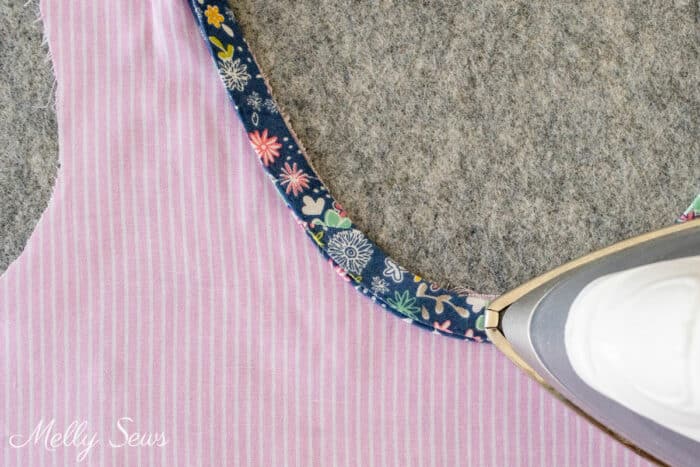
For best results, you need to do this with the bias tape laying as it will on the finished item. Above you can see that the two folds face away from the raw edges of the neckline, just as they will once this is sewn. The shorter folded side of the tape is on top and the fabric is right side up. The longer edge is on bottom. This way the topstitching will catch that longer fold on the wrong side of the fabric.
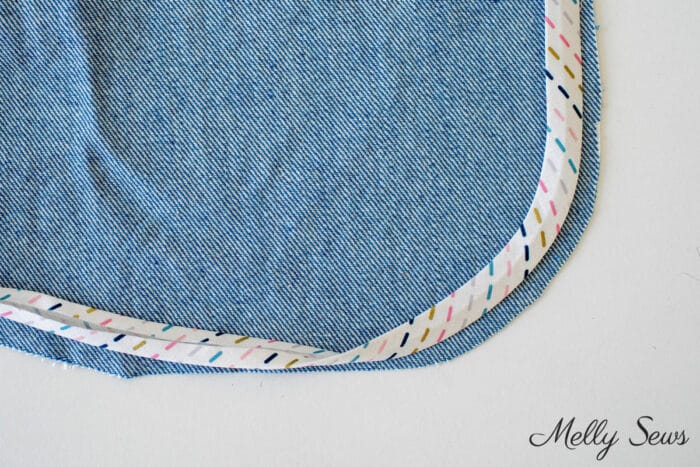
If you are using single fold bias tape, you need to do this with the right side of the tape facing up on the side of the fabric where it will end up. And the folded edge of the tape needs to be the width of the fold away from the raw edge of the fabric. As you can see in this post, single fold bias tape can finish to either the inside or the outside of the garment. In the image below, the bias tape is on the wrong side of the fabric as it will be finished to the inside.
After you press the tape into the shape of the curve, then you’ll carefully unpin and unfold the tape. You’ll line up the raw edge of the tape with the raw edge of the fabric. Then you’ll carefully stitch in the crease of the first fold closest to the edge of the curve.
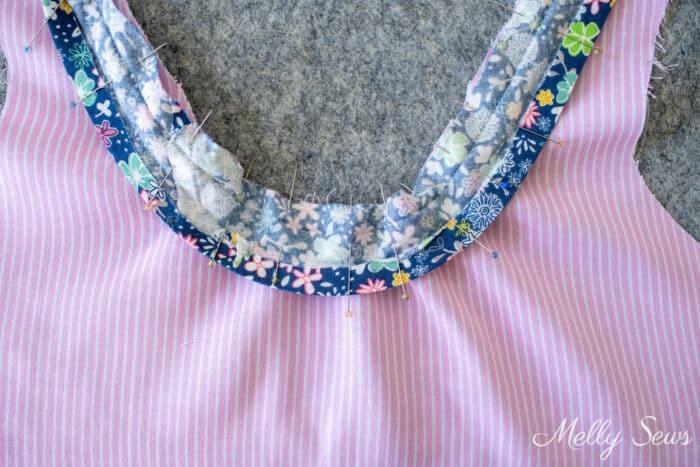
After stitching and removing the pins, you’ll fold the bias tape on the fold line and pin. You may want to press the tape again at this point and check for any wrinkles in the seams. It is much easier to seam rip if needed at this point than later.
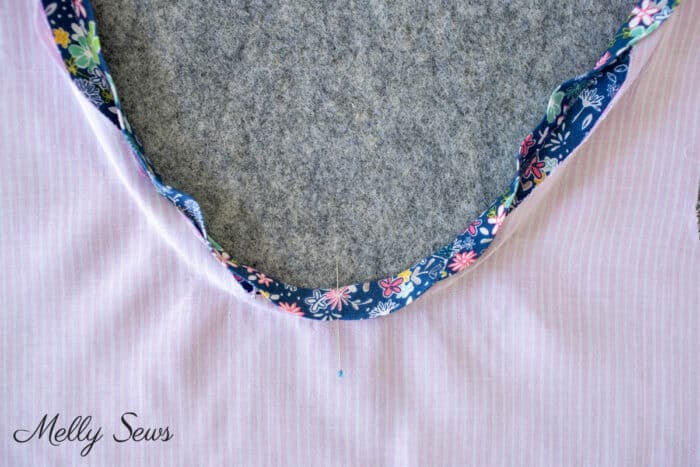
Topstitch to secure the other side. Make sure to choose thread that coordinates with the bias tape. You can place your needle right next to the seam allowance. Alternatively, you can pin carefully and stitch in the ditch with double fold tape.
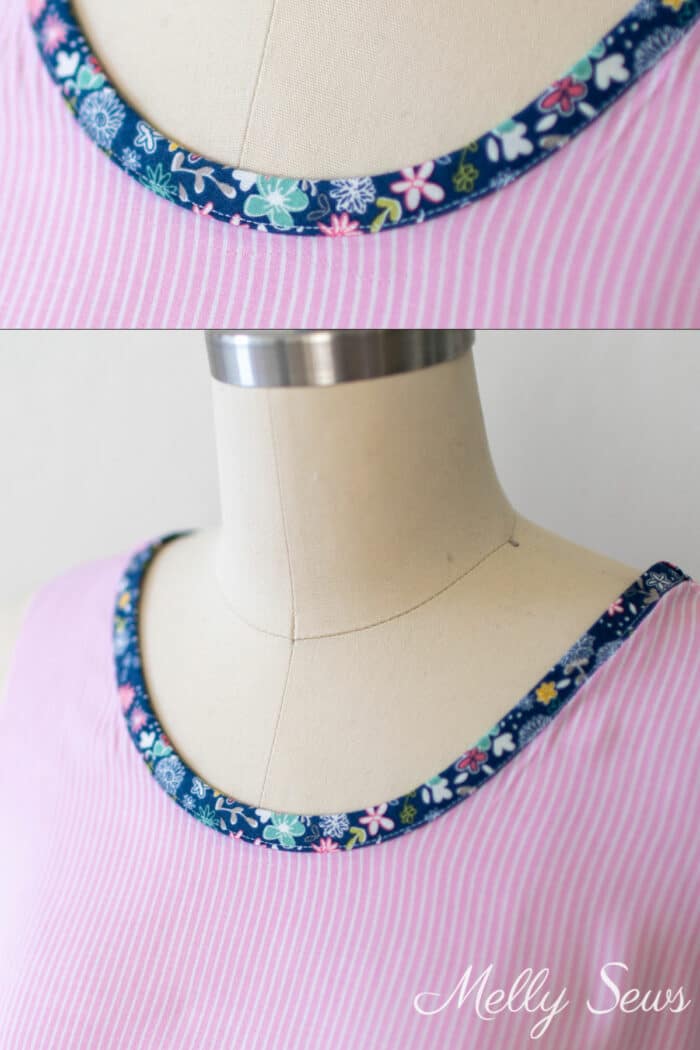
When you’d done, you should have a nice, flat curve on your neckline, as shown below.
BELLA CUCINA
Melly, this could not be a more important tute. Recently, I made a very nice long sleeve knit peplum top. It was so frustrating to end with a neck binding that would not lay flat. I am looking forward to not making this mistake again. Happy Sports Season to you and your family!
Marcia Anderson
Melly, I am so happy you’ve put this into print! A few years ago I was making 5″ round coasters and this was the method I used to ensure the bias lay flat and had no wrinkles. Another plus was the stitching to attach the bias was pretty accurate on both sides! I even took some bias tape, curled it, steamed it, and mailed it off to a friend just to prove you can do small circles with bias tape! I’ve never seen this tip written by anyone else, so I’m happy it’s now ‘published’ so all your followers will use this technique;