
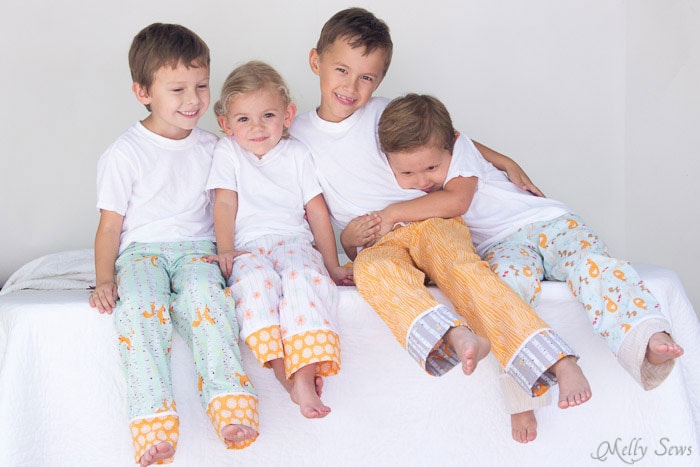
Make matching pajamas for the whole family and bags to gift them in with this easy sewing tutorial.
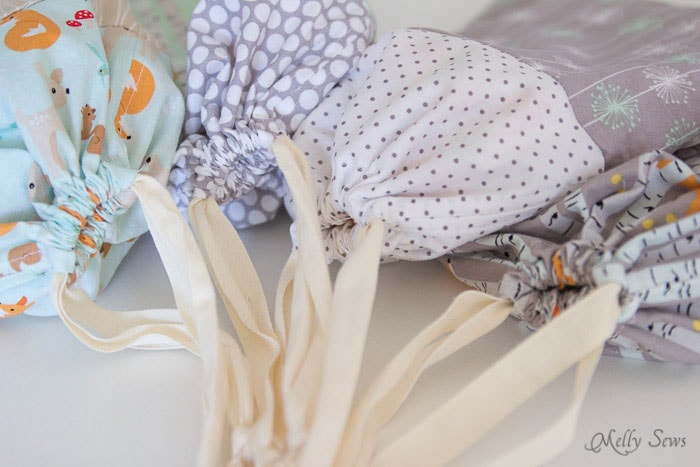
Hey y’all – today I’m going to show you how to make pajama gift sets. These are easy sew drawstring bags that contain coordinating pajama pants inside. So you sew pajama pants and sew the bag, and make a kid in your life happy and super cute!
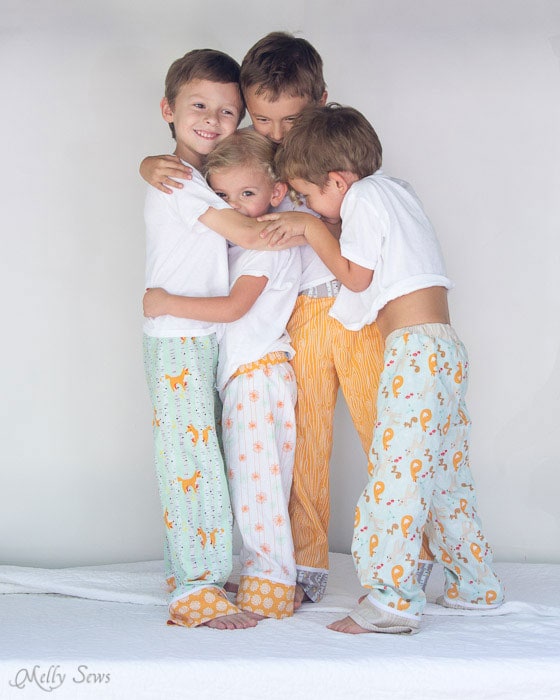
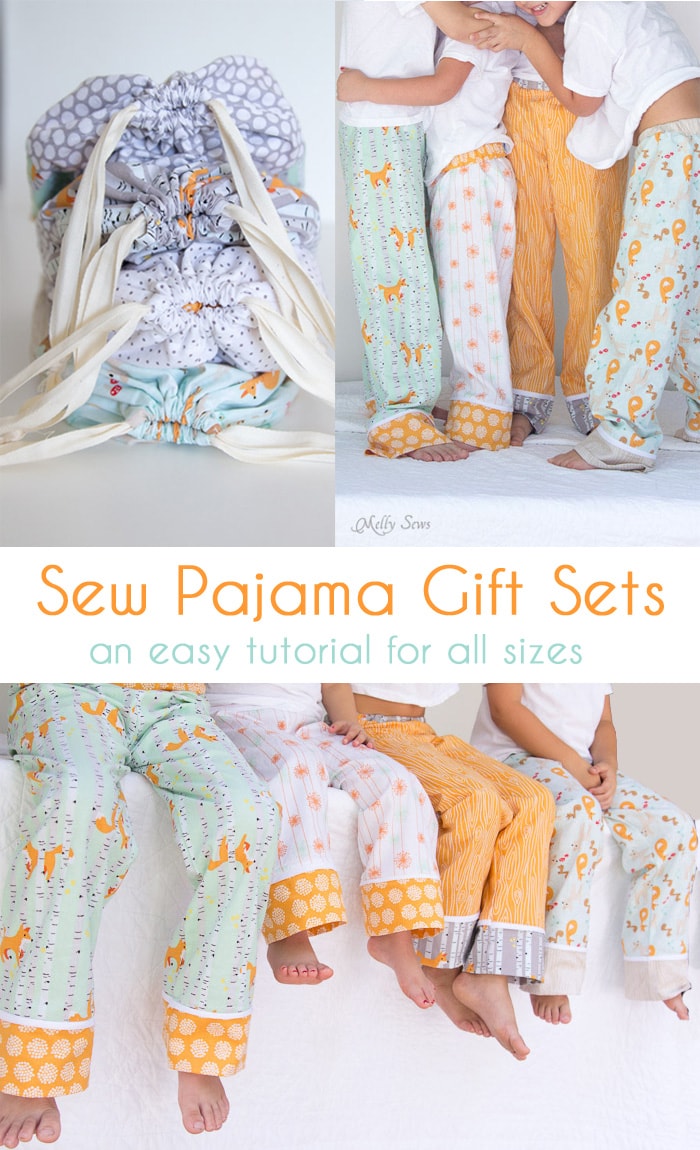
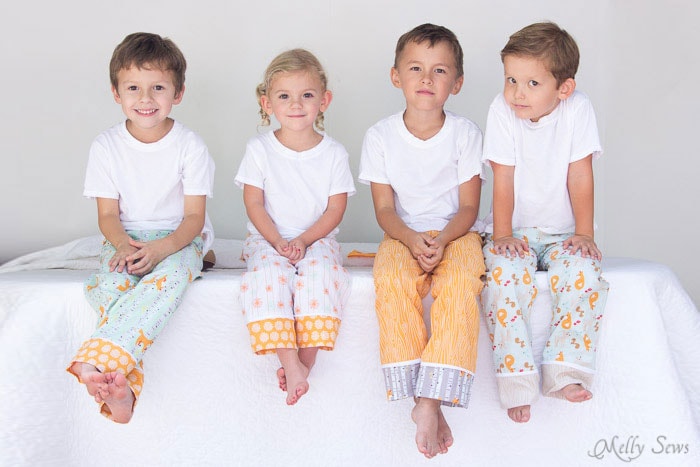
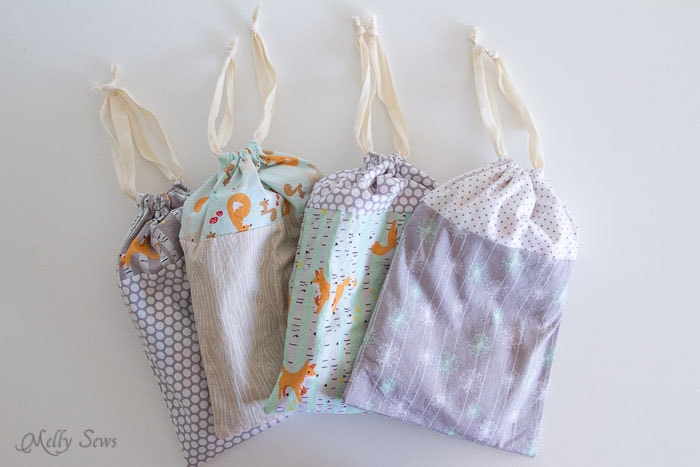
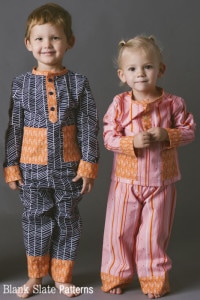
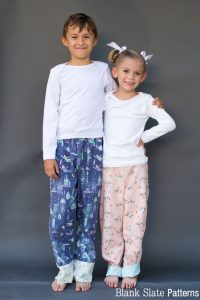
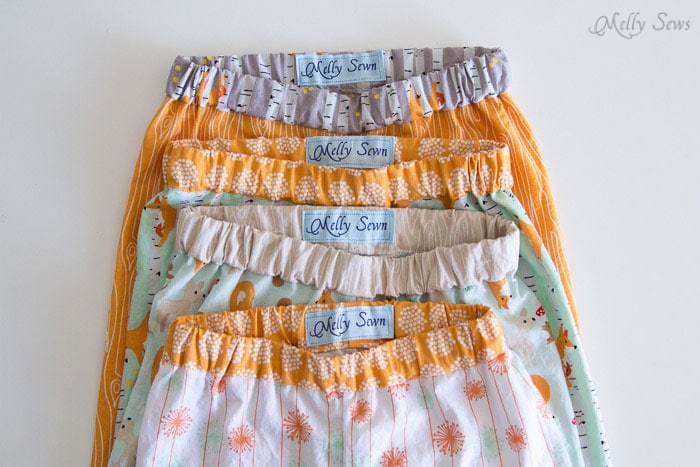
I just love how these from the Good Natured collection came out. From left to right I used Friends Mint with Fireflies Orange, Dandelion Multi with Fireflies Orange, Timber Orange with Friends Gray, and Mint Main with Timber Brown.
To make the drawstring bags, use this tutorial. The only change I made was to sew the two coordinating pieces of fabric together into one piece before cutting out my drawstring bag pieces.
To make the pajama pants, follow the instructions below.
Note: The US Consumer Product Safety Commission (CPSC) has strict requirements for children’s pajamas (and other children’s clothing), and these do not meet their requirements. I am fine with them for my own kids, but it would be against their regulations to sell these pairs. So if you’re an Etsy shop owner or planning to make pajamas for sale, make sure you read up on their requirements and keep yourself out of trouble.
Don’t feel like making a pattern? You can buy these from my shop – just click one of the images to go to the purchase page – and they come with the tops as well as the bottoms.
 |  |  |
Make your PJ pattern
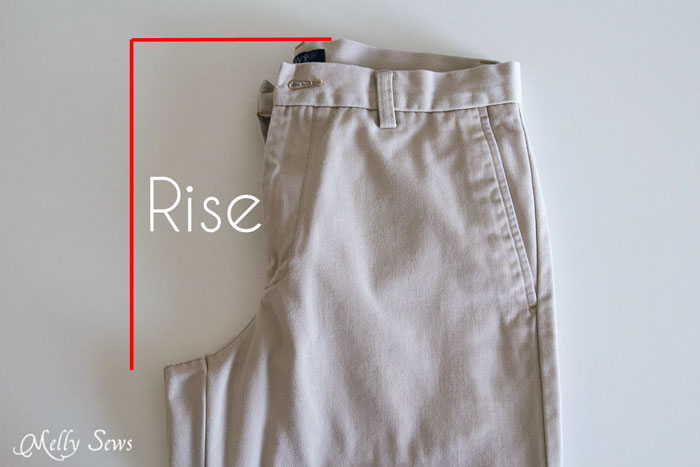
In order to make these pants, you’ll need three measurements from your child – their hip, rise and inseam length. Don’t know how to measure your kid? Watch this video.
To get the rise length, the easiest way is to measure a pair of pants that your child owns. Fold them in half, then measure from the point of the crotch straight up to a line level with the waist.
To draft your pants, you’ll need to do a little math. First, take your child’s hip measurement and divide it by 2. Then add 5 inches. Call this number A.
Next, add the rise plus the inseam. Call this number B.
Draw a rectangle that is A wide by B tall.
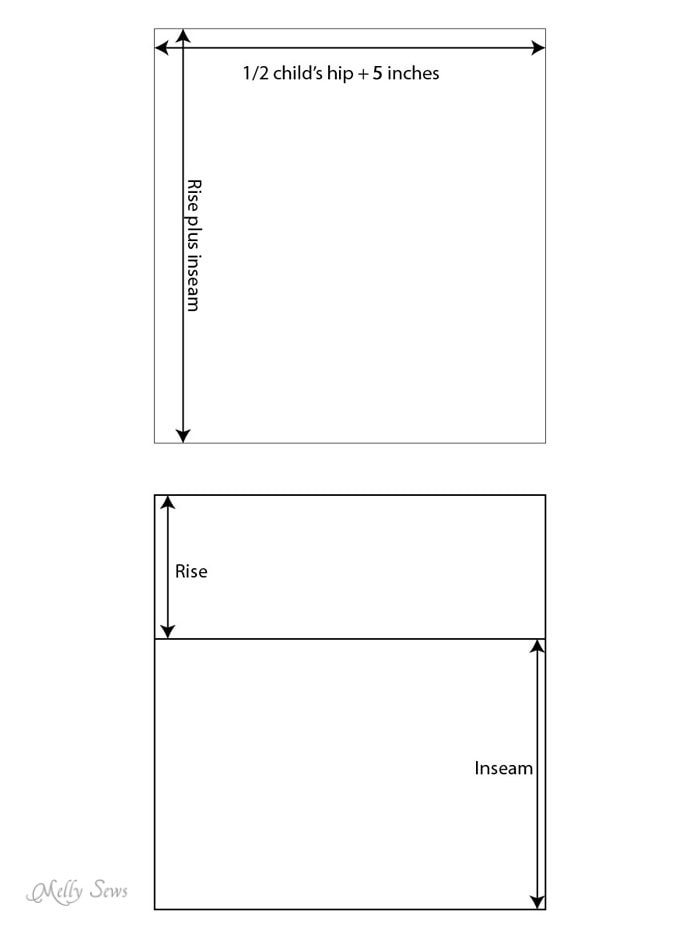
Draw a line across the rectangle between the inseam and rise lengths.
Bring the sides of the rectangle in as shown at the rise line. The 1″ side is the front of the pants, the 2″ side is the back.

Curve the corners to create the crotch lines.
At the front edge, drop the line 2 inches and redraw it – this way the waist will cover your kid’s booty but not come up uncomfortably high in the front.
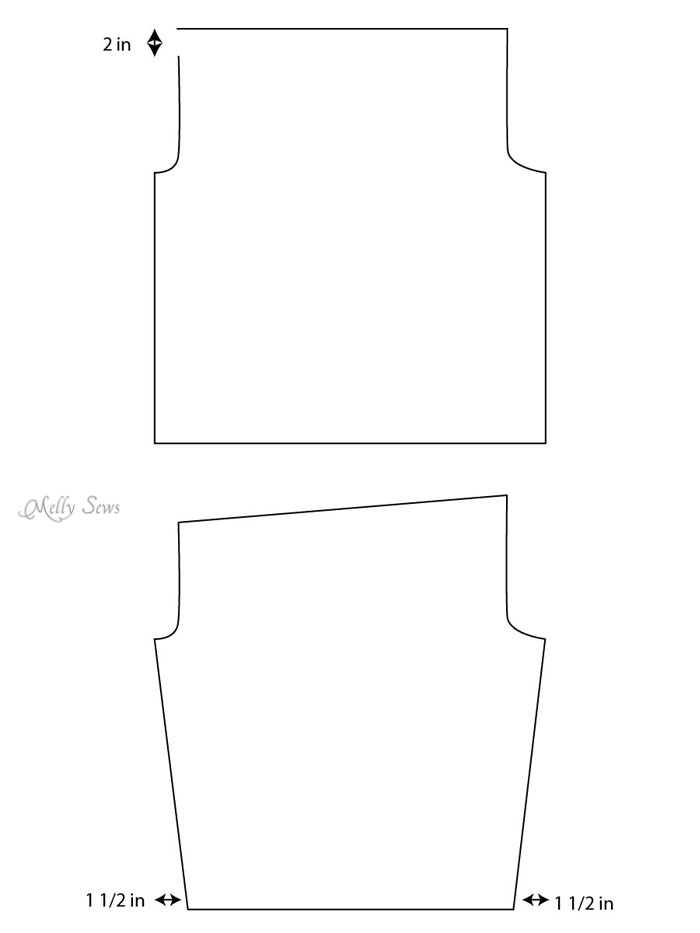
Bring the bottom corners of each pants leg in 1 1/2″.
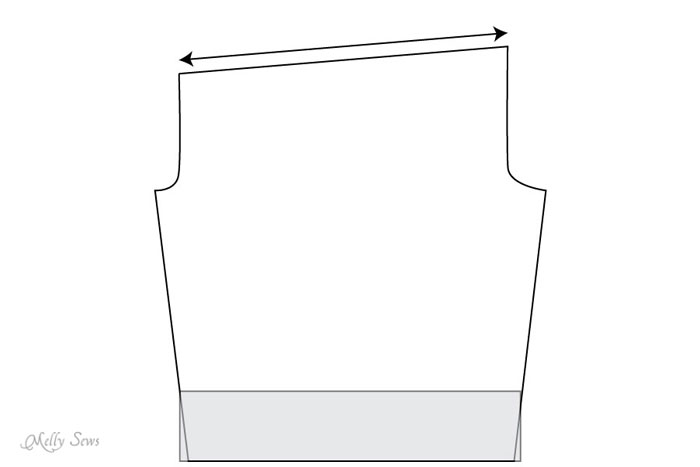
Measure the waistline – you’ll need that measurement to create the waistband.
If you want cuffs, trace out a rectangle that covers the part of the pants you want to be the cuff. Don’t follow the angle of the pants leg at the bottom; keep your rectangle with 90 degree corners. Cut off your pants pattern at this line, separating the pants and the cuff.
Add seam allowances all around the pants piece.
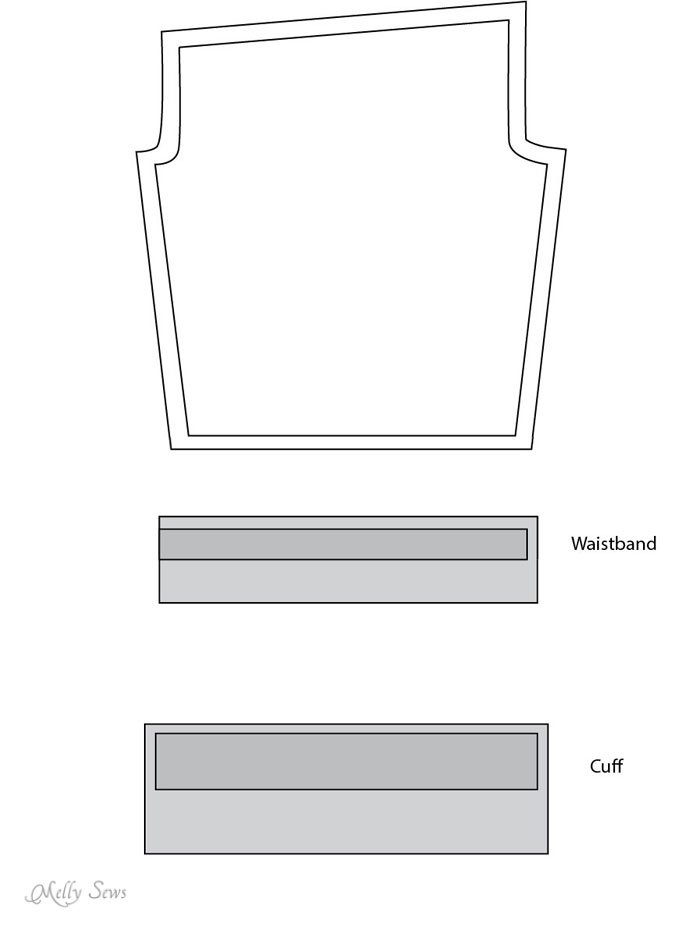
Your waistband should be the same height as the elastic you’re going to use to finish the pants plus 1/4″, and then the length is going to be the same as the measurement you took earlier. The waistband will be cut on the fold, so add a seam allowance to the top and side edge, then double this rectangle in height for the final waistband piece (because it will be folded in half to form the casing).
The cuff will also end up folded in half, so add seam allowances to the top and sides, then double that rectangle to form the final pattern piece.
Video Tutorial for Pyjama Pants
I’ve got a video of the process below, or you can keep scrolling for the written instructions. You can also watch the video on YouTube here.
How to Sew Pajama Pants
It’s time to cut out your fabric. For your first time using your pattern, you should probably use muslin or other fabric you aren’t attached to, in case there is an issue.
You need to cut 2 legs, 1 waistband and two cuffs. Make sure you have your fabric folded while you cut, so that you get a right and left leg.
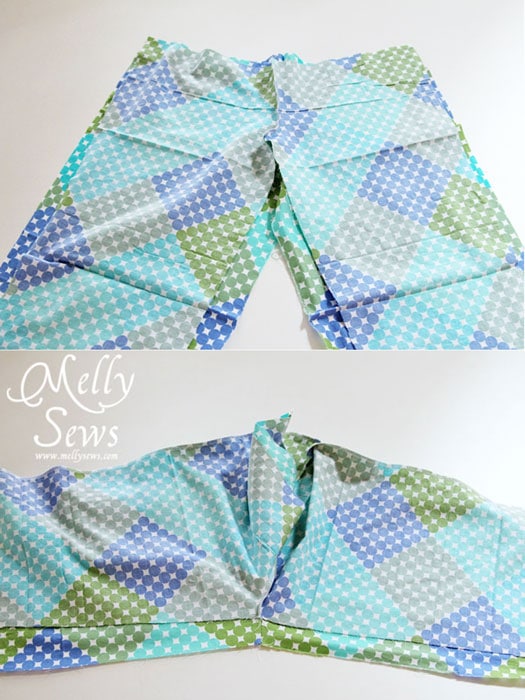
Start by placing your legs right sides together and sewing the rise lines.

Fold your pants so that the two seams you just sewed are one right on top of the other. Match up your inseams, then sew both in one long seam.
Sew short ends of the waistband together to form a loop, then line this seam up with the center back. Pin your waistband around the top of your pants and then stitch it in place.
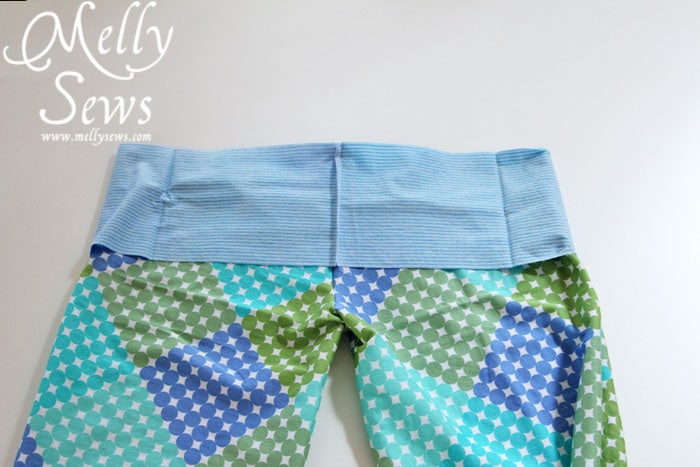
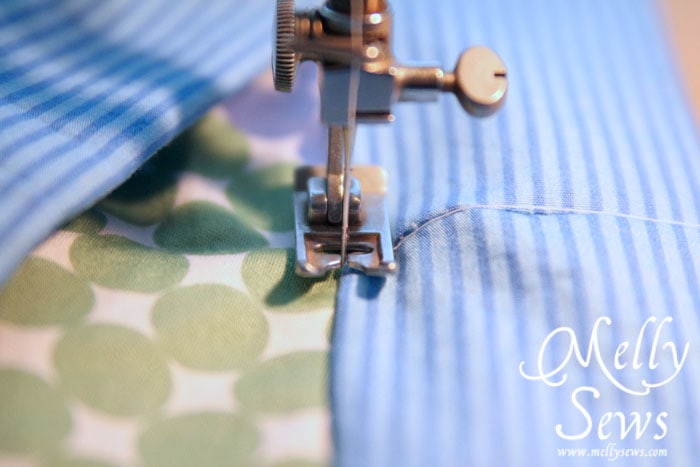
Iron the other edge of the waistband under slightly, then pin it so it barely covers the seam joining the waistband to the pants.

Stitch right next to the waistband edge to secure it in place, leaving an opening to insert elastic.
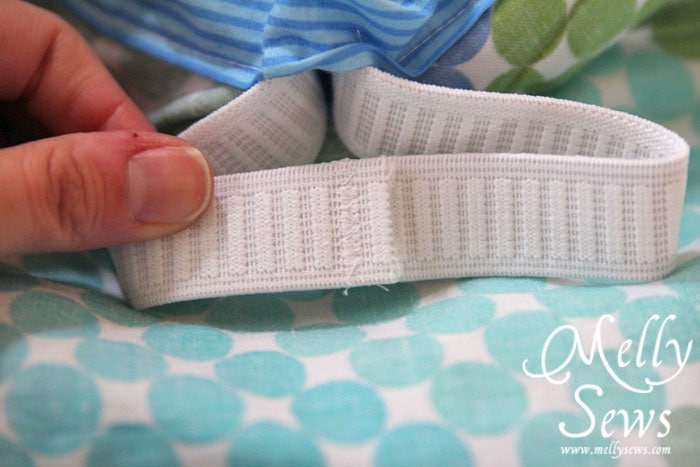
Insert your elastic using a bodkin or a safety pin.
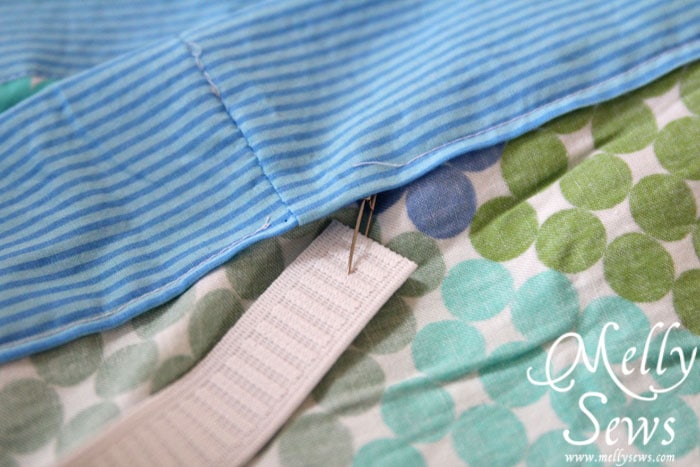
Sew your elastic into a loop and sew the opening closed.
The next step is to fold the cuffs right sides together, matching the short edges. Then you stitch this edge to form a loop. Place each cuff right sides together over a pant leg, matching the seam with the pant inseam. Stitch.

Next, just like you did with the waistband, fold the raw edge of the cuff a little to the wrong side and press. Then fold this edge to cover the seam attaching the cuff to the leg, and stitch again.
Finishing Your Project
I sewed tags into the back waist of the pairs I made to help the kids get them on the right way.
And you’re done! Now you can proceed to round those cute kiddos up and take some photos!
The drawstring bags are not only good for giving the gifts in, they’re great for hoarding all those little things kids love to collect.
Sheryl
Thanks for a great tutorial!!! I love the fabric and details you have chosen!!!
Melissa Evans
Oh man, I already made my little guy a pajama set but didn’t think of a little bag. So cute! Im going to pull out my scraps.
Alice
Did you use knit fabric or cotton or a flannel? I love their drape and I’m hoping you used knit. Thanks!
Amy
The bag is a great idea! Love it! Makes it more gift-y. (Yes, I just made up that word.) And I love the mini-lesson on drafting the pattern. You make it look easy enough, I might even have to try it.
Artemisa
Excelente tutorial, aprendo muchísimo con usted…Gracias…
Emily
so super cute!! I LOVE the fabric you used… so so cute! what a fun gift idea to put it in a bag and gift ;o) Pinned it!
Carrie
I just attempted to draft my first patter which happened to be pajama bottoms for my nephew. This would have been so much easier. I am going to make him two more pairs, so if the first pair don’t fit (lucky he has a twin sister I can use a test model) I will be back!
Connie
I always love reading your posts. This one is no exception – and perfect timing for those heartfelt Christmas handmade gifts. I really appreciate the beginner drafting lesson too. What a nice bonus!
Wendy
Just making some of these for my 11 year old daughter and would be interested to know how to make the white trim above the cuff. Thank you for the free pattern.
Christine
These are sooo cute! Thank you for the tutorial! Can’t wait to try a pair for myself!
Theresa
I’m gonna try this for myself, lol. Since I hate the way store bought ones fit.
Colleen P
Thanks so much for sharing! I made a pair for my son and they are the most adorable pajama pants ever!
Frollein Schmidt
Thanks for this great tutorial. I had to do some math for metric dimensions and had to guesstimate on how to do the curves for the crotch line, but in the end it turned out great and my daughter loves these pants! Definitely not my last PJs! 🙂
Pheby
Wonderful tutorial. I have to make pajamas for my sons soon.
Susan Mathias
Aloha last year for Xmas I made your pj bottom for my five granddaughters with bags and for my two grandsons and a pillow case to match so much fun and they were so excited thank for this wonderful ideas
Suzanne
I have my material for my 5 grand daughters and 1 grandson and I noticed on the material it says. Not made for children’s sleep wear. So I started looking for cotton and flannel have the same thing. The material is not flammable. Where can I get material that is suitable to sew with i love your pattern adorable.
Melissa Mora
CPSC standards are different for tight fitting pajamas. See their rules here: https://www.cpsc.gov/s3fs-public/pdfs/blk_pdf_regsumsleepwear.pdf
Jessica Miller
Hello! So I made several pairs of these for Christmas and they turned out really well!
Jacqueline
I just made one for my grand daughter and it was so easy to follow your instructions, Thank you for the free pattern.
Diya
Will this draft work for adults Melissa? Thanks for such a lovely tute