
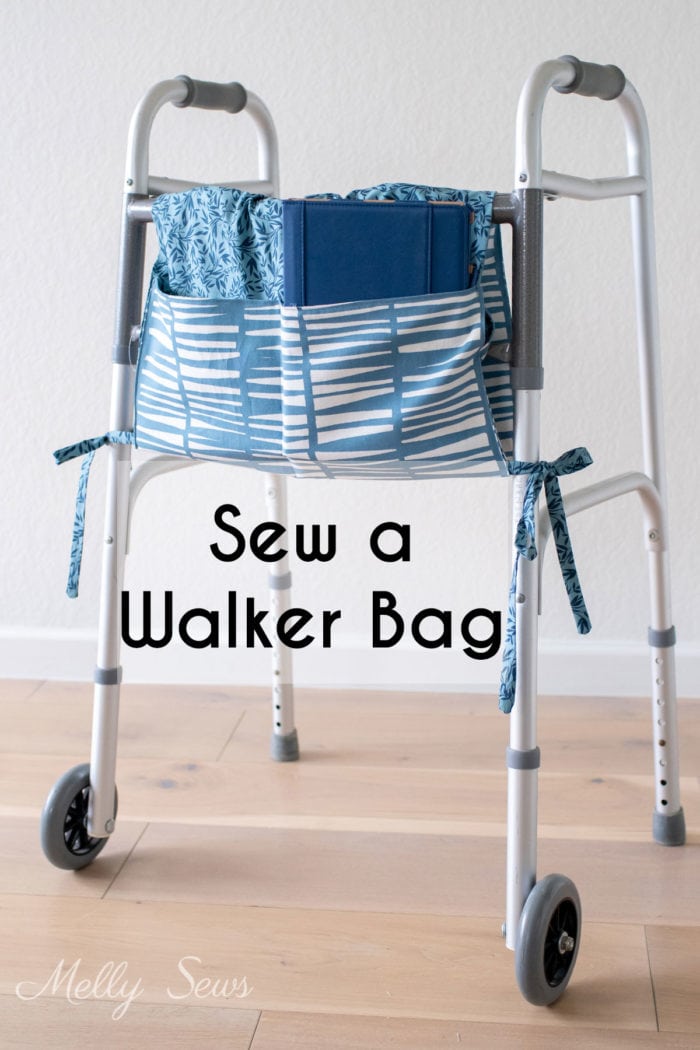
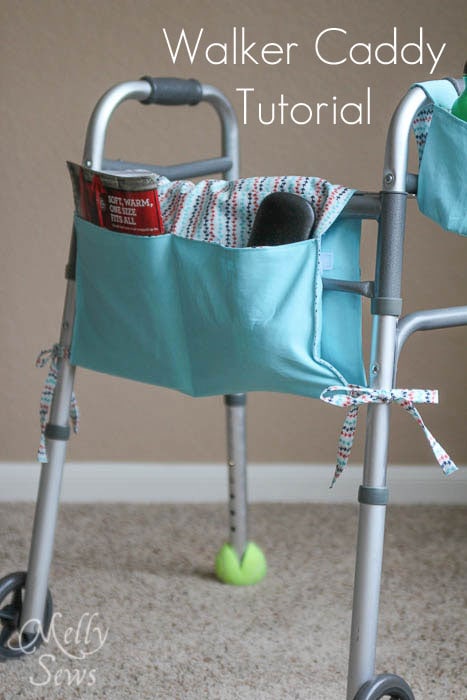
Make a bag that attaches to a walker and can accommodate objects of various sizes and shapes with this tutorial and video
Hey y’all, today I’m sharing a tutorial for a walker caddy accessory bag. This is a great gift for people who use mobility assistance, and it can also be a great charity sewing project. I know many groups who have sewed these for to donate to nursing homes. It takes an ordinary walker and makes it more useful. I wrote this post a few years ago, but I’m updating it with some new pictures and a new video to make it even easier to sew.
A walker caddy tutorial is one of those things I never thought about until a few relatives got old enough to need walkers. If you’re using a walker, what do you do if you need to carry your glasses, or the remote, or your mail? Your hands are full, so where do your personal items go? You can’t even carry things across your own house.
Well, that’s where this walker caddy tutorial comes in. I designed this to be easy to sew, with side straps so that it can be tied on to walkers in a variety of sizes. It also has velcro for stability, to keep it from sliding back and forth across the bar when there is more weight in front or back.

And this walker tote can be easily adapted for wheelchairs, or strollers. Because new mamas and special needs caregivers never have enough hands either. Once you see how it’s constructed, you can modify the measurements to attach to a stroller handlebar or drape over the back of a wheelchair. This stores personal items easily within reach.
(Psst – if you’re looking for the cup holder tutorial, that’s here. This one is just about the pocket tote for the walker).
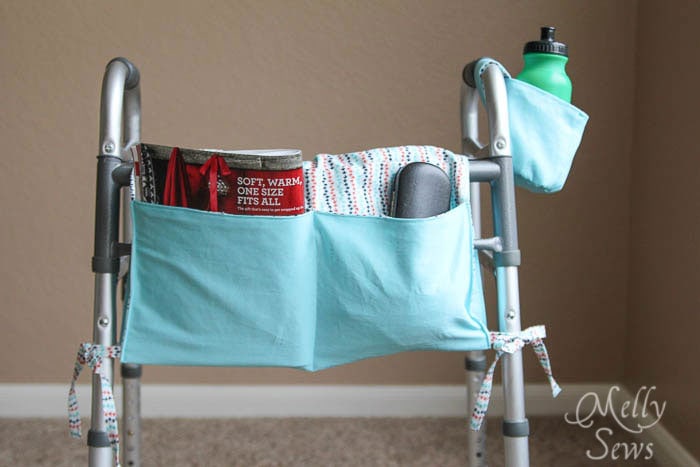
The caddy has front pockets for larger items like tablets and magazines.
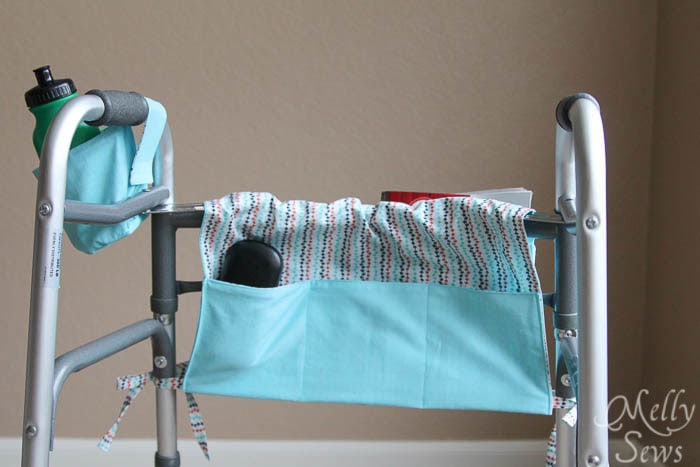
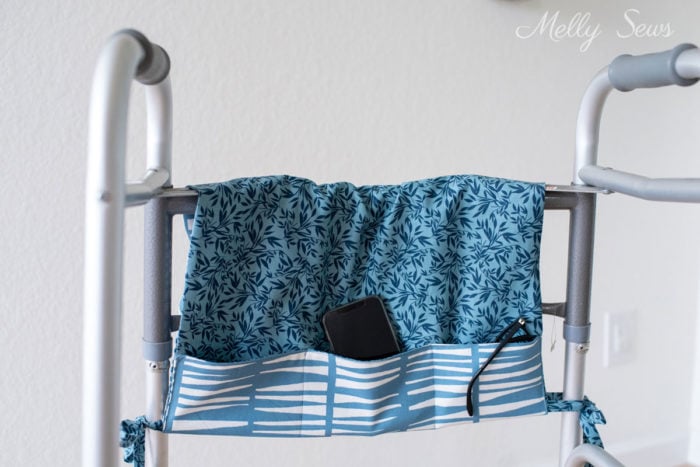
And it has back pockets for items that need to be easily accessible, like glasses or phones.
To make this walker tote bag you’ll need
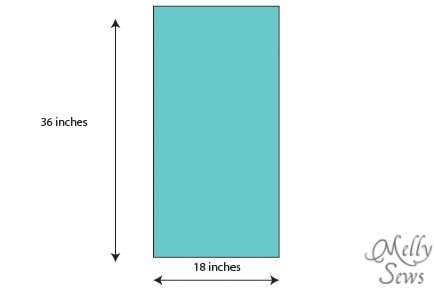
- Two pieces of fabric measuring 18″ x 36″. One of these should be a heavier weight fabric – like heavy twill, denim, canvas, etc.
- Ties or ribbon – I used ties made of 1/2″ wide bias tape sewn shut – you’ll need 1 1/2″ yards or 54 inches
- 1/2 yard of sew on velcro
How to Sew a Walker Caddy
You can watch the video of me sewing this walker bag below or on YouTube here. Or find written instructions below the video.
Links to tools in video, commissions earned on these links
Quick turn tool
Velcro
To start, cut your two pieces of fabric to 18″ by 36″
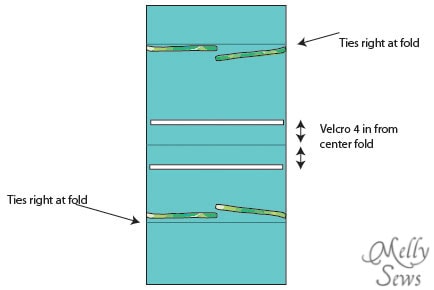
With your sturdier fabric wrong side up, fold the two ends up to make the pockets. I made the pockets on one side 8 inches deep and 5 inches deep on the other side. Iron these folds so that you leave a crease in the fabric. Then, with pockets still pressed up, fold the fabric in half right sides together and press that fold as well.

Cut your tie ribbon into 4 equal length pieces. Using your pressed creases as a guide, lay your fabric right side up. Pin the ties right next to the pocket folds, and pin or use side clips to hold the velcro about 3-4 inches to each side of the center fold. Sew on velcro and ties.
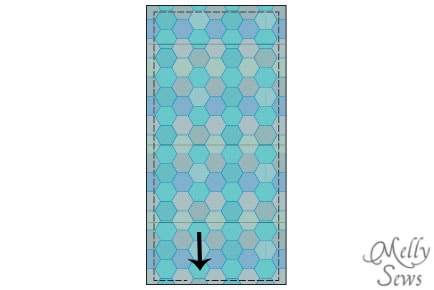
Place your other piece of fabric right sides together with your tied/velcroed piece and sew around the edges. Stop with your needle down at the corners to turn and leave an opening for your hand to turn this right side out.
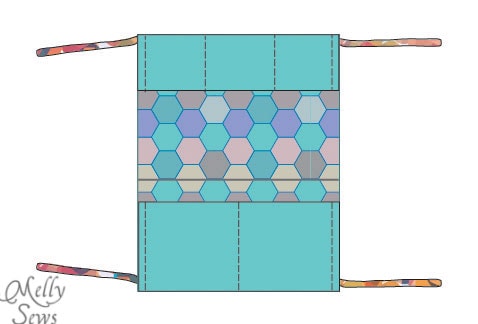
Turn the caddy right side out. Press the edges and topstitch all around the edges, closing the hole you used to turn the caddy right side out. Then fold the pockets back up and stitch down sides, backstitching to reinforce the top edges of the pockets. Sew dividing lines on the pockets, backstitching at these top edges as well.
And then all that’s left is to fold this caddy onto the recipient’s walker, securing the velcro and the ties. Then let them load up the pockets and be more self sufficient in carrying their things.
P.S. – I have a tutorial for the cup holder shown in these pictures here.
Charo Murciano
Una idea fantástica. Puedo publicarla en mi blog con un enlace para que la puedan usar en España? Hau tanta tanta gente que usa andadores, que es genial!
Tu siempre eres genial!
Besos
Charo
Cindi
Great pattern. This would be useful to make for gifts for those that need one!
My 24 yr old daughter made me one last Christmas when I broke my ankle and was down “non-weight bearing” for THREE MONTHS!
She is a beginner sewer but has watched me for years. She look at some images online and made her own pattern! Well I don’t think she made an actual pattern. She winged it! Out of fat quarters that she had picked up just because she liked them lol. It looks a lot like yours except it had two smaller pockets on each side that were INSIDE a larger pocket! I used it proudly, because she loved me enough to make me something I needed before I even realized I needed it!
I am so proud of her!
Now that I don’t need it for my walker I am putting it on my sewing chair! It will remind me that anyone can make anything if they try!
And will give me a little family love when my sew is a little out of whack! Even professionals have bad days!
Michelle DuBay
Melly, Please pin it so I can repin your walker caddy easily, I tried to pin this, as last year I needed one for myself.
I do love this tiny houses, although I would also love to see one set up for easily accessibly sewing and sme stash.
Brandie
Great tutorial! What is the seam allowance?
Melissa Mora
I typically use 1/2″, but seam allowance doesn’t matter too much on this project since you have the ties to secure it to the walker – it doesn’t need to fit the walker’s measurements exactly because you adjust with the ties.
Alice
I made one in a hurry this morning for a friend who has a birthday today. It went together easily and quickly. Luckily I had some denim in my stash big enough! Thanks for this tutorial!
Tammie
Thank you so much for this tutorial! My son was in a motorcycle accident 2 years ago that resulted in a spinal cord injury. He was supposed to be paralyzed from the chest down but has since recovered to the point that he can walk with a walker. My granddaughter and I made this caddy for him as a Christmas present. I made Velcro tabs instead of the ties and used all black fabric to make it more “manly”. He loves it and it has been on his walker since Christmas day. He even went out today to do some work on his car using the caddy to hold his tools. He told us it was the best present ever!
Carol
I have seen several walkers at the restaurant – I think I’ll make a few of these out of some scraps. Just walk over and put them on for them. Think I might see a couple of smiling faces? (I hope!)
Kitty Melancon
I finished making the first of many of these. The directions confused me at first but I stuck with it and absolutely ADORE the way it came out!!!! I hope the people at the nursing home love it as much as I do!
Marie Brandon
Thank you for instructions, I am making one for my mother who is in a nursing home and just turned 101 years old! If it turns out good, I will make one each for her lunch buddies (all white hair seniors), all 3 ladies aka The Golden Girls!
Janell Evans an Occupational Therapist in NH/CCs
If anyone has the time Nursing Homes &/or Care Centers would be grateful for donations. They are great for increasing peoples independence and dignity that they can carry their own items.
Christie Heckler
THIS tutorial is the most understandable one ive seen on Pinterest! I read others & it was clear as mud. Thank you for a crystal clear tutorial! My elderly friend will love it.
Merianne Smith
I am sew grateful to find your pattern online! (pun intended!) I have several physical conditions that wax and wane and sometimes I’m able to be the mom I want to be and some days I’m forced to use my wheelchair or walker. On the days I need my walker, I have a rolling walker with a seat for when I’m shopping or need to go to one of the kids’ schools and can’t stand up for long periods. I was just thinking the other day that I needed a cup holder on my walker for my water bottle! Now I can make one, thanks to you. I have also really wanted a bag to go on my rolling walker/seat but most patterns use buttons or tabs of some sort to attach the pouch to the stiff bar on the walker. My rolling walker/seat has a sort of stiff band that is easier across the back than a straight bar but hangs and droops with the tab type pouch. Your pattern uses a line of Velcro that goes from edge to edge and doesn’t allow the strap to droop hardly at all! Thank you for your simple ingenuity!
Sharon
Great tutorial My husband just got home from the hospital and was commenting on how inadequate the little bag they give you with the walker was and he asked me to make him one! I truly appreciate the availability of this pattern and look forward to making one tonight!
Bev Brindle
Made 3 of these so far.Today was the third for brother with a stroke.EASY to make.Thanks for tutorial.
Kathy Kumiega
I had surgery 9 days ago & came home with a walker. I agree, where do you put your phone & just stuff when your hands are holding on to the walker. I intend to make several of these, your instructions are so great.
Debbie Zigler
Thank you so much I made one for a friend in a nursing home.She was so excited to receive it now she tells people look what Debbie made for me. I plan on making more soon.
Tammie
4 years later and I’m back to this pattern. My son’s wife accidentally left his walker in a parking lot with the pocket caddy on it. Yes, someone actually snatched it in the half hour it took for them realize they left it.
He was more upset about losing the caddy than he was about the walker.
Such a simple project to make and it makes a huge difference for a disabled or elderly person.
Michelle
Thank you so very much for this tutorial! I used it to make a walker caddy for my grandmother last summer and she uses it all the time and often comments on how useful it is. I am getting ready to make a second one, for my uncle. He saw my grandmother’s and requested one for himself. Know that your generosity in sharing this (and your clear and helpful directions/diagrams) allowed me to bless them 🙂
BettyAnn
Thank You so very much for this great pattern and instructions. I have made 30 walker caddies for Christmas presents for Seniors in my area. I had so much fun with material combinations. The Seniors will love them since they are so useful and pretty.
Debora Preputnik
I am hoping to adapt this for use on the hospital bedrail for one of my home Hospice patients. Thanks for the clear instructions!
Alicia
I’ve been looking all over for a ‘stroller caddy’ to go over the handle of my Joovy Caboose, and this will work perfectly! Thank you so much for sharing!
Michele Ricci
Thank you for this tutorial. My aunt recently had a heart attack and is getting her strength back. She is using a rolling walker. I made this in three hours including the time to pick out the polka dot fabric from my stash. I made ties at the top as well in case she needs them to adjust the bag to the walker. Very easy directions.
Barbara Falkner
HI, I made 2 for my mother-in-law, ‘cos I wasn’t too sure of the colour she would prefer. She loved them both! The only thing I thought would improve the bag would be a zip installed on one side of the bag. Sew 1/2 to the pocket..and the other half to the main body before sewing the pockets down. (So easy..I’ve actually done this on my sewing machine cover/placemat. It holds all my sewing feet, cord & miscellaneous, and using clear plastic, I find things easily.)
Teresa
Thank you for the great pattern and instructions. Well written and explained. Went together quickly. I even embroidered my mother-in-laws name on the front. I will definitely be using this again.
Ann Wroot
Brilliant tutorial, thank you for sharing it . I will make a few of these for gifts, great idea
Jean Walters
Hi, thank you for sharing th is pattern, it is well written with clear instructions. I made one for my girl friend..
Susan Podewitz
Thanks for the great tutorials with easy directions! Made the caddy and cup holder this morning for a friend! I enjoy all your patterns and videos.
Emily
I’ve made four of these over the years for my father as he dealt with knee replacements, etc.
The first one he gave to his roommate who “needed it more.” 😊
The second one he left at the hospital by accident! I hope it found a good home 😆
The third and fourth he keeps on the downstairs and upstairs walkers, respectively.
Thank you so much for helping me make his life easier!
Cindi
Thank you for such a well written/picture tutorial. I will be needing a Walker for knee replacement surgery soon, I looked at several patterns yours seemed to be the simplest- I know I could have a figured it out myself but I haven’t purchased a Walker yet and I am sure I would have made it a lot harder to do lol. other than being 3 inches narrower( made from leftover fabric from a set of scrubs I made)
Mary
I’ve been using this pattern for years and love it. It’s easy to adapt for different walkers and people, it goes together quickly, and people love it.
Barbara Falkner’s zipper idea is one I will try. Instead of upholstery fabric, I use iron on fleece. The top stitching and pocket seams are all the stabilizing that’s needed. For ties I make bias binding or use a cotton rope to go with the style.
This is a fantastically useful pattern. And you’re correct…it is about travel.
Sue Wagner
I just made this for a friend. I used two different fabrics and one was with a character direction print! It took some planning, but it came out perfect. I think she’ll love it!
Robin
Thanks for this great and simple pattern! I made one for my mom for Christmas and I’m excited to give it to her.
Marie Ramagos
Thank you for this tutorial. Several elderly family members have received caddies as gifts; all were appreciated and used. I’m toying with the idea of making one side as a single large pocket with a zippered top as an alternative to a purse.
Kindest regards,
Carol
Thank you for this caddy. I made one for my mom. She is able to put her mail, bottle of water, etc and move around without falling. She says it’s the best thing given to her in a long time! She really didn’t see the use for it at first. I’m making a second one to use while the first one gets washed. Thanks again!
Lynne
Great set of instructions, thanks. I’ve made a couple of similar caddies for my dad using a bought pattern (one each for the upstairs and downstairs zimmer frames) and he thinks they’re fabulous. This pattern looks simpler and quicker, and I hadn’t considered having smaller pockets on one side.
One change that Dad did request to his was for one of the deep pockets to be wider than the other so that he could use to to transport something wider, such as a plate.
Barbara
Thank you . Great pattern and tutorial to follow. I made one for my husband who has to use a wheelchair for a while. I did shorten the fabric to accommodate the wheels.