
Learn how to create a stylish and comfortable hoodie from scratch with this detailed DIY video tutorial. Perfect for beginners and experienced sewers alike.
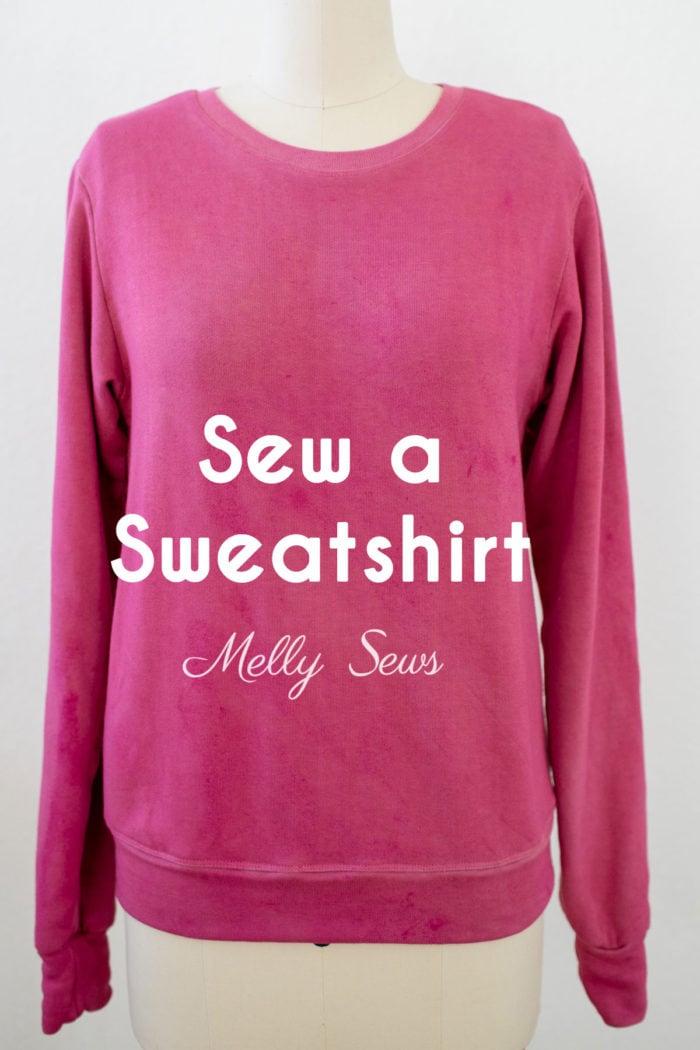
Hey y’all, today I’m going to share a how to sew a hoodie, including a free pattern. If you’re like me and often cold, then you probably have hoodies on hand to keep warm! I’ve been sewing for decades, but even beginners can sew a comfy hoodie to wear. So in this post I’ll go over the exact steps to make yourself a sweatshirt, including where to get a sewing pattern, what materials to use, and even a video tutorial.

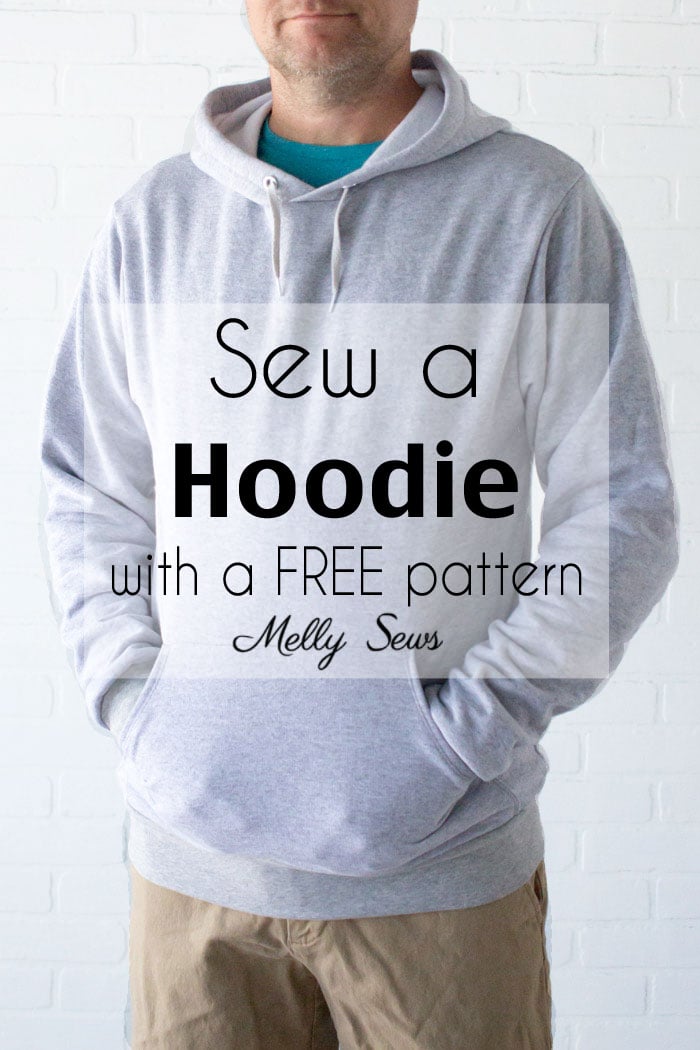
If you’re not familiar with high school football coaching in Texas, you should know a large portion of the wardrobe of every coach I know is supplied by the school in the form of game day shirts, practice shirts, spirit shirts, etc. Because of this, there is also an unspoken coaches’ code that when you switch schools, you turn in all your school related wardrobe to the school you’re leaving, so that the next guy(s) will have more than the 1 or two new shirts from that school year to wear. So when my husband the Coach switched schools, he suddenly had no hoodies and asked me to make him one. And after I made it and we took the above pictures, you know what he did? He left it sitting on a chair, where I grabbed it on my way to the gym.
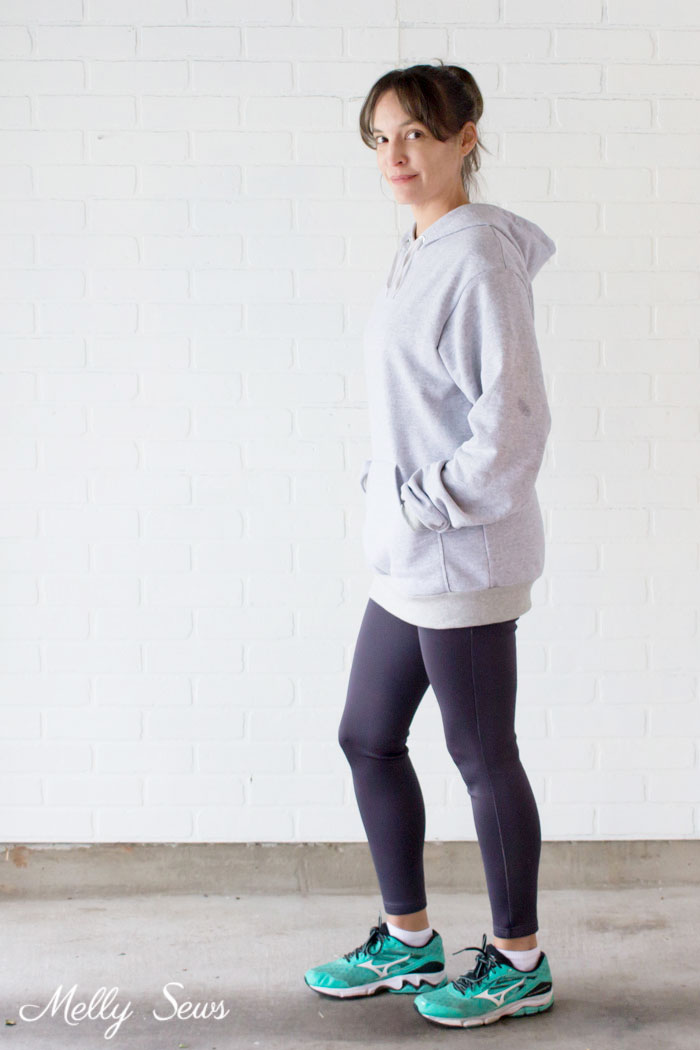
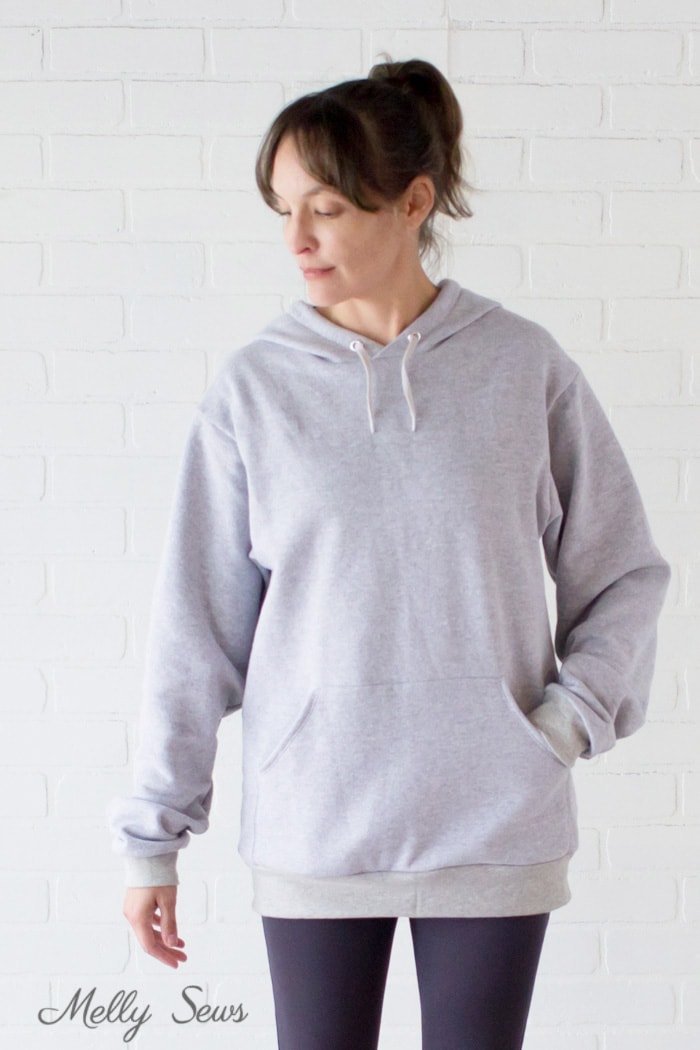
I think I look cuter in it 🙂 also, it’s very cozy and finders keepers and I’m not giving it back. After all, I don’t have my old school hoodie anymore either and an oversized unisex hoodie pattern is just what I needed to replace mine. But I might sew the Coach a new hoodie anyway, because I love him.
Key Skills for this Project Before You Get Started
In this project to sew a hoodie you’ll practice the following skills:
- Using a printer to print a PDF sewing pattern
- Basic sewing machine operation to sew straight lines and curves
- Stretch stitches – as long as your sewing machine can zig zag you can sew stretch fabrics
- Working with sweatshirt fleece fabric
- Adding grommets to your hood for the drawstring (this is optional, you can skip this step if you don’t want a drawstring)
- Sewing cuffs and a hem band
This post contains affiliate links. As an Amazon Associate I earn from qualifying purchases. All affiliate links are identified with (affiliate link) after the link or a commissions earned statement above the link(s).
Materials to Make a Hoody
Want to make your own hoodie? You’ll need these supplies (affiliate links):
- About 2 1/2 yards sweatshirt fleece knit fabric. Make sure this stretches at least 10% widthwise
- 1/4 yard rib knit for the cuffs and waistband, make sure this stretches 30%
- Eyelet kit
- 36″ Shoelace
- Mallet
- Fusible Interfacing scraps
- The pattern – see below
How to Get the Pattern
The free pattern is for a size 36-38 inch chest ONLY. If you need a different size, you can grade up or down as shown in this post or you can purchase the multi-sized pattern here. As a note, my bust is 34 inches, so you can see how it fits oversized.
Click your preferred option below to get the free pattern as a newsletter subscriber or buy the multi-sized pattern with printable instructions. The pattern for purchase is the Conroe Sweatshirt, and it will fit chest/bust sizes 31-60″. Note that free patterns don’t have printable instructions.
 |  |  |
Please note that all my free patterns are licensed for personal use only (no selling items made from them unless you purchase the pattern) and by downloading you are agreeing to this license.
How to Sew a Hoodie
To sew this, watch the step by step video tutorial below. If it won’t load below for some reason, you can also watch on YouTube here.
DIY Hoody – Sewing the Hood and Front Pocket
After downloading and printing the PDF pattern (help for that here) follow the pattern instructions to cut out the pieces.
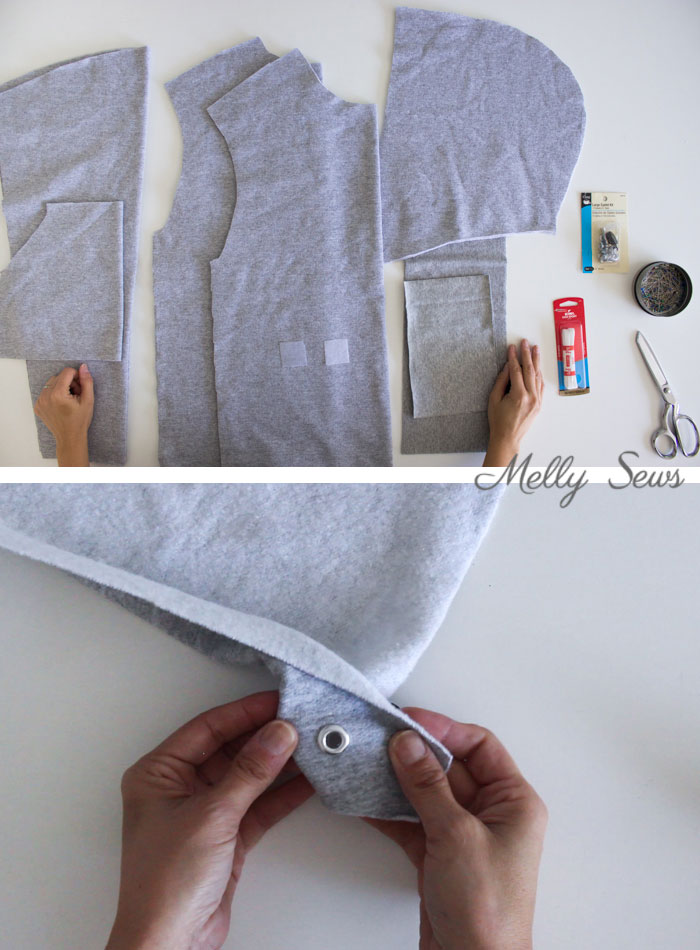
Next you’ll follow the eyelet instructions on the box to insert eyelets on the marked spots. If yours doesn’t have instructions I demonstrate in the video.
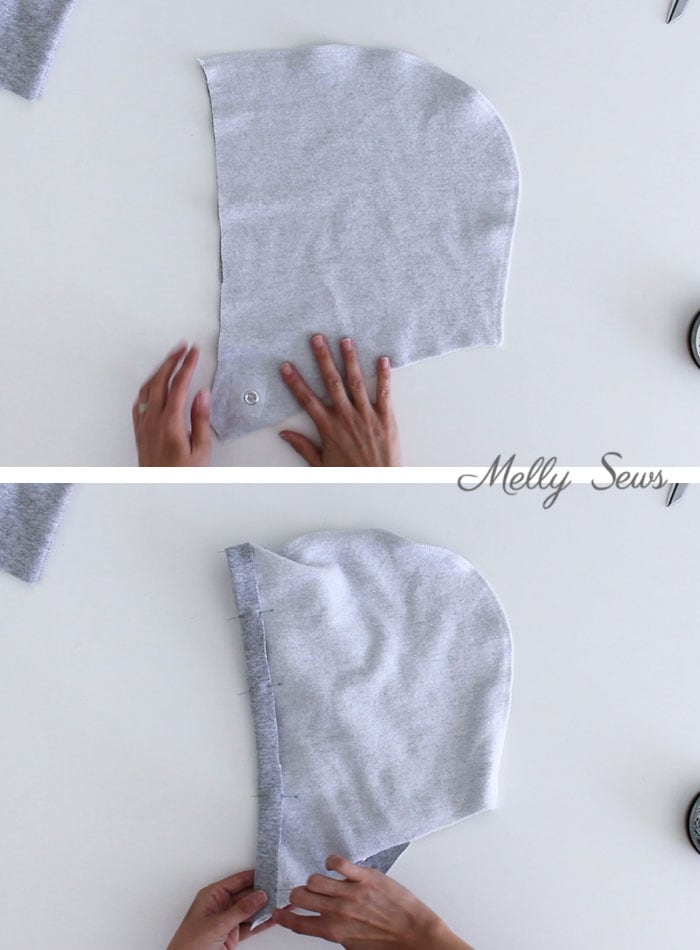
Place the two hoods right sides together and sew along the curved edge. Note – you should use stretch stitches through this project.Fold the casing to the wrong side, and stitch right next to the edge. Be careful when stitching near the eyelets – you may have to raise the presser foot and hand crank the machine to get past those parts.
Thread one of the shoelaces through the casing and then set the hood aside.
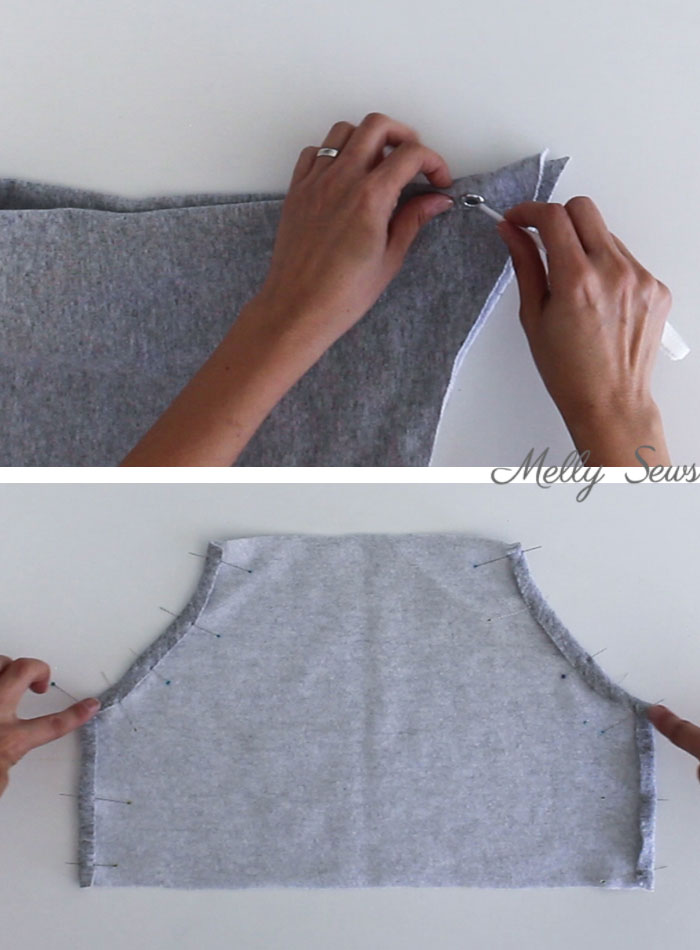
Fold the curved and side edges of the pocket 3/8″ to the wrong side and pin. Stitch the curved edges.
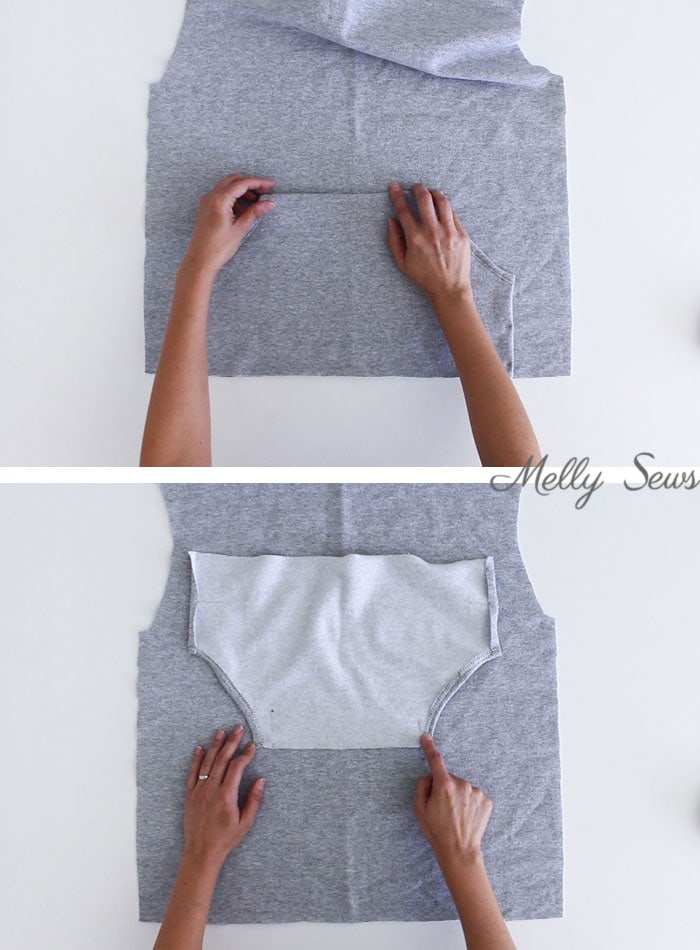
Place the pocket on the shirt front, aligning centers and bottom edges. Fold the top edge of the pocket 1/2″ to the wrong side of the pocket, then flip the pocket up so that it’s right sides together with the shirt.
Stitch across the top edge of the pocket to secure it, then flip it back down so that the bottom edges are aligned again.
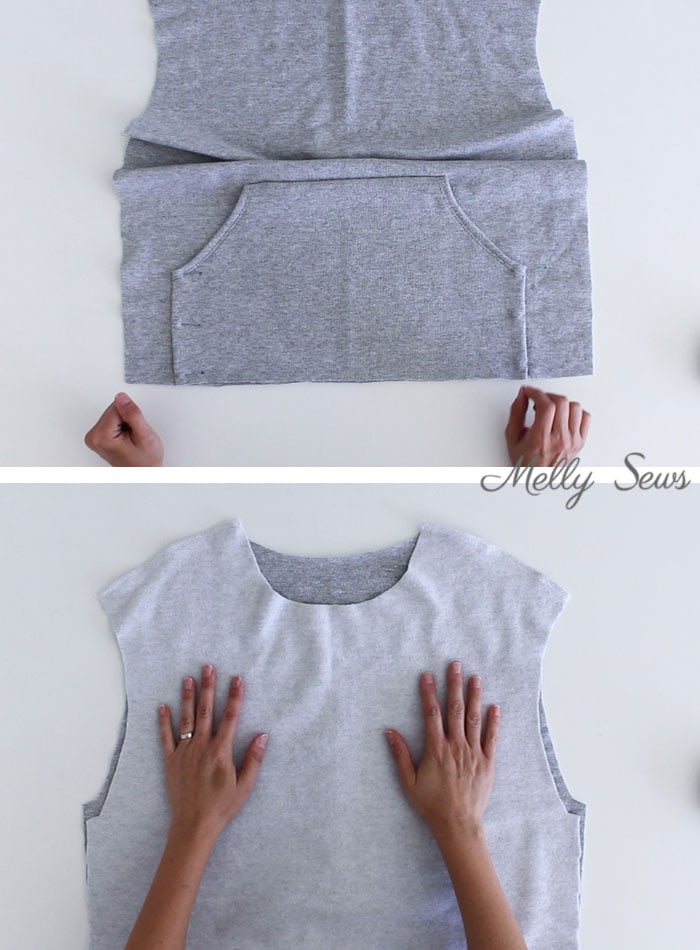
Sew the two side edges of the pocket to the shirt front.
Place the shirt front and back right sides together and stitch across the shoulders.
Sewing the Sleeves, Cuffs and Hem of Your Sweatshirt
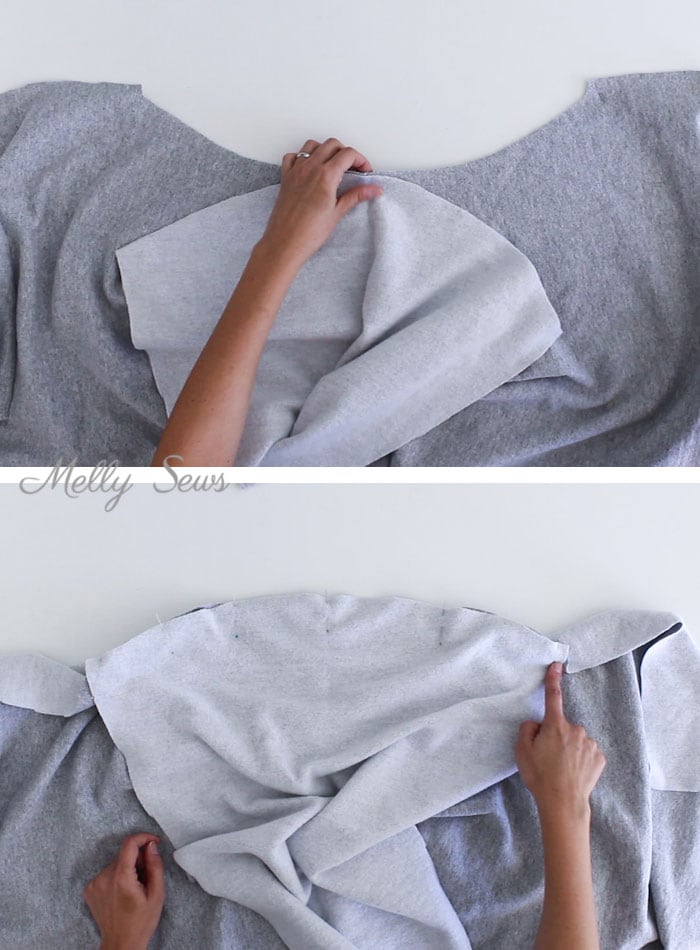
Open the shirt up flat. Match the center of the sleeve to the shoulder seam, right sides together.
Pin the rest of the sleeve into the armscye and stitch.
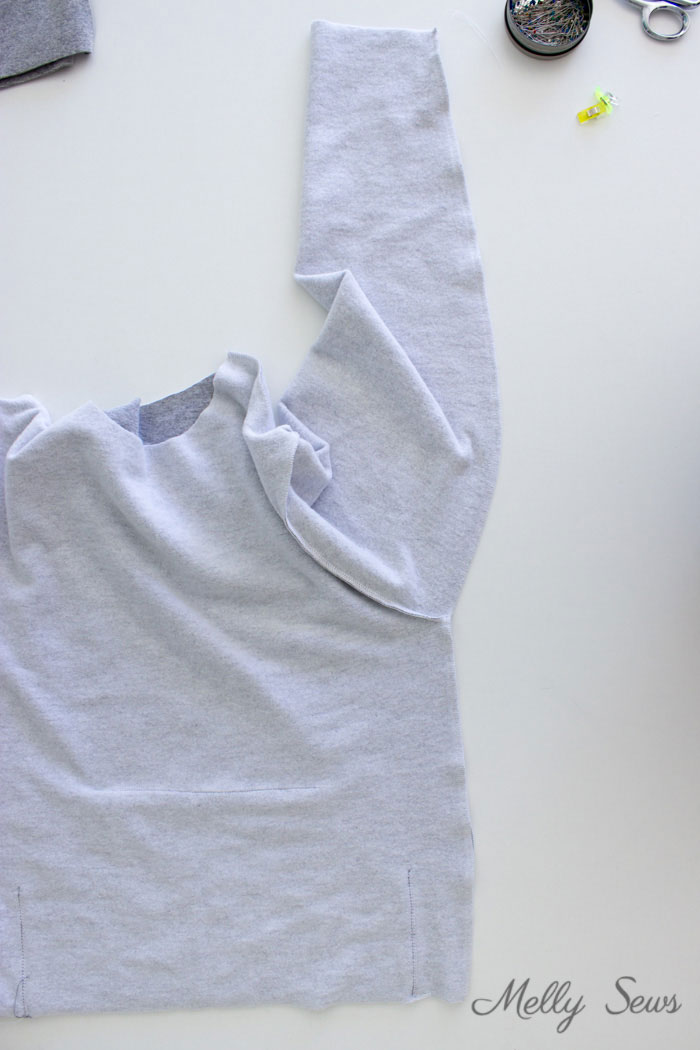
Fold the shirt right sides together and match the sleeve seams. Sew the underarm and side seam all in one continuous seam.
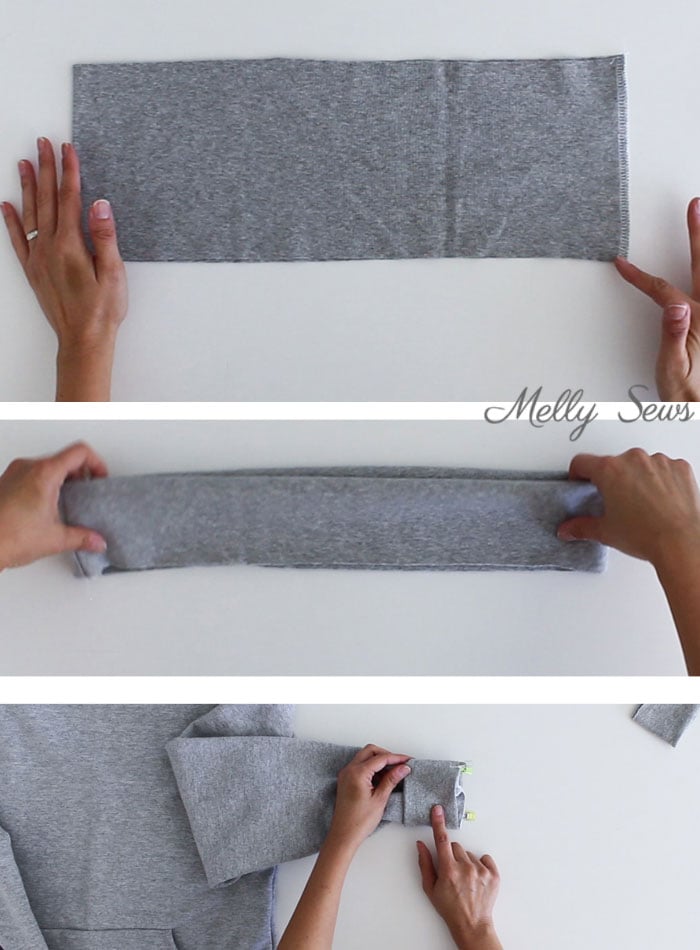
Fold the cuffs and waistband to match the short edges, right sides together. Stitch short ends together.
Fold each cuff wrong sides together, matching raw edges. Mark quarter points on the cuff and waistband, as well as on the sleeves and shirt bottom. Match the quarter points of the cuffs to the sleeves and the waistband to the bottom edge. Stitch, stretching cuffs/waistband so they lay flat agains the shirt as you stitch.
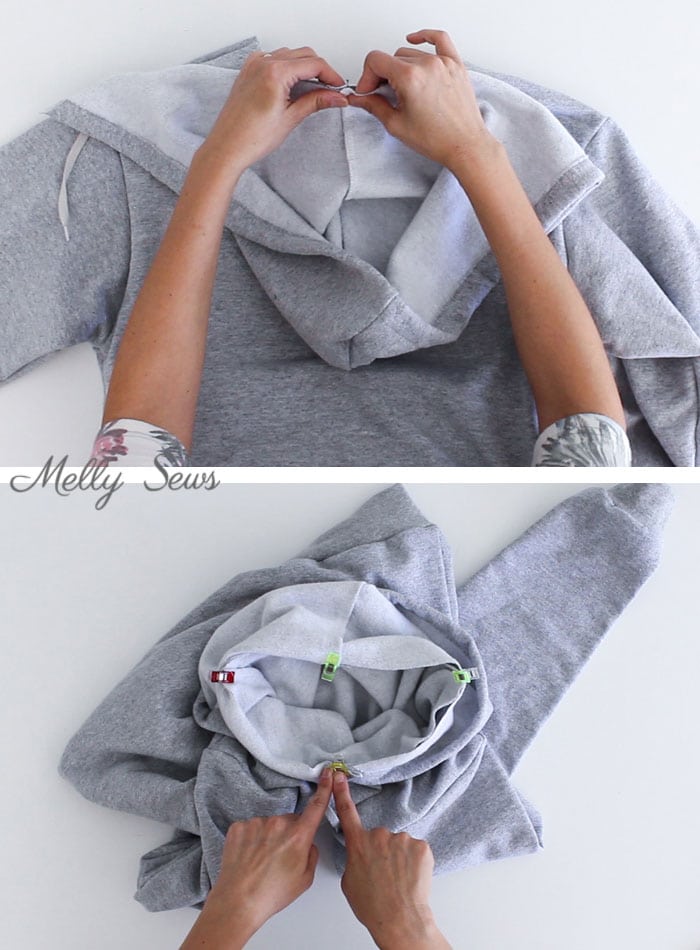
Match the hood seam to the center of the back neckline.
Overlap the front edges of the hood at center front approximately an inch. You want the left side of the hood to be agains the neckline and the right edge behind it. Pin the rest of the hood around the neckline, adjusting at center front as necessary so that the hood goes all around the neck. Stitch in place.
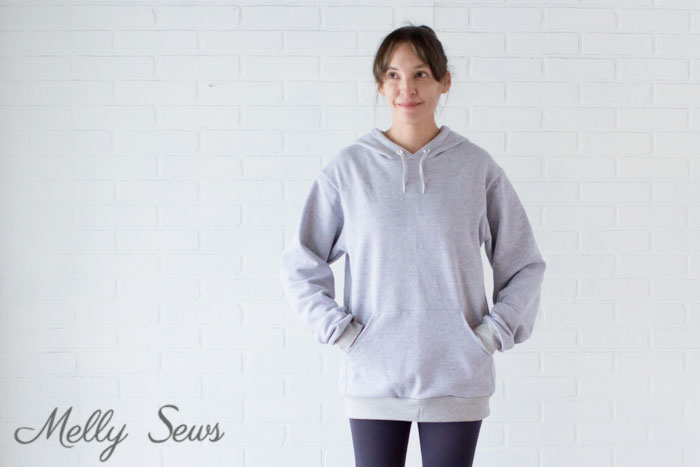
And you’re done! Enjoy the warmth of your new cozy hoodie.
DIY Hoodie FAQs
Here are some common questions and answers about this project.
- Is it hard to sew your own hoodie?
No, this is one of the easier garments to sew. The hardest parts are the cuffs and hem band, since you have to stretch and stitch at the same time and are dealing with several layers of fabric, some thick. Other than that, this is a straightforward project and sweatshirt fleece is fairly easy to sew. - How much does it cost to make your own hoodie?
Setting aside the cost of your sewing machine and notions (pins, needles, thread, etc) fabric for a hoodie will cost $25 – $60 or more depending on what type of fabric you choose and how much it costs per yard. I have an organic cotton fleece hoodie I sewed myself that was definitely more expensive than if I had purchase a basic hoodie at the store. But it just keeps getting softer every time I wash it and the fabric is better quality than I’ve seen in stores. - What is the best fabric for hoodies?
As mentioned above, I have an organic 100% cotton sweatshirt fleece hoodie I sewed that I love. Other good fabrics are polyester/cotton blend sweatshirt fleece, French terry and rayon or bamboo sweatshirt fleece.
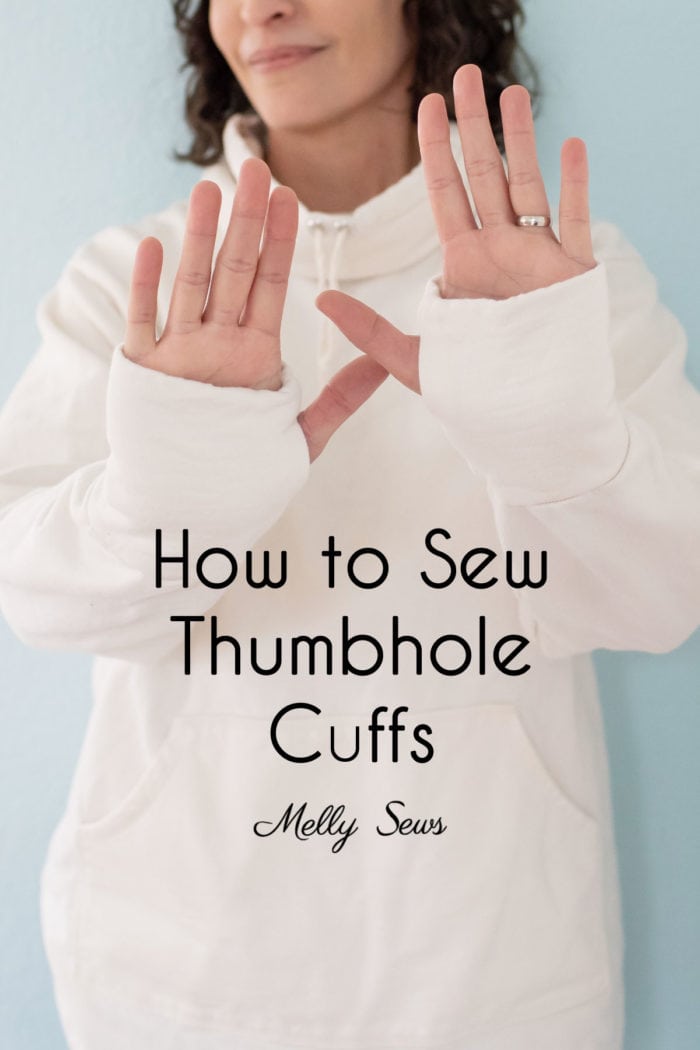
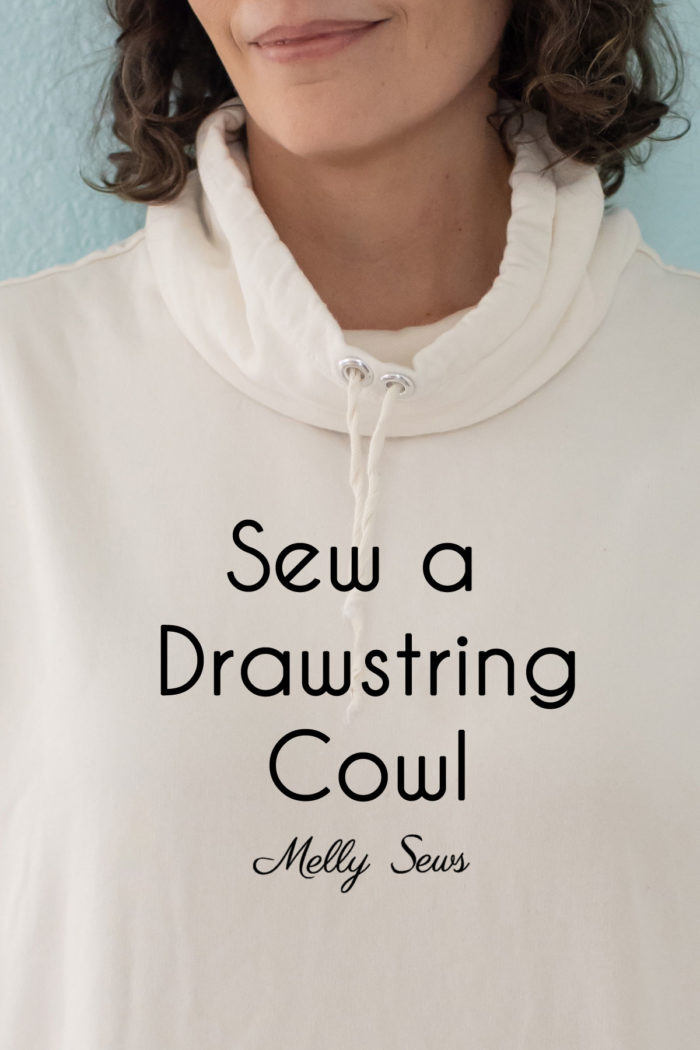
Hoodie Pattern Hacks
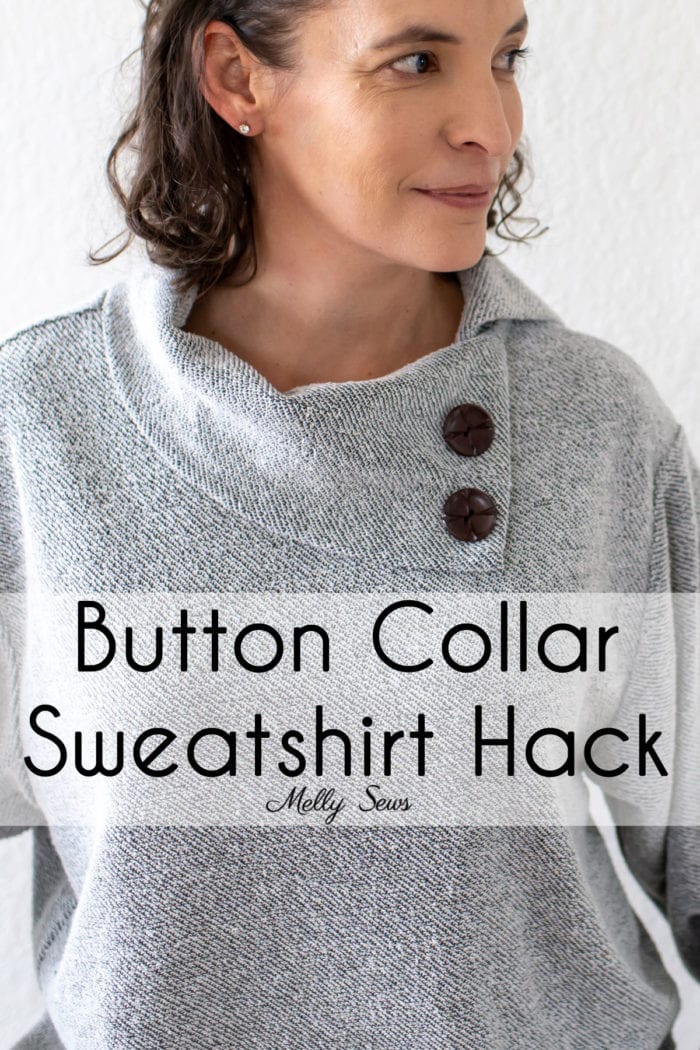
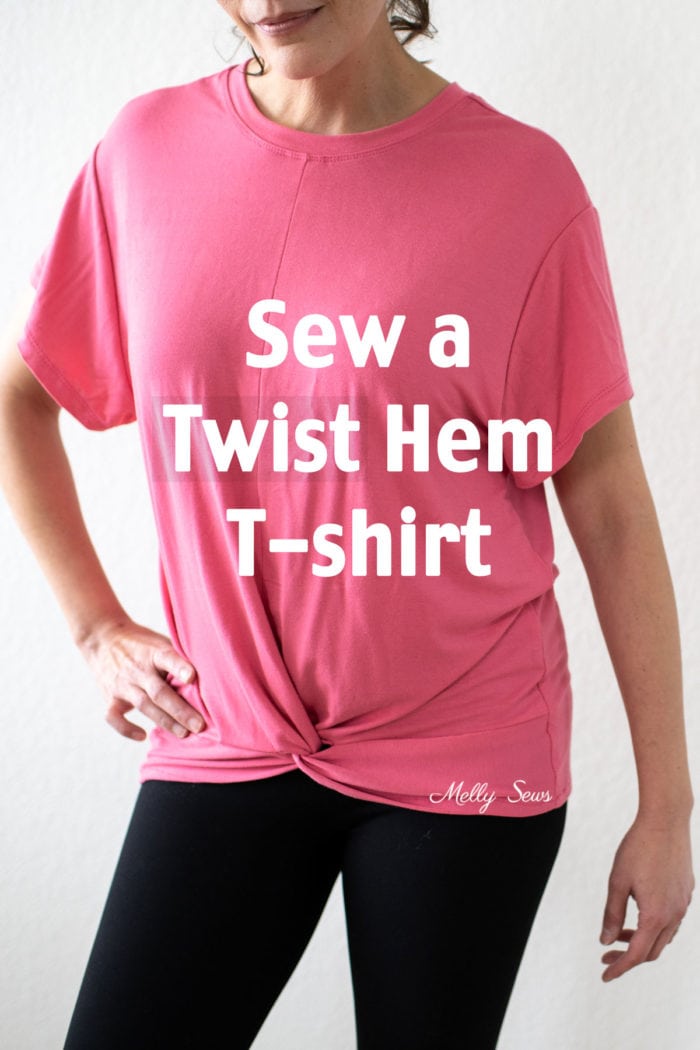
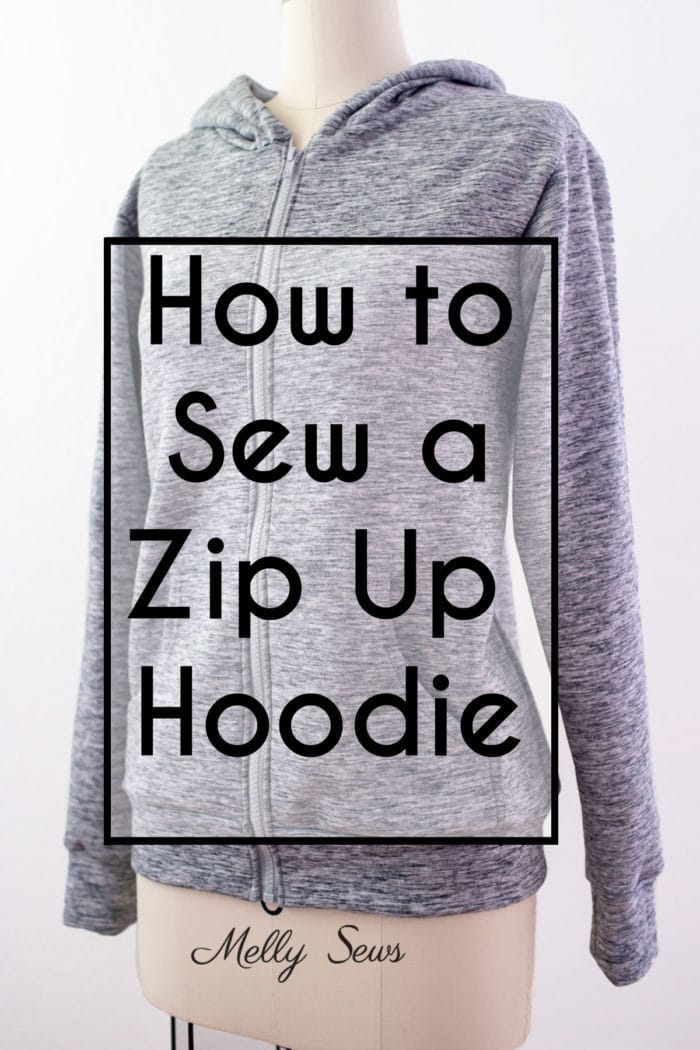
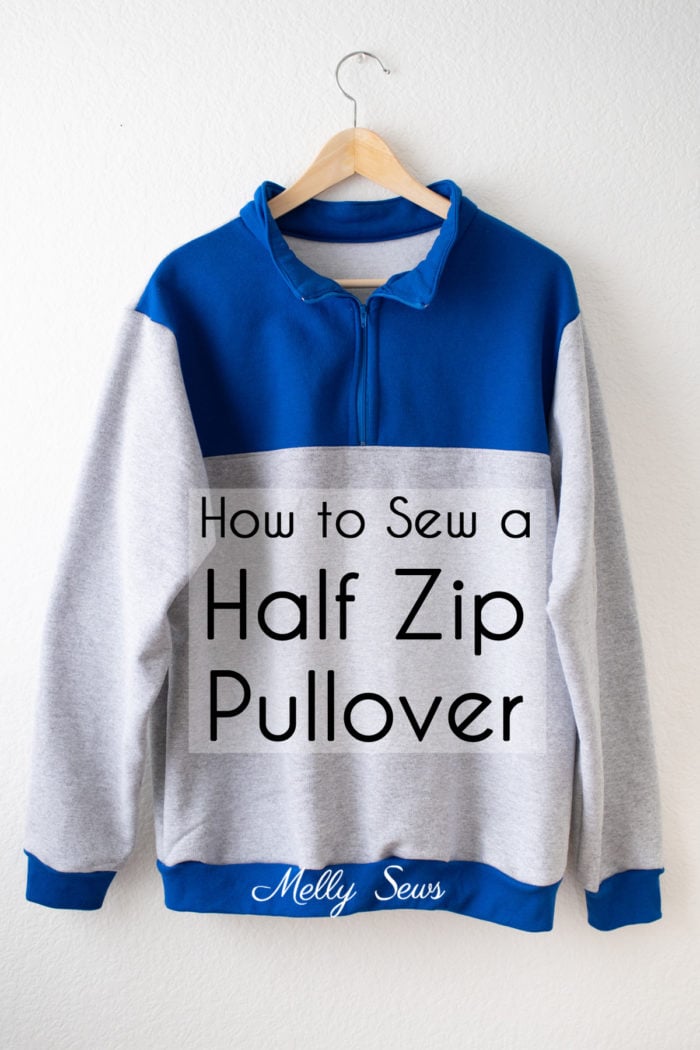
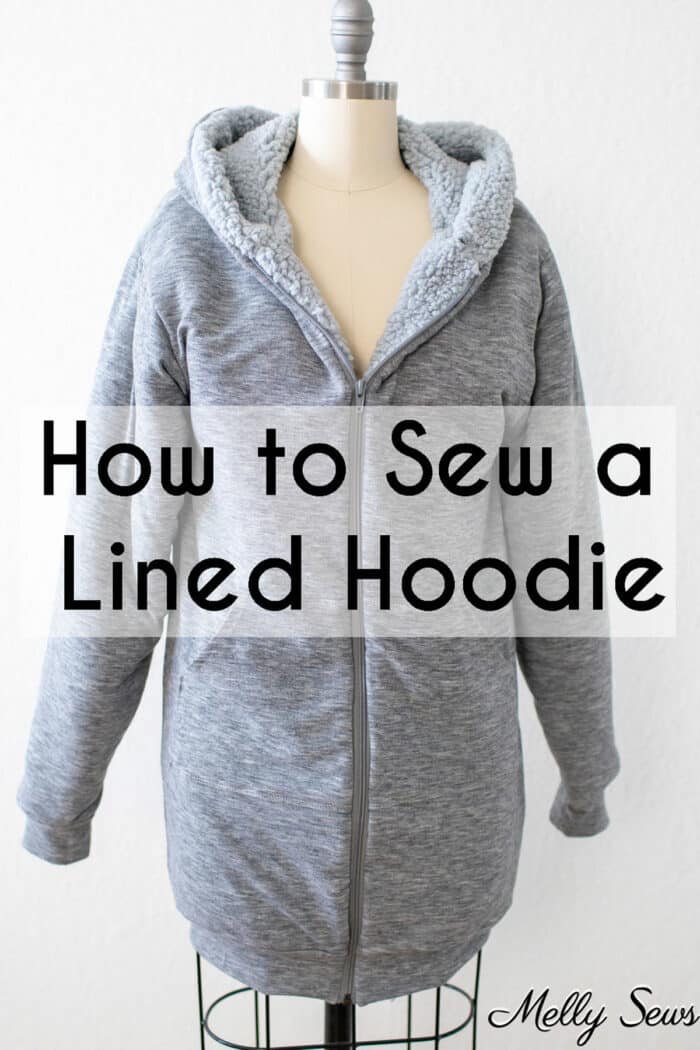
Now you can use the hacks below to customize your next hoodie even further! You can see how to add thumbhole cuffs, and how to swap out the hood for a drawstring cowl, a button up collar, or a half-zip pullover with a collar. There are tutorials with a basic neckband to make either a twisted t-shirt or a standard sweatshirt. You can also see how to make your hoodie zip up the front instead of pullover style. Click on the images to go to the tutorials.
Nancy Gibson
Thank you so much for the pattern and the sewing video. Great job.
Natalie M
Omg I don’t know if I’m daring enough to try and make this, but I absolutely love it! You’re the best girl! I love your emails and patterns. Thank you for helping out individuals like me that don’t have a clue!
BarbMac Vt
Awesomeness! I have lost over 80 pounds the last few months and am starting my wardrobe over because nothing fits anymore and I have wanted to add a few hoodies to my closet! This tutorial is perfect and I can’t wait for my fabrics to arrive so I can get started! Thank you so much for the inspiration! It is much appreciated!
Germaine
Thank you for the Hoodie Pattern and I am looking forward to making one. It’s been a while since I’ve sat in front of my sewing machine and I’m excited to do this project Love your site and all the tid bits you give out..
Jenny
Another great tutorial from Melissa. Exactly what I was looking for. Just got fabric to try this one. Think you’re right about this looking great on you. Love the oversized look on a cute petite. Thanks for all the details on how to make it happen.
Kathleen Keegan
can’t wait to try this. i love a good sweatshirt!! thanks
Zach W
Thank you for this pattern and very helpful video! Just stumbled across this the other day, and then finished a fleece hoodie today! It turned out great – with only a couple minor hiccups. I definitely feel more confident tackling other clothing projects after doing this!
Judy
I am always amazed when I receive my Melly Sews email. You are a wonderful seamstress and a great human being to share these patterns and instructions with us! I am a quilt maker so I don‘t sew garments very often anymore. My son would be quite impressed if I made him a hoodie for Christmas. Thank you, thank you!!
Julie
Thank so much. Can’t wait to try this one out.
D
Thank you Melly. Your tutorials are so easy to follow you have given me the confidence to make hoodies for gifts.my family love them. Thank you so much for sharing your skills. I look forward to making other things, with your help of course.🧵
Nigel
I’ve just made this & it’s the perfect size, so easy to put together.
Amanda Grogan
Legend, followed your instructions to complete my son’s hoodie which came home as cut fabric that he didn’t get to complete at school due to Covid. Had no idea the order to proceed. One happy son.
Alexa Elliott
I love this pattern. I originally downloaded the free pattern and made about 6 hoodies. So easy and enjoyable to make. I bought the multiple size AO pattern as so many larger or smaller family members now want one.
I think this is the best hoodie pattern I have seen. I line the hood with satin. It’s luxurious and stylish. Thanks for the wonderful tutorials and hacks to adapt the original style.
david
Thank you so much for this pattern. It fit me perfectly. I have been slowly working towards sewing my own garments and this is my first project that worked out exactly as written. I sincerely appreciate it.