
Sewing mistakes happen to both beginners and the most experienced sewers. Learn about the most common mistakes and how to fix them.
Hey y’all, today we’re going to talk about common sewing mistakes and how to fix them. I spent over a decade teaching high school students to sew, and some common themes emerged. There were certain mistakes that I saw sewing beginners making over and over, so today I’m going to share them so you can avoid them. After that, I’ll share mistakes that I see intermediate and above level sewists making. Some of those are taken straight from my inbox of frequently asked questions!
Key Takeaways – Categories of Sewing Snafus
As we discuss sewing mistakes, remember that mistakes are a great teacher and everyone makes them! Even experienced sewing experts sometimes get in a hurry and make mistakes. The important parts are having a can do attitude to fix your oops-ies and getting to a final finished result that you can use. I find most mistakes fall into the three categories below:
- Wrong supplies
- Wrong technique
- Skipping steps/ignoring details
Beginner Sewing Blunders
I have a video that you can watch below and or on YouTube here covering the ten most common sewing mistakes beginners would often make in my classroom.
Choosing the Wrong Fabric
You’re not going to be able to sew anything without fabric. So make sure you’re choosing the RIGHT fabric for your sewing project. The first project I generally assigned my students in theatre class was to sew garment bags for themselves. They would use these bags when we travelled to do shows. They kept them over the years, finally taking them home as a gift when they graduated. And while I realize kids in theatre might have more of a flair for the dramatic than the general population, I’ve seen non theatre people in my inbox make the same mistake of choosing the wrong fabric.
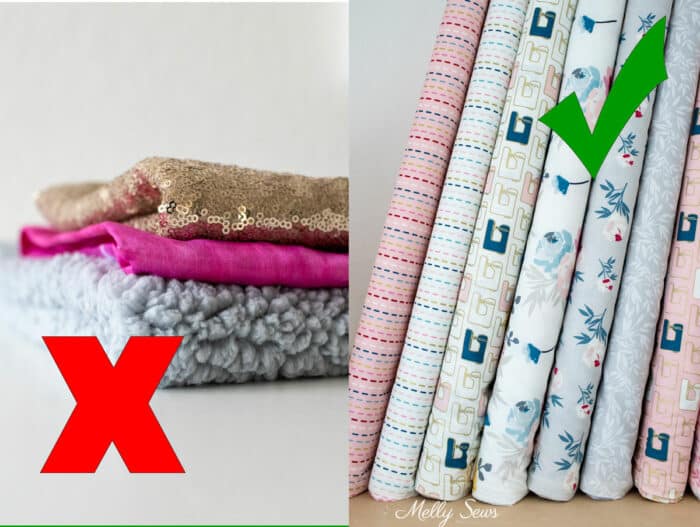
Inevitably, some students would become enchanted by the silk or sequins in the costume shop and want garment bags made of that. And I’d have to steer them back toward the much easier to sew quilting cotton. Since we didn’t need our bags to be waterproof, quilting cotton worked well for us. It is also a perfect fabric for beginners to start with – it’s easy to cut, easy to sew, and comes in so many print options. I would generally get clearance fabrics to save our supply budget and had a selection the students could choose from.
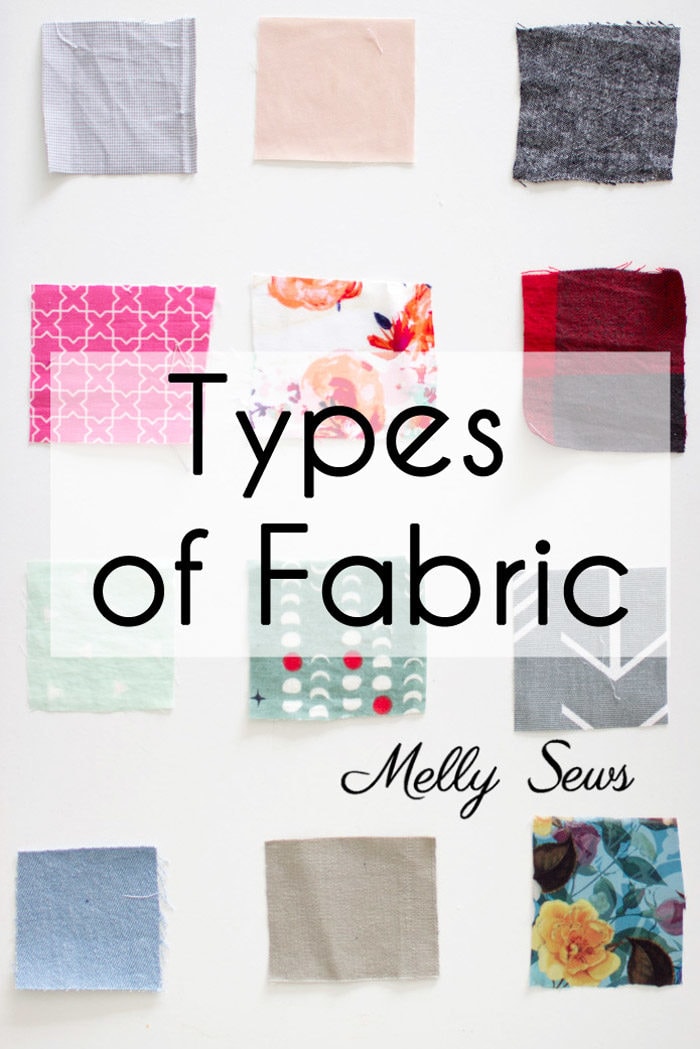
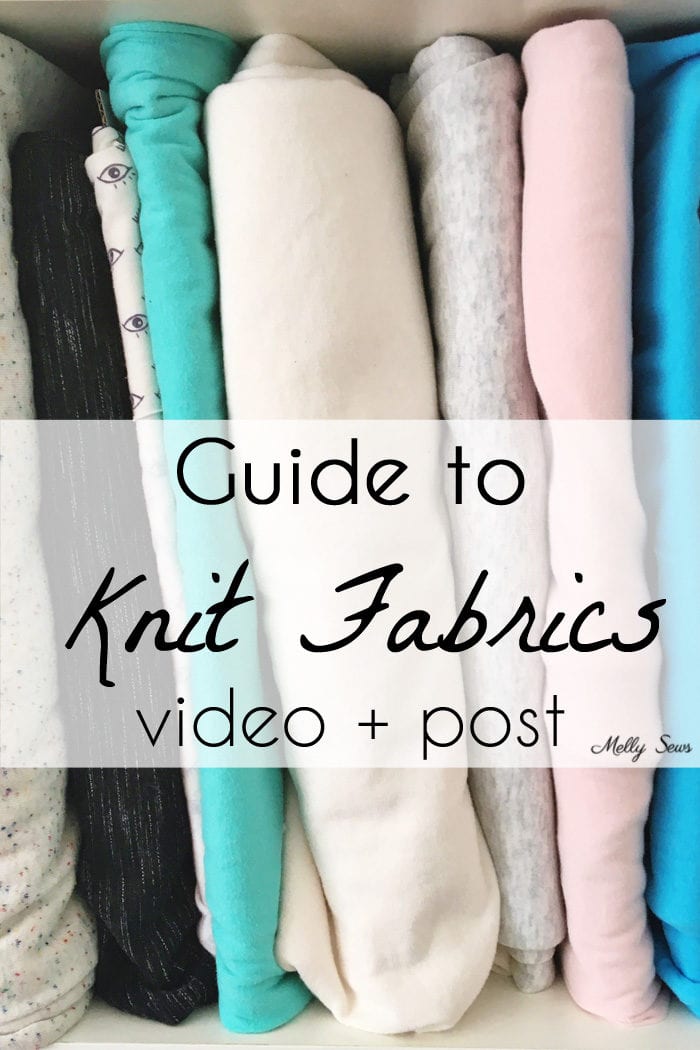
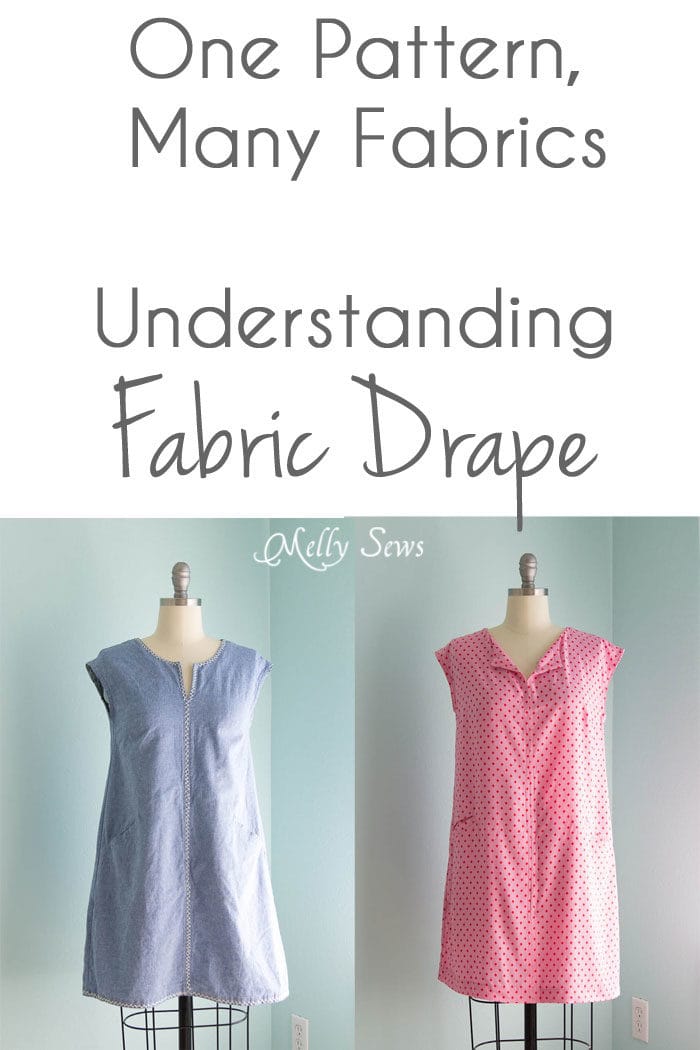
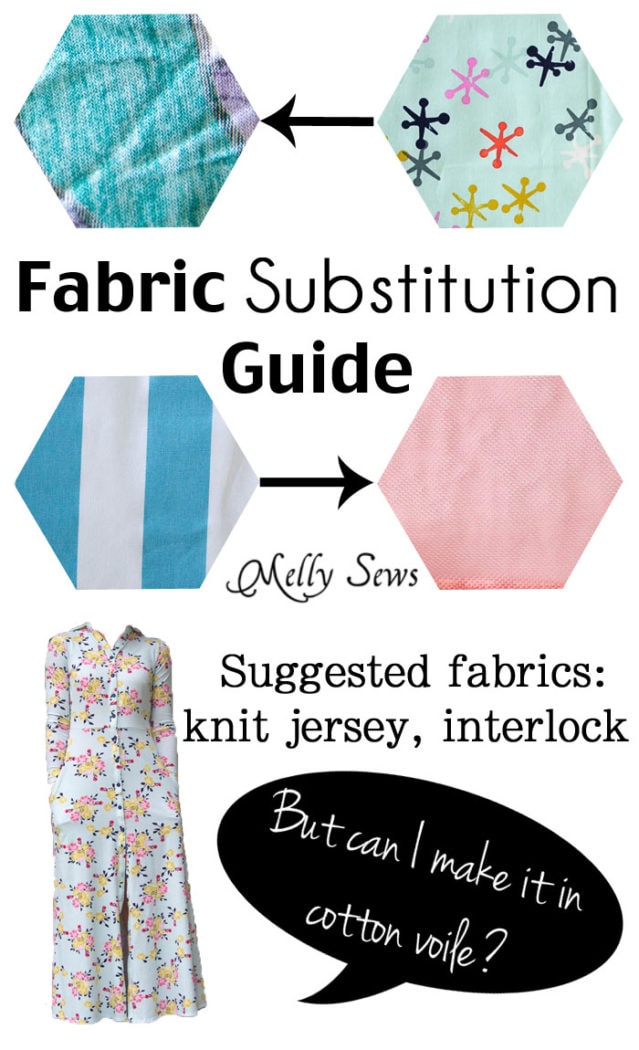
Even if you’re more experienced, you should still make sure you’re choosing the right fabric for your project. Sewing patterns for clothing have suggested fabrics, and those are always a great starting place. You can also expand your knowledge of fabrics by checking out the posts below. I have examples of many woven fabrics in the first, and stretchy fabrics in the second. In the post on drape I explain how it affects your final result. This helps you consider the best drape for the kinds of garments you want to sew. And in the post on fabric substitutions I share details and considerations you should take into account if you’re determined not to follow the suggested fabric list, or if you want to substitute woven for knits.
Choosing the Wrong Thread
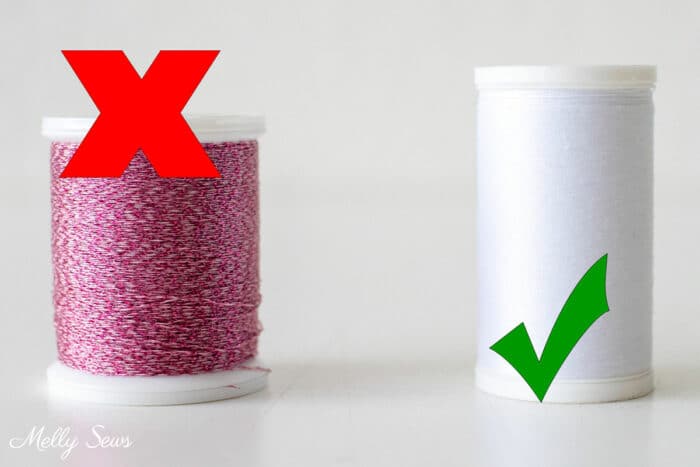
Much like choosing the wrong fabric, I often saw students enamored with things like fancy metallic thread. And I get it, metallic thread IS cool looking! But the thread pictured above is meant for embroidery machines, not strong stitches to hold your quilt or pattern pieces together. Even in its correct use, metallic thread is something for experienced sewists as it is prone to shredding and breaking. If you’re a beginner, stick with all purpose thread. I generally use polyester all purpose thread. However, if you prefer natural fibres there are all purpose cotton threads as well.
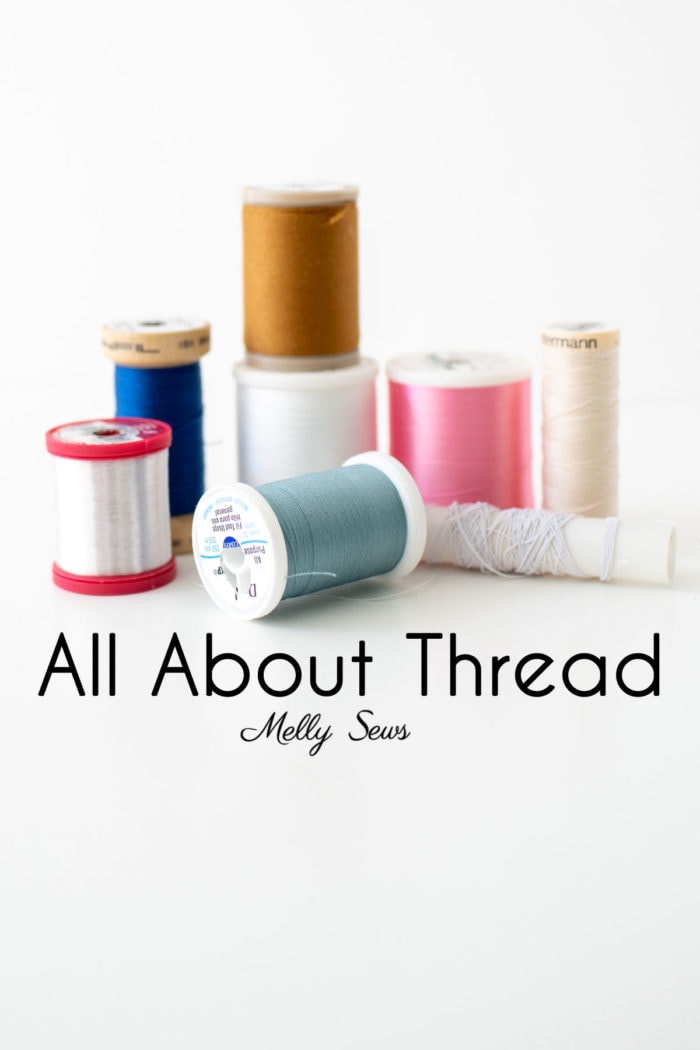
For a more in-depth exploration of thread types and some specialty threads that I use, check out this post.
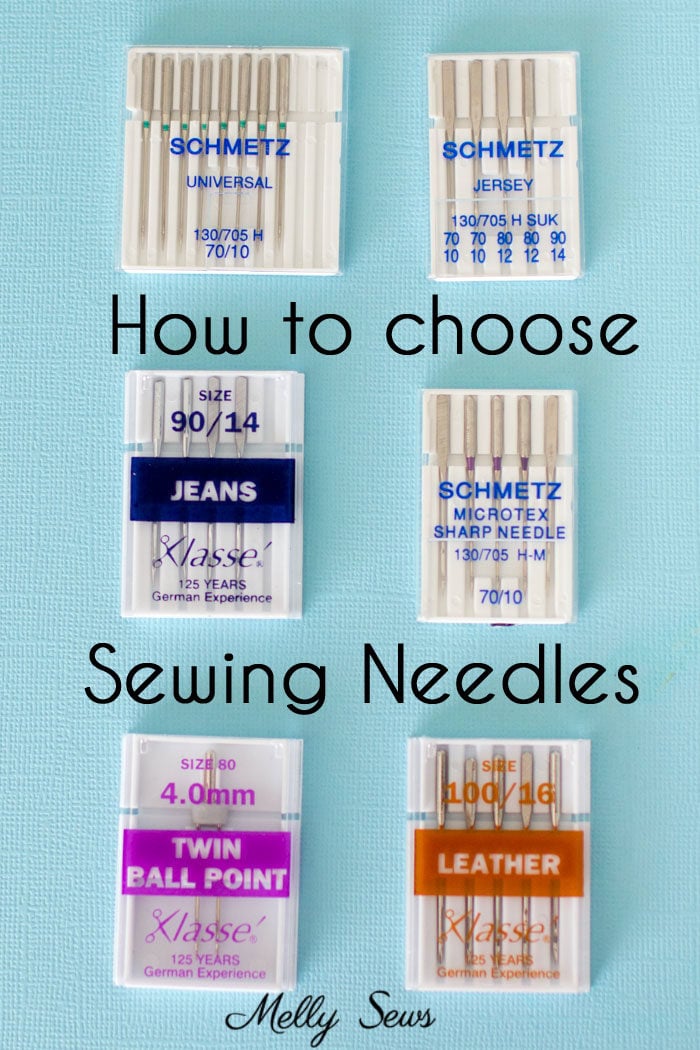
Choosing the Wrong Needles
It can be intimidating to try to buy sewing machine needles only to be faced with a slew of online choices or a wall of choices at the store. So to simplify for beginners – start with 80/12 universal needles. I sew a majority of my projects, from t-shirts to home decor with those needles. It’s my default starting point.
For more about types of sewing needles and when you should change to a different type or size, check out this post. That way you won’t have the wrong needle size as one of your mistakes.
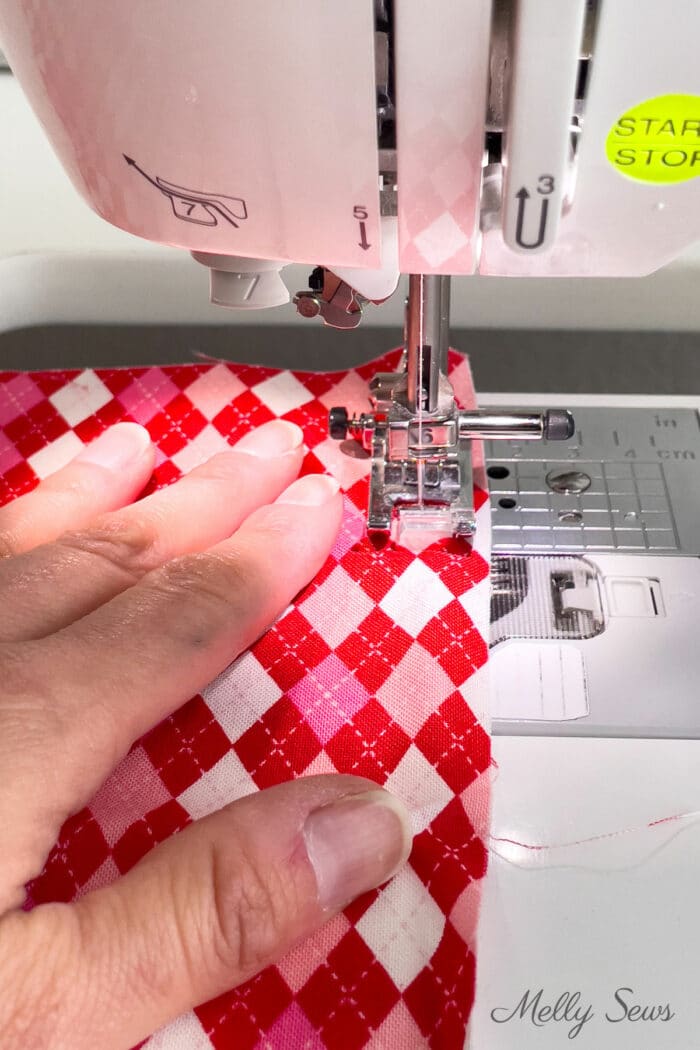
Pushing or Pulling Your Fabric
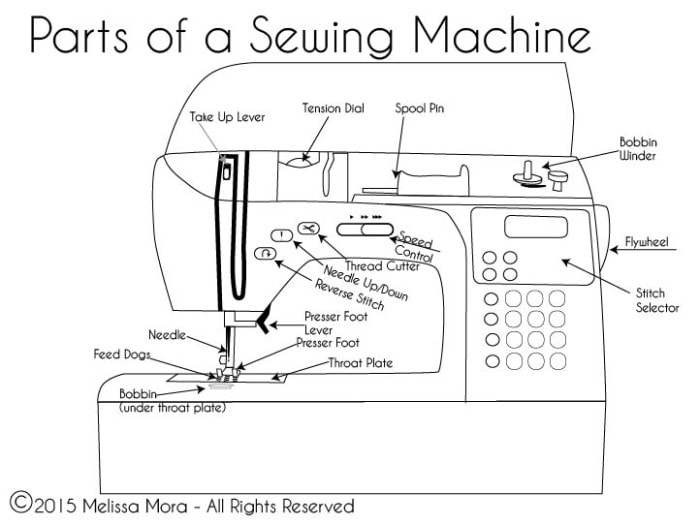
With people sitting down at a sewing machine for the first time, I found I needed to explain the feed dogs before I let them stitch. Feed dogs are the ridged plates that move up and down, backward and forward under the needle plate. You can see them in the image below on the sides of my piping foot.
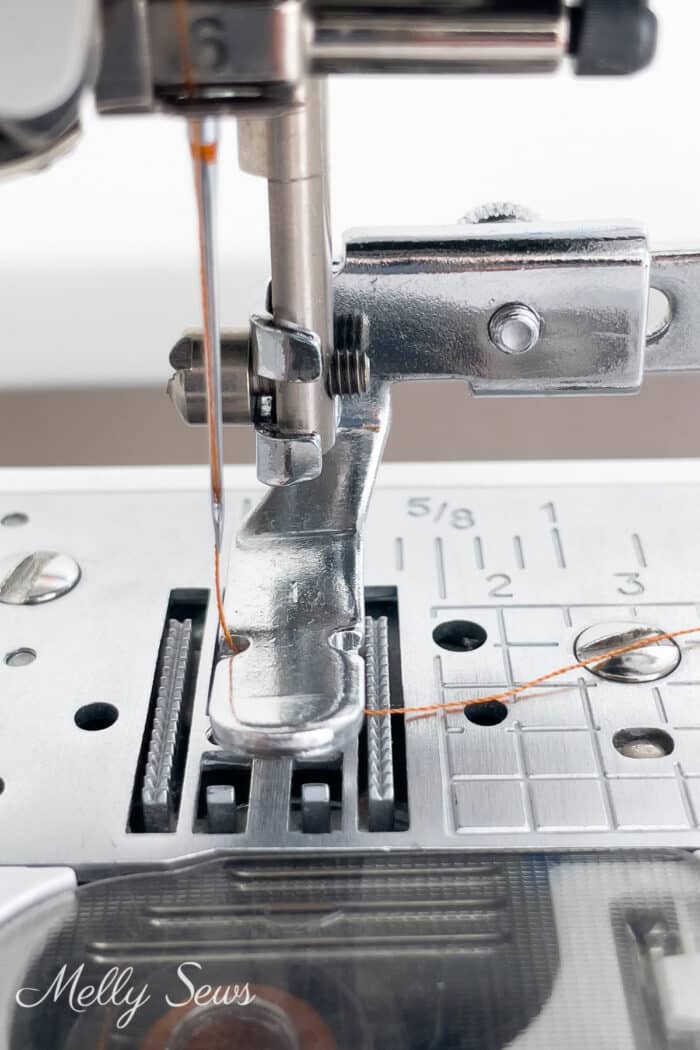
So I had to explain to my new students that they needed to let the feed dogs feed the fabric. The temptation, even after my explanation, was for some students to try to pull their fabric through. That results in uneven stitch lengths and less control over the fabric.
Other students tried to push the fabric under the presser foot. That is a great way to accidentally sew through your finger. It’s also a good way to accidentally sew puckers into your fabric.

Instead, keep your hand flat on the fabric on the bed of the sewing machine, with almost no pressure on the fabric unless you need to guide it around a curve in the seam.
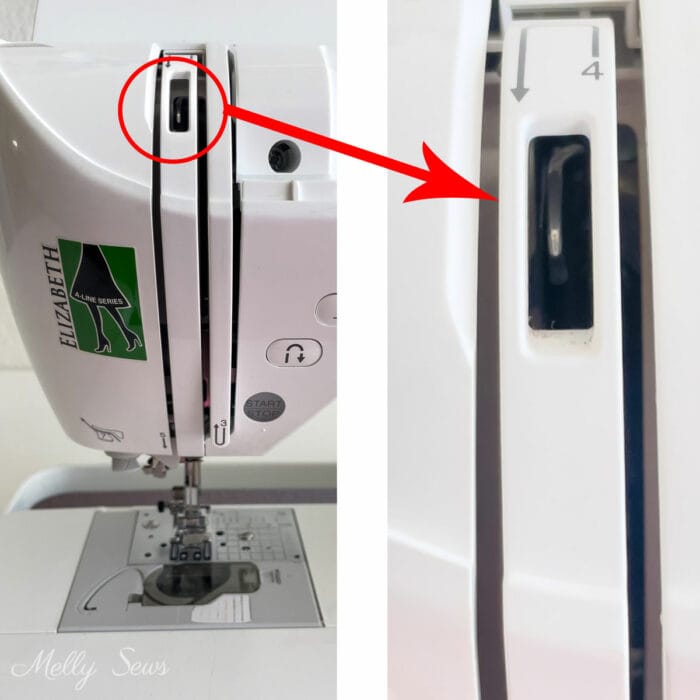
Not Using Speed Control
It’s a Catch-22: sewing beginners often buy the cheapest sewing machine they can, but those machines often don’t have a speed control. If there’s one feature I recommend beginners spend a little more on if they can, it’s speed control. This is because it can take a while to develop the skill to adjust your foot pressure on the pedal to adjust your stitching speed. Having a speed control makes a world of difference. With speed control you can focus on guiding the fabric and sewing straight lines without having to worry as much about your foot pressure.
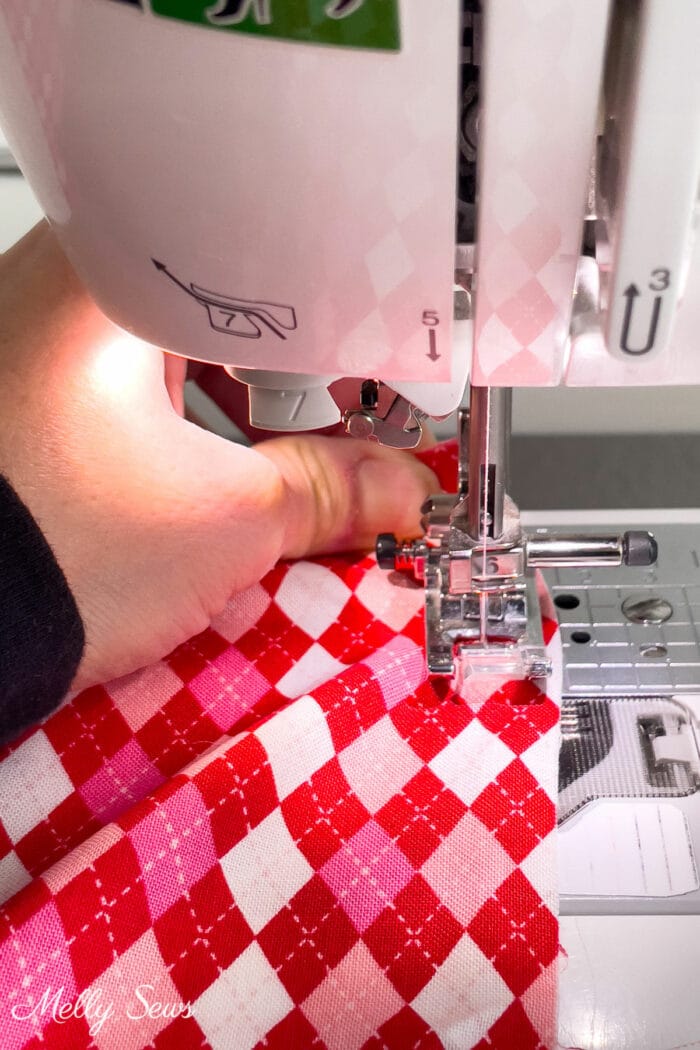
Trying to Line Fabric Up at the Needle
As a beginner, you won’t get straight seams by focusing only on the fabric next to the needle. Much like you have to set your sights beyond the edge of the car when driving in order to keep in a straight line, with sewing you have to look further back on the fabric. You can see how I added a sticker to my sewing machine to extend my guidelines further back beyond my needle plate.
Accidentally Unthreading Your Needle
Once I let the students begin stitching, I reminded them over and over to make sure their take up lever was all the way up before cutting their thread. And inevitably someone forgot and unthreaded their needle. So the first few days of sewing lessons were very slow. I constantly paused to help someone rethread their machine.
But as I said, there’s a very simple solution to this problem. Just make sure your take up lever is all the way up when you stop.
Choosing the Wrong Pattern
I’m not one to discourage people from sewing anything they want to sew. But I do caution you to know yourself. Are you the type of person who greets a challenge with a can do attitude and is OK with failing as long as you learned something? Then it would be no big deal to choose to sew a ball gown even as a beginner.
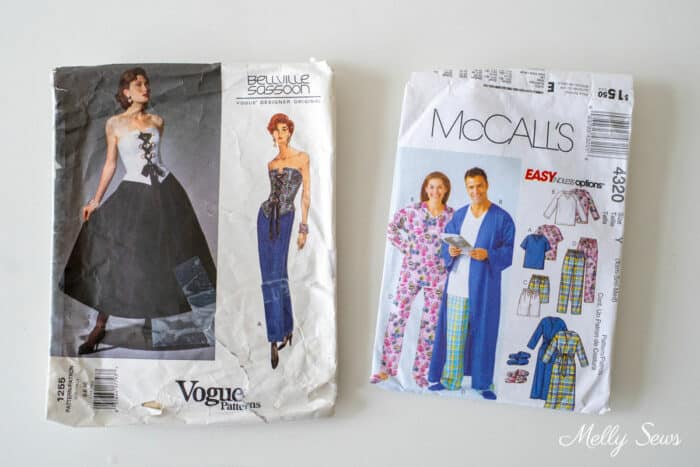
If, however, you have a streak of perfectionism, are worried about wasting fabric, or get easily frustrated and want to quit and never return when you meet a challenge, then you should choose easier projects to build up your skills. The pattern on the left above calls for formal fabrics which can be harder to sew, and includes boning in the fitted strapless bodice, many pattern pieces to align, and a faux corset detail. It is not the pattern for a beginner who wants to sew it just once and have it turn out like the image on the cover. On the right, the patterns have fewer pieces, a looser fit, and can be made from quilting cotton. The pants and shorts don’t have fasteners, just elastic. Those are great characteristics for a first garment sewing pattern.
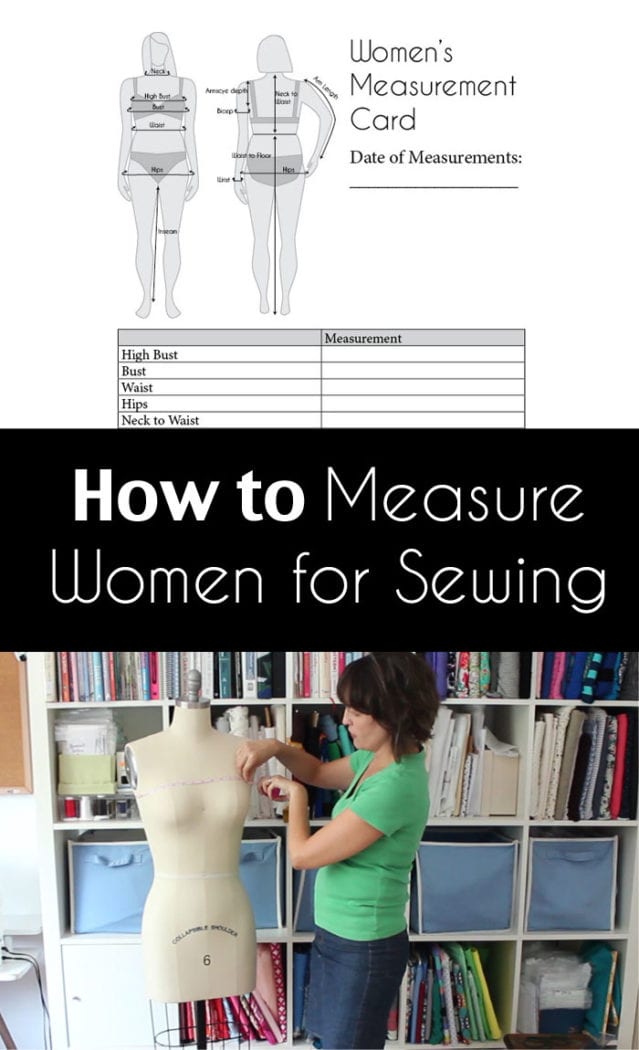
Not Measuring Accurately/Choosing the Wrong Size
Just like your size can vary between different store brands of ready to wear clothing, your size in patterns can vary. And very often, your size in sewing patterns is VASTLY DIFFERENT from your size in ready to wear. This is particularly true with the big pattern companies that have been around since the early 1900s. Those brands often have size charts from early days, which are very different from current size charts. So measure twice and cut once isn’t just a saying that applies to construction, it’s also one that applies to sewing.
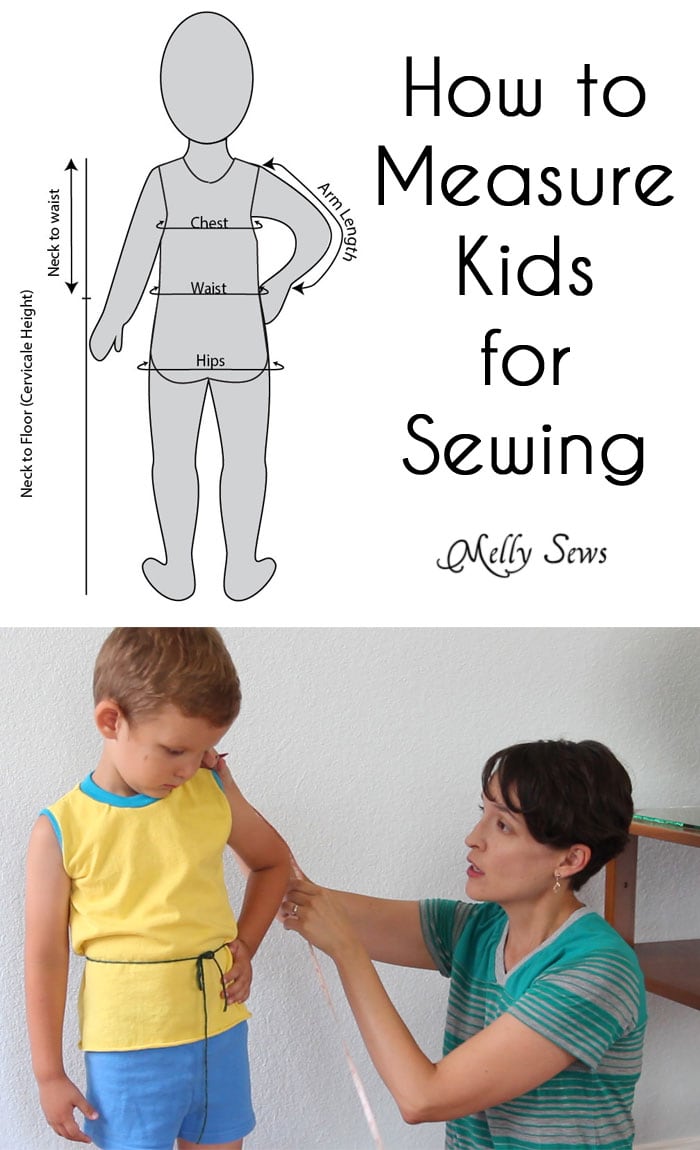
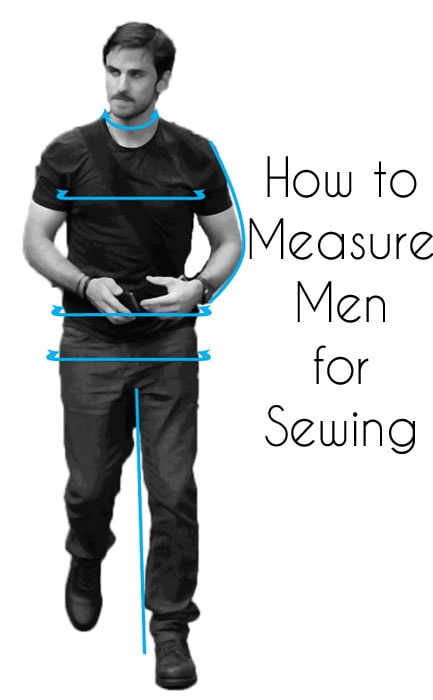
Speaking of measuring, low rise jeans were in style when I was teaching high schoolers. So none of them knew where their waist was to measure correctly! To make sure you’re measuring correctly, you can see the posts below for measuring women, kids and men.
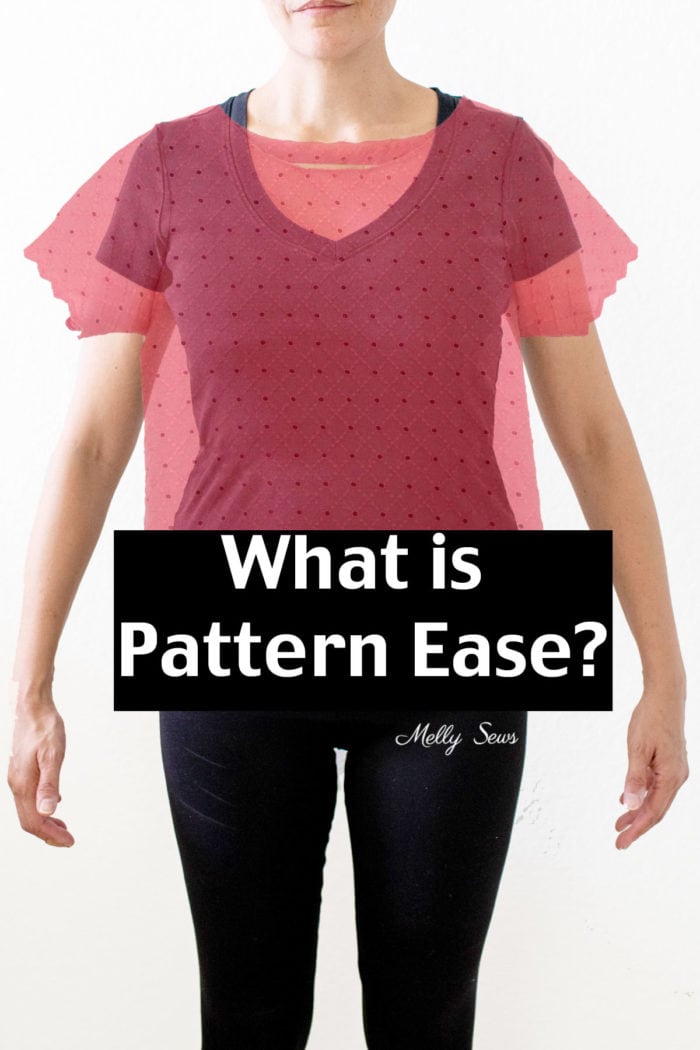
Another area you can easily get off track when you’re choosing a pattern size is when you mis understand pattern ease. Pattern ease is the amount bigger (or smaller for some knit fabric patterns) that the fabric is cut than your body measurements. Ease can be there to create a certain style. Some of it is essential so that you can move in your clothing. You can find a further explanation of pattern ease here.
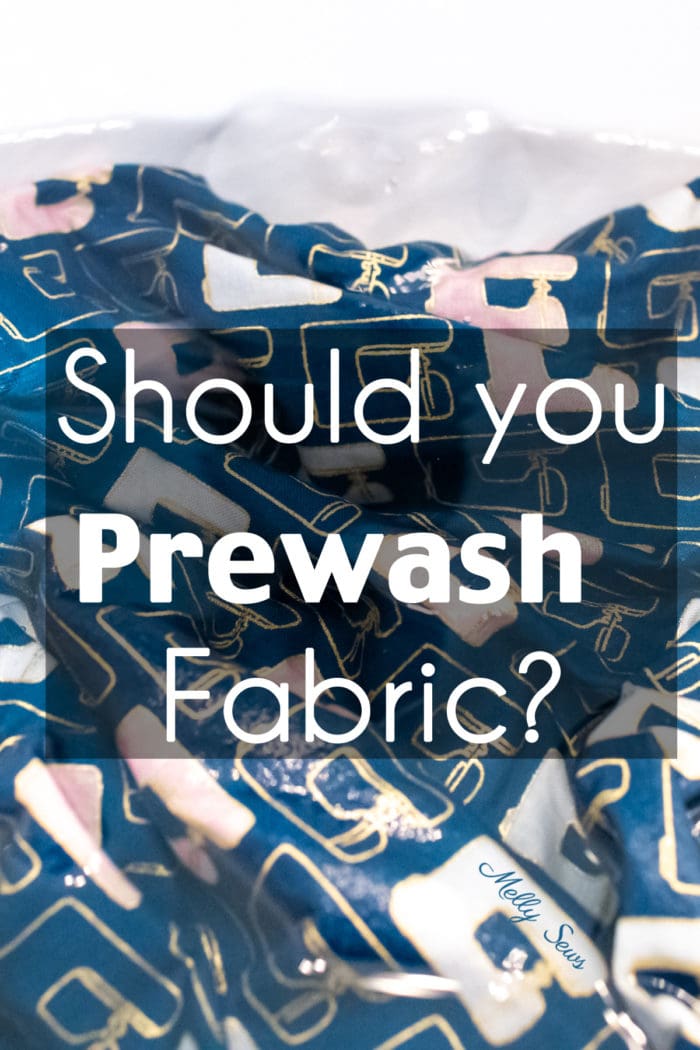
Skipping Pre Washing Fabric
The fastest way to heartbreak is to sew a garment you love, only to have it shrink in the wash. This is why almost all my fabric, from denim to chiffon, from wool blends to rayon jersey, gets thrown in the washing machine as soon as I get home. The only fabric I don’t pre-wash is fabric I never plan to wash in the machine, and I rarely buy fabric that I won’t machine wash. You can check out more of my reasoning on pre-washing in this post.
Failing to Pay Attention to Grainline
Woven textiles are made up of threads that cross over and under each other. The threads that run lengthwise on the on the loom are the warp threads, and the ones that go side to side are the weft threads. Grainline refers to the directions of these threads. Straight grain is the warp thread direction, cross grain is the weft thread direction, and bias grain runs diagonally across. Fabric behaves differently depending on which direction the grainline runs on a pattern piece. So you need to pay attention to the grainline indicators on your pattern pieces. Inaccurate cutting and disregarding the grainline will affect your finished garment.
For a more detailed discussion of fabric grain lines, check out this post.
Not Ironing Or Pressing Seams
I consider my iron an essential tool in my sewing room, as important to garment construction as my sewing scissors. Can you sew without an iron? Sure. But for most quilting and sewing projects, pressing seams will give you better finished results. I even press the seams on the cotton jersey bras I sew, as well as t-shirt necklines.
Forgetting to Transfer Pattern Markings
The pattern markings, like darts, dots and placement guides, are there for a reason. Mark them on your fabric or regret it later. There are a ton of different ways to mark your fabric, so check out this post for options.

Not Using The Right Seam Allowance
Your pattern instructions should have the seam allowance noted. And if you want your finished project to turn out with the correct measurements, it’s important to use the correct seam allowance. This becomes even more important when you’re sewing something that has a lot of seams, like a paneled skirt or corset. For example, there are 7 seams in the skirt pictured below, from my Tillery Skirt pattern which has 1/2 inch seam allowances included. If you accidentally sew with 3/8 inch seams instead, you’re adding an extra 1/4 inch per seam. One-quarter is 0.25 and 0.25 x 7 = 1.75 That would make this fitted skirt a whole 1 3/4 inches bigger than the size chart!
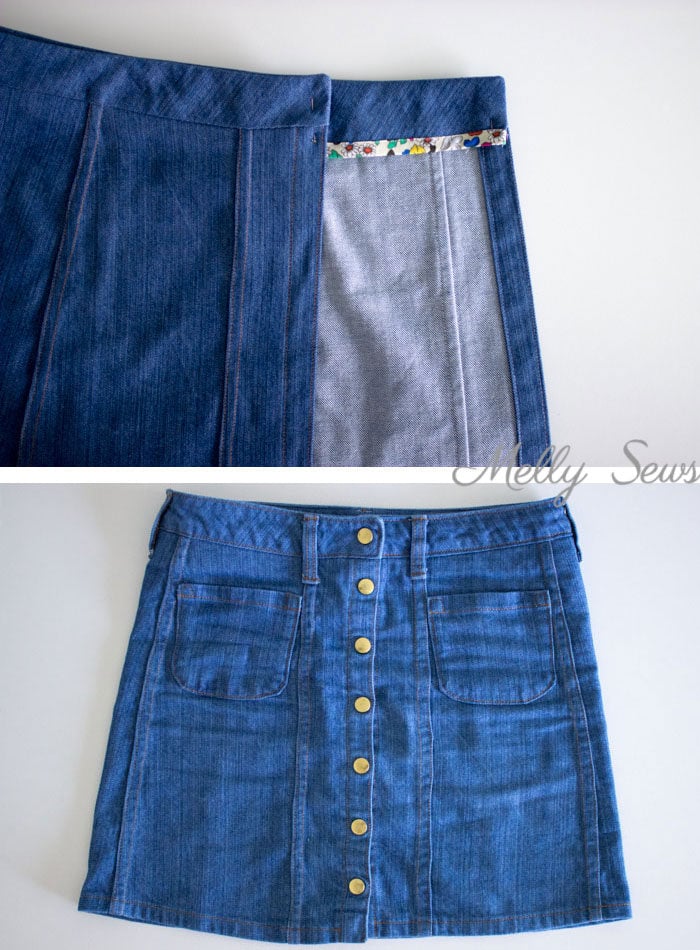
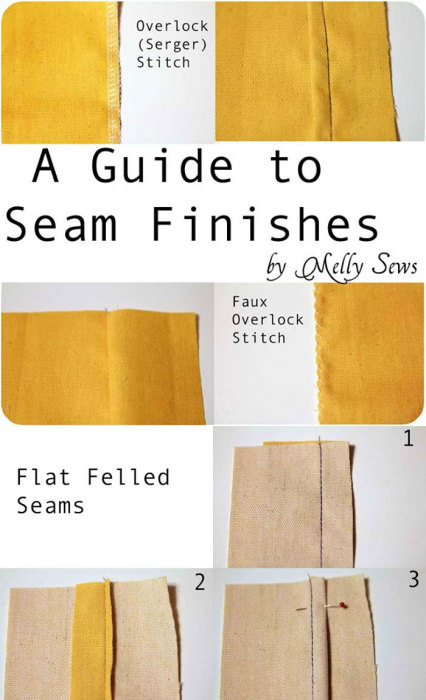
Not Properly Finishing Raw Edges
If you want your garments to last, you need to finish the seam allowances. In the skirt pictured above you can see and example of flat felled seams and a bias bound seam on the waistband. There are many more ways to finish seams, and you can see some of them in this post.
Kar
I’ve been sewing since I was 12, but I wouldn’t consider myself a particularly skilled sewist. I’ve probably done all of the things on your list. Lol! Sometimes by accident, sometimes on purpose because I am lazy or am determined to make work what isn’t supposed to work! I prefer cutting unwashed fabrics because the sizing in them and the fold down the middle make them easier to cut (in other words, I’m lazy). To compensate, I add as much length to my piece as I’m expecting it to shrink. For example, if fabric typically shrinks by about 5% when washed, I add 5% of length to what I’m making, that usually works out fine for things like knit pajama pants. But I know the proper and professional thing to do is to prewash.