
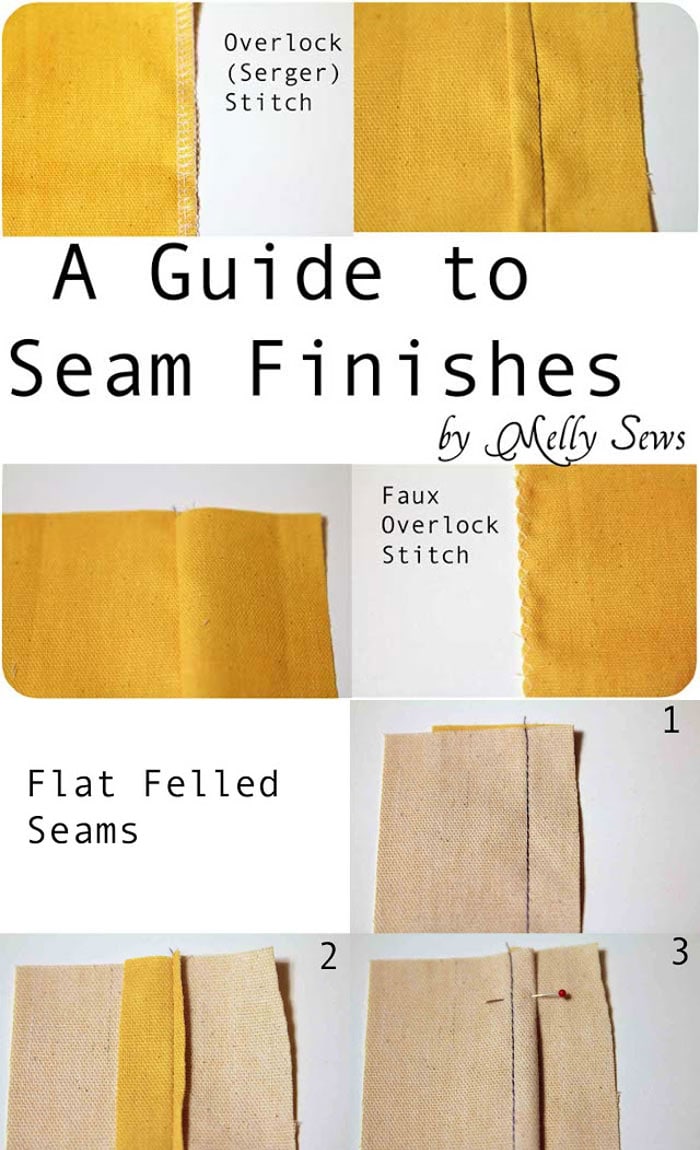
Different Ways to Make Sure Your Sewing Seams Don’t Fray, including how to sew Overlock, Faux Overlock, Flat Felled and French Seams

When I was younger, I was all about sewing as quickly as I could. A seam finish, if I did one at all, was a quick clip with the pinking shears. But now I really enjoy nicely finished seams. They help garments last longer, and I actually enjoy the process of being thorough. Or rushing through with the serger. Whatever works, ha! So let’s take a look at these different finishes.
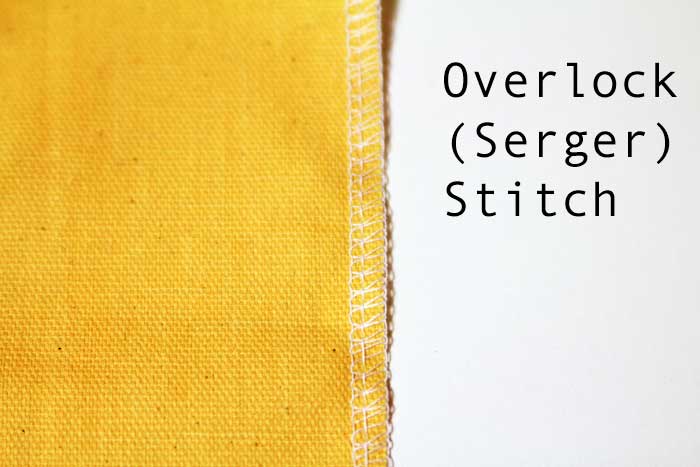
How to Sew an Overlock Seam Finish (Serger)
This stitch is done with 3, 4 or 5 threads on a serger. It can also be referred to as serging a seam. Two of the threads wrap around the edge of the fabric, and a knife trims the fabric edge straight so that the threads can wrap around it.
Pros: quick and easy to do
Cons: you need a special machine to do this stitch

How to Sew a Faux Overlock Seam Finish
This type of stitch is essentially a zig-zag stitch done with the needle hitting just over the edge of the fabric on one side.
Pros: Can be done with any machine that can do a zig-zag
Cons: Does not wrap around the fabric edge as securely as an overlock stitch

How to Make French Seams
French seams are sewn twice, enclosing raw edges within a seam. It is a good finish for sheer fabrics.
Pros: Can be done with any machine, finished seam can be made pretty narrow
Cons: Takes more time, precise fabric cutting and seam allowance sewing is key, needs at least 1/2 inch total seam allowance even for very narrow French seams.
I used French seams on this skirt. A French Seam is made like this:
- Pin pieces together with wrong sides together, using a 1/4″ seam
- Sew
- Flip the pieces to right sides together, and stitch the seam again
- The raw edges should be encased inside the seam
- If you look at it from the side, you can see the raw edges inside the seam
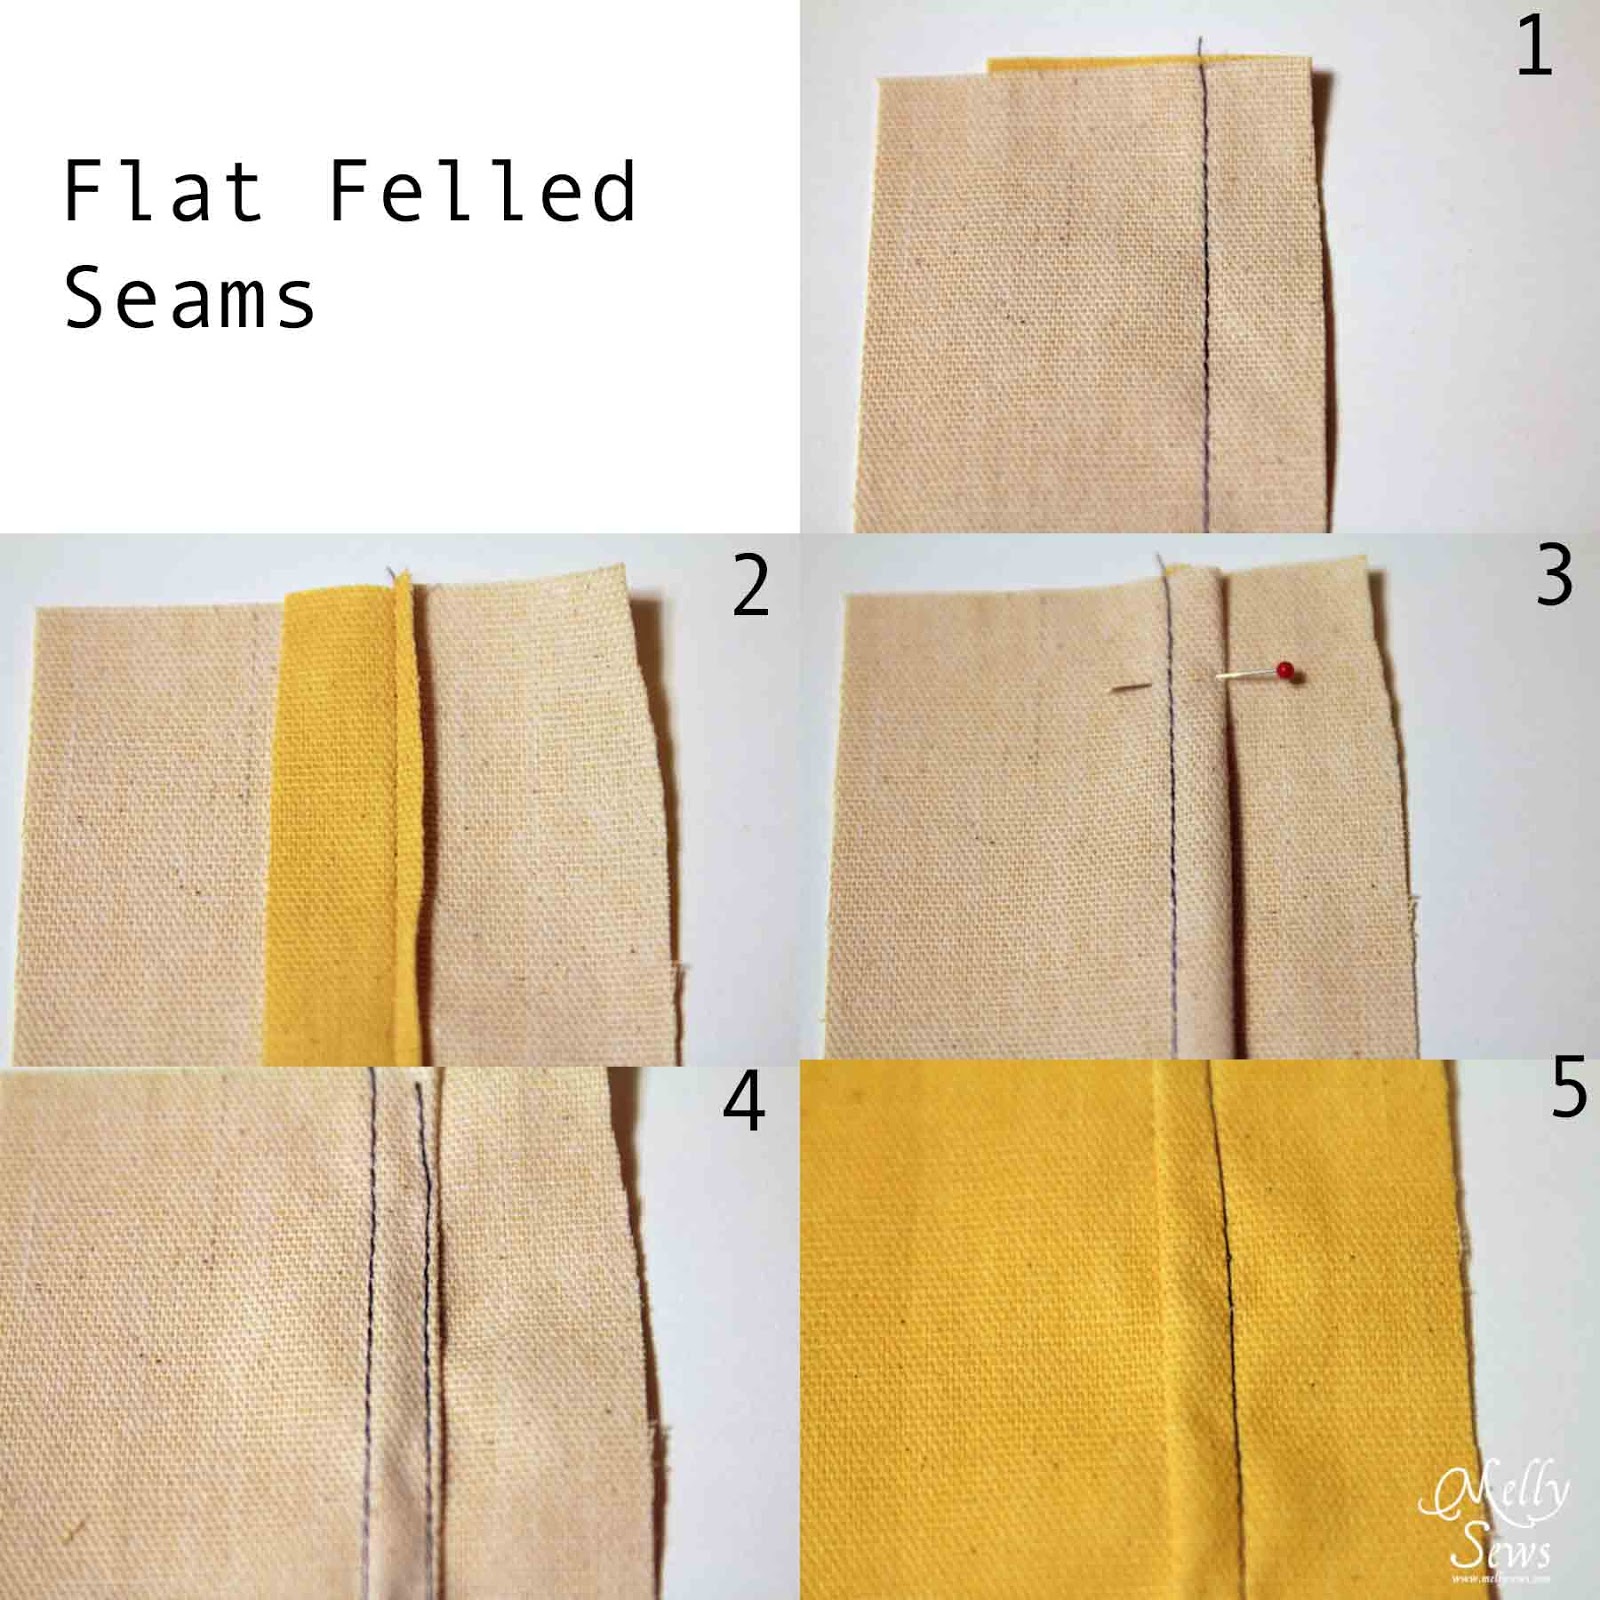
How to Sew Flat Felled Seams
A flat felled seam has the raw edges wrap around each other, and is often combined with topstitching. It is a very sturdy seam and suitable for heavy fabrics.
Pros: Can be done with any machine, very strong seam.
Cons: Takes more time, precise fabric cutting and seam allowance sewing is key, needs at least 1/2 inch total seam allowance.
To do a Flat Felled seam follow these steps:
- Stitch your pieces together with at least a 1/2″ seam.
- Press the seam flat and trim one seam allowance down to 1/4″
- Wrap the other seam allowance around the trimmed raw edge
- Stitch down close to the folded edge
- Your seam will look like this on the outside. You can add topstitching next to the seam or stitch with a double needle in step 5 to make this seam more decorative.
A flat felled seam can also be done starting with wrong sides together; this will give you a ridge on the outside like you normally see on jeans. It is the type finish I used on this skirt.
So see, these fancy, scary sounding names for finishes are actually nothing to be scared of.
Christina
This is so helpful – thanks very much for the handy tips.
Danni
thank-you.
O! Jolly!
Thanks for this very handy reference!
~ Olgalyn
TwinMegan
Awesome…what a great guide!
Fely
Thank you so much! You write comprehensively. This is a great reference.
R.M.Sharma
Thank you so much for providing such valuable tips on tailoring. It is relay appreciating and easy to understand your explanations. On pattern designing there no full videos available. It will be kind of you if you could upload the complete series at one location. I am a poor person so this has helped me to develop my skill partially due to partial portion of videos available on topics. Still thank you so much.
With Due Regards
R.M.Sharma
Dora Stevenson
Melissa~ You are such a talented and giving individual…Thank you so much for this tutorial. May God Bless your efforts and bring you much success in your endeavors.
Kristin
This is one of the best tutorials explaining seams.
Bronte
I keep coming back to this guide.
I had only ever left raw edges or zig-zagged seams. I don’t own an overlocker and I can’t justify buying one until my 4 month sewing binge lasts at least a year. Even then, I’m not a huge fan of the look of overlocked seams. I didn’t realise the other options available to me.
I’m making the Lazy Day pyjamas for my sons’. The first pair of pants I did zigzagged and I am disastified with my finishing. Now I’m French seaming them and it is making a huge difference to the finish and my satisfaction. I think French seaming will be my go to from now on.
I am really enjoying your website. Thank you for providing such clear and useful advice.
Sonia
Thank you for this information soooo well explained too😍
Ann
Wow this finally answer my question ’bout seams..thanks a lot!
Laurie
You’d think with thirty years of sewing experience, I would know about the different types of seams. This goes to show that there is always more to learn. I learned so much! Thank you for the tutorials! Thank you for sharing your knowledge and expertise!
Rebecca
Love the video to go along with the name of seam and step by step.
I am more of a visual person.
I love your posts. This I will save and go again.
Mellie B
Your tutorials and guides are the best! I was just thinking about flat-felled seams the other day – so glad this popped up so I could get a refresher course 🙂
I normally use French seams, and have one extra tip: switch my needle position to the far left for the second (final) seam – that way ALL of the raw edge is sure to be encased 🙂
Ruth Angotti
Melly,
I’m a beginner and have learned so much from you. I Love you tutorials and videos, you take the time to truly explain everything so I can understand. So glad I found you!!! God Bless, stay safe and healthy!!
Josephine Hili
Mel Love Your Videos And Your Sewing Tips thank you So much