
French seams are an elegant seam finish done on a regular sewing machine. Learn how to sew a French seam with these instructions.
Hey y’all, today I’m going to be sharing how to sew French seams. I’ve got step by step French seam tutorial video and photos in this post. You can do this with your regular sewing machine to finish raw edges and prevent fraying. A French seam may take a little time, but it’s simple and elegant. I’ve used French seams on things like this peasant top and this pillowcase project.
Why Should You Finish Your Seams?
Create a seam finish on the seam allowances to keep them from fraying and unravelling. With some fabrics, seam finishes are unnecessary. For example, knit fabrics do not fray like woven fabrics. But for most fabrics, seam finishes extend the life of the garment or project. And in clothing, seam finishes keep extra frayed fabric threads away from your body.
What is a French Seam?
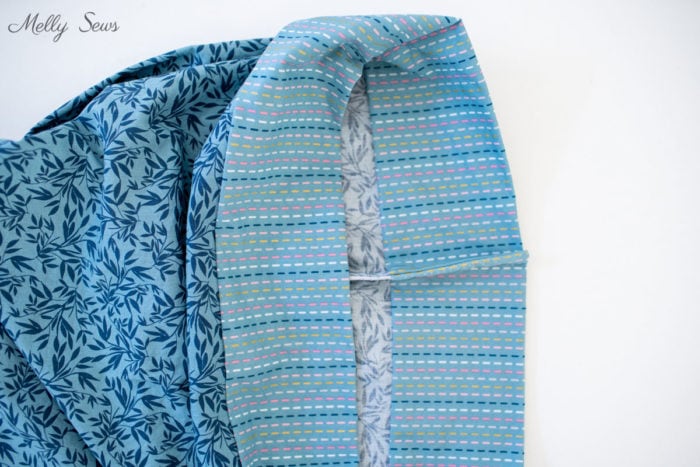
A French seam is a seam finish you can do on a regular sewing machine. It’s great for sheer fabrics like chiffon when you don’t want pinked or overlocked seam finishes to show through your garments. ince you sew the seam twice with French seams, it’s a strong seam finish to use on your sewing project.
A French seam is a self enclosed seam finish, meaning that all the raw edges are enclosed within the seam. They share that characteristic with a flat felled seam. The difference between French seams and flat felled seams is that French seams are generally left alone after stitching, while flat felled seams are usually topstitched down. But both types of seams can begin with stitching the wrong sides of the fabric together and share high durability because they are double stitched
Pros of French seams: easy to do, neat finish with no special machine (like a serger) required, can be adjusted to very narrow seam allowances, great on a straight seam, suitable for light- to medium-weight fabric like silk, organza, voile, gauze, etc.
Cons: Takes more time, can be tricky on curves and seams that cross other seams (like an armhole or sleeve), requires planning in order of construction and math to determine seam allowance amounts for first and second passes of stitching, can be bulky with heavy fabrics.
Sewing French Seams
Before you sew French seams, you need to know what kind of seam allowance you are working with and calculate the amount you’ll use for the first and the second line of stitching. For example, if you have 5/8 inch seam allowances you’d do a first seam at ¼ inch (or 2/8) and then the second stitching line would be 3/8 (2/8 + 3/8 = 5/8). Basically you want your second seam allowance to be at least 1/8 more than the first line, and you want the total to be equal to the total seam allowance in the pattern. Another example – if you have a 1/2 inch seam allowance, make your first pass at 1/8 inch, and the second pass at 3/8 inch (1/8+3/8=4/8 or 1/2).
Steps to Make a French Seam
I have a video below that you can also watch on YouTube here showing how to sew French seams. Or you can scroll below the video for written instructions. Note that in the video I used contrasting threads so you can see the seam, but generally you would want to match the thread.
Time needed: 10 minutes
How to Sew French Seams
- Place fabric wrong sides together
Line the edge of the fabric up precisely and pin pieces together.
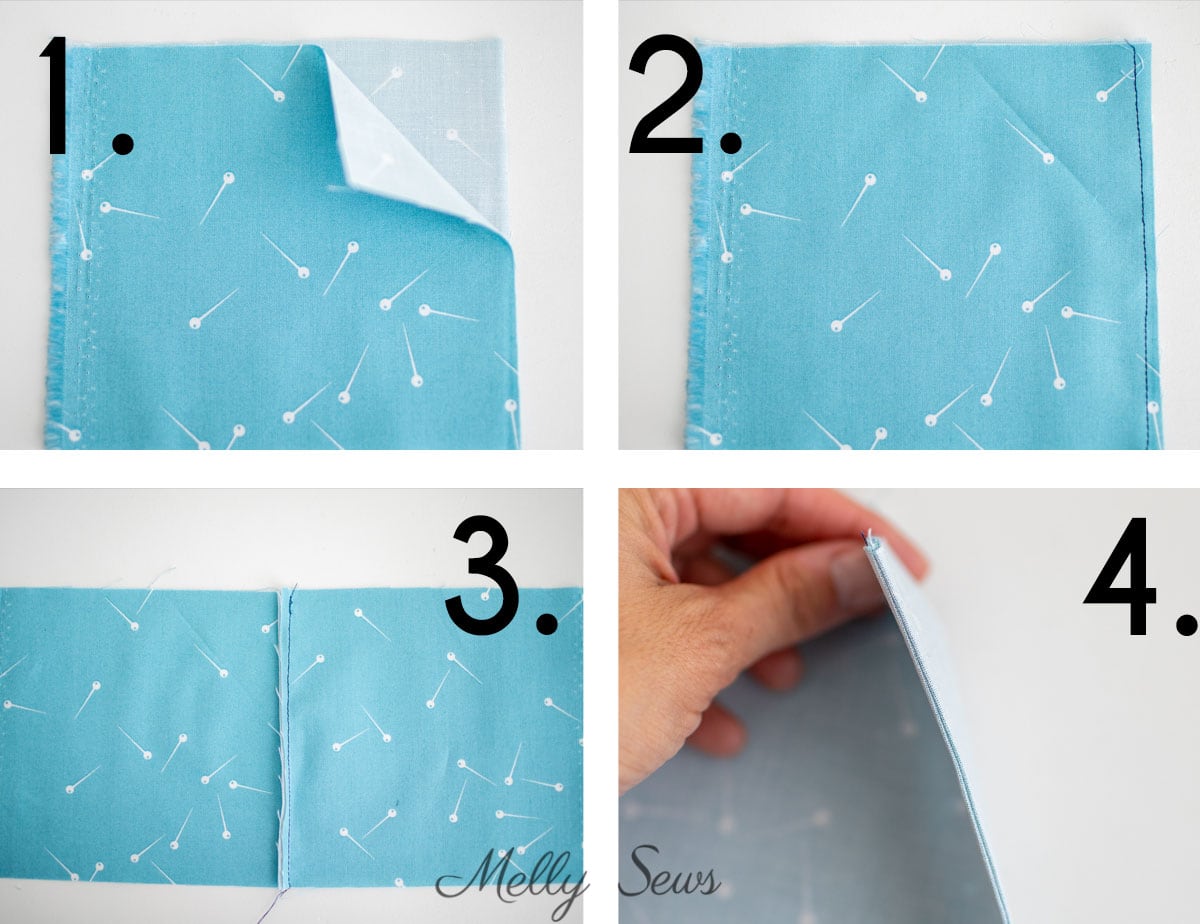
- Stitch seam.
Use your calculations explained above to stitch the first line of stitching. I often use the edge presser foot as a guide for very narrow seams.
- Press the seam allowance toward one side.
This helps prepare for the next step.
- Fold the fabric right sides together and press.
Make sure your fold is on the seam’s edge.
- Stitch a second time.
Use the calculations explained above to stitch the remaining seam allowance amount.
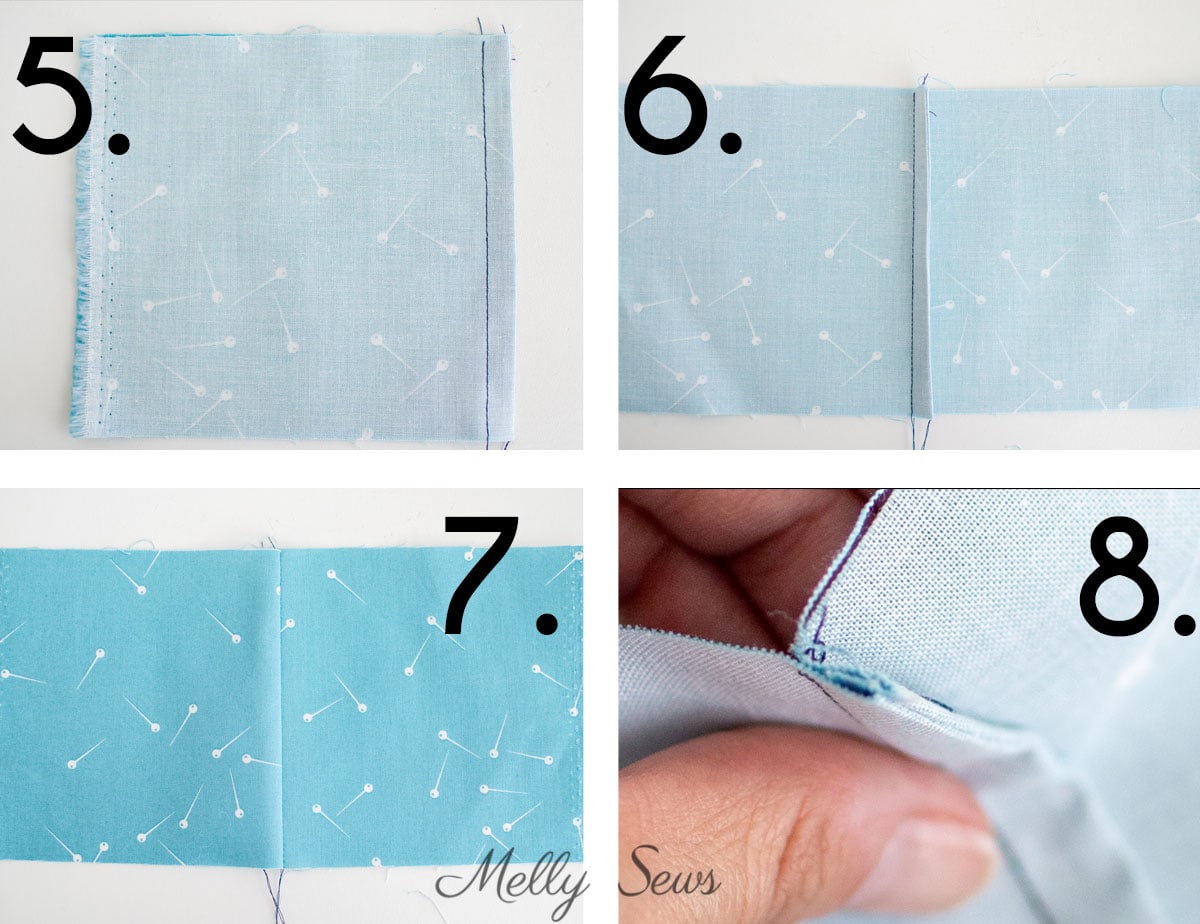
- Press the seam
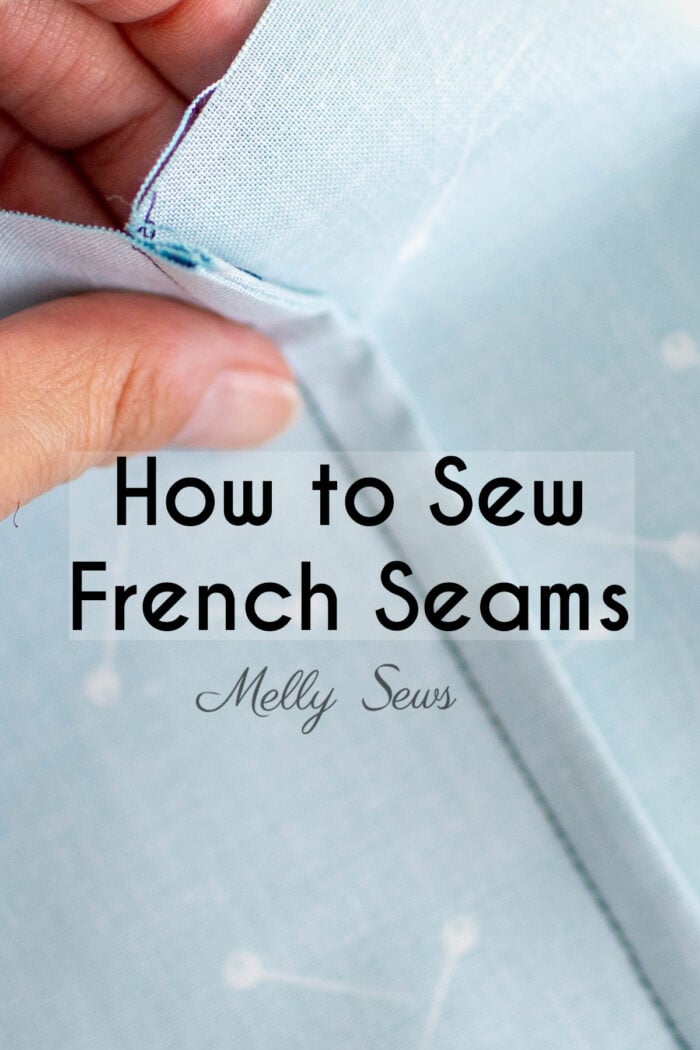
This finishes the seam and makes it look more professional. Image 6 shows this finish from the wrong side.
- Seam view from the right side of the fabric.
This is what your seam will look like on the right side – no different than any other seam.
- Seam view from the wrong side of the fabric
If you look closely, the raw edges of the seam are enclosed inside.
If you are sewing French seams on a curve, you’ll have the best outcome if you keep the seam very narrow. With a 1/2 inch seam allowance, I would sew the first pass at 1/4 inch, then trim the allowance down to 1/8 inch using scissors or a rotary cutter. Then the second pass would also be 1/4 inch, and it would cover the previous stitching entirely.
For more seam finish options, check out this post that covers several ways to finish a seam.
Joanna
I really like French seems, but they have a tendency to trip me up – sewing wrong sides together is so counterintuitive! I even managed to trip myself while reading your instructions, I was sure you’d got it mixed up… 🤦🏻♀️
Beverly Largent
Oh my I learned A LOT!!! I’ve been sewing since I was age 9 and I’m 64! This is WONDERFUL how you teach us! Just can’t thank you enough!