
Learn how to sew a pillowcase for beginners with this tutorial
Hey y’all – today I’m showing you how to sew a pillowcase, two different ways! I’ve got one easy method on video that finishes all the seams nicely. Then there’s another method in a written tutorial that gives you more flexibility to use different fabrics and cutting layouts. Either way, this is a great beginner sewing project. All the seams are straight lines and the project doesn’t take very long, so you get quick gratification.
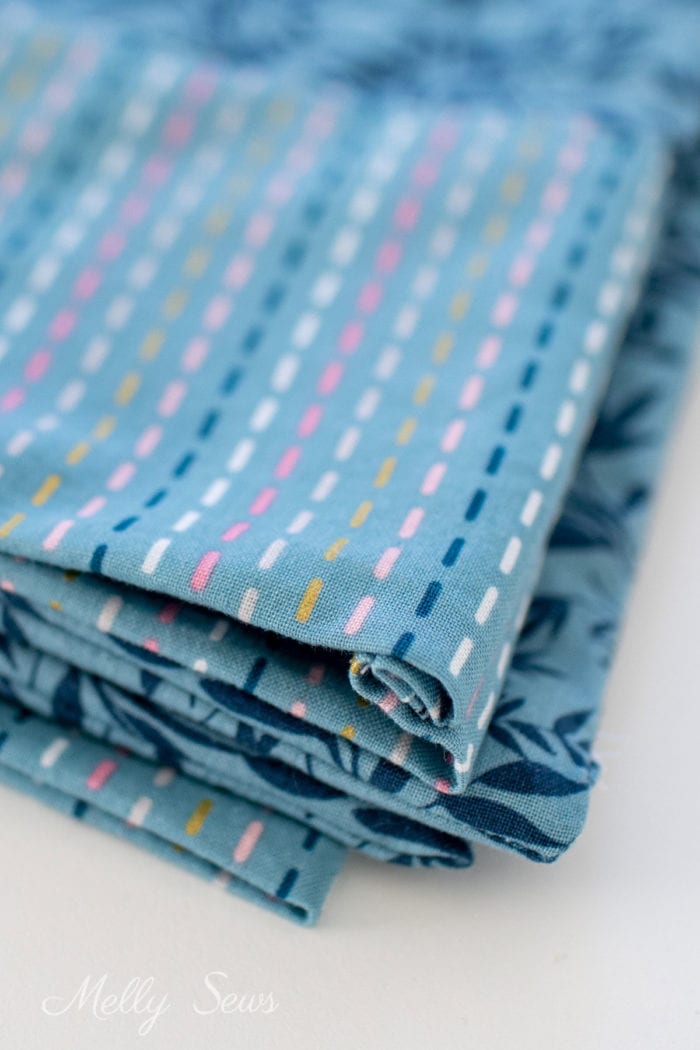
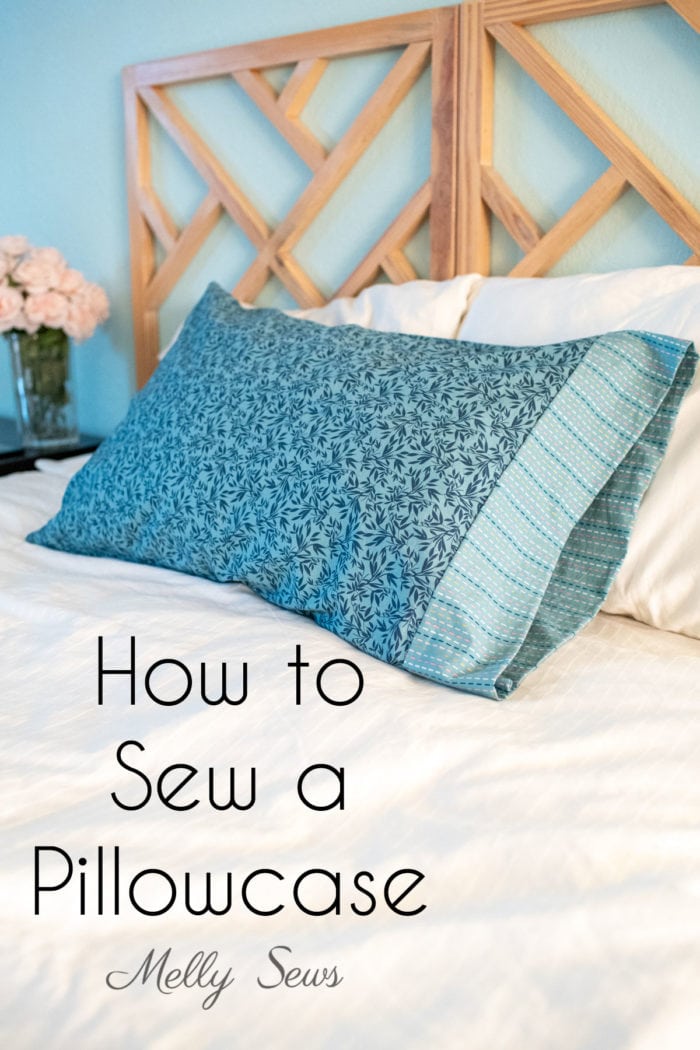
This is an update of a post from 2015, when I sewed the pillowcases for the written tutorial out of Happy Home fabrics by my friend Caroline Hulse. That fabric is out of print. So the blue pillowcase is sewn in fabrics from my Blooms & Bobbins line with Riley Blake designs. Another reason this sewing project is perfect for those learning to sew is that it’s made with quilting cotton. Quilting cotton comes in a huge variety of prints, can be found easily, and is also easy to work with.
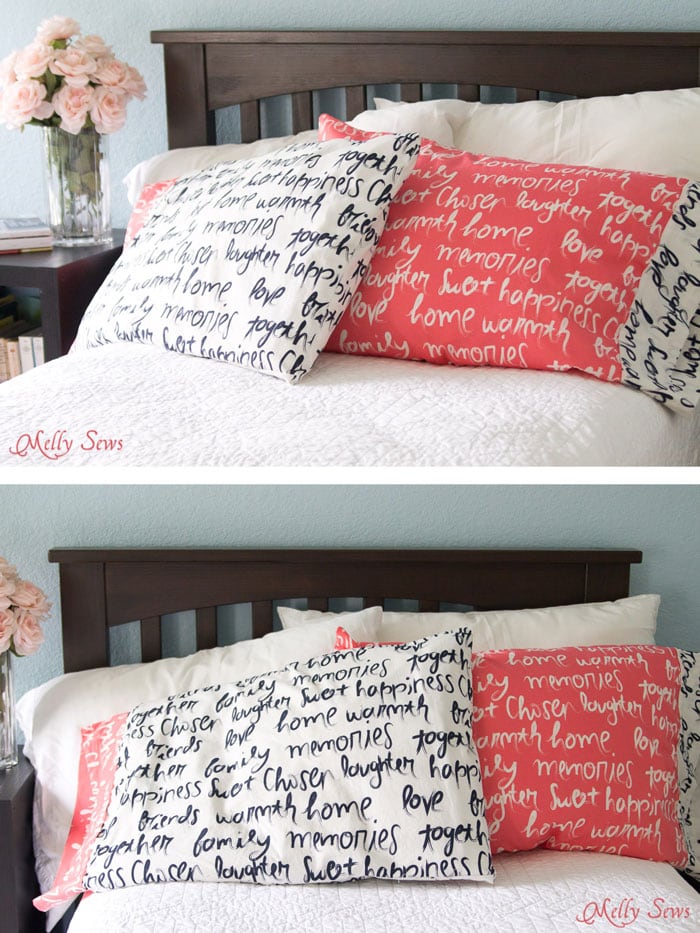
I made the blue pillowcase pictured below using the burrito method and French seams. The one above has seams on all three closed sides of the pillowcase. The reason I didn’t want to do a folded pillowcase with the text on the Happy Home fabric is because that print is directional, and I didn’t want the words to be right side up on one side and upside down on the other. With sewing, there are usually multiple ways to get to a finished product. Part of learning is figuring out which method to use to honor your time, skill, and desired outcome.
If you’d like to see more specifically about the French seam technique for finishing, check out this post.
Materials You Will Need to Sew a Pillowcase
So, to make a pillowcase you’ll need
- 1 yard (non directional prints) or 1 1/2 yards (directional prints) of two fabrics – this will make 2 pillowcases with contrasting cuffs. If you only want to make one pillowcase, you’ll need 1 yard of the main fabric and 1/3 yard of the coordinating fabric for the cuff. I recommend quilting cotton as it’s readily available and the easiest fabric for beginners to work with. If you’re more experienced you can use any fabric you’d like with these techniques
- Scissors and measuring tape or rotary cutter, ruler and cutting mat (If you’ve never used a rotary cutter, see this post)
- Straight pins
- Sewing machine with needle and thread (To learn about needles, see this post, for thread, see this one)
To sew a pillowcase like the blue one pictured above, watch the video below or on YouTube here, or scroll below the video for written instructions.
Step 1: Burrito Method for Cuff
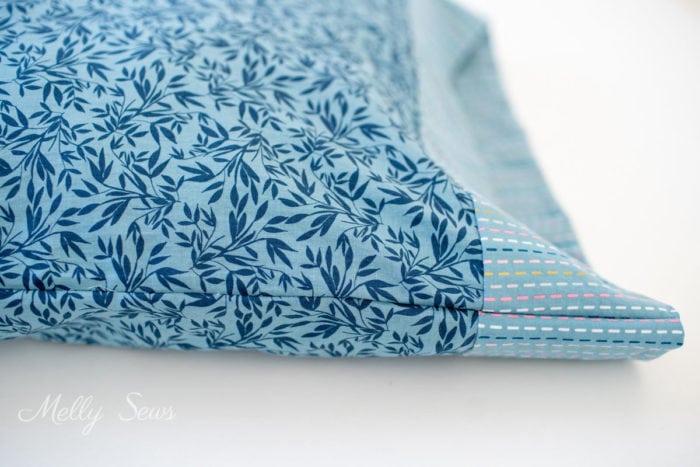
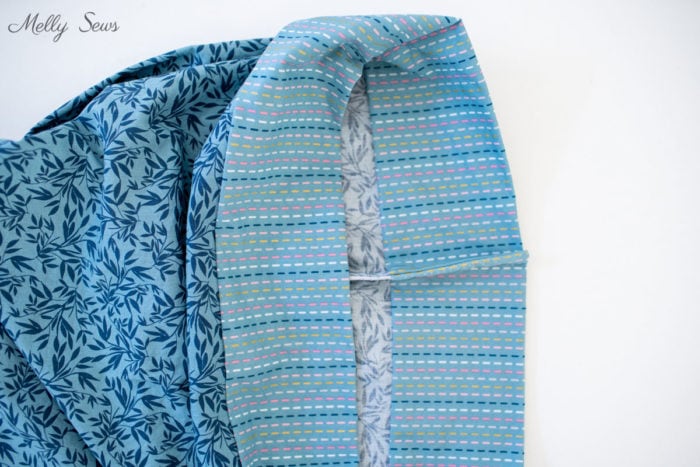
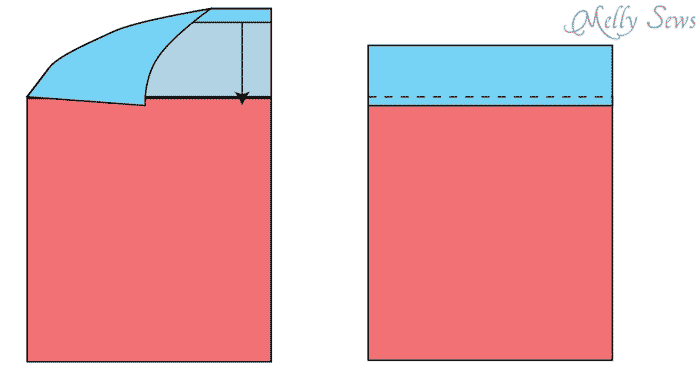
To begin, you’ll need main fabric cut to 42 inches by 29 inches, and a cuff cut to 42 inches by 9 inches. This will make a finished case with dimensions of 20.5 inches by 32 inches long. of Place the cuff and main fabric right sides together and match the raw edges along a long edge. Add a few pins to keep these edges together, then open up your fabrics so you can see the right sides. Roll up the main fabric until you can see the pinned edge, then fold that pinned edge up against the other raw edge of the cuff so that they are right sides together. This makes so much more sense if you watch the video.
You should have 3 raw edges, each layer in a sandwich – the cuff, the main fabric, and the other cuff edge. The rolled up main fabric (the reason this is called a burrito) is in the middle of those layers. Now you’ll pin and stitch this edge using a 1/2 inch seam allowance. Be careful not to catch your “burrito” in the seam. Once you’re done stitching, turn right side out and you’ll see a cuff with all raw edges of that seam inside.
Step 2: Sew The Bottom Of The Pillowcase
Now we’re going to sew a French seam across the bottom edge or short side of the pillowcase. Start by folding your pillowcase WRONG sides together. Stitch across the short end with a 1/4 inch seam allowance. Then turn the pillowcase right sides together. Press the seam you just sewed and then stitch it again with a 3/8 inch seam allowance this time. Again, I demonstrate and clarify this in the video above.
Step 3: Sew the Side with French Seams
We’ll use the French seam finish again to sew the remaining side of the pillow. Fold your pillowcase WRONG sides together. Stitch across the long end with a 1/4 inch seam allowance. Then turn the pillowcase right sides together. Press the seam you just sewed and then stitch it again with a 3/8 inch seam allowance this time. The corner may try to get a little bulky, so press it as flat as you can before stitching.
Method 2: Double Stitched Cuff
I’ve got 3 fabric layouts below if you’re not doing the burrito method I showed in the video above. For the burrito method, make sure to cut your main fabric on a fold. For the method I show written below, choose the one that is appropriate to your fabric to cut. If you’re making 2 pillowcases with the contrast cuffs as I did, cut these pieces out of EACH fabric. Fabrics below are laid flat, not folded.
I’ll also note that these measurements result in a pillow case that is 1/2 inch shorter in height and 3 inches shorter in length than the burrito method pillowcase I made in the video, though the cuff is the same width. I’m not sure if pillowcases have changed sizes in the last 7 years, all I can say is that for both the tutorial 7 years ago and the one this week I started by measuring my finished store-bought pillowcases, and the ones I made in 2015 fit my then pillows and the ones I made this week fit my now pillows and they all said standard size pillowcases when I bought them. 🤷🏻♀️ If you want to modify the ones below, replace 21 with 22, replace 26 with 29, and replace 41 with 42 to get the same size I did for the burrito pillowcase.
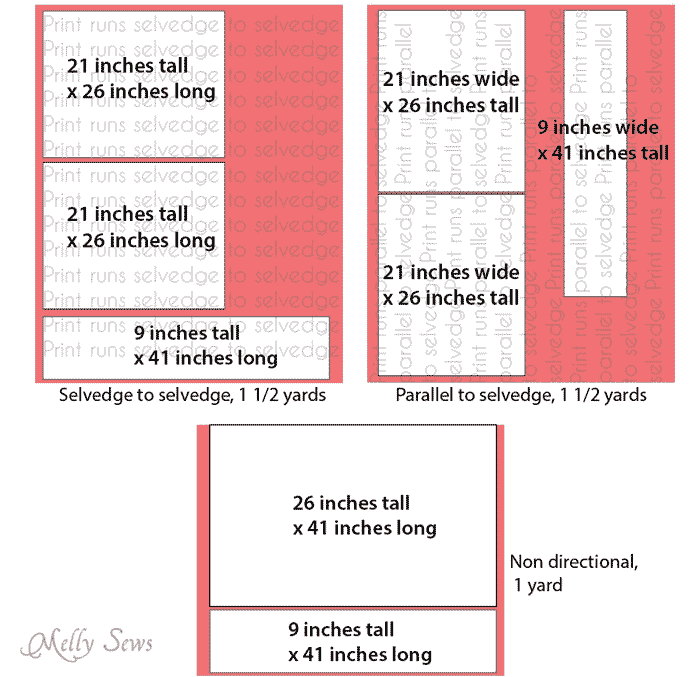
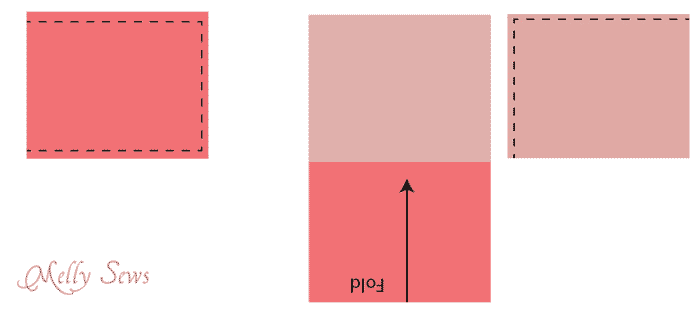
Either place your two pieces of fabric right sides together, making sure the print is right side up on both, or fold your one piece of non-directional fabric in half, right sides together. Using 1/2″ seams, sew raw edges, leaving one short side open. You can finish these edges with a serger, pinking shears, or another seam finishing method of your choice.
Fold the cuff in half, right sides together, matching the short edges. Stitch the short edge.

Press one edge of the cuff 3/8″ to the wrong side.

With the cuff right side out, and the pillowcase right side out, place the cuff inside the pillowcase, matching the raw edges. Match the cuff seam to a pillowcase seam. Stitch. Press the seam toward the cuff.
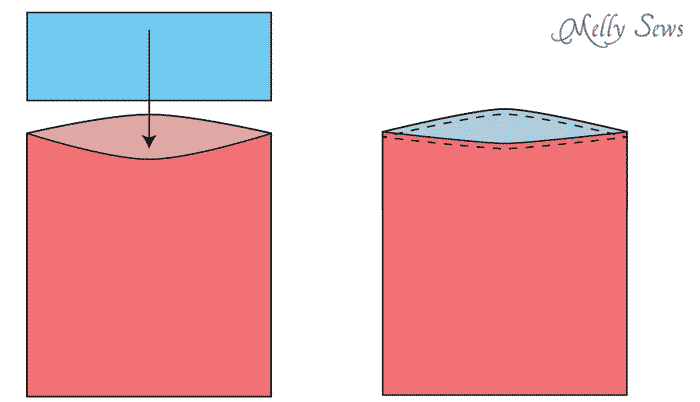
Fold the cuff in half, wrong sides together, so that the pressed edge just covers the seam from the previous step. Pin the cuff, then stitch close to the pressed edge to secure and you’re done!

Elizabeth
So happy, and I’m glad they’ll bring some joy to some precious kids. I like the technique…i will give it a go the next time I make pillowcases.
Caroline
So beautiful, Melissa! Thanks so much for sharing your Happy Home project! I know the kiddos who receive these will be immensely blessed =) XOXOXO
Ruth Guida
I am currently making Breast Cancer pillows. Easy to make and pattern on internet. Women use these pillows following surgery to hold arm in a position that isn’t painful. I am also making hats/head coverings/scarves for our chemo clinic.. I have lung cancer and am doing chemo. My hair is just beginning to come out so a few will be for me.
Nancy Bailey
Ruth, I just saw this post and was looking at comments and saw yours. I hope you are doing well and continue to do your generous work.
Heather Peveril
love your pillow pattern. Made two today for my grandsons who will be heading out to summer camp soon. Think I’m hooked on making more.. thanks for your ideas. Love them!
Rosslyn
Great and simple idea that even I can try. Having had chemo- & radio- therapy, that almost killed me last year, I was still up for major surgery six months later (UK lock down March).
I didn’t loose much hair (for which I thank God) however, great tip from my hairdresser, MAKE a SILK pillow!
Having just made black super shiny satin pyjama palazzo bottoms the spare fabric will become one of your marvellous pillows.
Cindy
My sewing guild makes these for foster children and this is the best tutorial I’ve seen by far. Thank you.
jos van Meel
I have a quetion. Do you know how to make a pillowcase for a tempur pillow with high and low parts?
Rebecca
I was just looking for a directional pillow case tutorial with no luck, until now!
Thanks again Melly.
Prayers out to you to feel like much better soon.