
Learn how to sew your own diy prom dress in sequin fabric with a tie back using this step by step guide and video tutorial.
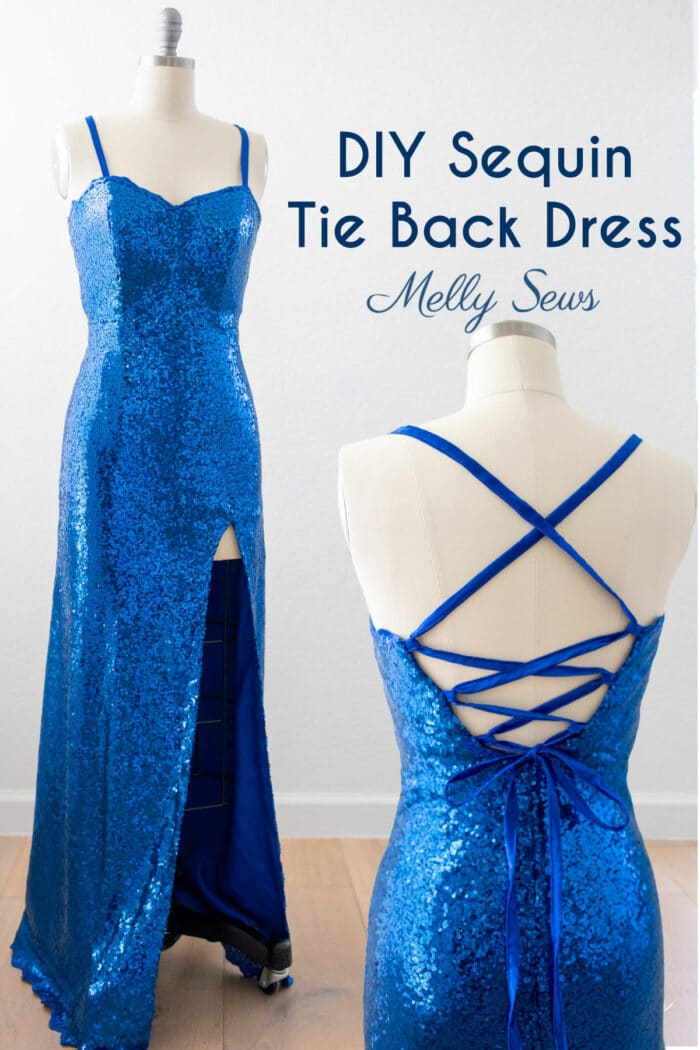
Hey ya’ll, today I’m going to show you how I sewed this DIY sequin dress with a tie back for my daughter’s prom last year. You might remember that for prom when she was a junior, we added a rhinestone appliqué to a dress we thrifted. But for her senior year she wanted a 100% custom gown. So we started working on this dream dress in December for prom in May.
While this isn’t a project if you barely have basic sewing skills, newer sewists can still tackle a formal wear. As long as you have time and patience and you’ve sewn simple garments you can make a stunning gown. But don’t try this in a rush! Even with decades of sewing under my belt I took three weeks to sew this dress. Part of that was the process of making a muslin (don’t skip that step!). A few days worth of work was simply all the hand-sewing I did to cover the seams with sequins.
Choosing the Fabric
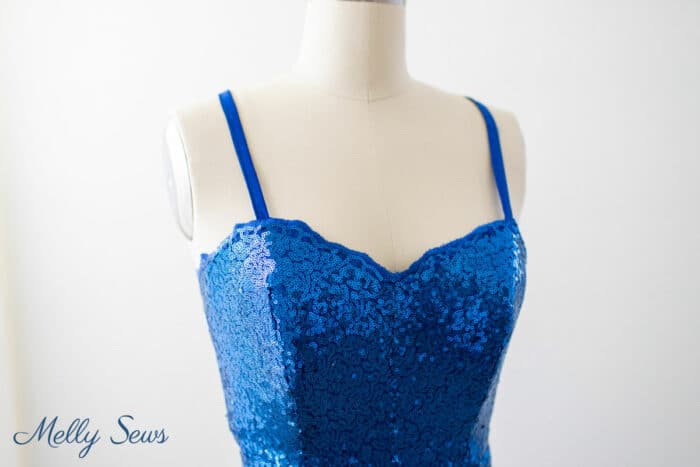
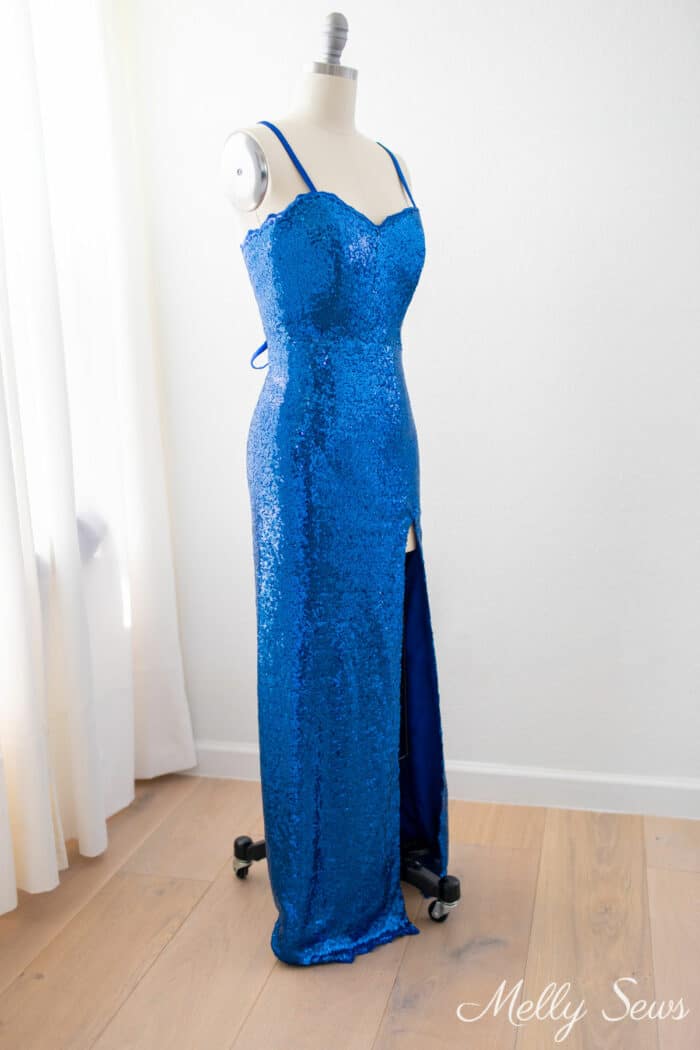
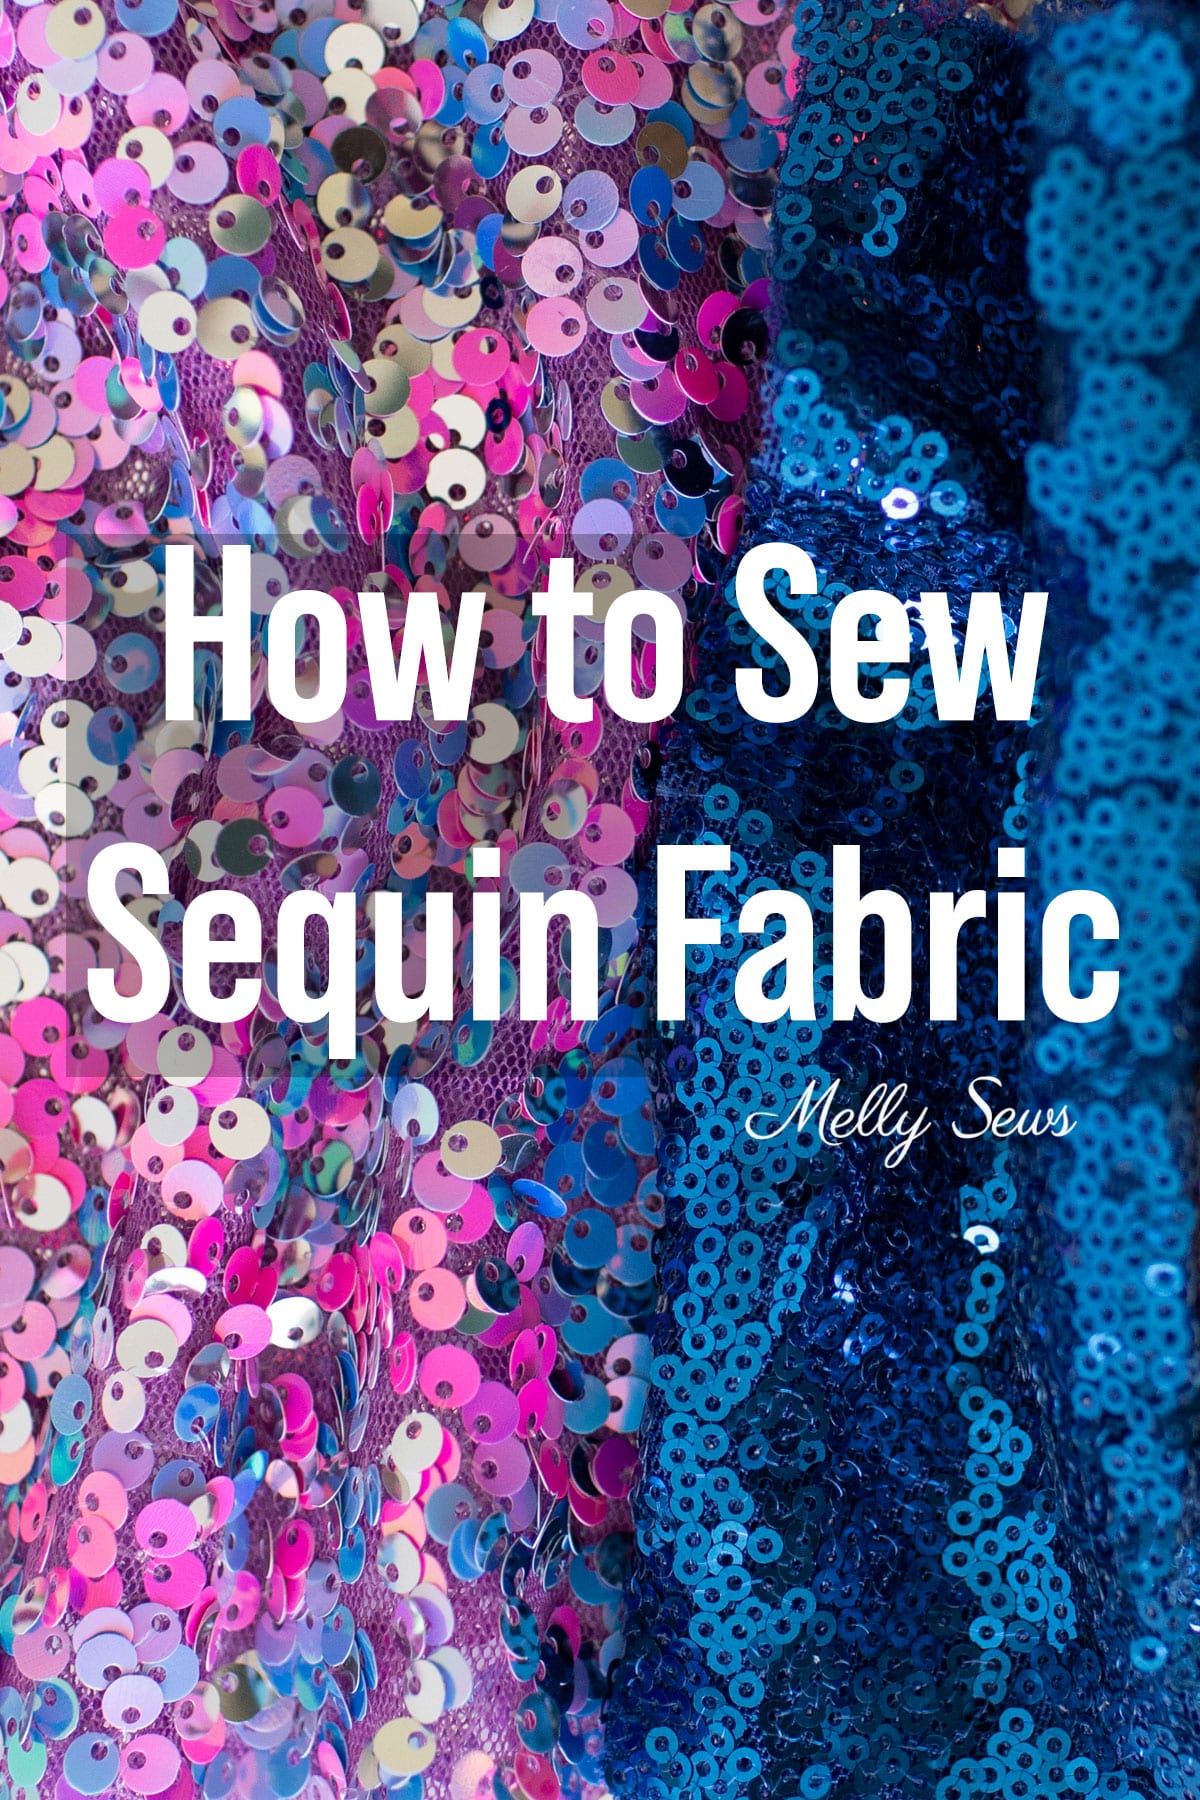
The first step was choosing a fabric. So over the Christmas break we visited the Dallas warehouse shops to look for more evening gown fabrics than I can find in person in Austin. We browsed formal fabrics of all types – silk, lace, velvet and every kind of embellishment from beads to embroidery to feathers. I went in thinking we were looking for something black, but she changed her mind. When she saw this brighter and fun blue sequin fabric with double scalloped and embroidered borders, she decided that was the one.
Since design details hadn’t been nailed down, I bought plenty of yardage. Keep in mind that even if you have a pattern, you need additional fabric beyond the recommended yardage if you’re going to use the borders of the fabric on the neckline and hem as I did.
We also came home with several yards of matching polyester crepe back satin to use for lining. And I grabbed some boning for good measure. Thank goodness for the low prices at the warehouse fabric stores. Materials, including the extra fabric, cost just under $100, so we didn’t go over budget at the checkout. And I had more than enough excess fabric to sew samples for the video in this post.
Gather Your Supplies
In addition to your fabric, here are the things you’ll need to make a DIY prom dress.
- A pattern – more on that in the next section
- Sewing machine and basic notions: scissors, a lot of pins, sharp needles, thread, seam ripper etc. You might find sewing clips work better to hold the sequin fabric together. I prefer clips to pins.
- Hand sewing needles and invisible thread to sew sequins over the seams.
- Double fold bias tape for the ties and tie loops. I made my own, as this tutorial will show you. You could also sew tubes and turn them right side out, but I find bias tape sewn closed is easier for me to work with when you need this much length.
- A 7 or 9 inch invisible zipper. Length depends on how tall the dress wearer is and the difference between their waist and hips. If they’re short and straight, the 7″ will work, curvy and/or tall, get the 9″ one. When in doubt always get the longer zipper.
Preparing the Pattern
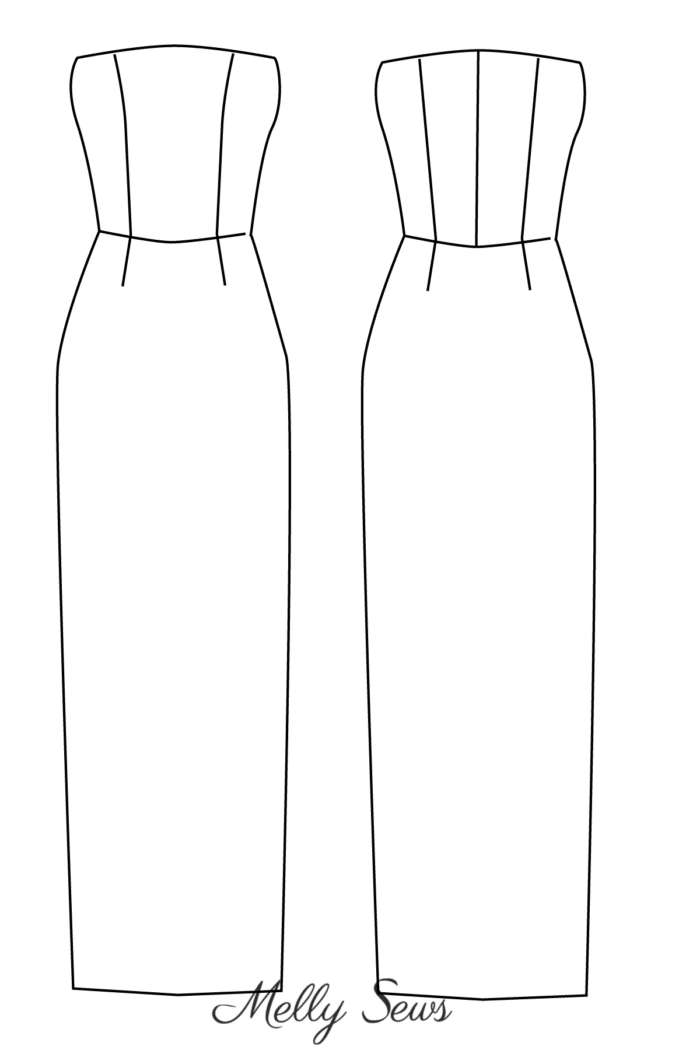
The first step to making this dress was to figure out a pattern. While I prefer to draft my own patterns, you don’t have to do that. For example, McCall’s 7654 could work well if you leave the sleeves off and lengthen the skirt. Simplicity 9289 has a skirt the right style and length, but the front bodice is pleated instead of princess seamed. Basically you’re looking for a princess seamed strapless or spaghetti strap bodice, and a skirt with darts and a center back zipper. Check the line drawings on the pattern envelope. You don’t need the bodice and skirt to be from the same pattern as long as they both end at the natural waist. You’re looking for something similar to the drawing below.
Next, before cutting into any sequins, grab your sewing machine and make a muslin of your dress so you can make the necessary adjustments to perfect the fit. You can see a picture of my muslin below.
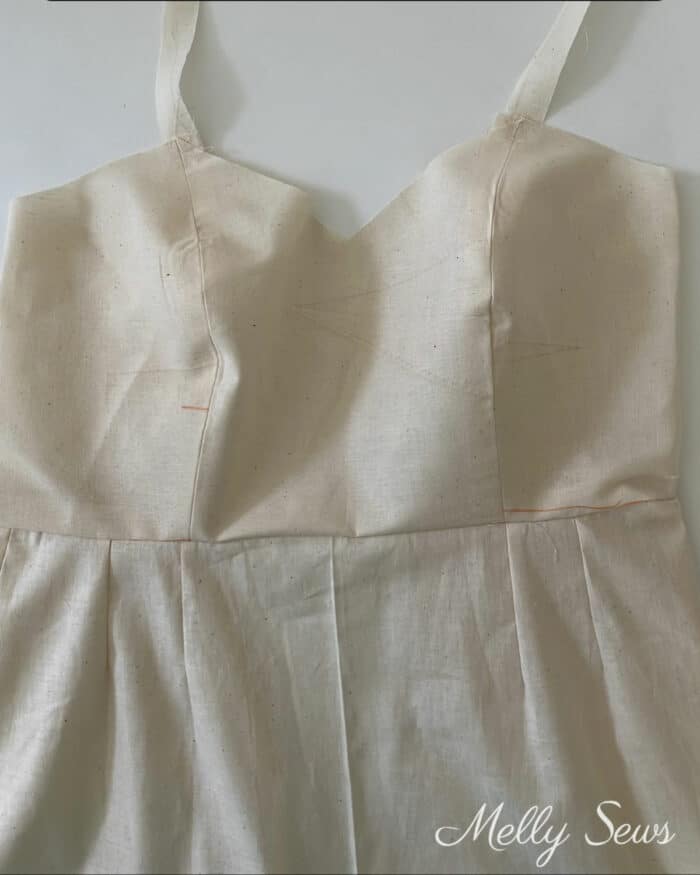
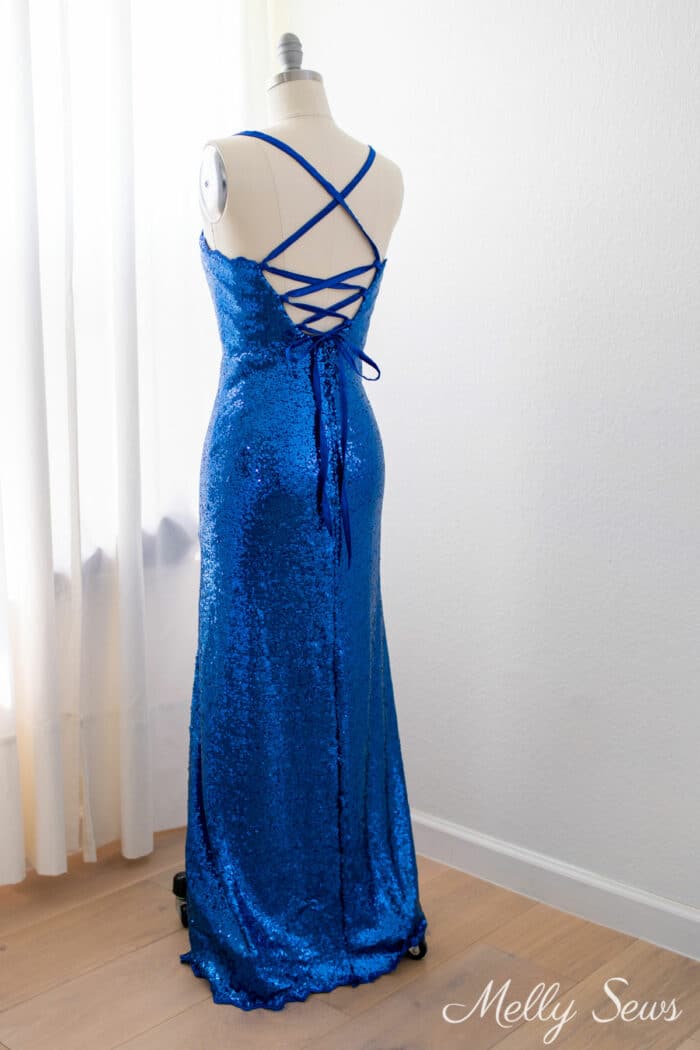
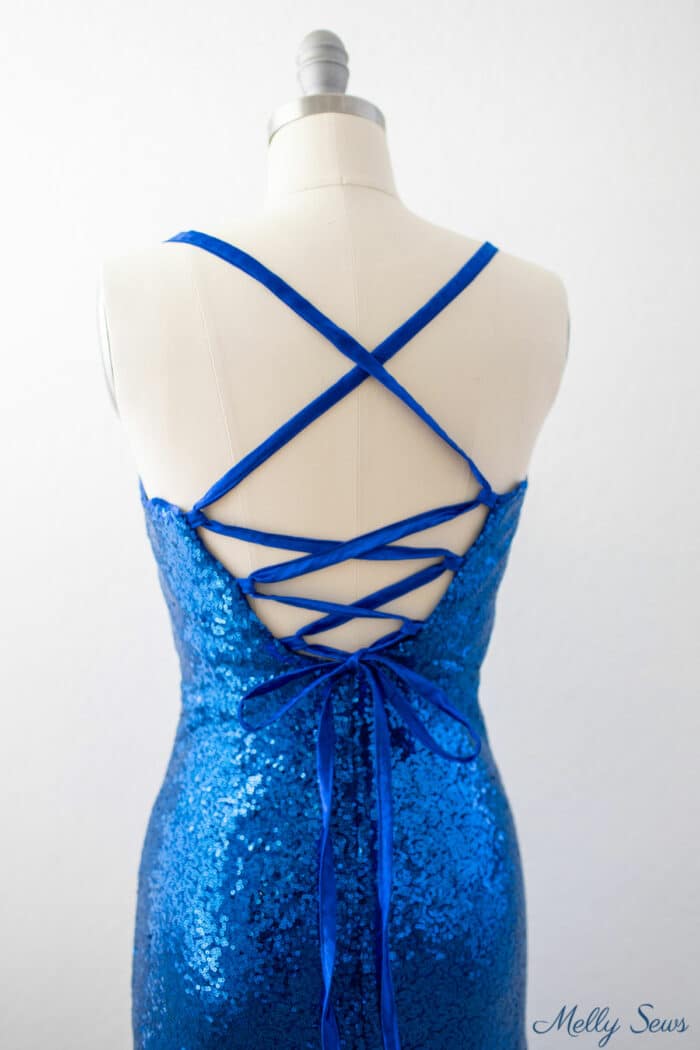
I made the muslin with the full back, because part of what we were figuring out was how we wanted to cut the back for the ties. Many of the examples we looked at online had straight sides on the back piece. We played with folding the center back pieces different ways and both of us agreed that a V shaped back was more flattering.
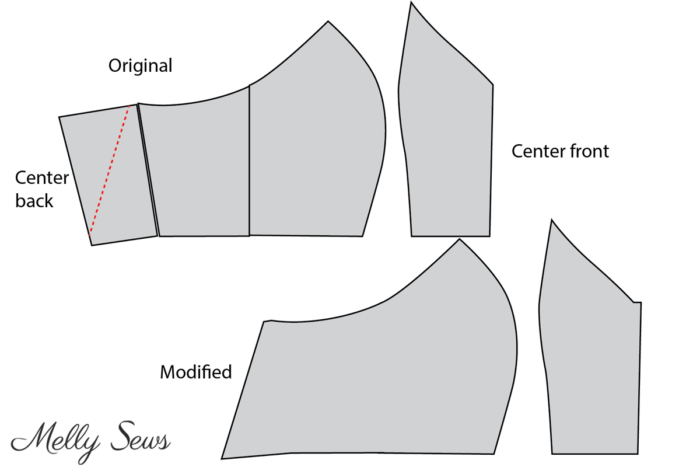
Below you can see what my altered back pattern piece looked like. I also eliminated as many seams as possible by combining pattern pieces. The fewer seams on a sequin dress, the better. You can also see in the video in the next section how I combined the skirt pattern pieces to create this skirt all in one piece. As you can see in the video below, I cut all the pattern pieces in a single layer of fabric so I could line up the border scallops.
Sewing The Dress
Here’s a quick video overview of aspects of sewing this dress. You can also watch this DIY prom dress video on YouTube here.
Below is the order of construction I followed:
- Assemble the bodice outer fabric. Sew center front and side front seams. Next, hand sew sequins over the seams on the right side.
- Cut a double set of bodice linings. Sew bodice lining pieces together. I cut center front pieces on the fold for the lining.
- Add boning to seams in one bodice lining.
- Lay sequin bodice on top of boned lining and hand stitch together along neckline. I used the same stitch as shown in this post where I attached the rhinestone appliqué. Make sure to stitch below the seam allowance on the lining. This double piece will now just be referred to as bodice.
- Sew straps by sewing open edge of folded bias tape closed.
- Stitch bodice to bodice lining along neckline, adding straps in between lining and outer fabric at front. Tuck the scalloped edge between the two lining fabrics and below the seam line. This way the the scallops will be free when turned right side out.
- Sew skirt outer fabric darts. Cover on right side with sequins.
- Next sew skirt lining darts.
- Baste the skirt outer fabric to outer bodice at waist. Check the length at this point since the scalloped hem edge can’t be shortened from the bottom. It’s important to try on the dress with the actual shoes so the hem is the perfect desired length. Mark the height of the slit at this point as well. I used thread marking. If length is correct, remove basting stitches and finish the waistline with a straight stitch, then cover seam with sequins.
- Place skirt lining and bodice lining right sides together at waist and stitch, leaving center back seam open.
- Cut tie loops and pin into seam, then sew bodice lining to bodice outer fabric at center back. Turn right side out.
- Sew the slit in the skirt (see video above for how to). Hand tack lining to outer fabric inside slit to prevent lining fabric from rolling outward through the silt.
- Insert the zipper at center back in outer fabric. This post covers how to insert an invisible zipper.
- Sew the center back seam in the lining, hand basting top edges to the zipper.
All that’s left to perfect your DIY prom dress at this point is to complete the outfit with jewelry and other accessories!
Tips For Working With Sequin Fabric
I have detailed tips for working with sequin fabric in this post. There’s also video there showing some techniques, like how I sew the sequins over the seams to help hide them.
Troubleshooting Common Challenges
Here are some common challenges you might encounter when sewing a DIY prom dress, as well as some suggested solutions.
- How can you make a prom dress shorter?
On most prom dresses, you can cut the bottom of the dress and sew a new hem. With this dress the only way to shorten is from the waist seam, so it’s very important to baste the waist seam and check the dress length before finishing that seam. If you didn’t, you’ll have to unpick the stitching and shorten at the waist. - How do I make my prom dress fit? I want it to be (tighter, bigger, smaller, or looser).
This is why the muslin stage is very important if you’re going to make a prom dress from scratch. Use the inexpensive muslin fabric and make alterations to the dress at that stage so that when you cut out your good fabric the fit is perfect. If you are starting with a dress that is already made, here is a tutorial I did on how to make a dress smaller. - How do I make my prom dress longer?
Cut the skirt longer than you think you will need it to be and sew with a wide seam just in case. That way you can let the skirt down longer if you need to, and if you don’t you can cut the extra fabric off after you check the length. If you didn’t leave enough length, you’ll need to add some kind of trim or ruffle to lengthen it.
Dawna Fennewald Fennewald
I made both daughtersxprom dresses. They’re were different in the 80s but I’m sure I could have pulled this off with some time though I have been sewing 50 years. I finished with my youngest daughters wedding dress. ( that is some stress) I lovev your blogs and yes ah old dog like me learns