
Thrift flip: sew a rhinestone appliqué to a thrifted bridesmaid dress to make it prom ready

Hey y’all, today I’m going to show you how to sew a rhinestone applique onto a bodice. This month I’m going to be focusing on sewing for formal occasions because it’s prom season here. In fact, the dress with the crystal rhinestone applique pictured in this post was my daughter’s prom dress last year.
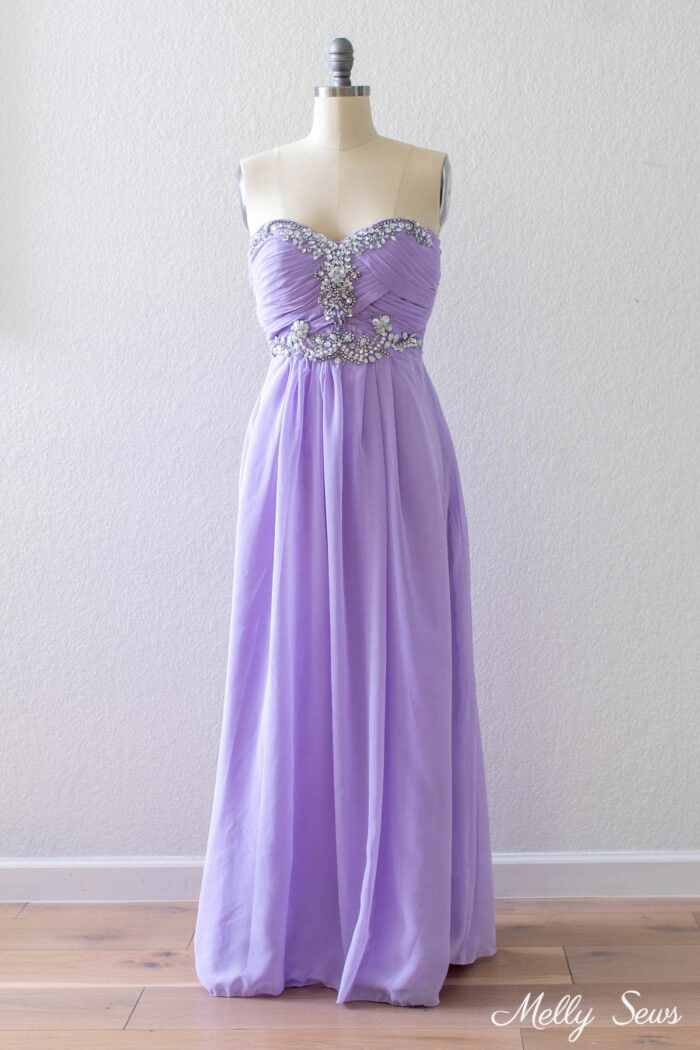
As a junior she got a last minute invite to go to prom with a friend, so there was no time to sew a dress from scratch. But we found this dress at the thrift store, and aside from being too long, it fit her perfectly, a lucky break! Her date wanted them to wear purple, so it was almost perfect. But it was a little bit more bridesmaid and a little less prom – it didn’t have quite the wow factor she wanted. Good thing we share a can do attitude and we both love an upcycle.
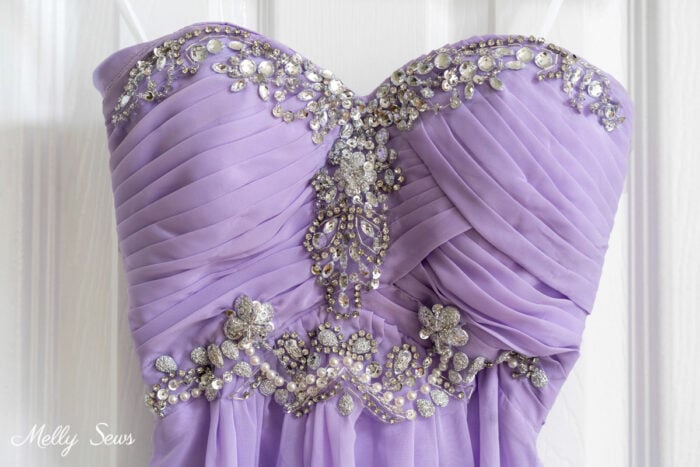
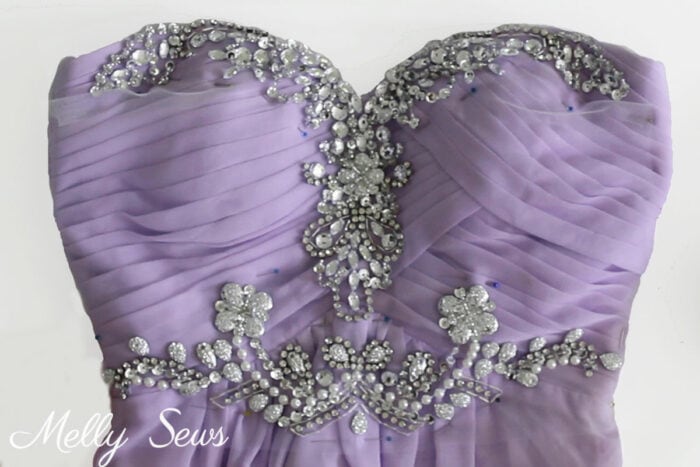
Enter the rhinestone applique to add lots of shine! I had seen these before when shopping in the Dallas warehouses. They were marked for dance costumes. I didn’t realize that they’re also available online in a wide variety of styles for a wide application of uses, from bridal gowns to headdresses to dancewear. Sewing on an appliqué with the rhinestones made it a better choice in a time crunch than sewing on individual beads and stones or even rhinestone chain like I used on the neckline and cuffs of this dress.
Supplies to Add Bling to a Dress
This post contains affiliate links. As an Amazon Associate I earn from qualifying purchases. All affiliate links are identified with (affiliate link) after the link or a commissions earned statement above the link(s).
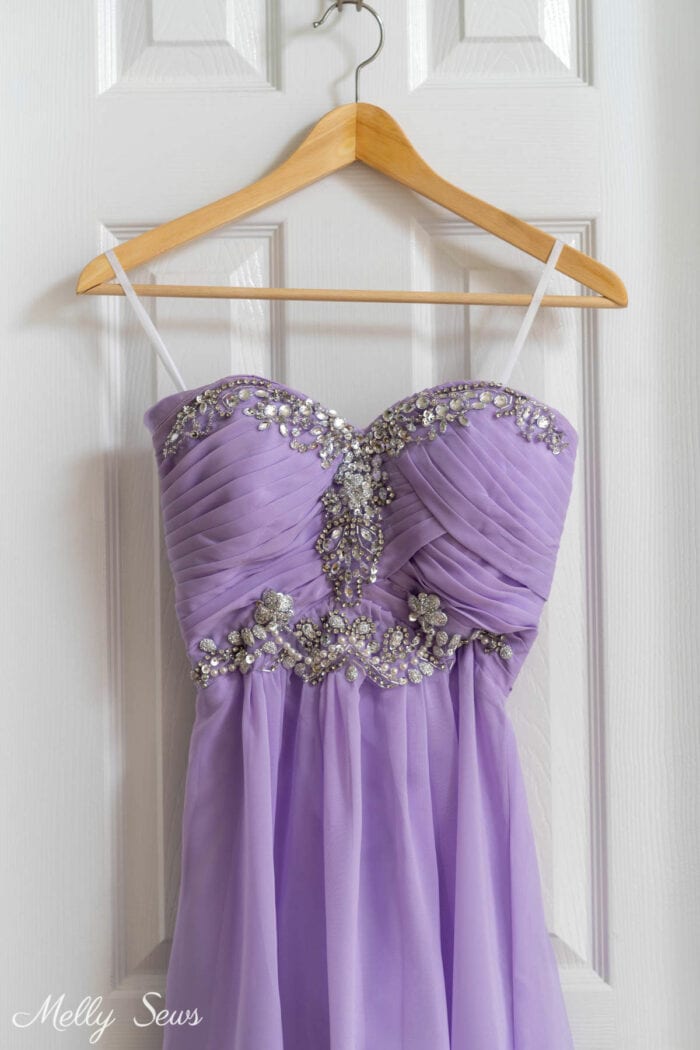
So my daughter and I browsed through so many beautiful appliques. We looked at shapes for necklines, lovely rhinestones for belts, even patches meant to be sewn onto shoes. And we found designs for all kinds of clothing. Some were even more detailed than this and obviously meant for a wedding dress, some were just not “wow” enough (her words) Ultimately she chose this one (affiliate link).

Note that rhinestone appliqués for bodices don’t really come in dress sizes. They’re designed in vague shapes so that one size will fit most. The appliqué may just not extend as far to the sides on larger sizes. In addition, the mesh gives you a little wiggle room to change the shape of the applique slightly.
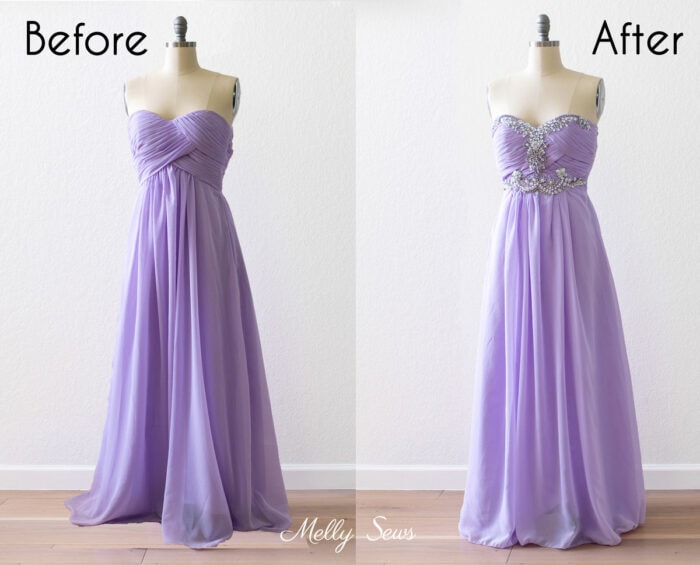
For taller bodices, you can cut the mesh in between the neckline and waistline pieces. This way you can extend the distance between the two. For shorter dresses you can fold the mesh in between to get the neckline and the waistline where you want them. If you compare the image of the applique from the shop to the image of the dress after I sewed it on, you can see that I decreased the distance between the neckline and waist on this dress.
In addition to the applique, you’ll need either matching thread or invisible thread. Invisible thread is more difficult to work with because it is harder to knot and the knots are prone to untying. So keep that in mind when choosing your thread.
Step By Step Instructions
So how do you sew rhinestone patch like this to a dress? By hand-stitching. Even a beginner can do this if they’re patient and go slowly. I’ve got a video below and on YouTube here showing how I sewed this on. Or scroll below the video for written instructions.
To sew a rhinestone applique, you’ll start by pinning the appliqué to the bodice of the dress. It’s not important that the extra mesh lays flat, it’s important that the stones end up where you want them.
Next, using matching thread or invisible thread, sew tiny backstitches through the mesh and the outer layer of the dress. Place your stitches close to the edges of rhinestone designs. Try to bury the back side of your stitching between the outer fabric and lining (assuming your dress is lined). Below you can see an example of the backstitches I used. You can also see me sew those in the video above.

Once you have securely stitched along all the edges of the appliqué, then cut all the extra mesh off, as close to your stitching as possible. This is the hardest step, you need to cut out all the extra mesh without cutting into your dress. Appliqué scissors (affiliate link) like these can be helpful for this step, but they’re not necessary. You can also just use small embroidery scissors and go slowly.
Kip
Beautiful!
Judy Cole
this flipped thrift evening/wedding gown, with the added appliqué now has the “Wow” factor as a prom dress. So pretty!
Carol Burman
I am sure this dress looked fabulous on your daughter.
Thank you for sgaring!