
Learn how to serge corners and curves on your overlocker, as well as what to do with the thread chains at the ends.
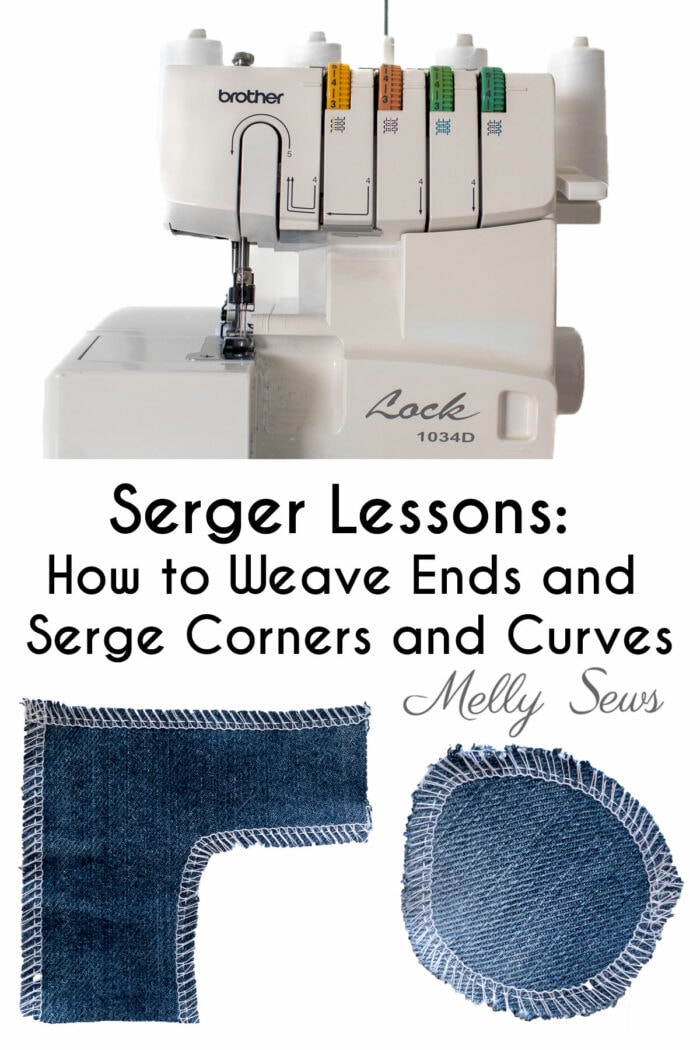
Hey y’all, today I’m going to show you how to serge corners and curves and weave in thread tails. This expands on last week’s beginner’s guide on serger basics. So if you missed that one make sure to check it out! These serger techniques will be used often while you’re sewing on your serger, as sergers are often used for garments and garments have curves and corners. I also show how to unpick a serger seam in the video, in case you ever need to do that.
I made a video covering these serger sewing skills, which you can watch below or on YouTube here. If you prefer written instructions, I also have those below the video.
4 Things to Do with Serger Thread Tails
As I showed you in last week’s episode, you don’t pull threads to cut your fabric off the machine like you would on a regular sewing machine. You chain on and off of your seam. This leaves thread tails at the beginning and end of each overlocked seam. There are 4 options for what to do with that thread chain, and the handy tips in the video above and the text below will help you choose the right method for each of your sewing projects.
Option 1: Do Nothing
Doing nothing is the option I most often use. Does that surprise you? I take the same approach to this as I do to backstitching. Which is to say, if the seam will be crossed by another line of stitches, I don’t bother doing anything with the serger tails. Most often, my serging will be crossed by either another serger seam or by a hem. Either way, the stitching will get secured in the cross seam, so I don’t worry about it.
Option 2: Tie Knots
You can also cut your thread tails close-ish to the end of the seam and then pull the looper threads tight and knot them at the end of the fabric before trimming them off. This will secure them somewhat, though it is possible for the stitching lines made by the needles to unravel this way. I do this on pieces where I serge all the way around raw edges, like on my not paper towels. Since I cross over the starting place on my stitching before chaining off, I feel like this method is a quick and easy way to take care of the thread ends. And even if a couple stitches unravel the whole trim will not since I crossed over the beginning. The disadvantage to this method is that it causes some puckering at the end where you pull the looper thread and tie the knots.
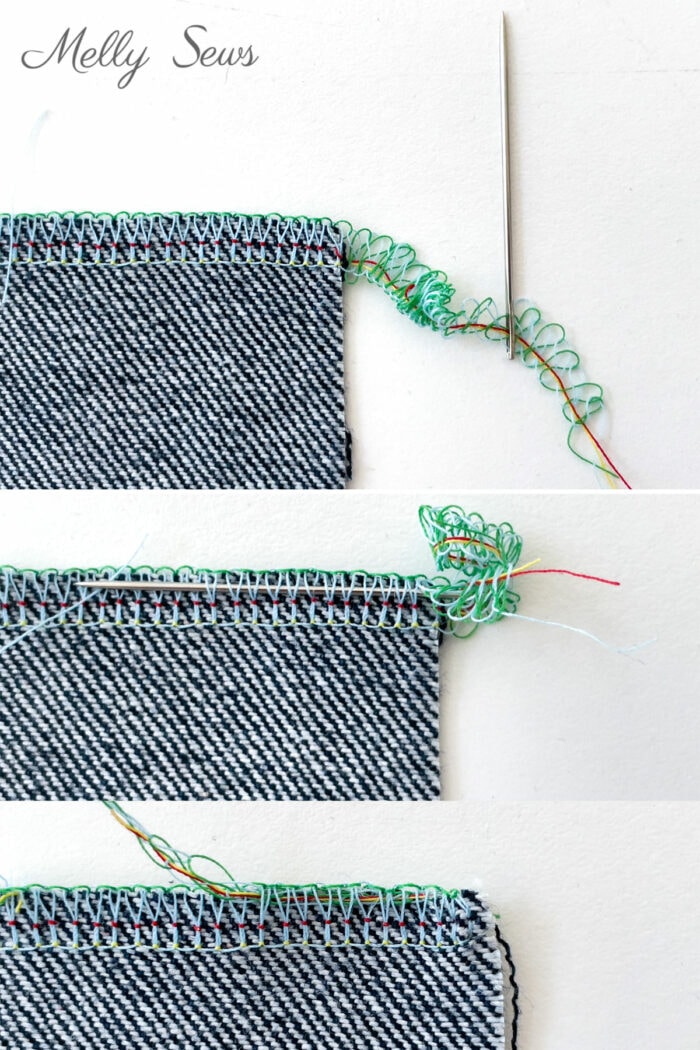
Option 3: Weave in Serger Tails by Hand
You can use a large eyed needle, thread the serger tail, and then use the needle to weave that tail under the looper threads. I show this in the video above and the image below. It takes a bit of time, but it’s a secure way to finish tails.
Option 4: Weave in Tails by Machine
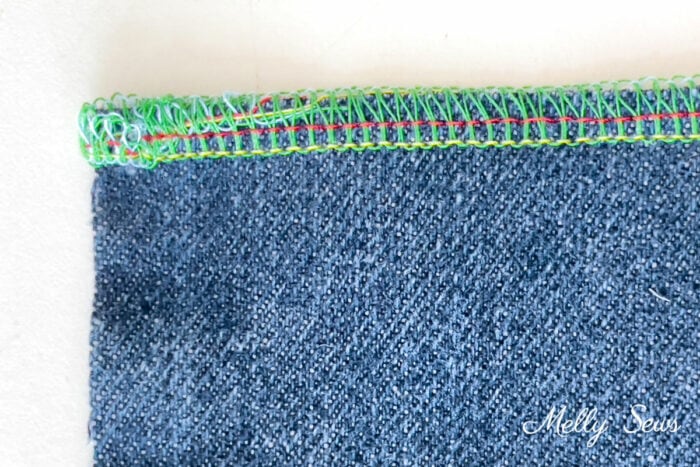
The last option I cover is letting the overlock machine weave in the ends as you stitch. If I’m not going to be crossing my serger seam with another line of stitching, this is what I generally do. However, it does require me to remember that I’m going to do it! I like to sew fast and you need to sew slowly at the beginning and end to use this method.
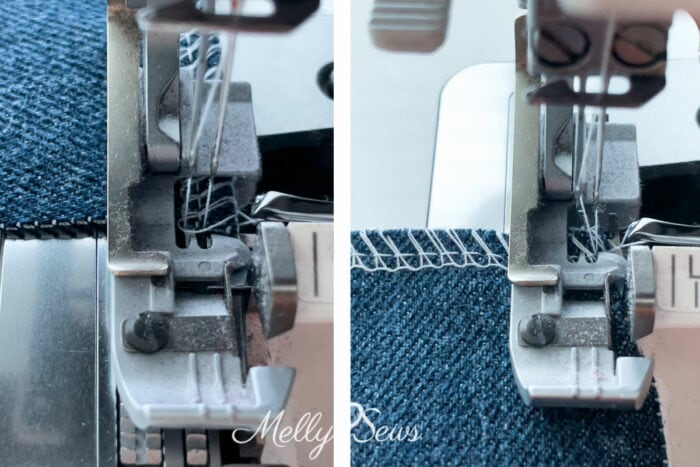
At the beginning of as seam, sew just a couple stitches onto the fabric and then lift the presser foot, pull the thread tail under the presser foot, and stitch over it as you continue sewing the seam. When finished, it will look like the image below. On the left you can see the thread tail turned and sewn under the green looper threads.
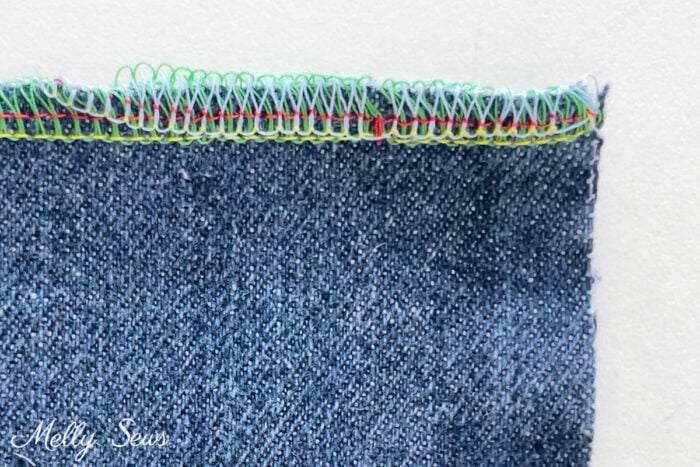
To weave ends by machine at the end of a seam, sew a couple stitches past the edge of the fabric. Then lift the presser foot, pull the fabric gently toward the back to release the threads from the stitch finger, then flip it over and put it back under the needles. Make sure the edge is to the left of the knife blade so you don’t cut your stitching back off. Next, chain onto the edge of the fabric for a couple inches, then angle the fabric away from the presser foot and chain off. Cut your chain at the edge of the fabric. You can see what this looks like below.
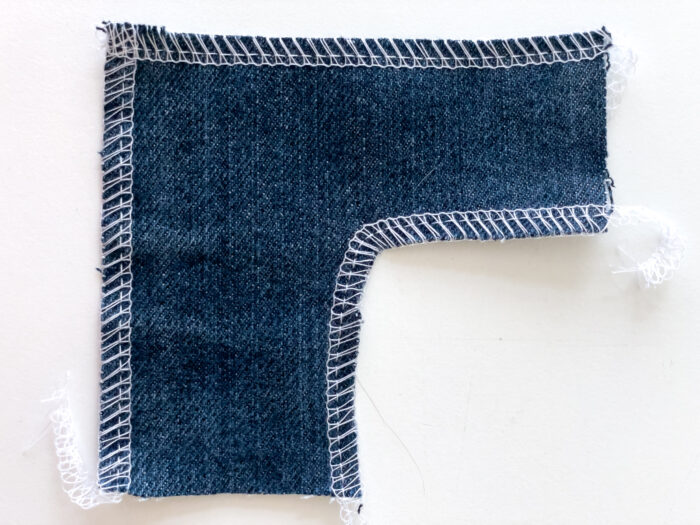
How to Serge Corners
Ok, let’s talk about how to serge corners and curves. We’ll start with overlocking an outside corner. You’ll stitch to the fabric edge at the end of the corner, and then hand crank your machine to sew a stitch or two beyond the edge. Then lift the presser foot, pull the fabric toward the back to get the thread off the stitch finger, then turn the fabric and get it as close to the needles as possible. Put the presser foot down and continue stitching the next side.
To sew an inside corner, you want to spread the fabric with your hand so that the serger sews in a straight line. Make sure to keep the stitching within the seam allowances. You will likely cut off less fabric in the point of the curve, and that’s OK. That’s why it’s useful to sew your woven fabrics on a sewing machine first and then just use the serger to finish the seams. If you do that you’ll be able to see the line of stitching you don’t want to cut through. With knits, be careful not to stretch your inner corner too much or you’ll end up making it wavy. Should that happen, steam from the iron can usually get it back in shape. This method is the same for sewing inside curves, aka concave curves.

Below, you can see how both outside and inside serger corners look sewn with these techniques.
How to Sew Curves on a Serger
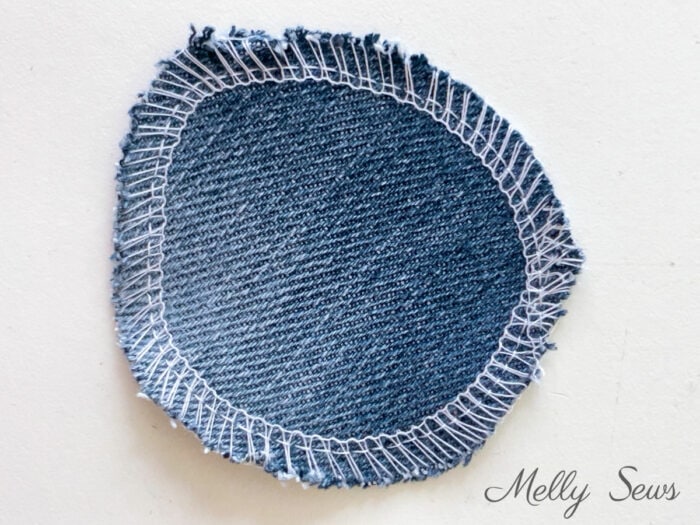
Let’s talk about how to serge an outside curve or convex curves. These are very similar to sewing curves on the sewing machine – you use your hand to apply counter pressure to balance the strength of the feed dogs (which are more powerful on a serger) and turn the fabric as it gets stitched.
The only tricky part with a serger is starting and stopping. You’ll feed the round in at an angle, which means that as you come back around the the starting point you’ll need to cut off the point and then chain off at an angle to keep your circle round. You can see on the right in the image below how the starting and ending stitches cross at angles but keep the shape round. Small circles like the one pictured above are harder to sew well than larger ones, so as you practice start with bigger pieces of fabric.
How to Overlock Around a Cuff
Finally, in the video above I show how to serger around cuffs or pants legs. This technique is very similar to how you serge curves – you start on at an angle, and as you come back around to the start you cut the starting point even with the rest of the round.
So, there you go – how to serge curves and corners, how to weave in ends, and how to sew in the round on a serger. Now go practice your skills! I recommend starting with either reusable paper towels or makeup rounds as great, scrap busting projects to refine your serger technique. Next lesson we’ll be talking about troubleshooting serger tension.
Barbara Crowell
Thank you – thank you for posting the serger tips today! New to serging and working on pants as first project. This is a totally huge help!!!
Lesley
Looking forward to trouble shooing serger tension problems. But glad we are getting these tips in small instalments. I approach my overlocker saying, Nice boy, nice boy. Be nice to me.
Cherie
Hilarious! I talk to mine also!