
Elastic bands on pants and sleeves can be uncomfortable, on your body. Here’s a remedy for a tight elastic band with a DIY sewing tutorial.
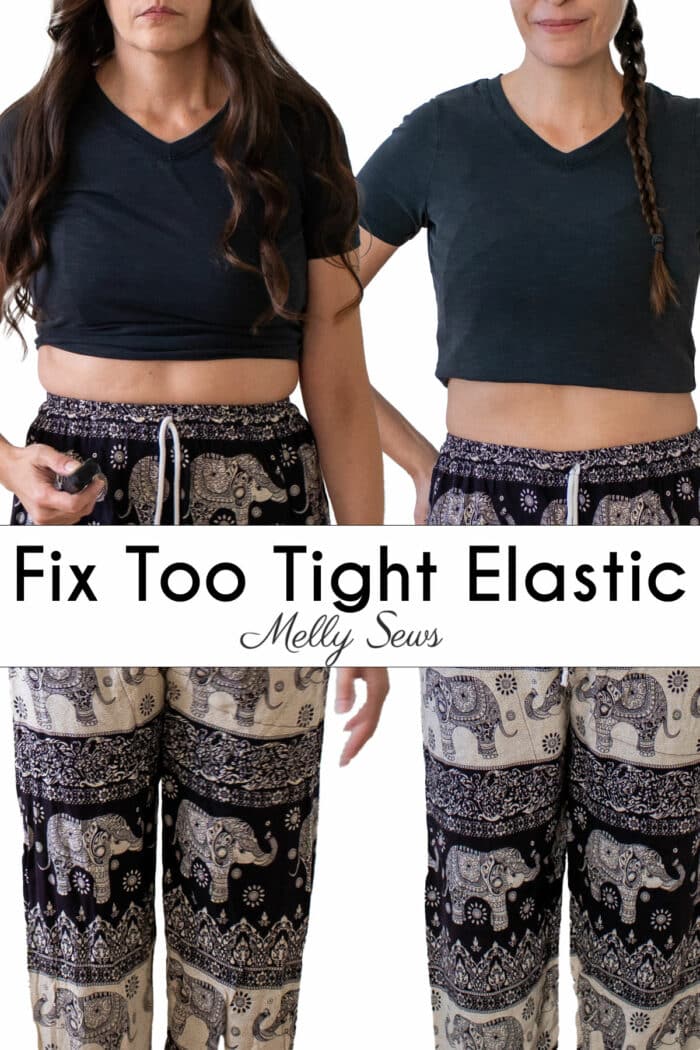
Hey y’all, today I’m going to cover how to loosen too tight elastic. I’ll be showing you how I fixed the too tight waist on my pants in the picture above, but the same technique will work on sleeve cuffs with elastic, ankles on sweatpants, skirts, or anywhere there is elastic sewn into a casing. You can see how the pants don’t pinch my waist anymore after the alteration. So if you’re wondering how do you loosen a tight elastic band, read on.

I picked up these pants at the thrift store. I have a pair of similar elephant pants I bought in Thailand in a tourist market, and they are some of my favorite bottoms. They’re super comfortable, so I grabbed this pair without even trying them on. Oops! After I washed them and put them on I realized my mistake. They fit OK everywhere except the waist, which was uncomfortably tight and cut into my midsection.

You can see the quick version of how I loosened the waistband in the video below, which is also on YouTube here if it you prefer. Or you can scroll below the video for written instructions with pictures to fix this elastic waistband issue.
I want to caution that this post isn’t a quick fix or the easiest way to make a waistband bigger. It will take 30 minutes to a couple hours to do this, depending on how much seam ripping you need to do and whether you’re hand stitching. Lots of posts on the internet recommend using heat like from a hair dryer or the high heat setting on an iron to heat the elastic to a breaking weight and make it stretch out.
While that might work and could allow you to stretch the elastic further, you are actually degrading the elastic when you expose it to a high temperature. (Unless the elastic happens to be cotton, which is generally only used in swimwear.) And that means the quick 5-10 minutes “fix” could come back to bite you when your elastic fails. It could just a matter of time before you feel the degraded elastic pop and your trousers fall down. So this tutorial will show you how to loosen elastic without ruining it – by adding an extension and without needing to visit a tailor.
Supplies to Fix Tight Elastic Waistbands
This post contains affiliate links. As an Amazon Associate I earn from qualifying purchases. All affiliate links are identified with (affiliate link) after the link or a commissions earned statement above the link(s).
Here are the supplies you’ll need to free your waistline (or ankle, or arm, etc.) from strangulation and create a perfect fit:
- Sewing machine or hand sewing needle and thread. I used my sewing machine, but it is possible to hand sew this. It will just take longer. If you’re hand stitching, you’ll likely want to review the whipstitch and backstitch from this post.
- Seam ripper (affiliate link)
- Matching replacement elastic – you may not know what type of elastic you need until you open the casing and pull out the existing elastic. It’s not imperative that you match the elastic type exactly (you can sew a woven elastic to a braided elastic, for example) but you do at least want to match the width. For the garment alteration shown in this post I used 1 inch wide knit elastic.
- A pair of scissors and straight pins. You can also use a safety pin or two if you don’t have straight pins.
Start by Seam Ripping
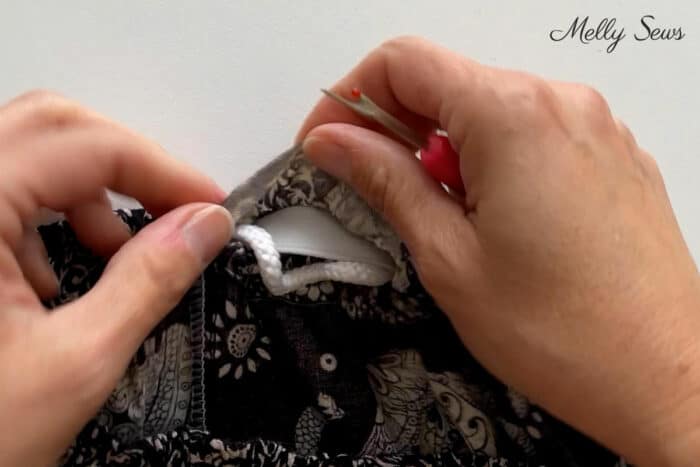
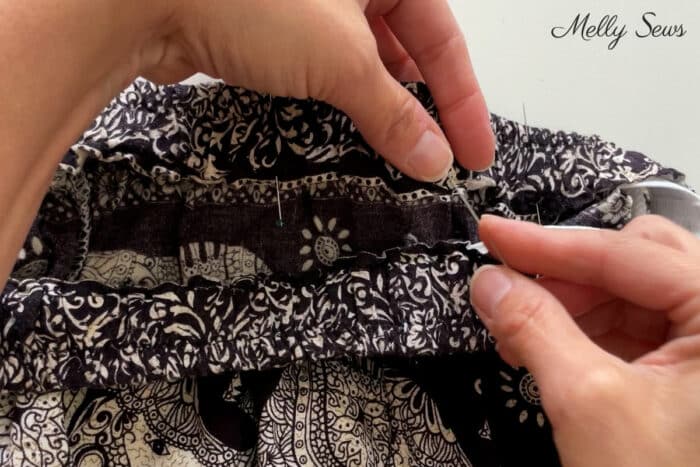
The first step to making your elastic band bigger is to seam rip the casing that surrounds it. If you’re new to using a seam ripper, check out this post on how to use a seam ripper. Be careful to only cut the threads from the stitching and not poke a hole in the fabric or elastic.
These pants had a drawstring waistband like I show how to construct in this post, so I had to remove three lines of stitches. If your casing is more like the one on these pajamas, you’ll only need to seam rip a small slit on the inside of the waistband to be able to pull the elastic out.
Determine How Much Elastic to Add
The next step in this alteration to make an elastic band looser is to add an extension to the elastic.
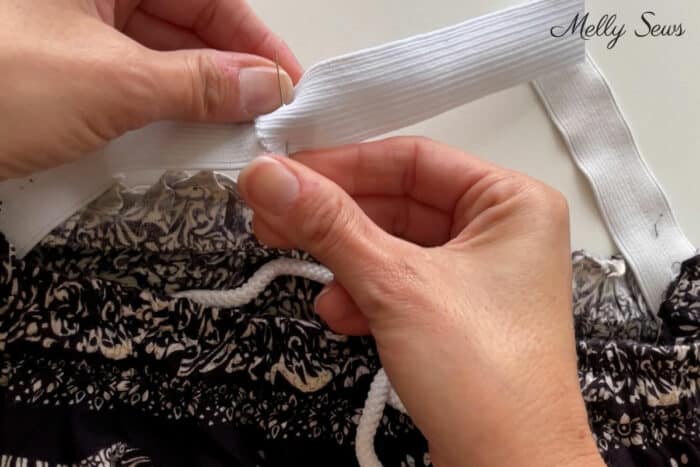
Once you have the elastic exposed, cut it and try the pants on again. Pull the ends of the elastic toward each other and measure the gap between them to determine how much elastic you want to add. Cut a piece of matching elastic to that length plus 1 inch. Pin the new elastic into place, overlapping each end of the elastic by 1/2 in.
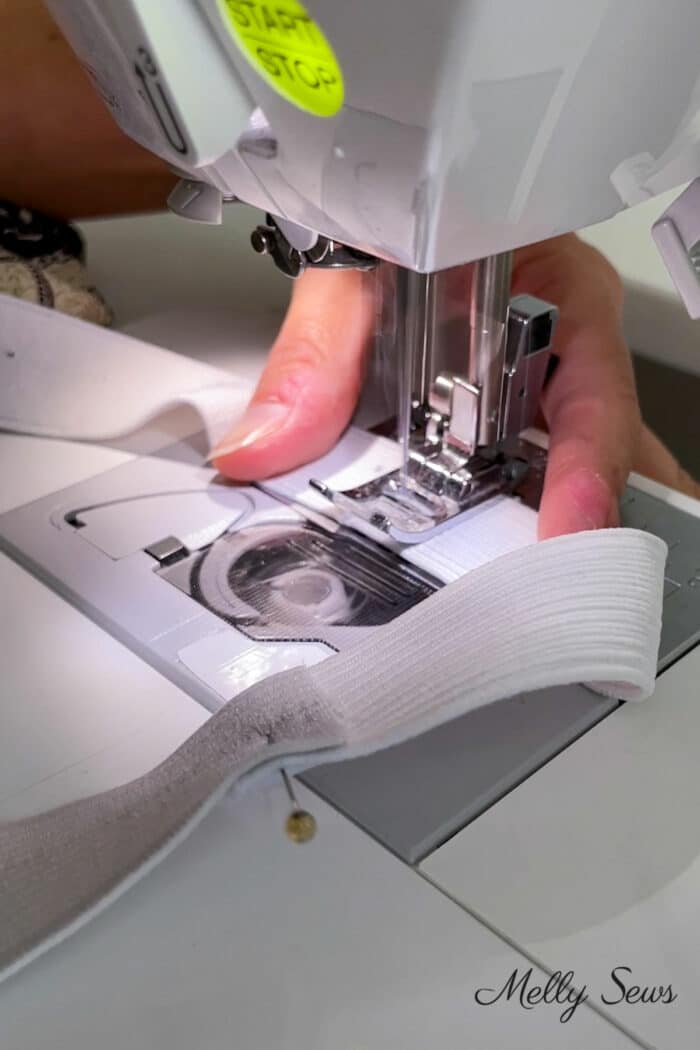
Use a zigzag stitch (or whipstitch if you’re hand sewing) to sew the pieces of elastic together.
Sew the Waistband Closed
The final step to finish your new band is to sew the casing closed. Pin the casing back around the top of your elastic band.
Then stretch the casing flat as you sew it closed. Since I repaired a drawstring waistband, I had to sew around 3 times to enclose the drawstring again. You can see more of that process in the video in this post. If you’re hand sewing, use a backstitch.

Once these pants had the new elastic inserted, they were just as comfy as my older pair!
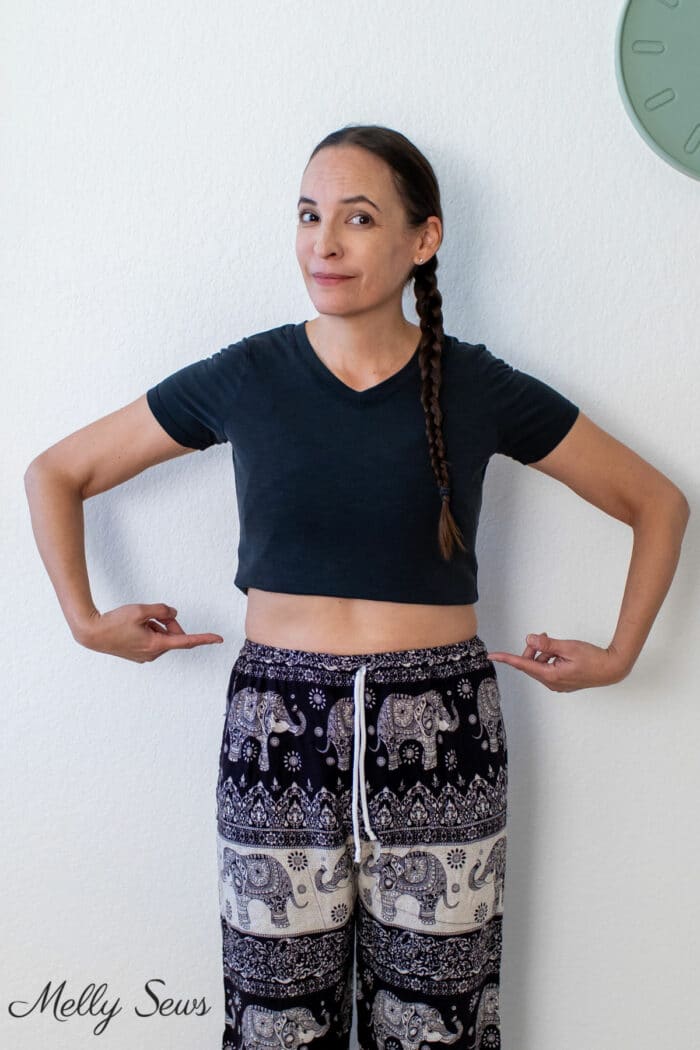
In fact, I added a hat, tucked in my shirt and this was my outfit for the first day of the ACL music festival we went to last month.

Samina
Thanks for this. I’ve got a couple of skirts where the elastic is all worn out & I know the method to fixing them is similar, but I’ve needed a reminder & the motivation to fix them!