• Privacy Policy
  • Meet Melissa
  • Learn to Sew
  • Tutorials
  • Free Patterns
  • Things I Love
  • Subscribe
  • Shop

Melly Sews

A Sewing Blog - Dream. Learn. Make.

Home » Tutorials » How to Sew a Shirt – 20 Minute Tunic Project

How to Sew a Shirt – 20 Minute Tunic Project

December 1, 2015 by Melissa Mora 12 Comments

20 Minute Tunic - Sew this top from any kind of knit fabric in about 20 minutes with this EASY how to sew a shirt tutorial from Melly Sews

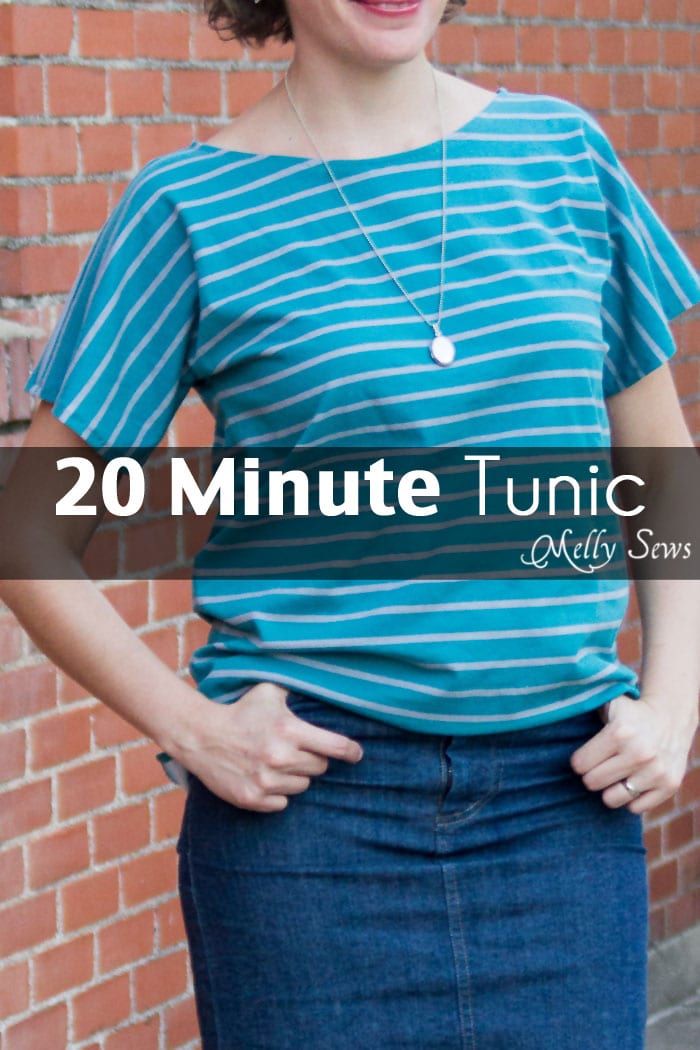
Hey y’all – today I’m sharing this tutorial showing how to sew a shirt – which is SUPER easy and you can make this out of basically any knit fabric at all. PLUS no pattern needed because it all starts with a rectangle, so you can make it in about 20 minutes!

Easy to sew t shirt - 20 Minute Tunic - Sew this top from any kind of knit fabric in about 20 minutes with this EASY how to sew a shirt tutorial from Melly Sews

To make this, you’ll need two pieces of knit fabric that are about 30 inches long and about 40 inches wide.

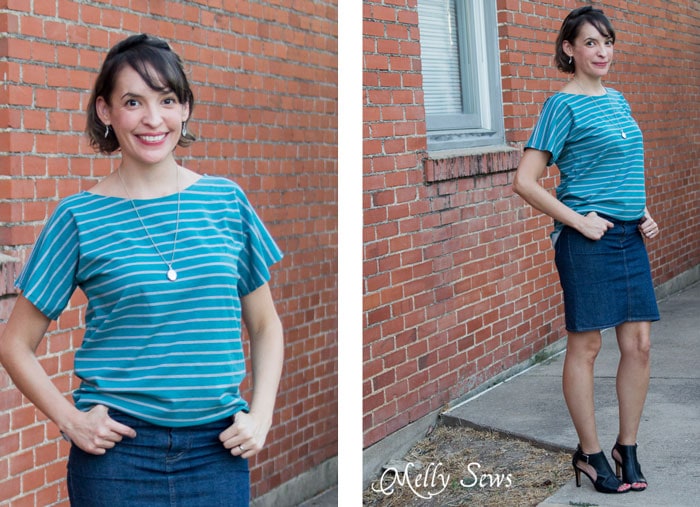
For this tunic I used Riley Blake Knit 1/4 inch stripes in Gray/Teal


Step 1 - Measuring - 20 Minute Tunic - Sew this top from any kind of knit fabric in about 20 minutes with this EASY how to sew a shirt tutorial from Melly Sews

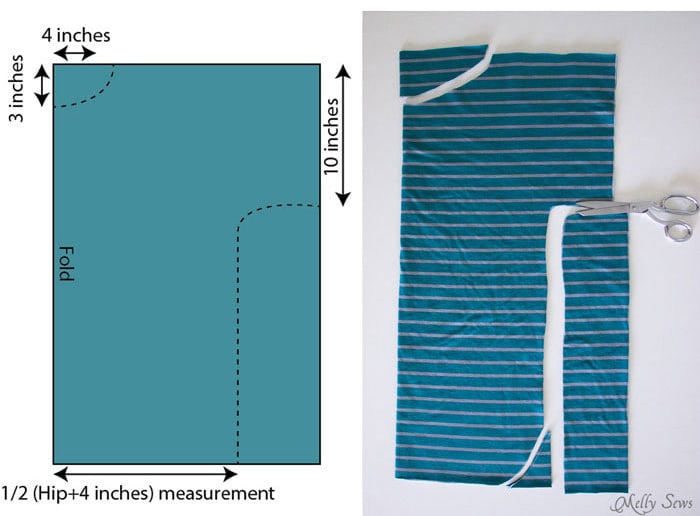
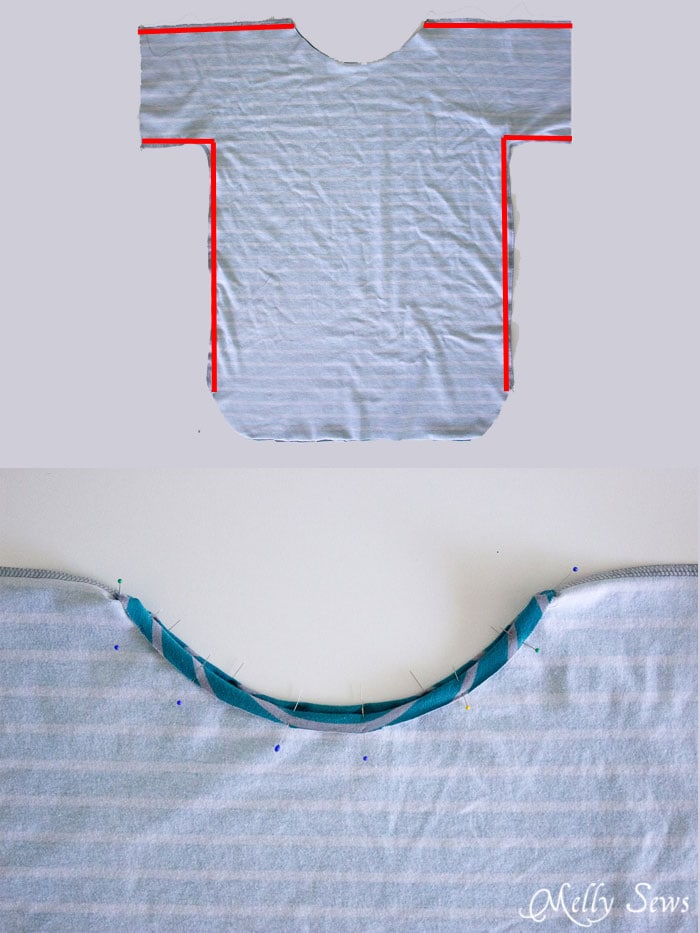
After you have your two rectangular pieces, place them together and fold them in half, matching the short edges. Then you’re going to make cuts as shown above. Make one cut to form the side seam, and one for the neckline. Then, if desired, cut off the bottom corner to round the hem. This cut is optional, if you want a straight hem all around, that works too.

Place the two pieces right sides together. Sew across the shoulders and down the side seams as shown below, using a stretch stitch. New to sewing knits? See this post for all my best tips and tricks for sewing knits. 

Step 2 - 20 Minute Tunic - Sew this top from any kind of knit fabric in about 20 minutes with this EASY how to sew a shirt tutorial from Melly Sews

Since knits don’t unravel like wovens, you can be finished after sewing those seams. Or you can finish the edges by turning them 1/2 inch to the wrong side and stitching to hem.

Step 3 - 20 Minute Tunic - Sew this top from any kind of knit fabric in about 20 minutes with this EASY how to sew a shirt tutorial from Melly Sews

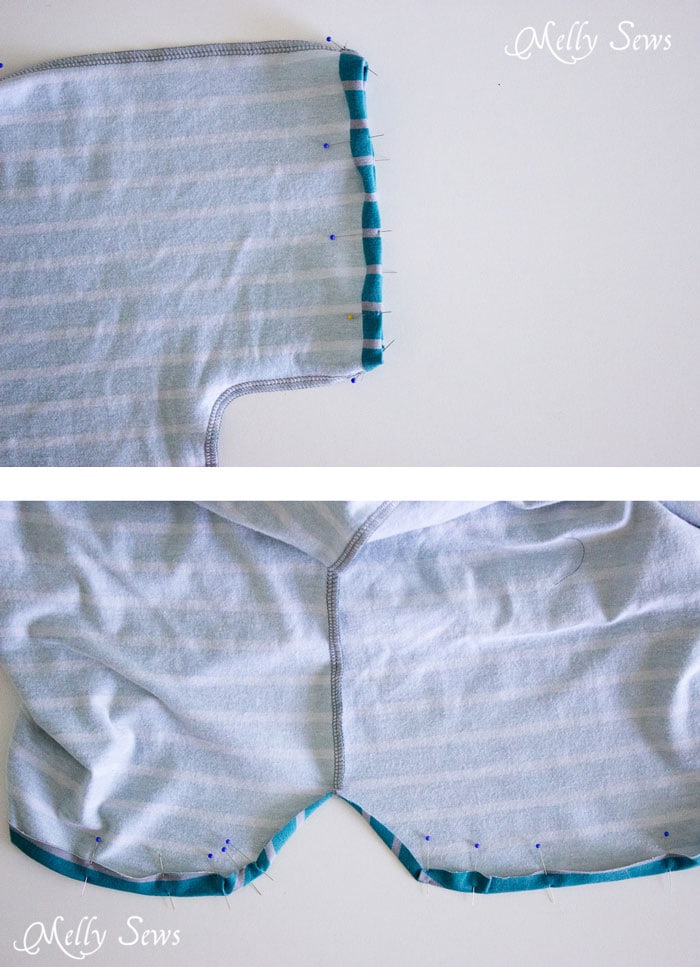
If you cut curved edges, you’ll fold and press them as well, but when you fold around the curves, you’ll have some wrinkles that will end up on the back side. These are okay, and they won’t show on the front side. Hem, using a stretch stitch and you’re done! Sew a t-shirt - Great beginner project - 20 Minute Tunic - Sew this top from any kind of knit fabric in about 20 minutes with this EASY how to sew a shirt tutorial from Melly Sews

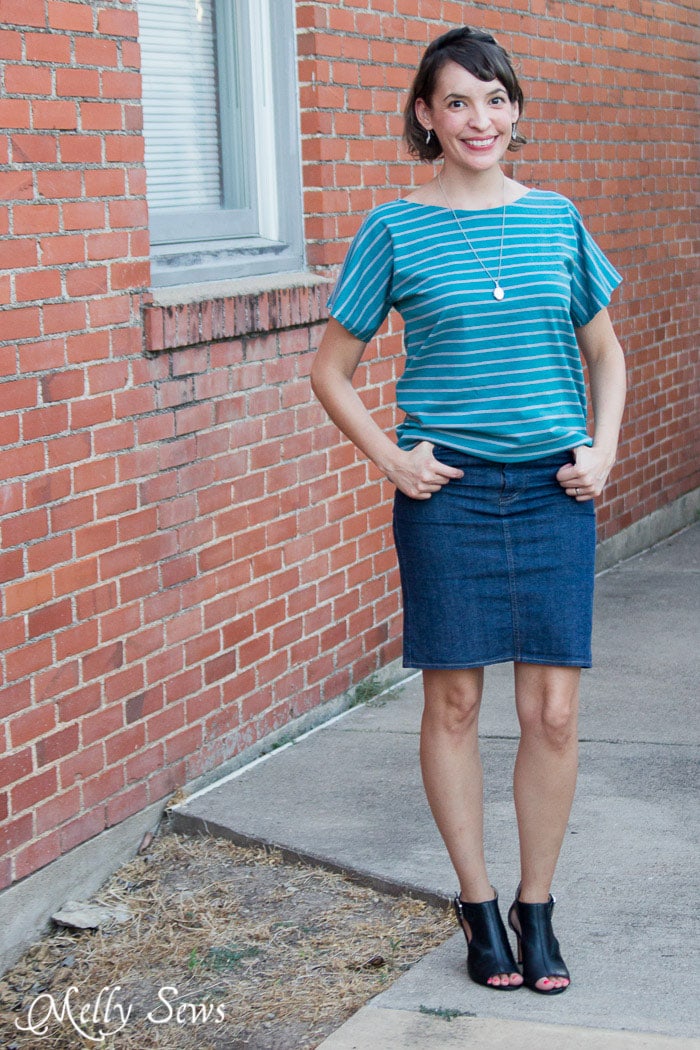
For this look, I added my denim skirt and some heels and half tucked the front of the shirt. When it cools off a little here I think this top will be great over leggings with a belt. And for even colder weather I think it would be cute over a long sleeved fitted t-shirt or turtleneck too.

Super cute! Must Make! - 20 Minute Tunic - Sew this top from any kind of knit fabric in about 20 minutes with this EASY how to sew a shirt tutorial from Melly Sews


Signature-web Get access to my free pattern gallery - sign up for my newsletter!

Filed Under: Tutorials, Women's Sewing Tutorials

Comments

  1. emilia says

    December 1, 2015 at 7:23 pm

    you are such a cutie!! great tutorial! i think i know some folks who could use this!! thanks bunches

    Reply
  2. Dara says

    December 1, 2015 at 9:33 pm

    Thanks SEW MUCH!! I will have to do this! Happy sewing!

    Reply
  3. Pennyp says

    December 2, 2015 at 4:19 pm

    And I thought your wrap skirt was my favorite tutorial…… ((gasp))

    Reply
  4. Julia Miller says

    December 4, 2015 at 11:30 am

    I love this! And the link to your advice about sewing with knits. I find your blog so clear and helpful. Thank you!

    Reply
  5. Deborah says

    December 4, 2015 at 7:52 pm

    great article

    Reply
  6. Ansie says

    December 5, 2015 at 4:19 am

    Love the boat neck line! Great sewing!
    Thank you.

    Reply
  7. Val says

    December 6, 2015 at 7:06 am

    Love this Thank you.

    Reply
  8. Rose Estigoy says

    December 14, 2015 at 9:08 am

    Would it work to make it wider and have longer sleeves?

    Reply
    • Melissa Mora says

      December 15, 2015 at 11:56 am

      I haven’t tried that, if you do, let me know how it goes!

      Reply
  9. Laura Kee says

    January 5, 2016 at 2:17 pm

    Is it supposed to be 1.5 x hip measurement for each rectangle, or is that the total width of both rectangles? It sounds like you are saying each rectangle should be that wide, but that just doesn’t make sense to me. The hip measurement is all the way around the widest part of your hips, right? If I take my hip measurement and multiply by 1.5, I get 60 inches. But, 2 rectangles that are each 60 inches wide will give me a shirt that is 120 inches around. Even subtracting seam allowances and the small part to make it have sleeves, that doesn’t seem right. Am I misunderstanding something? Thanks! I really do love your blog and tutorials, I’m just confused this time. 🙂

    Reply
    • Melissa Mora says

      January 5, 2016 at 2:28 pm

      Nope, math is correct for the tunic that is shown. For larger sized hips, so you don’t end up with longer sleeves and a lot of fabric to cut off, you might want to go with 2x the shoulder to shoulder measurement as your width as long as that width is at least 8 inches more than 1/2 your hip. If you’re very pear shaped, you might want to go with a more trapezoid shape, 2x shoulder width at top and 1/2 hip plus 8 inches at bottom.

      Reply
      • Vickey Gerrish says

        February 18, 2017 at 6:59 am

        Thanks for the great tutorial –just one question….in your diagram you have indicated a 4 inch X 3 inch cutout for neck opening, but no inch measurement as to how much to cut on the sides for the sleeve formation…or did I miss it?

        Reply

Share Your Thoughts: Cancel reply

Your email address will not be published. Required fields are marked *

My Shop

Blank Slate Patterns - Sew Your Story
  • Facebook
  • Instagram
  • Pinterest
  • Twitter
  • YouTube
Learn to Sew with a free online course from Melly Sews

2011-2019, Melissa Mora. This is my original work unless otherwise indicated. If you are writing a round up and want to use a photograph from this blog, you may use only one photo, do not remove the watermark, provide a clear and easily seen link back to the post near the image and give clear and easily seen photo credit. Photos of children on this blog may not be used without permission. Other uses of any content or designs by permission only. Patterns/tutorials are for personal use only. As an Amazon Associate I earn from qualifying purchases through my affiliate links.

This blog accepts paid advertising, products for review, and uses affiliate links, but all opinions are my own. The blog owner is not responsible for the republishing of the content found on this blog on other Web sites or media, with or without permission. Amazon Affiliate Disclosure: Melissa Mora is a participant in the Amazon Services LLC Associates Program, an affiliate advertising program designed to provide a means for sites to earn advertising fees by advertising and linking to Amazon.com
All content provided on this blog is for informational purposes only. The owner of this blog makes no representations as to the accuracy or completeness of any information on this site or found by following any link on this site. The owner will not be liable for any errors or omissions in this information nor for the availability of this information. The owner will not be liable for any losses, injuries, or damages from the display or use of this information.

Copyright © 2019 · Magazine Pro Theme on Genesis Framework · WordPress · Log in