
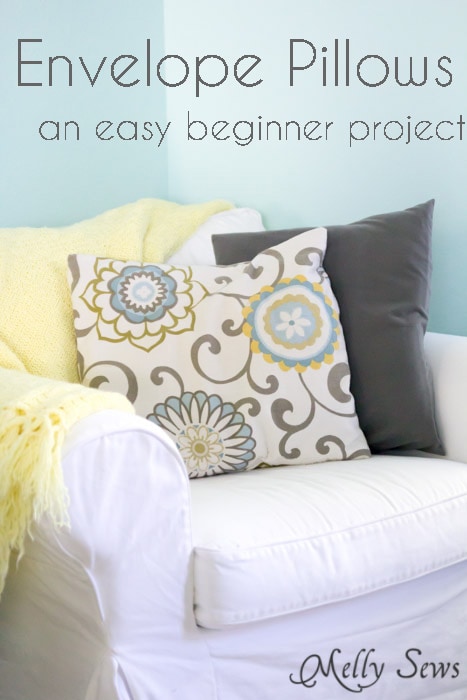
Hey y’all – today’s tutorial is how to sew envelope pillow covers, which are among the easiest super easy beginner sewing projects! And even if you don’t need to learn to sew this project fits into this month’s “Back to Basics” theme as a fun and quick way to brighten up a room.
Sometimes you just need the satisfaction of a quick sew, and these totally fit the bill with one piece of fabric and 2 seams! Bean (my 4 year old) actually did most of the sewing on the gray pillow in the picture above – he thought using the sewing machine was a lot of fun.
OK, so to make your own you’ll need:
- A pillow or pillow form
- Fabric. Your fabric should be the same height as your pillow plus 1 inch, and twice as long as your pillow plus 8 inches.
- Sewing machine and sewing tools
I’ve made video instructions as well as picture instructions, so whichever way you learn best, you’re covered! Watch the video below, or if it won’t play for some reason you can watch how to sew envelope pillows on YouTube here. Or keep scrolling for the written instructions.
Start by cutting your fabric. Your fabric should be the same height as your pillow plus 1 inch, and twice as long as your pillow plus 8 inches. For my 18″ pillow, I cut a piece of fabric 44″ long and 19″ tall.
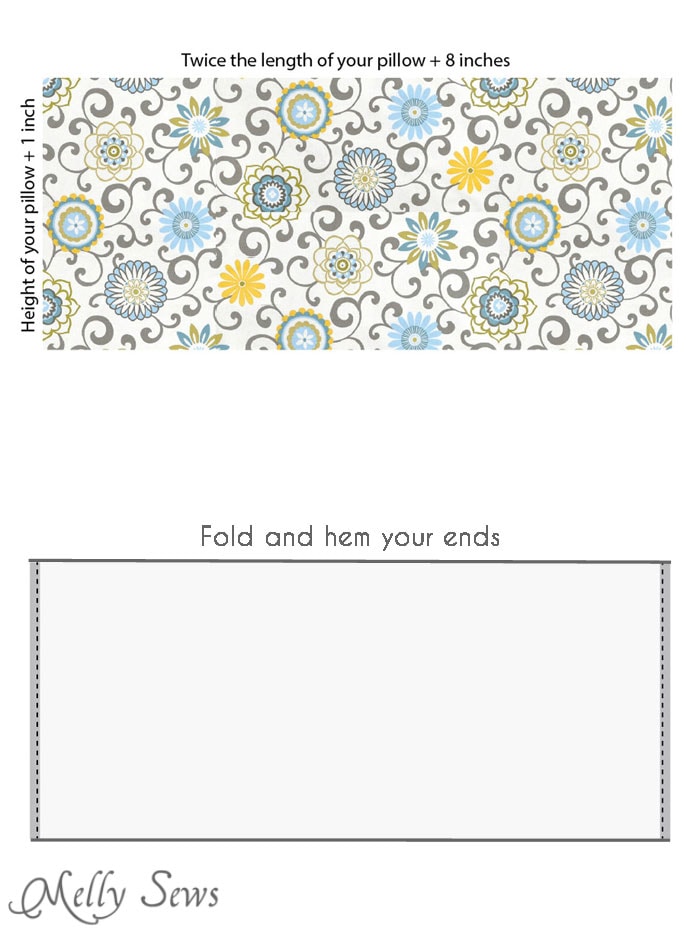
Fold the short ends of the fabric 1/2″ to the wrong side and press, then fold them again 1/2″ to the wrong side and press again. Stitch, forming hems.
Lay the fabric right side up. Fold the fabric from the left right sides together, overlapping the center of the fabric by 3″.
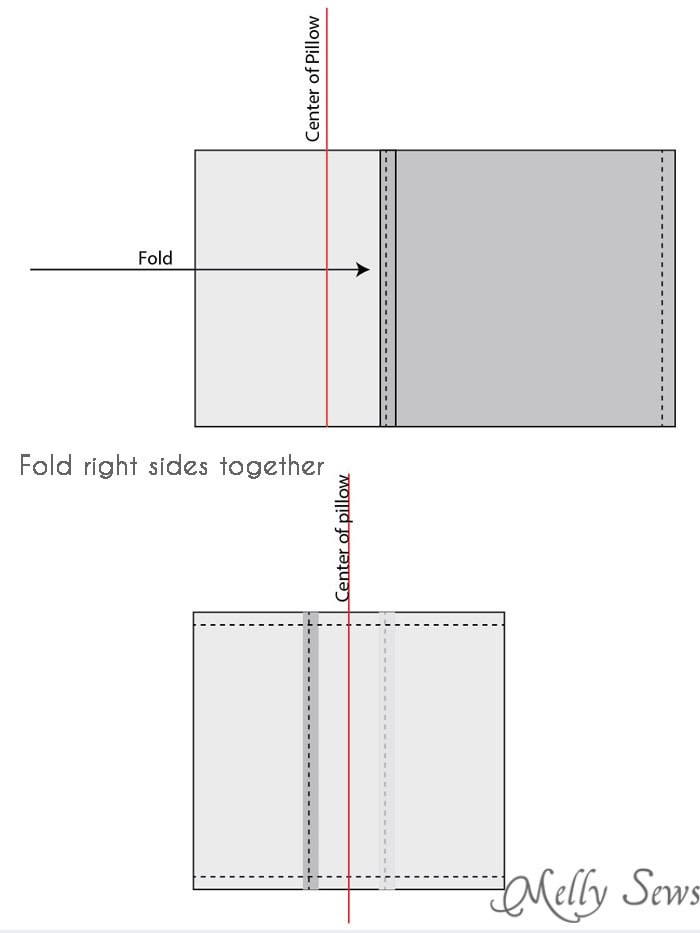
Repeat with the fabric on the right, overlapping the center by 3 inches. This will form the envelope opening. Stitch along the top and the bottom.
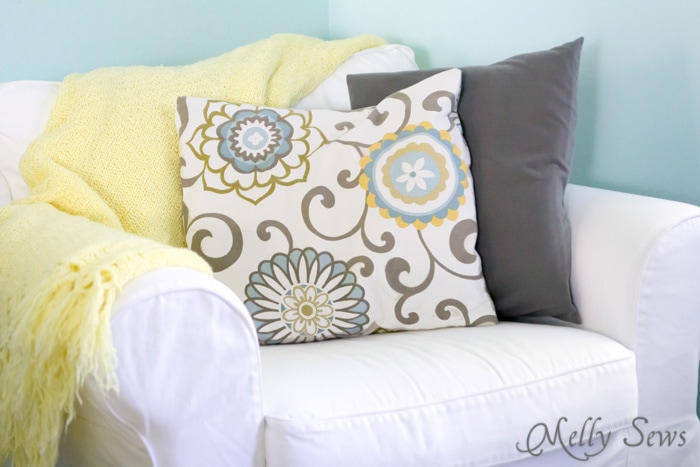
Turn the pillow cover right side out and stuff with your pillow or pillow form. And if this is your first project, give yourself a high five, because you are D O N E!
Diane
This is a great way to brighten up our well used living space. I will be using this when springs comes around. Thx!
Clare K. R. Miller
Hmm… I’d like to make this, but apparently I forgot about something important in sewing! Will it just look awful if not pressed? I don’t have an iron, and I don’t want to buy one, since I’m getting married in a few months and it’s on the registry.
Trenna Larson
Enjoyed the video plus the written instructions. Makes it easier to understand all steps. Thanks!
Linda
Love this site finally someone who cares about teaches and helping others without cost
Char
Thank you so much. It would be nice if all tutorials were this easy to follow. Thanks for helping people like me that needs a step by step to learn from.
sewing nut
I’m not a beginner, but for some reason my chronic lack of spatial awareness means I have to look this up every single time. I even managed to use it for a pillow but get the pocket top to bottom (along the long side) ! A quick addition of a couple of poppers sorted that out. Thanks for posting this – even if it takes me more than once to get it right – next time……! LOL
Vanessa
I made it! I used three different fabrics and put the whole thing together, but your tutorial was great! I LOVE my new cushion cover: http://leatherandabel.com/sewing-a-cushion-cover/
Thank you so much 🙂
Luana
Thank you, Melissa! I appreciate your clear instructions♥
Surose312
I love this pattern! I’ve made two already and since they’re so simple I’m making several more and making them seasonal!
April
Great, simple breakdown! I need to make some of these with sturdy upholstery material bc my hubs keeps pilling my pretty throw pillows on our couch with his head scruff when falls asleep on them. (I didn’t know that was a thing until he started shaving his head – so not just the face. The entire thing. Poor guy! And poor pillows!)
Pamela Hardwick
Thank you Melissa’s! Your video is great! The printed instructions very helpful it keeps me from going back to the video because of memory problems.
Amber
Great tutorial! Can you tell me What the name of the patterned fabric is that you used? I love this pattern!
Melissa Mora
It’s a Waverley print that’s out of print.
Marty
This is great way to make holiday or seasonal covers that I can rotate on my pillows! The remnant fabric bin often has large enough.
Lisa
I love your lessons and tutorials, they are so easy and straight forward, but I noticed you never say when to back stitch to lock it so as not to come undone. Most other sites say this, is needed as much as they say? Or just a given that people know to do this?
Thank you
Melissa Mora
I don’t back stitch if it’s going to be crossed by another line of stitching because it generally isn’t necessary then. Also my machine pulls threads to one side to secure them when it cuts the threads.
NR
Nice! These are easy to read and follow instructions.
Patty Fountain
Hello, I just made my first cushion and just wanted to thank you for the knowledge. It came out lovely.
Stephanie
Thank you so much for providing this video. I purchased some beautiful fabric YEARS ago and I was always too intimated to try to make anything with it. I am so happy I found your site.