
Hey y’all – today I’m going to share the easiest way to get better blog photos – the camera settings for shooting in manual. And I PROMISE this isn’t scary or hard AT.ALL. Plus it’s easy and fast.
I feel fortunate to live in such an interesting time that I’ve gotten to see the crossover from tangible to digital technologies, because I think you learn a lot from each one. For example, the lessons of the dark room from high school developing film made a lot of the photography concepts that are more abstract in digital photography (ISO, for example) more concrete. Nothing teaches you about exposure like ruining a whole roll of film by accidentally exposing it while loading your camera. But the low cost of digital photography by comparison makes it easier to experiment, and that’s a big plus too. So hopefully (though keep in mind I am NOT a pro photographer) my experience with both can help you.
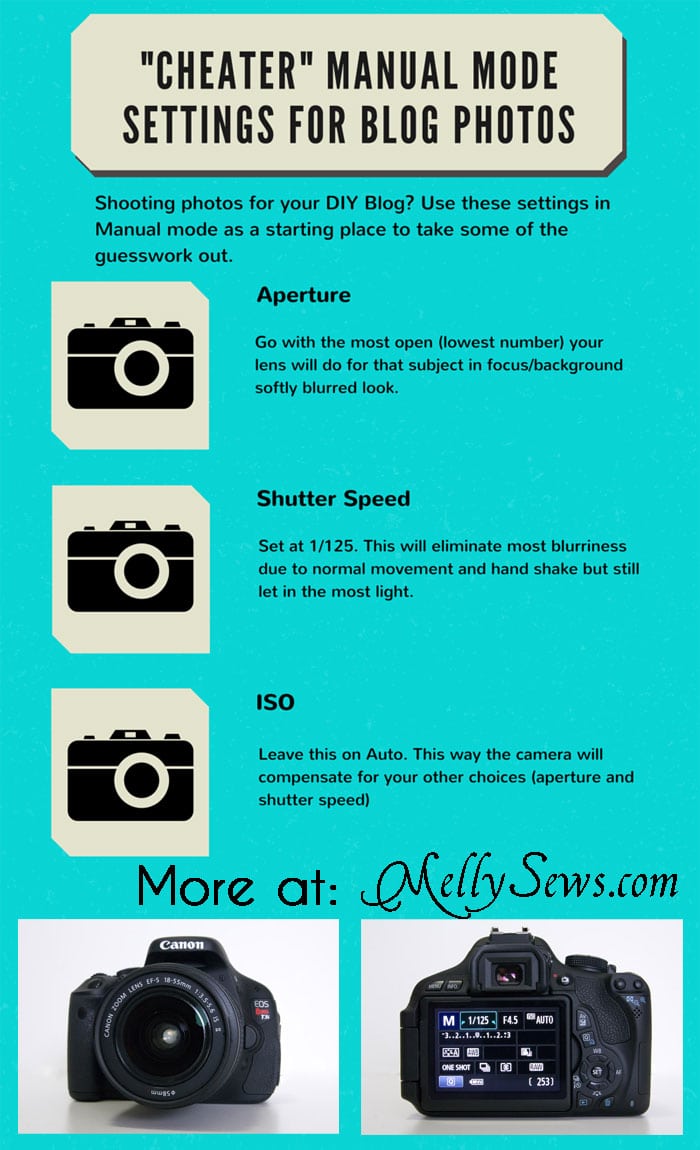
Cheater Manual Settings for Bloggers in 3 Easy Steps
- Put your camera in manual mode. Choose your aperture or F-stop. Generally, for a blog photo, you’ll want the most open (lowest number) aperture your lens will allow.
- Set your shutter speed at 1/125.
- Set your ISO to Auto.
That’s it! We’ll talk about the whys and wherefores and subtleties below, but I promise if you don’t know much about your DSLR or you’re often frustrated by how your blog photos look, following these three tips will lead to almost instant improvements.
If you want more information about what aperture and shutter speed do, this is a good explanation. ISO refers to light sensitivity, but it’s also important to note that as ISO goes up, photo grain or noise does as well.
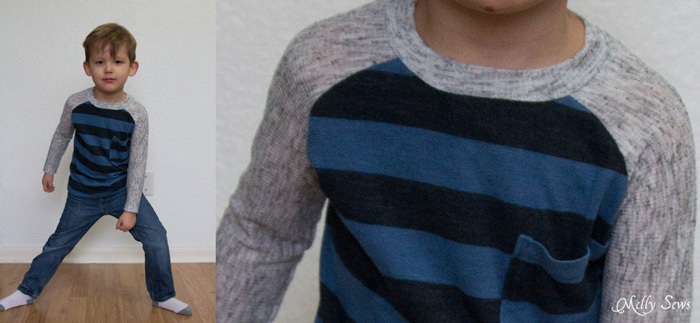
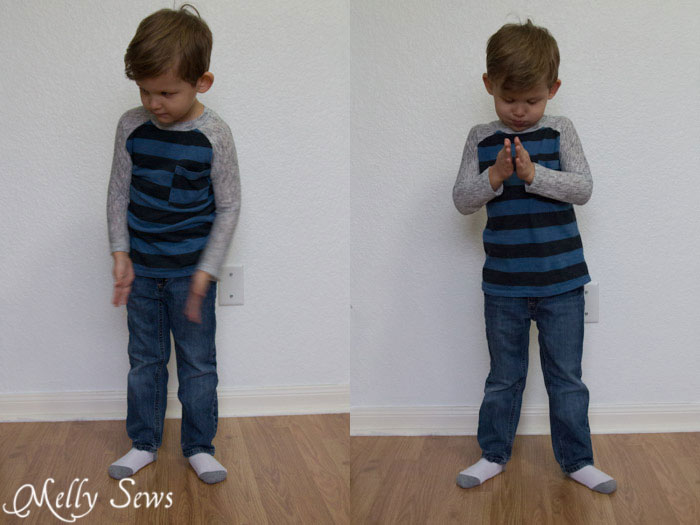
Now the why. If you shoot with your camera in auto mode, your camera uses it’s own formula for determining your settings. For example, check the images below. By the way, these images are straight out of camera; I haven’t edited them except to resize. Also, these were shot indoors in a room with one window on an overcast day. Since Bean was standing still for the first shot, you probably can’t see the difference in sharpness from the full length photo, so I’ve included close ups from the same images so you can hopefully see how my settings are sharper than the camera’s.
Camera’s auto settings below, top row (ISO 400, F 2.8, Shutter 1/40)
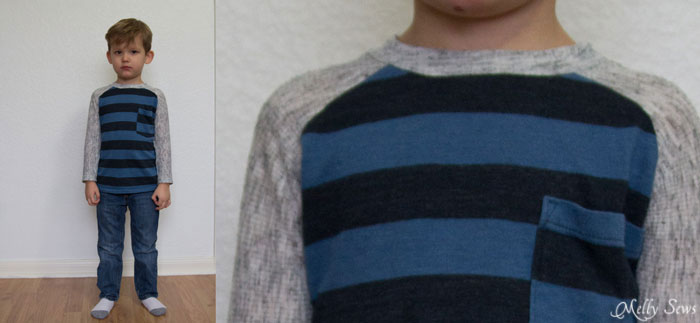
My cheater manual mode settings above, bottom row (F 2.8, Shutter 1/125, ISO Auto, which camera set at 1250)
Generally you’ll find that your camera auto exposure defaults to a lower ISO and slower shutter speed than the cheater settings. So why should you use these cheater settings I suggest?
Aperture – setting to a more open aperture lets in the most amount of light (so you can shoot indoors) and also gives you that subject in focus/background out of focus look that is popular on most blog photos.
Shutter speed – setting to 1/125 is a fast enough speed to eliminate most blur from hand shaking when you’re doing handheld shots (and even if you think you have very steady hands, a teensy bit of shaking is pretty much inevitable when pressing the shutter release button), and also fast enough for all but fast moving subjects.
ISO – this is where the cheater part comes in. If you leave this on Auto, you are effectively letting the camera compensate for your other choices. Though the camera’s own formulas tend to choose lower ISOs on full Auto because of the grain/noise issue, grain and noise are not nearly as important when you’re shooting blog photos that they would be if you were going to print portraits.
Now of course, if we all had studio lights or perfect outdoor light all the time, we would all tend toward the lowest ISO we could use. And that’s why your camera is programmed that way. But again, especially for blog photos without access to that perfect lighting, graininess can be reduced in editing, but there’s not much you can do for blurry photos from slow shutter speeds.
In addition I feel the need to point out that normally, instead of using these photos straight out of camera, I would edit them and brighten a bit using Lightroom. Also I generally would not shoot in this low light, but I was trying to make a point that it could be done.
When/How to Deviate from these Settings
- If you are shooting outside in a brightly lit area, you run the risk of overexposure. Take a test shot to make sure this isn’t the case. If your shot is overexposed, adjust your shutter speed to faster settings until your shot isn’t overexposed.
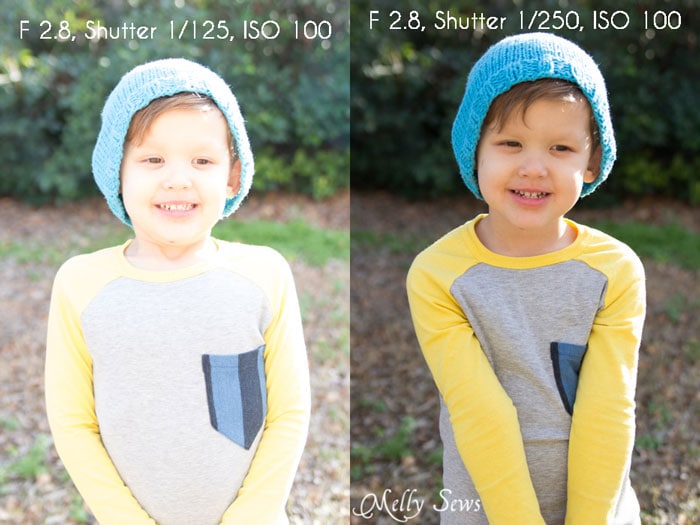
- If your subject is moving fast (ex, kids who won’t stand still). Compare the two photos below – in one I used my standard “cheater” settings and you can see his clapping hands are blurred, in the other I upped the shutter speed to 1/200 and the motion doesn’t cause as much blur. The camera compensated by setting my ISO higher when I changed the shutter speed.
- If you need deeper focus. In the photo of my camera body, I wanted the whole camera to be in focus, but I had to go to F-stop 13 before I could get a semblance of that. (See pictures below)
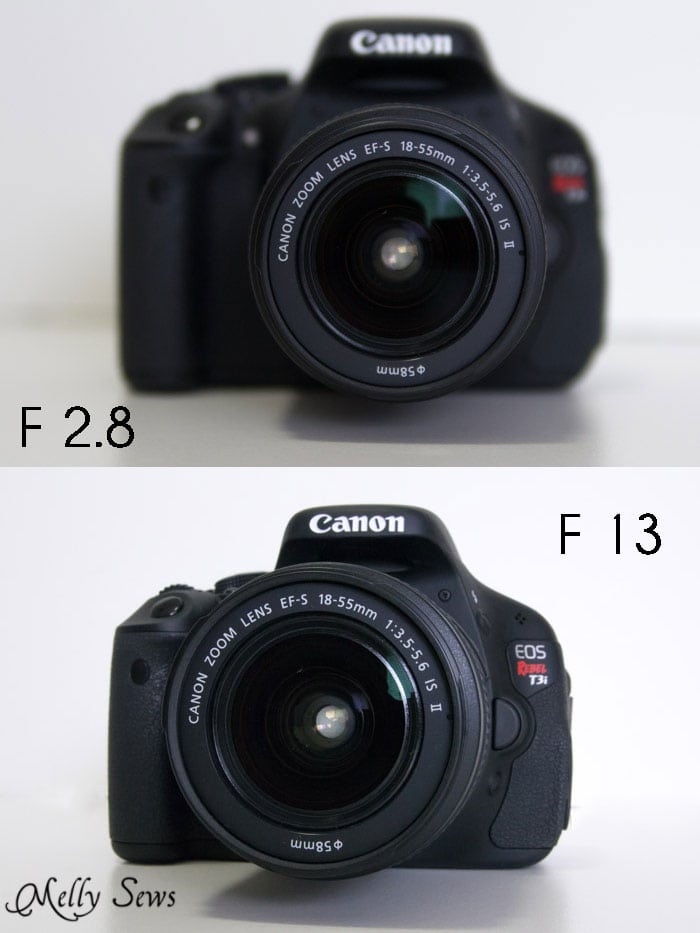 This meant I had to take my shutter speed all the way down to 1/15 because there wasn’t enough light in the room at that aperture. And because I was using such a slow shutter speed, I also had to put the camera on a tripod so that it wouldn’t blur the photo from my hand shaking (even if you have what you consider steady hands, a small amount of shake is inevitable when shooting handheld).
 - If your subject is still underexposed even at the highest ISO. In this case it’s probably best to take the photos at a different time when you can get more light. But if that simply isn’t an option, and you’re already at the most open (lowest number) aperture your lens will shoot with, then your only other choice is to reduce shutter speed. If you do this, though, I highly recommend using a tripod and having your subject be as still as possible to minimize blur that comes with lower shutter speeds.
Now, there are tons of articles out there about the relationship between aperture, shutter speed, ISO etc in photography and how to manipulate the three and how they have to move in conjunction with each other, etc, but I’m assuming that readers of an article with the words “Easy” and “Cheater” in the headings aren’t interested in those articles yet. And that when you are, you’ll google them 🙂 So use these cheater settings and happy photographing!
Colleen Gray
How did you know I was trying my hand at photographing for my etsy today??!! Thanks SO much, I applied all of your tips and my entire experience was so much less stressful and way more successful!!
Victoria Peat
Argh…..I just can’t get this in my head….total mental block. I have been reading up lots over the past few days and your post is so helpful. I shall try with the ‘cheat’ settings and practice practice from there! Thank you 🙂
Emilia
totally going to try this!!! my camera is badass, but I’m such a NOOOOOB
Sara Rodriguez
Hola! Siempre tengo mi cámara en “auto” por no saber utilizarla. Desde ahora pondré en práctica sus consejos. Son muy claros y útiles. Estoy segura que van a mejorar las fotos de mi blog 🙂 Muchas gracias!!
Sol
Very useful thank you, for those, like me, who do not see the diffence between aperture, shutter speed, ISO etc.. and the dependance among those concepts.
Thank you again.