
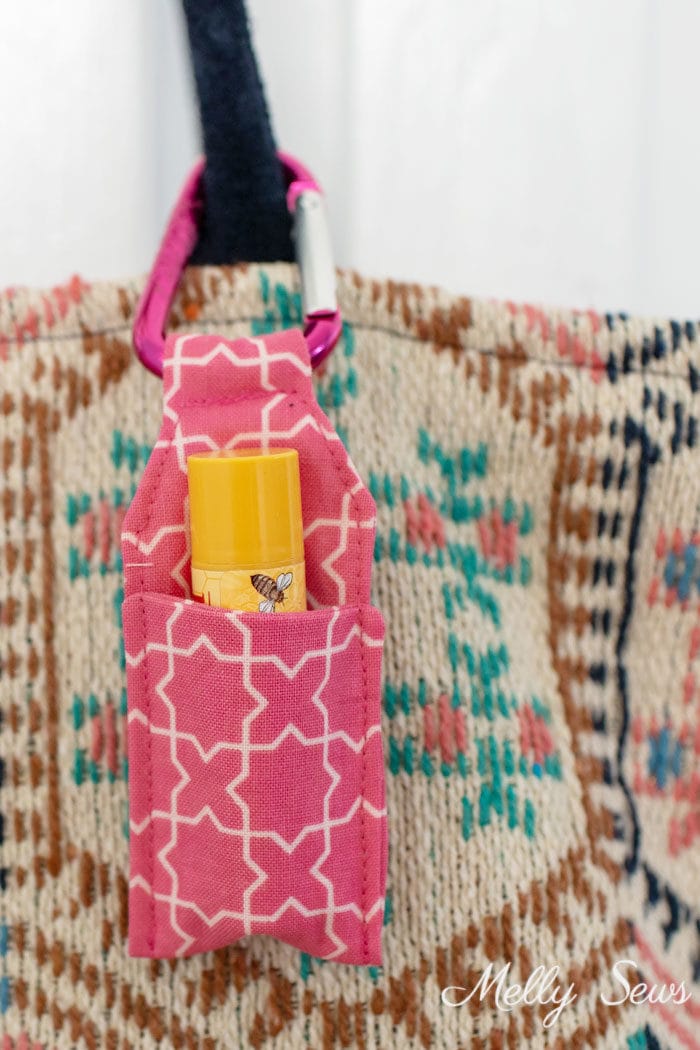
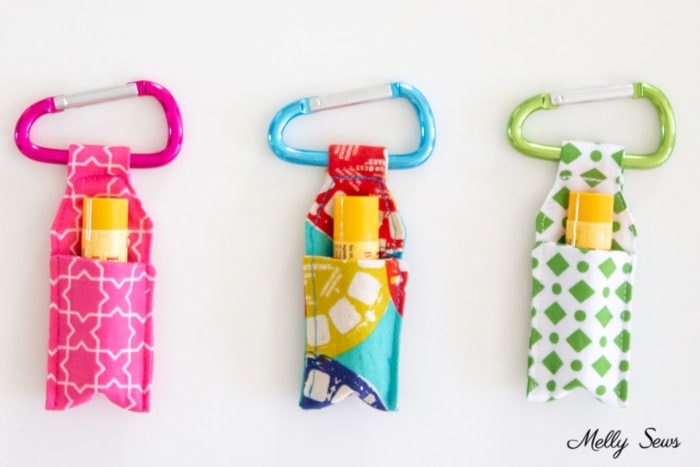
Use scraps to make these chapstick holders with a free pattern – a sewing project great for gifting!

Hey y’all, it’s almost Christmas and if you’re like me you need a few last minute gifts. So today I’m sharing a chapstick holder, an easy gift to sew that takes minutes to make with just a scrap of fabric. These are great to stick on a bag, belt loop or with your keys, and make a great gift to sew for neighbors, teachers – really anyone with lips!
These little holders take just a bit of fabric, and they’re super easy to sew in an assembly line fashion so that you can make a bunch in a short time. They’d be great to sew to sell at craft shows too, especially if you set up next to someone selling lip balms.
How to Get the Pattern
To get this pattern, you must either be a free newsletter subscriber or have purchased a gallery access pass. Then click your preferred option from the buttons below. Existing newsletter subscribers should look at the bottom of the most recent Friday newsletter for the current free pattern gallery password. If you purchased the all access pass you’ll log in to your shop account to download the pattern. Note that the free version of the pattern does not have printable instructions so you’ll need to refer to this post for instructions.
 |  |  |
Please note that all my free patterns are licensed for personal use only (no selling items made from this unless you purchase it) and by downloading you are agreeing to this license.
How to Sew a Chapstick Holder
Then watch the video below to see how to assemble it. Or you can also watch on YouTube here if the video below won’t load for some reason.
Time needed: 10 minutes
How to make a key ring chapstick holder
- Cut fabric
Use the pattern to cut out 2 pieces of fabric. If your fabric is lightweight (like quilting cotton), you may want to add lightweight interfacing to the wrong sides.
- Stitch
Place fabric right sides together and stitch, using a 1/4 inch seam and leaving a 1 inch gap on one long side.
- Turn
Clip into inside corners and across outside corners, then turn project right side out.
- Press
Use an iron to press the project flat and press the raw edges of the gap to the inside.
- Topstitch
Fold down the top tab to create the key ring loop. Fold the bottom up two inches to create the holder. Topstitch starting at the bottom corner, up one side, across the key ring tab bottom (you may want to backstitch across the tab too to reinforce) and down the other side.
- Insert key ring
Insert a carabiner or key ring in the loop and you’re done!
Ingrid KV Hardy
Brilliant idea, thanks for this! And happy Christmas!
Yvonne
I love your projects and instructions. You are awesome!
Karen Sullivan
What a great idea! My girls and I are always looking for our chapstick! Making some today!
Sue R.
Made a few of these for granddaughters…cute, cute! Thanks.
Janet Neidholt
That is so so cute!! thank you sew much!! I’ll be making these and showing them off to my sewing circle on Friday ….which is at my Mother-in-laws every Friday! And I’ll take enough supplies so everyone who comes can make one if they want!! We have a TEEA group (Texas Extension Education Assoc.) which meets once a month, so I’ll be showing these off there as well. Thank you so so much.
Sandra Gowin
THIS is my favorite chapstick holder! I couldn’t believe how easy it is to make. Your instructions are great. Thank you for sharing THIS with everyone.
Susan
So cute. I initially thought the pattern said ” chop stick holders” my brain started to think of all sorts of gifts to go with chop sticks.. a wok, cookbook, tea.
Lol.
CHAPSTICK holder much more practical and useful!
Suzanne
Yes, great idea for using scraps. I made some of these last year with grosgrain ribbon, and gave them as gifts inside zipper pouches ala Mellysews. 😀