
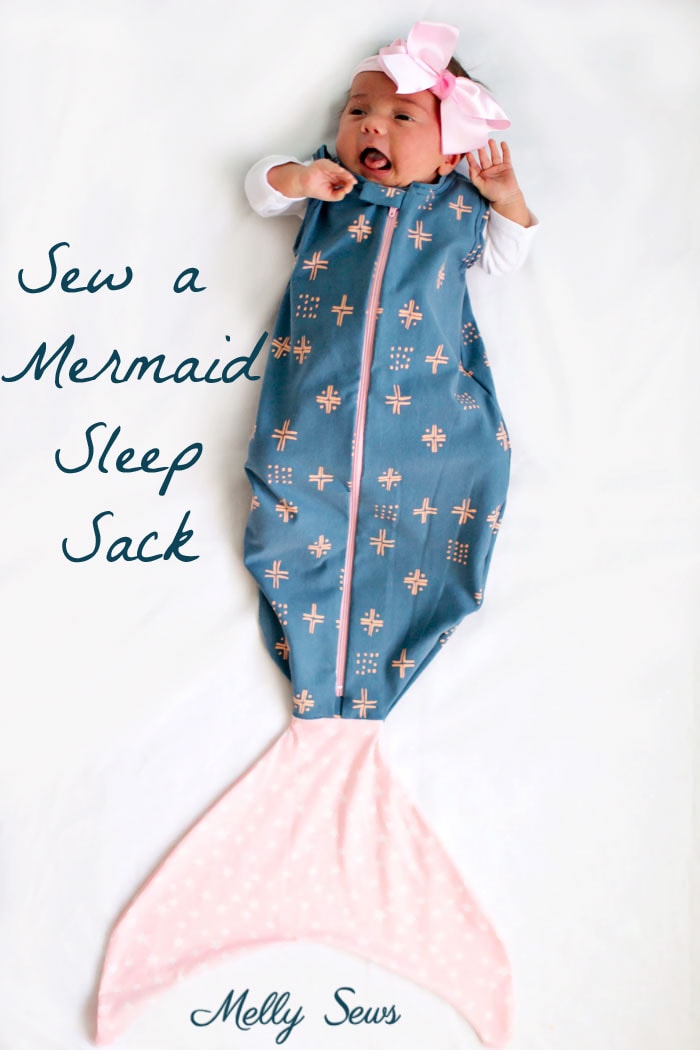
Hey y’all – today I’ve got a fun post – how to sew a mermaid sleep sack! Ever since I found out that my sister-in-law was expecting a girl, I’ve been planning things I wanted to sew for the new baby in our family, and this was at the top of my list.

I even designed specific fabric for this sweet girl, incorporating some of my watercolor paintings so that she would have her very own auntie made blanket from start to finish.

Want to make your own? You’ll need:
- 1 yard of knit for the main fabric. For the blue one, I used this Art Gallery knit (affiliate link). For the floral one, I designed my own fabric and got it printed here at My Fabric Designs on their organic interlock.
- 1/2 yard of the contrast fabric for the tail; I used fabric from my stash for those
- Scraps of fusible interfacing
- A 22 inch zipper
- A sew on snap
- The pattern (see below)
IMPORTANT: Before making, using or gifting any infant sleep or clothing item (including the one pictured in this post), check that it is compliant with CPSC standards to make sure your item is safe. This tutorial and pattern is for informational purposes only to create an item to be used as a photography prop under close supervision.
How to Get the Free Mermaid Sleep SackPattern
To get this pattern, you must either be a free newsletter subscriber or have purchased a gallery access pass. Then click your preferred option from the buttons below. Existing newsletter subscribers should look at the bottom of the most recent Friday newsletter for the current free pattern gallery password. If you purchased the all access pass you’ll log in to your shop account to download the pattern. Note that the free version of the pattern does not have printable instructions so you’ll need to refer to this post for instructions.
 |  |  |
Please note that all my free patterns are licensed for personal use only (no selling items made from this without a limited production license) and by downloading you are agreeing to this license.
Ready to sew? I’ve got the video of how to put this together below, or if it won’t load for some reason, you can also watch it on YouTube here. For written instructions, scroll below the video.
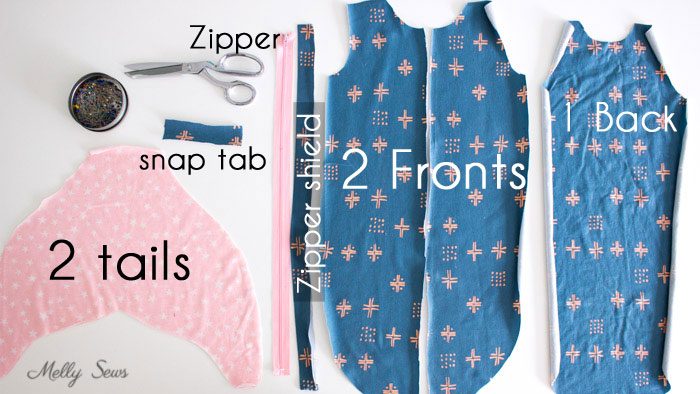
First, cut all your pieces out. If you need to shorten your zipper, you can do that like this. I also recommend sealing the cut end of the zipper by holding it near a flame to melt the fibers slightly. I also cut off the extra at the top of the zipper and sealed it the same way to prevent fraying.
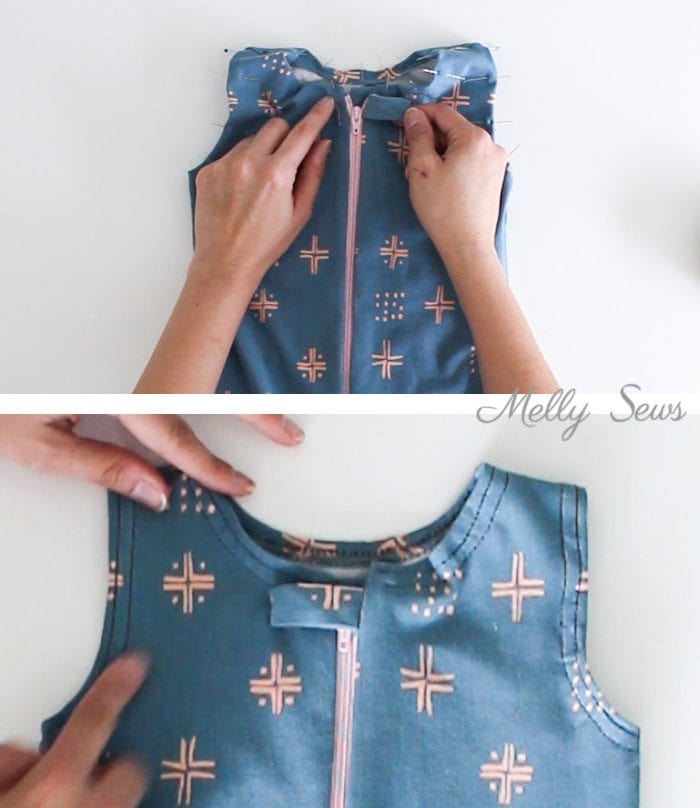
Fold the snap tab in half, and sew the long edges with a 1/4 inch seam allowance. Add a scrap of fusible interfacing to the tab to reinforce it, then turn right side out. Fold the zipper shield in half, right sides together, matching long edges, and sew across one short edge.
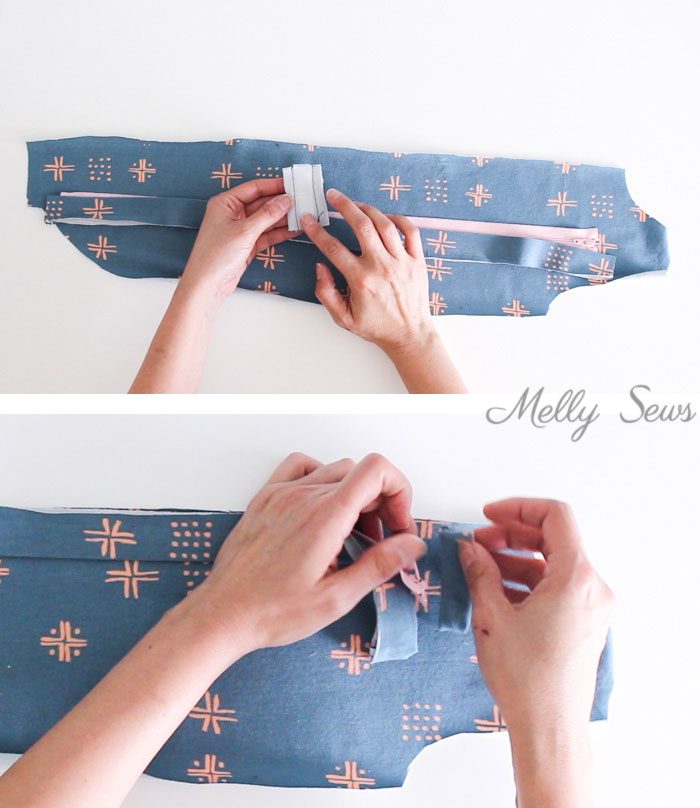
Place the zipper right sides together with the left front piece, lined up 3/4 inch below the neckline edge, then place the snap tab between the zipper and the front to cover the zipper pull. Then place the zipper shield on top, so the zipper and snap tab are sandwiched in between the front and the shield. Stitch, using a zipper foot.
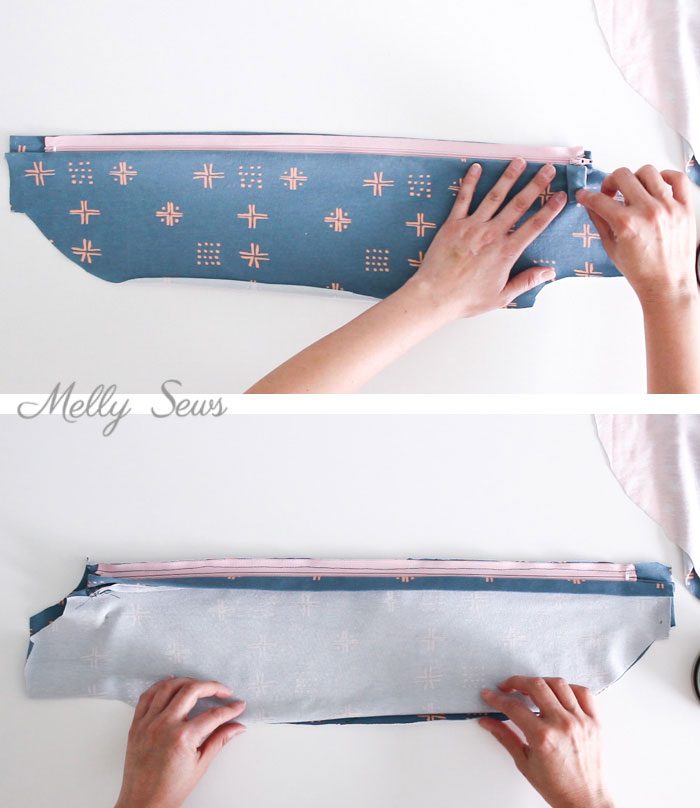
Fold the zipper shield and snap tab out of the way and place the other edge of the zipper right sides together with the right front piece. Make sure the neck edges of the two front pieces are even, then stitch the zipper using a zipper foot.
Place the tail pieces right sides together with the front and the back pieces and stitch across the seam allowance.
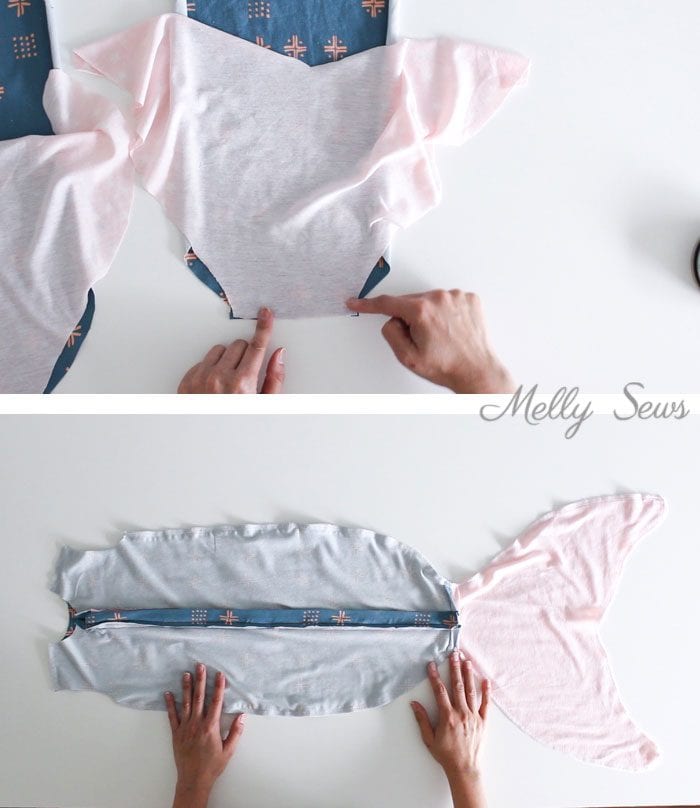
Place the front and back right sides together and stitch the shoulders, side seams, and around the tail, using a stretch stitch.
Fold the neckline and armhole edges 1/2 inch to the wrong side and hem. Need help with hemming knits? See this post.
Hand sew the snap in place, with one side on the tab and one side on the right front. You may wish to add some interfacing on the wrong side of the snap on the right front.

And that’s it – let your baby mermaid be a sleeping beauty!

Kaity
This pattern was awesome! I used bias tape to finish the armholes and neck just to try something different. Thank you so much, this was a great tutorial!
Kim Rackham
My first grand baby was born in December and I ran across this pattern recently – of course she needs one! I used the pattern along with your tutorial on grading patterns. Thanks so much! It turned out adorable….and going to deliver it today – so we will see how I did on the grading!! Great scrap buster!!