
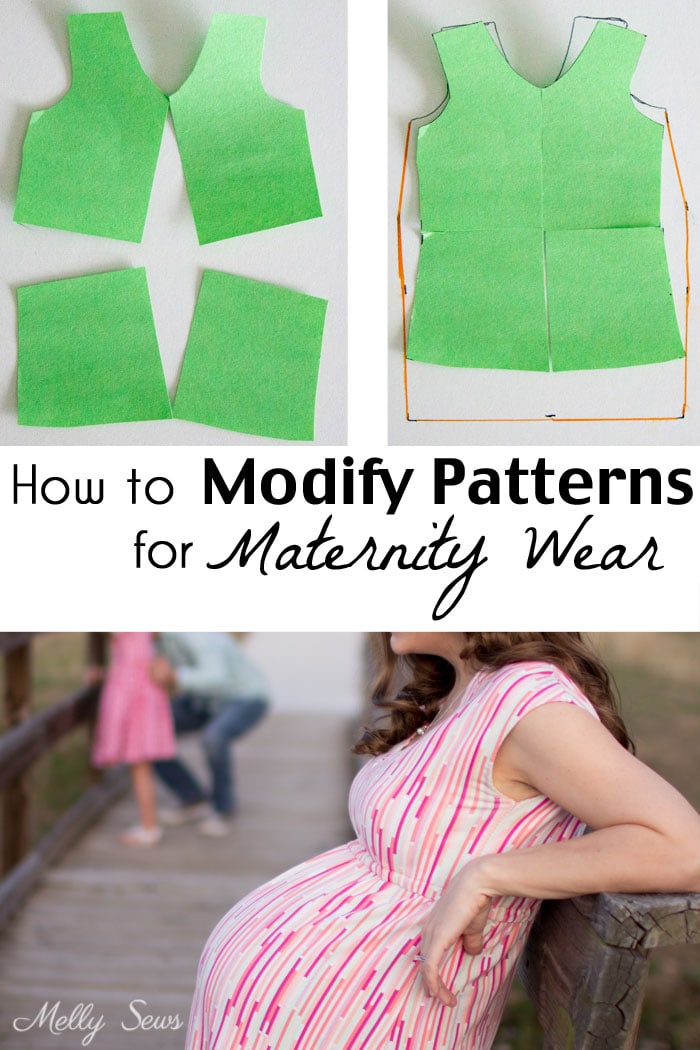
Hey y’all, today we’re going to talk about how to modify patterns for maternity wear. I know when I was pregnant, I hated having to buy a whole new wardrobe for a few months. And I couldn’t sew things for myself because I didn’t quite understand how to alter my normal patterns for maternity wear because I wasn’t exactly sure how my body would change, and just like I didn’t want to buy all new clothes, I also didn’t want to buy all new patterns. In addition, the maternity pattern selection 9 years ago was pretty limited. So today I’m writing the post I wish I had been able to find when I was pregnant.
There are two basic changes your body goes through during pregnancy. One is obvious, your belly grows. The other is that most of the time your bust gets larger, particularly toward the end of the pregnancy. So our goal in altering patterns is to add a little width to the bust and then add width and depth to cover the growing belly.
One more note – maternity clothing is more comfortable when it’s knit fabric touching your belly (trust me on this), and thank goodness we live in a day and age with knit fabric readily available.
So let’s start with tshirts. Depending on the fabric you use, a tshirt can go from comfy around the house wear to even business wear, which is why they’re a staple of both the maternity and non-maternity wardrobe.
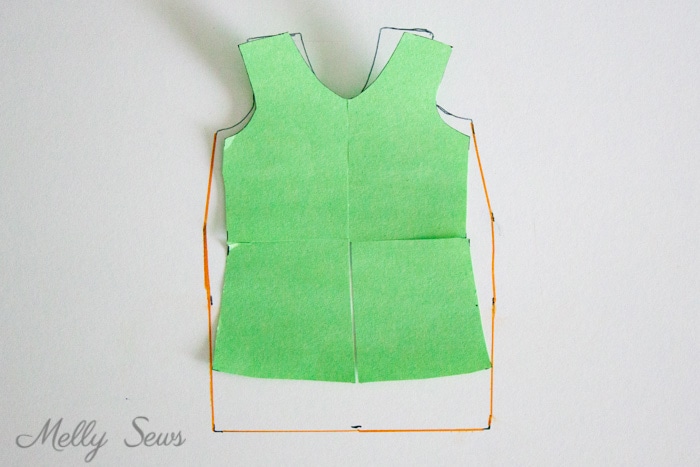
To add our width and depth we’re going to start by slashing the tshirt in a cross pattern, hingeing at the neckline and waistline. Now note that I’m illustrating with an entire tshirt pattern, but you can cover up half my picture and see the alterations you’d make to a half pattern (which is what most tshirts are).
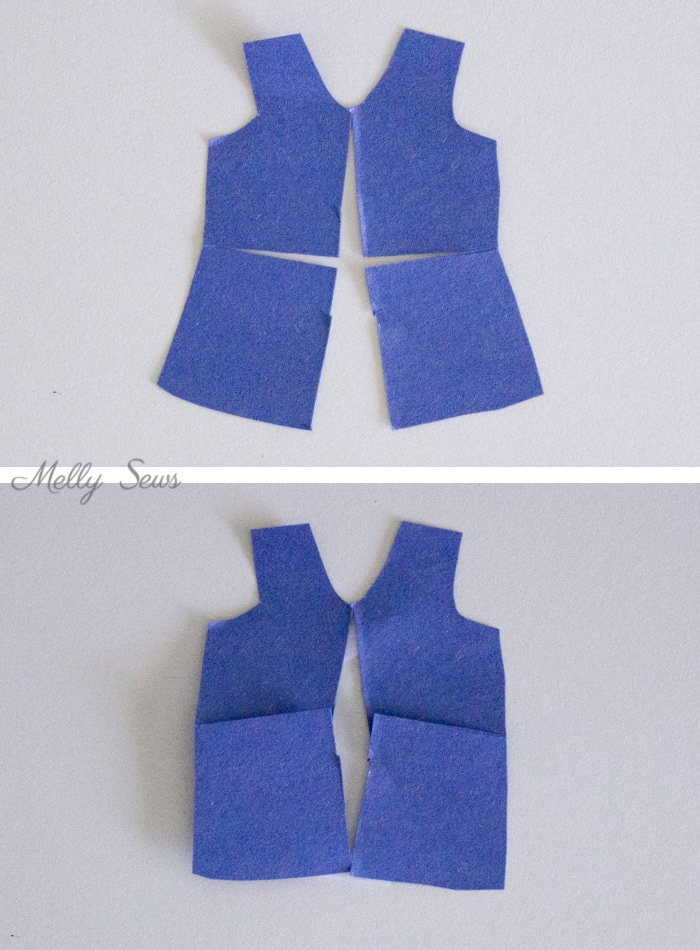
After you’ve got your pattern slashed, we’re going to first spread the pattern as shown above to widen both the bust and the waist. The waist hinges will overlap. Trace off the top quarters of the pattern to the waistline.
How much width to add? Well, at the end of your pregnancy, your front waist will have increased approximately 10-15 inches, depending on how much weight you gain and your body type. Since we’re working with knits, if you assume 30% stretch, you’ll need at least 7 inches increase across here, or 3 1/2 inches on each side. You can add more or less if your fabric is more or less stretchy.
Next, holding the neckline in place, add depth to the pattern as shown below. You’re adding the same amount to the length that we added to width. The center seam will overlap. This time you only need to mark the bottom center of the the pattern.
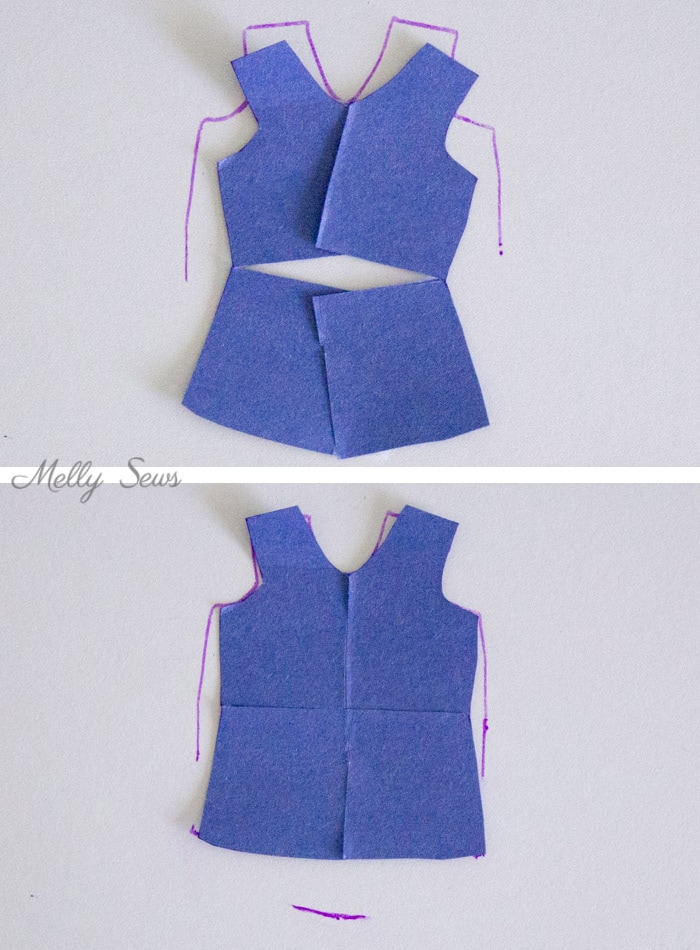
Finally, return the pattern to normal and line up the armscye – they won’t line up completely since your new armscye is slightly wider and angled, but you should be able to draw an imaginary horizontal line from armscye to armscye and line the pattern up to that. Trace the points at the bottom of the side seams.
Finally, connect the points. You’ll see your new piece is wider and longer in the center front.

Here’s a comparison of the two patterns above. With this pattern, your side seams are the same length, so you shouldn’t need to alter the back pattern piece at all. However, you’ll notice that the curve adding length means that the shirt has a longer front hem…which means the shirt won’t be especially fitted below the belly. This can be exactly the style you want, but if you want something more body conscious, see the next alteration.
Same cross cut to the pattern, however this time I cut through the waist hinges that I left on the prior alteration. Spread the pattern as shown below, adding both width and depth. Trace around the neckline and armscyes, then the points of the lower parts of the pattern. Add a dot for bottom center front as well.
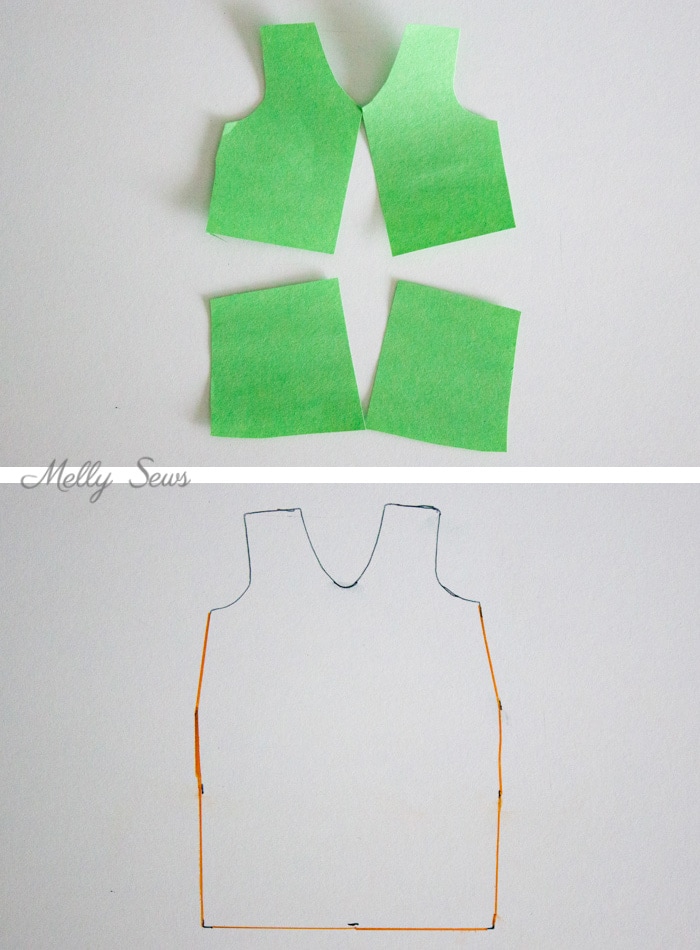
You can see how this alteration adds both width and length to the center of the pattern, while keeping the original bottom hem length. However, since the side seam has been lengthened, this is the type pf pattern that you’d then need to add the same amount of length to the back pattern piece, and side ruching to adjust the t-shirt to the appropriate length when worn. See this post to see how ruching works, and then sew the ties into the sleeve seam when the sleeves are attached.
Note that both of these alternations would also work to alter a tshirt dress pattern as well.
Finally, let’s talk pants. Applying the same principles of needing more width and length in the belly area, you can see how slashing and spreading a pattern as shown below would work.

However, I’m going to fall back on my experience wearing maternity pants and point out that the resulting waistband on these pants would be prone to slippage (because it would need to stay at the widest point of the belly but would need elastic to keep it there instead of migrating down the belly curve) and not necessarily comfortable. Which is why instead I would suggest cutting a belly sized scoop out of the pants front and then replacing the scoop and the waistband with a high yoga waistband of knit fabric.
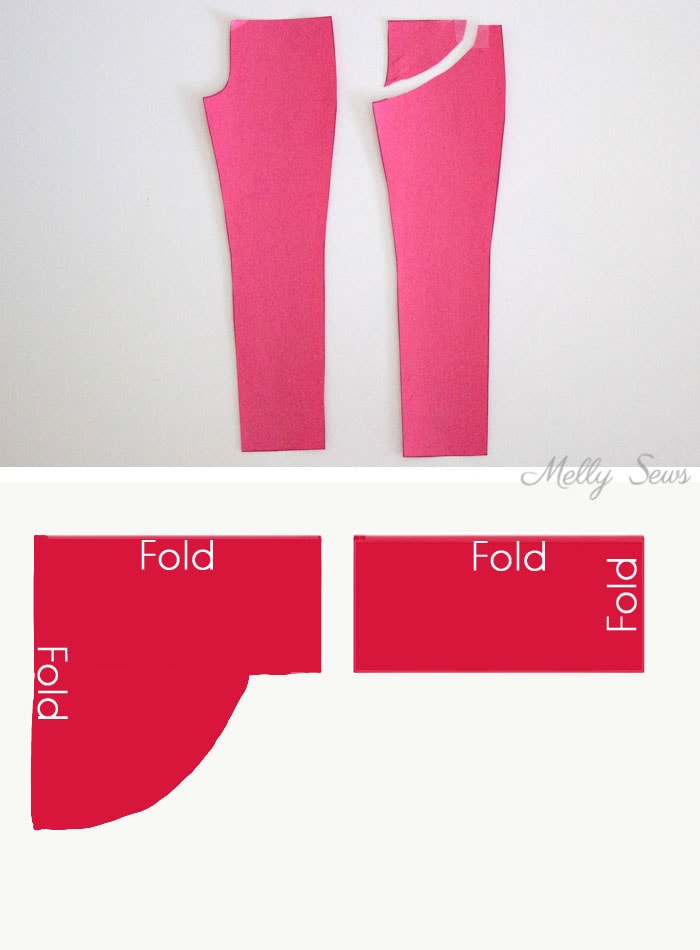
The waistband pieces would look approximately like this, accommodating the scoop in the front and thinner in the back. If the dual folds confuse you, trace the pattern then flip along one of the fold lines, leaving only one side to cut on the fold of the fabric.
I would also suggest with pants that it might be easier to go to the thrift store and buy already finished pants and then alter them for maternity, rather than starting from scratch. That was what I ended up doing with my most worn pairs, and it’s a fairly easy alteration to make.
Melody
This is genious! Thank you! 🙂
Sara
Great timing for me! I’m 20 weeks and about to start experimenting with maternity modifications. I was planning to do basically what you suggested, but it helps to have affirmation that I was thinking about it the right way. Thanks!
Sheila Robson
This is really good, Melly. Strangely, I’vr just posted several posts on my blog (with more to come) on the subject of how to adapt non-maternity patterns (because, as you say, what is available commerically is very disappointing). I’d like to put a link to your post on my blog, is that OK? You can find my blog here: http://newgrandmawantstosew.blogspot.co.uk/2017/04/how-to-make-your-own-maternity-patterns.html
Thank you for your clear explanations, I may go back through some of my posts and try and make them easier to read.
Sheila
Dara
Thanks Melly for a great post! Enjoy your family!
M.
Thank you, Melissa, for this and all the maternity/nursing modifications. I do NOT like ready made clothing, especially when I am with child. These modifications are most helpful. Have a lovely day!
Carla
Thank you for this Melly! My daughter has just hit 20 weeks, this helps so much!
Kawan
A millions thanks for this! I am definitely going to use them!
Meri
Thank you, this is just what I was looking for! My best friend is at the point where her pants are now uncomfortable. We got as far as taking off the waistband and cutting out a belly-shaped circle before I realized I’d forgotten the power cord.
You explain things so well that I just searched on here instead of googling for a tutorial