

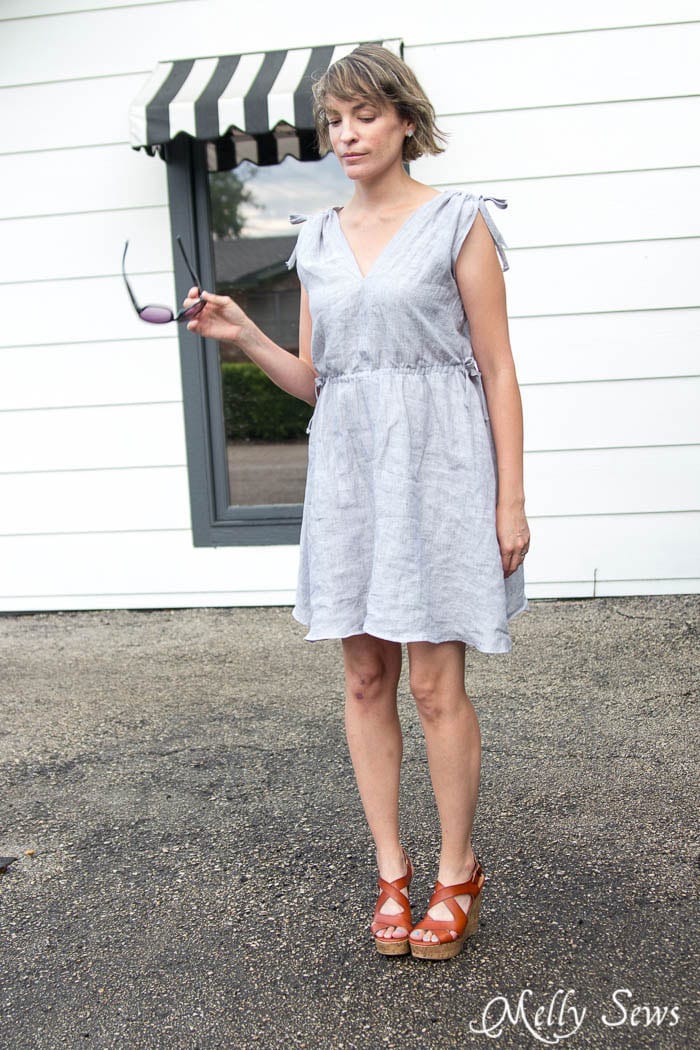
Hey y’all – it’s a two-fer tutorial day! I’m going to share how to make this easy linen sundress with just one pattern piece, and you can make it in any size. It’s even more customizable when finished, because you can adjust the waist drawstrings and the shoulder ties to give this dress more or less shaping and more or less shoulder coverage.
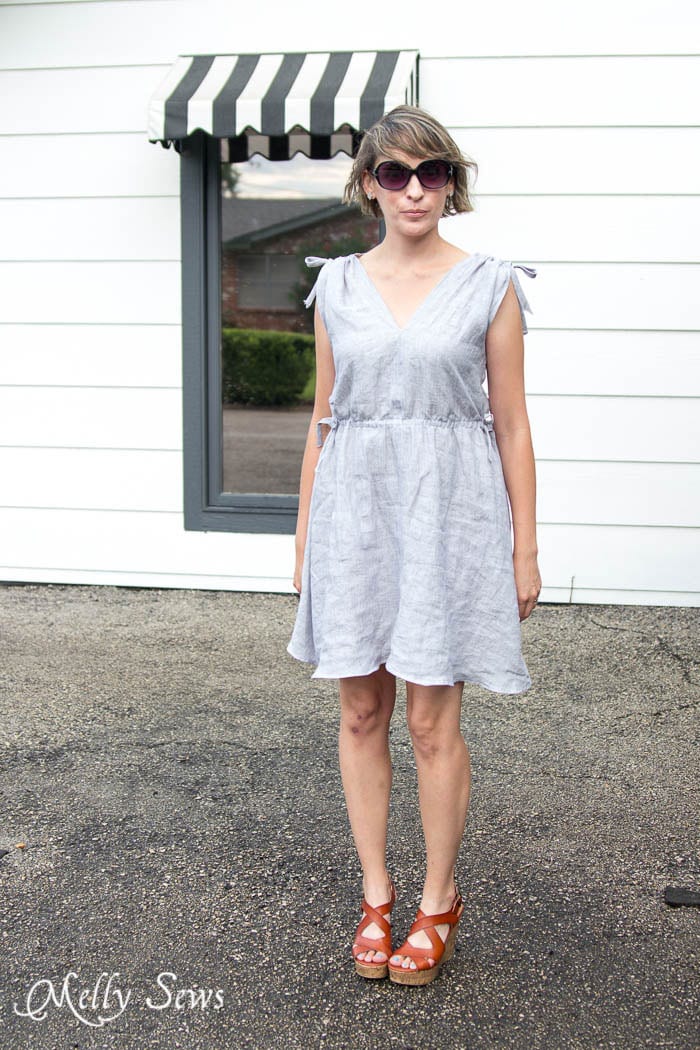
I’m wearing this dress with some cute wedges I grabbed at Target and a pair of Kendra Scott earrings from my latest Rocksbox – I like these more than I thought I would, which is one of the things I like about Rocksbox – it forces me to try things I otherwise might not. BTW, if you happen to want to try Rocksbox for yourself, you can get a free month with the code mellysewsxoxo when you sign up here (disclosure: Rocksbox has given me access to their service in exchange for my opinion).

Supplies needed:
- Large paper (craft paper or the backside of wrapping paper works well)
- Fabric (you’ll need to draft your pattern piece in order to figure out yardage)
- 1/2 inch Double fold bias tape (at least 5 yards) (See how to make bias tape here)
- 1 inch Single fold bias tape (at least 2 yards)
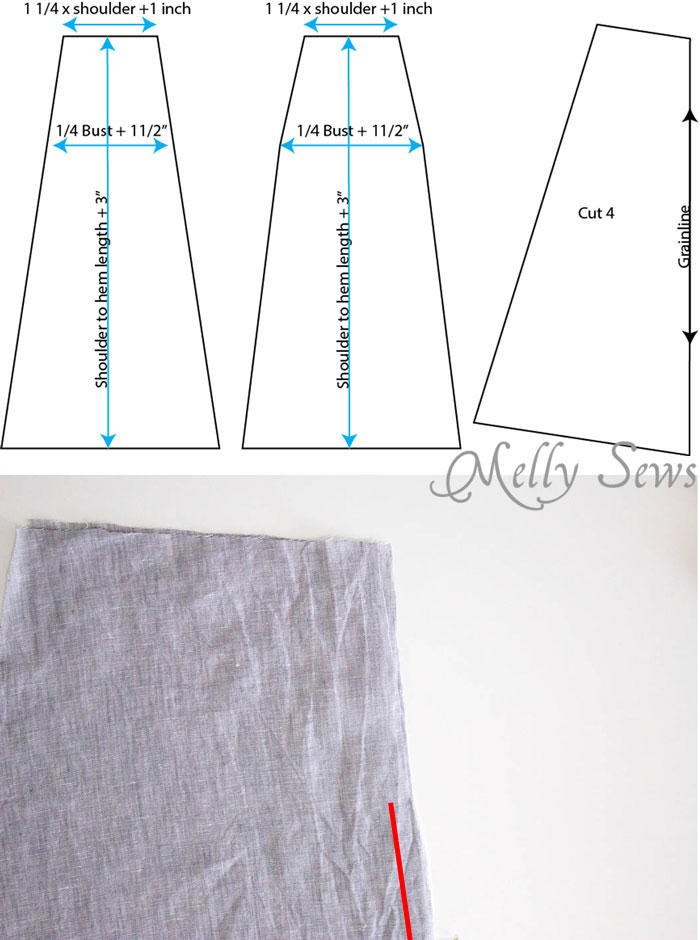
Okay, to make your own linen sundress, you’ll need to measure your shoulder (from your neck to the point of your shoulder), your bust, the length from your shoulder to your bust point, and the length you want your dress to be from the midpoint of your shoulder to the hem. Then draft a pattern as shown below. Depending on how much bigger your bust is than your shoulders, your pattern piece may look like the trapezoid on the right or the side edges may be more rounded like the one in the middle. However yours ends up, you want to tilt it so that the center front and center back are on grain, like the last diagram on the left. If you don’t, you’ll end up with the weave of the fabric wanted to tent out right in center front, and that’s not so flattering. Cut 4 pieces of a drapey fabric, like linen, rayon or cotton gauze. Too much body and this is going to look bulky on top instead of draping.
Next, place the fronts right sides together, and sew along the center front (the side on grain), starting about 8-9 inches down from the shoulder. Backstitch when you start, then stitch down the rest of the dress using a 3/4 inch seam. Repeat this process with the back pieces. Open the front and back and place them right sides together, then sew across the shoulders with a 1/2 inch seam. Finish this seam.
Once the shoulders are sewn, try the dress on and tie a string around your waist, then use this as a guide to mark the center front, side seams and center back at the waist.
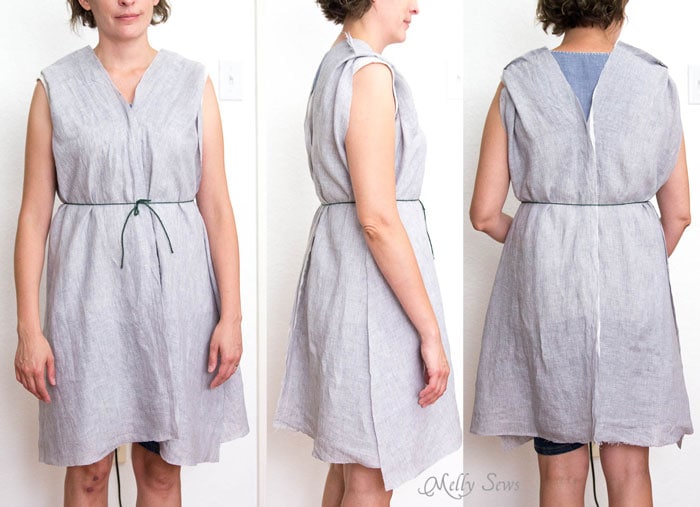
Next, press the center front and center back seams open. Then turn the raw edges under and back toward the seam (close up in second picture) and turn the neck edges under twice. Stitch these edges down to finish the seams.
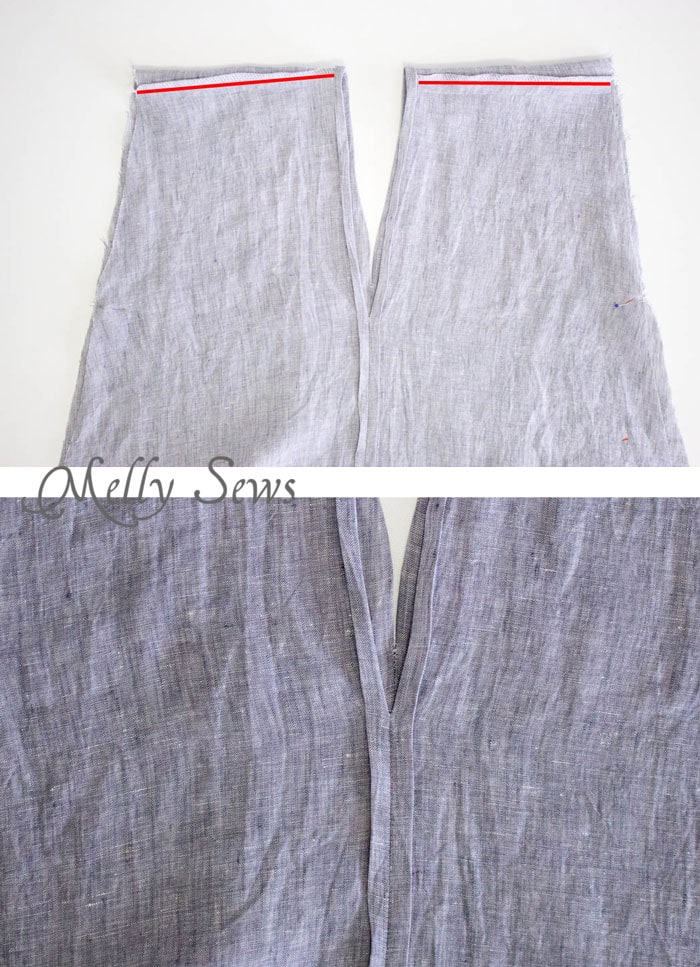
After that is done, sew down the side seams with a 3/4 inch seam allowance, backstitching at the waist marking then lifting the needle and skipping 1/2 inch before you continue sewing down the side seam, making sure to backstitch again when you begin sewing. This will leave a 1/2 inch gap in the seam at the waist, which is where the drawstring will get strung.
Next, fold and hem the arm edges and the side seams the same way you did for the front, back and neckline seams. After this is hemmed, place a piece of single fold bias tape over each should seam. Sew down the sides of the bias tape, then sew down the center, creating 2 channels.
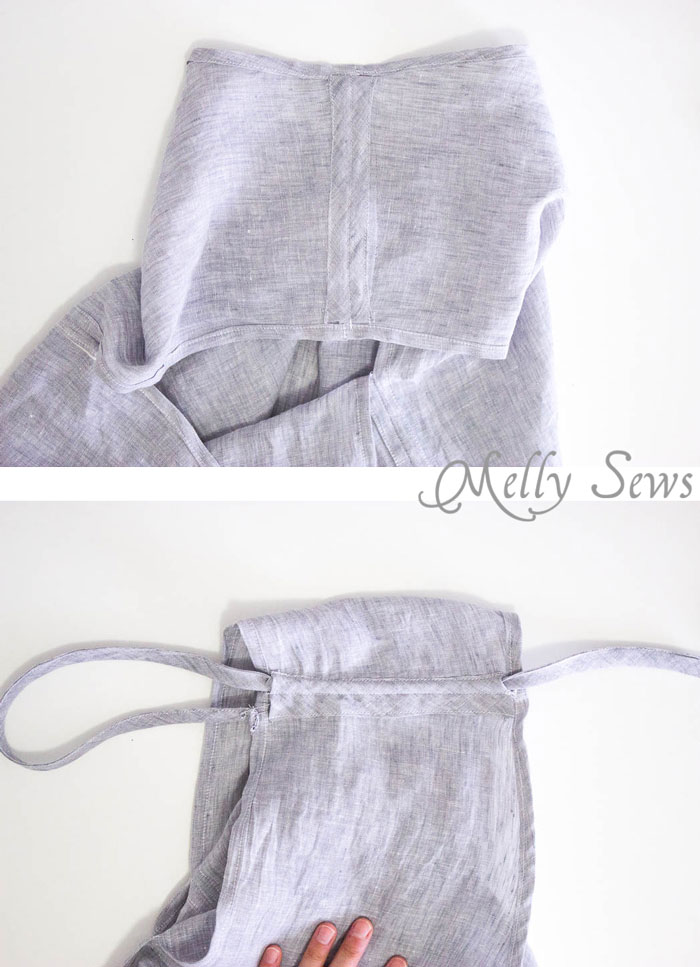
Take 1 yard of bias tape and sew the unfolded edge closed. Then use a safety pin to insert this through one channel toward the neckline then back through the second channel toward the arm. This will create the drawstring for the shoulder. Repeat this process with the other shoulder.
Pin a piece of single fold bias tape over the waist markings on the front, matching the ends of the bias tape with the gaps in the side seams. Stitch both long edges of the bias tape. Repeat this process for the back.
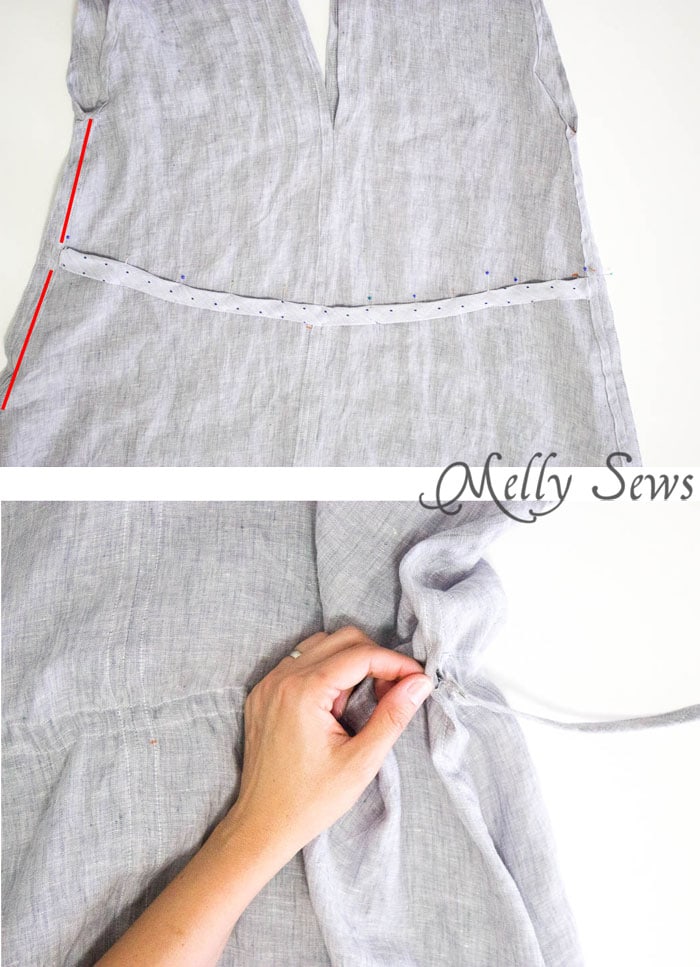
Cut two pieces of bias tape the length of your waist circumference plus 1 yard and sew them closed along the folded edge. Thread one through the waist casing from the right to the left and then across the back to come out of the same side seam gap you started with. Thread the other one from the left to right, across the back and then out of the same side seam gap you started with.
Hem the bottom of the dress. You may need to even out the hem first (that’s why we added 3 inches).
Put your dress on and adjust your shoulder and waist drawstrings to taste, then tie and wear!
Anne
I love linen in the summer!! I’ve got a Craft Gossip post scheduled for tomorrow morning that features your tutorial: http://sewing.craftgossip.com/?p=88294 –Anne
Rachael
I like your hair! It’s very flattering.
Maria
You look casual and elegant at the same time .And the dress looks easy.Thank you!
April Bartlett
This is so cute!
Rebecca
Thank you for this tutorial! Now I can fit myself or my daughter ( two totally different bodies).
Anxious to start