
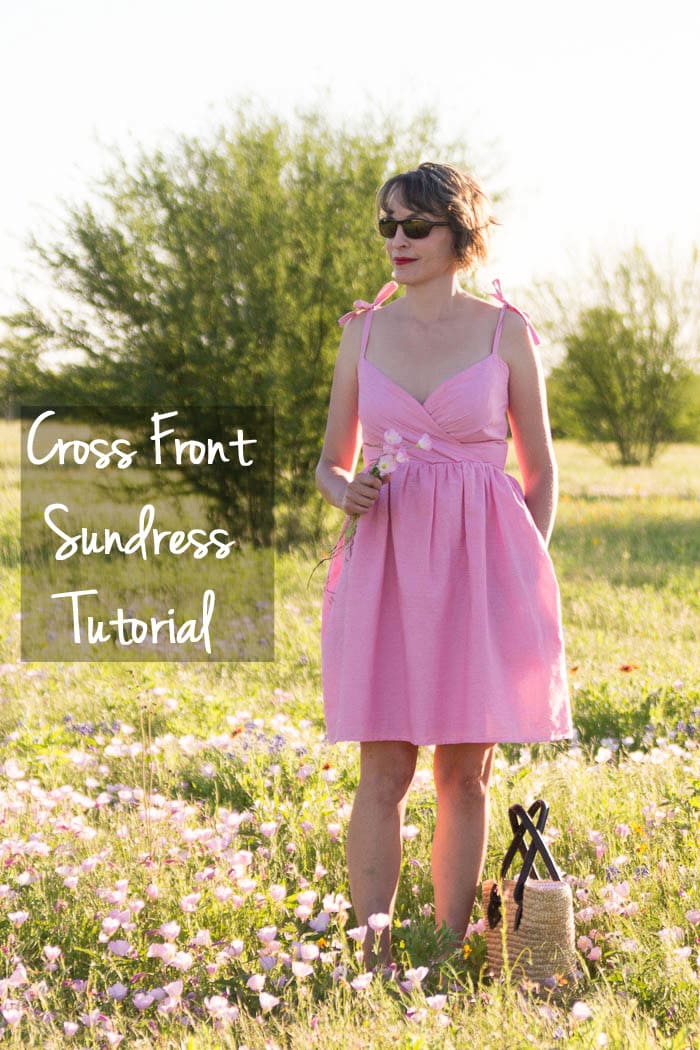
The first year I hosted the (30) Days of Sundresses series, I made a graphic with a cross front or faux wrap sundress that had tie shoulders. And each year I’ve updated the graphic, making the same dress graphic in a different color or fabric. And every year, someone comments or emails to ask where they can find the pattern or tutorial for the dress in the graphic. And each time I have to tell them it’s just an illustration and I’ve never actually made that dress. Each year until this one, that is, because in conjunction with my book Sundressing I’ve finally sewn that dress.

The book includes full size bodice patterns, then each dress is written like this post – where I start by showing you how to modify the basic pattern to get the final dress.

And then, just like every other dress in the book, you add the skirt that you want to get your perfect dress. I did a rectangle skirt with pockets (the same ones I used in this post).

So, to make your dress, you’ll need:
- Your bodice block from my book Sundressing, (or you’ll need to draft a basic bodice block for yourself)
- Fabric – I used Kaffe Fasset Shot Cotton in Pink (affiliate link). Use the yardage chart from the Primrose Dress in the book as a reference.
- A 16 inch or longer invisible zipper
- Large paper to trace your pattern on; craft paper or wrapping paper works well
To start, follow the back bodice instructions from the Primrose Dress on page 28-29. Save your back bodice piece.
For the front bodice, trace off your front bodice piece and cut out this traced bodice. Slash through the side dart and the bottom dart toward the bust point, creating a “hinged” pattern piece. Rotate your side dart closed (so the legs of the dart are one on top of the other) and tape the bodice closed.
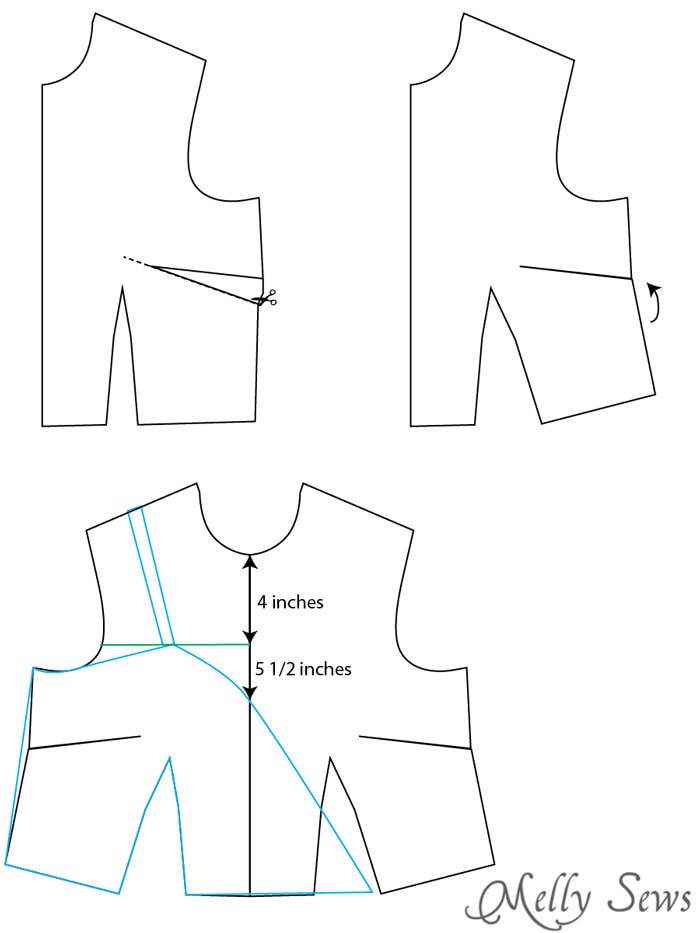
Next, trace your new bodice again, and then flip it and line it up at center front and trace again, so you can see the whole front bodice. Use the diagram above to trace out a new pattern piece. Cut out your new pattern piece, making sure to mark center front on the waistline edge.
Cut a line from the neckline toward the dart as shown below, then overlap the edge 1/2 inch. This creates the “cupping” action on the top part of the dress, so that you don’t have your chest falling out (yikes!). I HIGHLY recommend using this piece right now with the back bodice piece you made to make a muslin for the top of your dress; if your bust is very full, you might need to overlap and cup each breast even more. TRACE and SAVE this pattern piece; this is your front bodice lining piece.

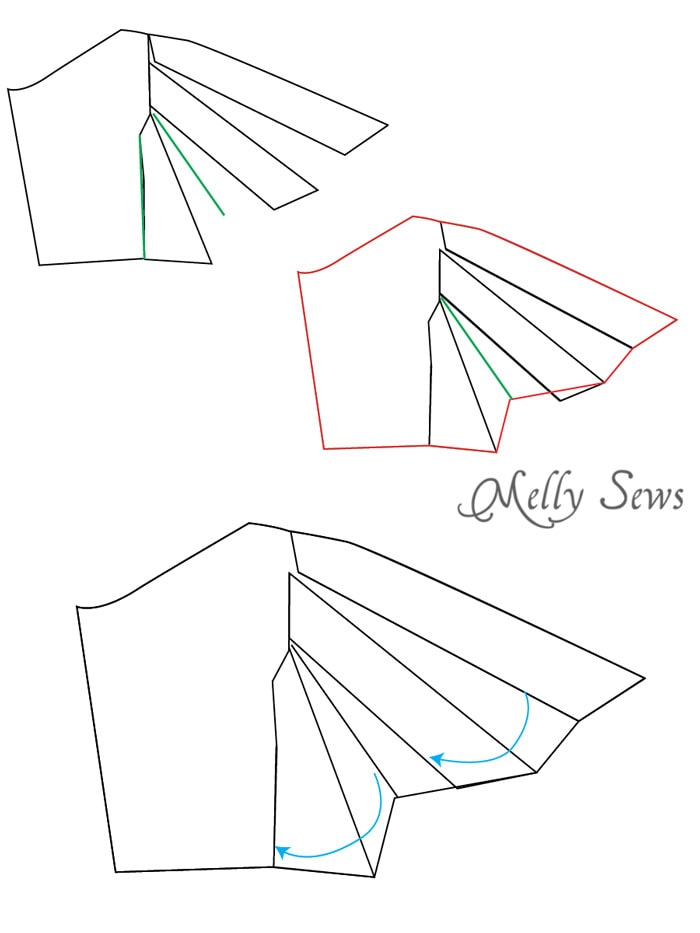
To create the outer bodice with the pleats, cut two evenly spaced lines as shown in blue in the diagram above. Spread the pieces of the front bodice apart as shown and add paper under them.
In the diagrams below, the green lines are the same length. So measure this part of your pattern and then trace the same length line in the center of the first pleat spread. Then you can trace out your pattern piece (shown in RED) for the front bodice. After you’re done with that, you’re finished creating your pattern.
Cut list:
- 2 front bodice pieces
- 2 front bodice lining pieces (make sure to mark center front on each piece)
- 2 back bodice pieces
- 2 back bodice lining pieces
- 1 skirt front; to knee length from the book chart pg 23 and the same width as your waist measurement.
- 2 skirt backs, to knee length from the book chart pg 23 and 1/2 the width of your waist measurement.
- 4 straps, 18 inches long by 2 inches wide.
- If you want pockets, use the piece from this post and cut 4.
Use 1/2 inch seams for this dress.
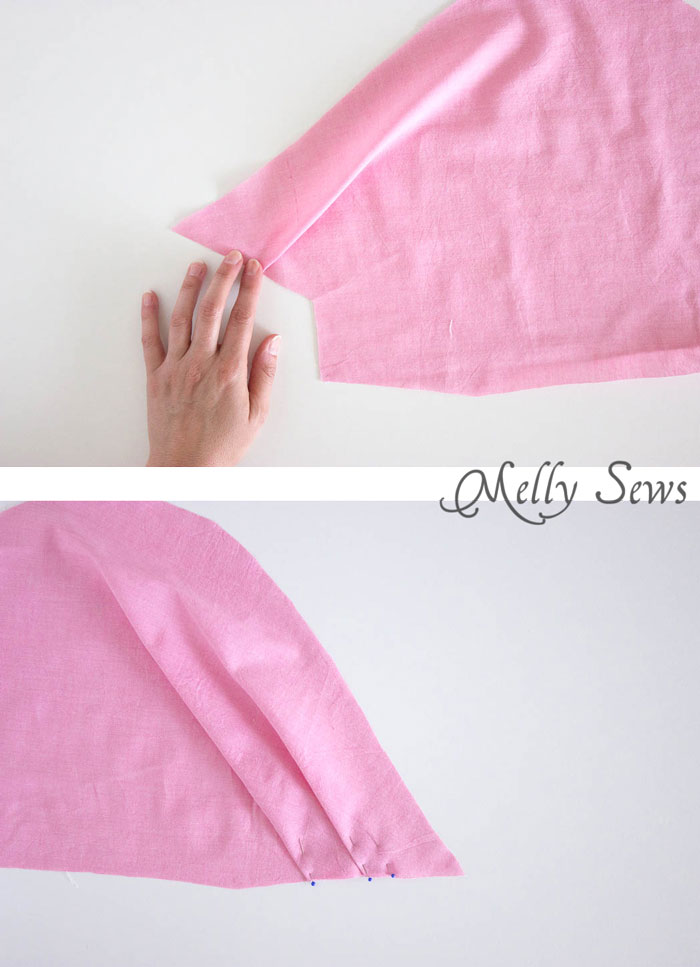
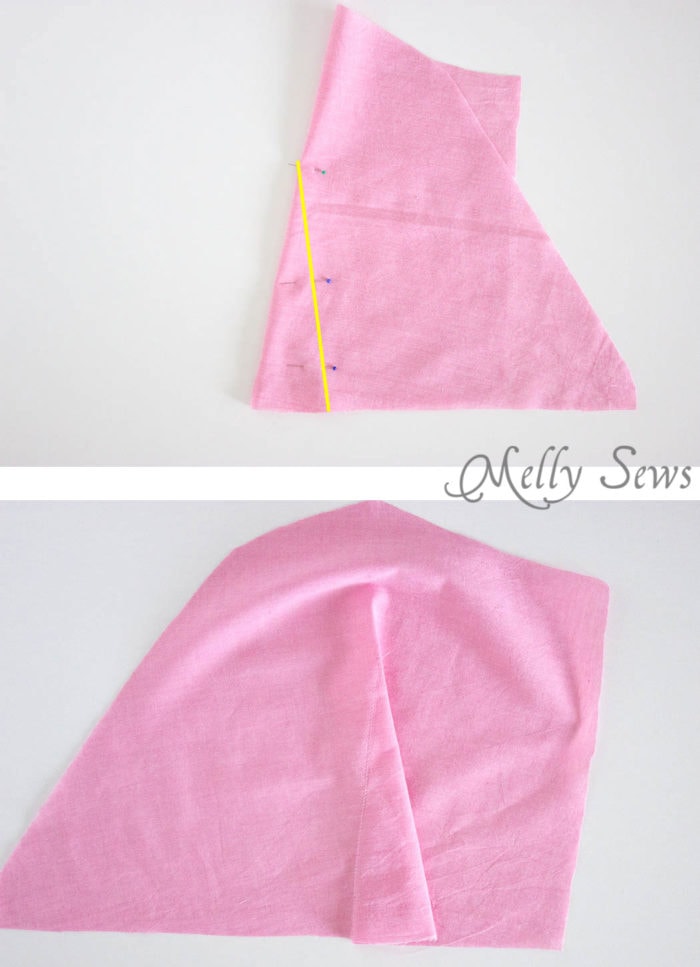
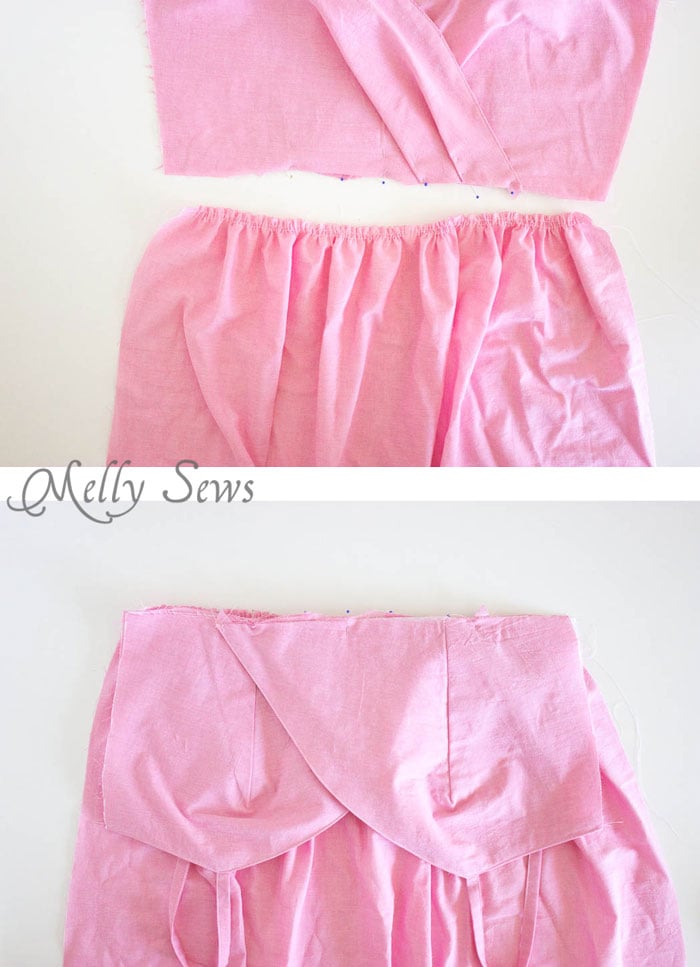
The diagram above shows how the pleats will be folded; the image below shows what this looks like on fabric. Fold your front bodice pieces with right side up and pin then baste the pleats in place along the waist edge.
Set the outer bodice pieces aside and then fold the darts on the lining pieces. Stitch the darts on the lining pieces as shown below.
Make your straps by folding the two inch strips the same way you’d do double fold bias tape (see this post if you’re not sure what that means) and topstitching the long sides closed. At the outer ends of the straps you can either tuck the short raw edges in to the wrong side or tie them in a knot.
Pin a strap to each side of the outer bodice, then pin the lining pieces right sides together with the bodice pieces. Sew each lining piece to a bodice piece along the upper edge.
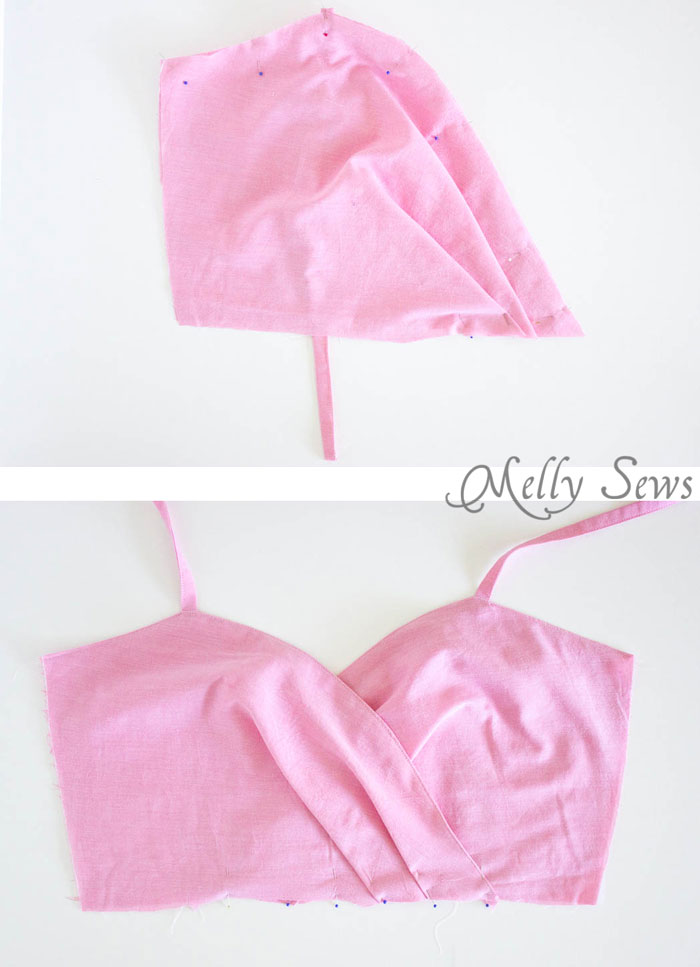
Clip curves, turn right side out and press the seams. Topstich if desired. Place 1 half of the bodice on top of the other half, matching center front at the waistline. Pin the bodice pieces together and baste across waistline.
Sew the darts in the back bodice and back bodice lining pieces as shown below.
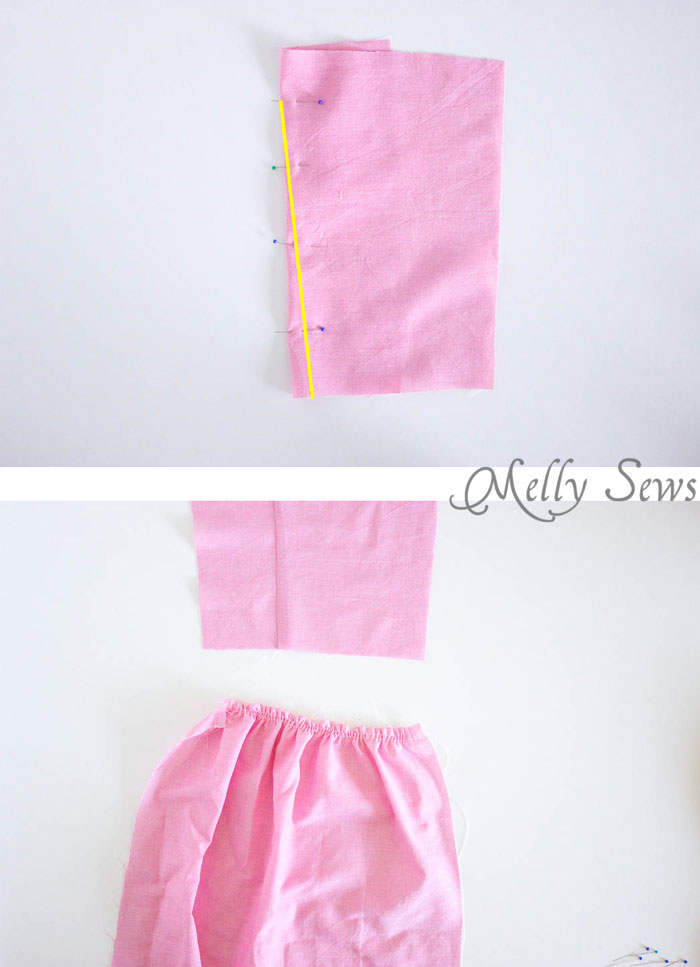
Gather your two back skirt pieces to the same width and the back bodice pieces. Place back bodice and skirt right sides together, matching waist edges, and stitch bodice to skirt. Finish the center back edges of the dress with an overlock or faux overlock stitch.
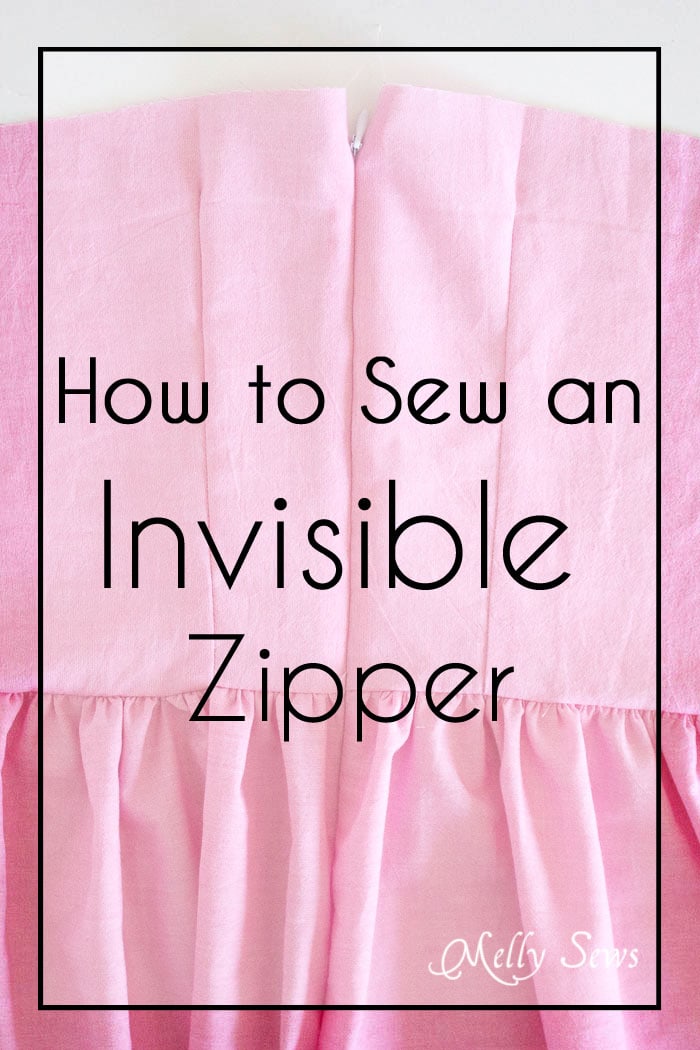
It’s time to insert the zipper!
To start inserting an invisible zipper, the first step is to unzip the zipper and iron the coils flat.

If your zipper was longer than 16 inches, sew a wide, very short stitch length zig-zag over the zipper teeth to create a new zipper stop.
Next, pin one side of the zipper right sides together with the back edge of the dress.
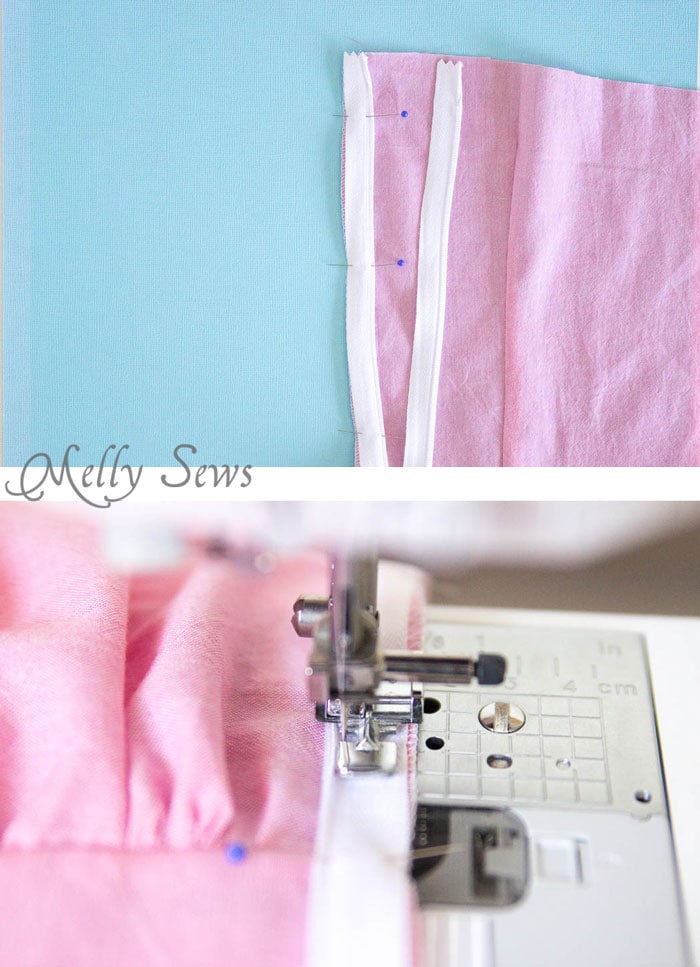
Stitch, using your regular zipper foot, and getting as close as possible to the teeth. Then zip your zipper slightly and mark the waistline on it.
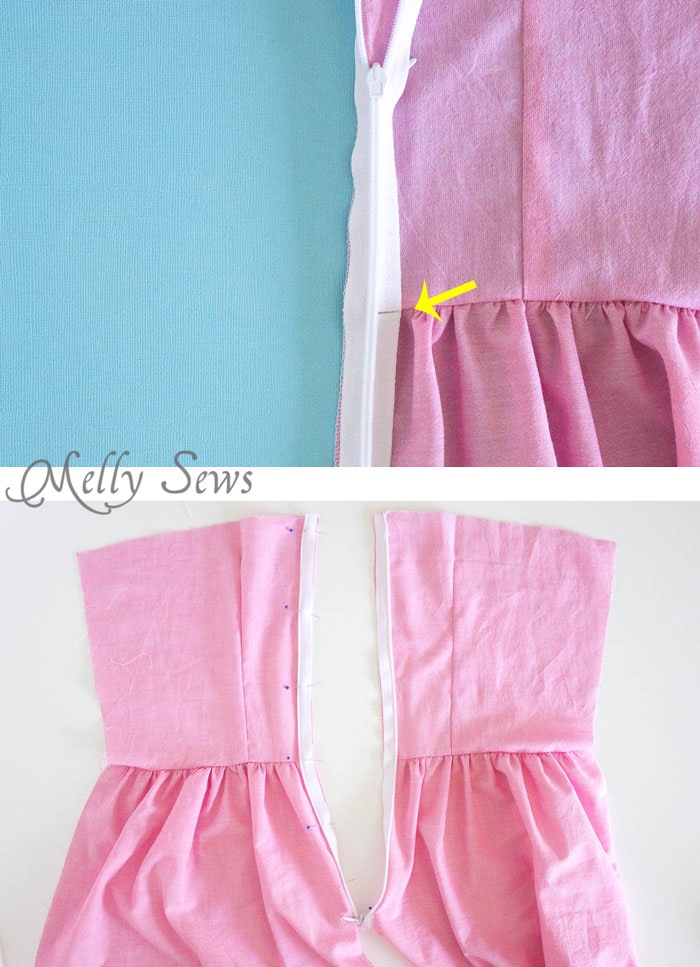
Unzip your zipper and apply the other side of the zipper tape right sides together with the other side of the back. Stitch as you did for the first side.
You’re done with the zipper part, but your skirt back is still not sewn together below the zipper. Zip up the zipper.
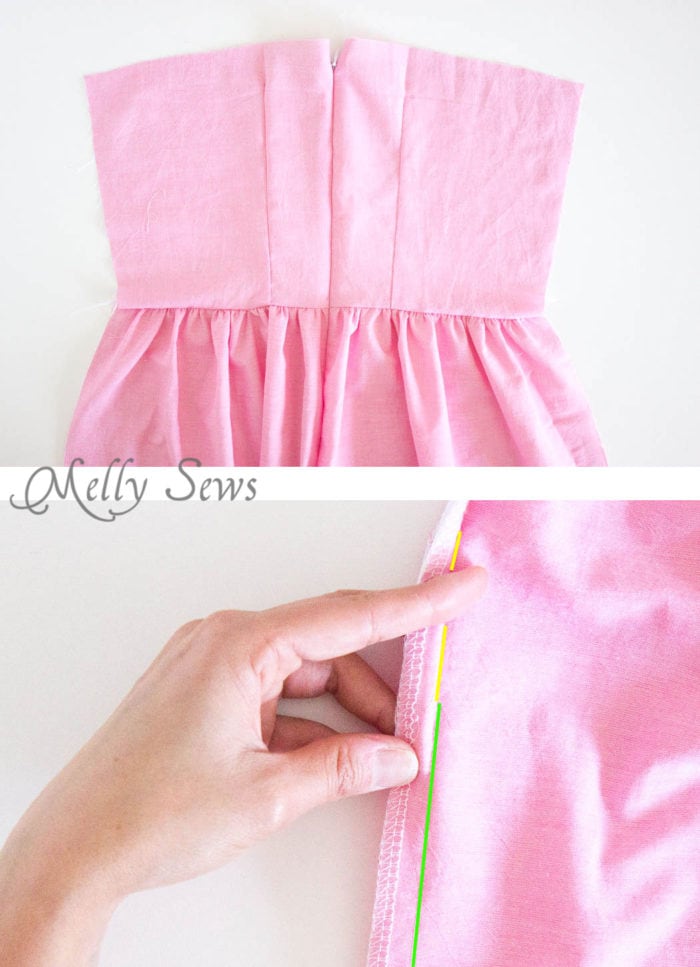
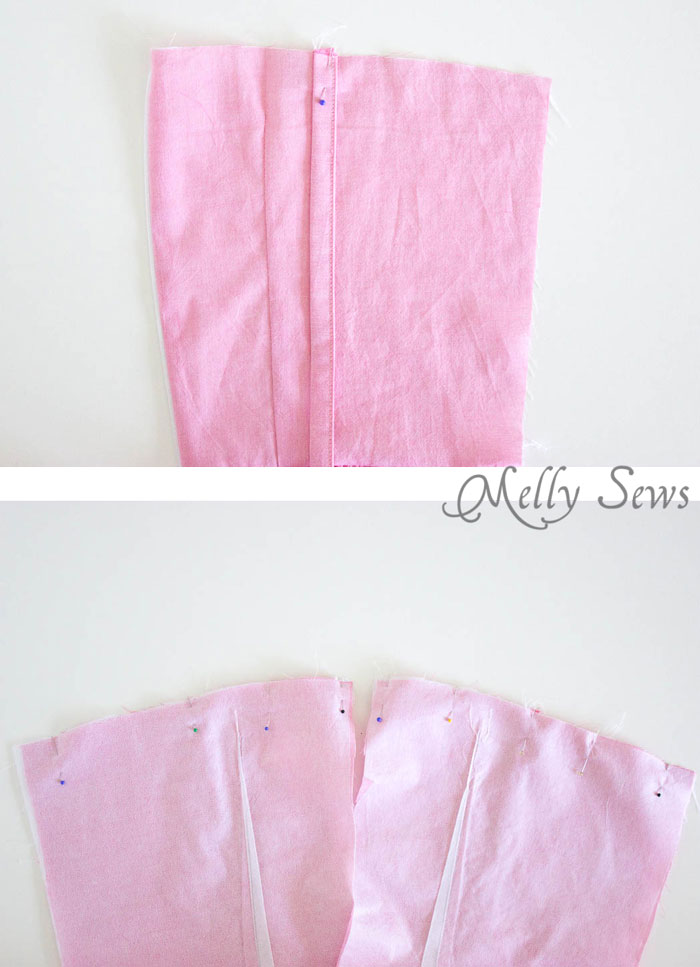
Then fold the dress right sides together. The yellow line above shows the zipper stitching line. You need to overlap that stitching by just one or two stitches and then sew from there down to the hem (green line above). Your stitching line will be very slightly to the inside of the zipper stitching line, and it’s important to backstitch over those first couple of stitches.
Pin the other two straps to the back of the dress.
Place the lining right sides together with the back of the dress. The lining will extend past the zipper edge of the bodice 1/2 inch. Sew across the top edge, then turn the lining to the inside and press this seam. Hand tack the center back edges of the lining to the zipper tape.
Gather the front skirt to the width of the front bodice.
Place the bodice right sides together with the skirt and stitch the skirt to the bodice, leaving the first 1/2 inch and the last 1/2 inch of this seam unstitched.
If you are adding pockets, sew them on now.
To finish – you want to sew the skirts together at the side seams, the front outer bodice to the back outer bodice at the side seams, and the lining to the lining at the side seams. The process looks a lot like how the Balcones dress is put together (pg. 41). Then finally, finish the waistline seam and sew the hem.
Barbara
waauw, that is indeed very beautiful!!
Kelly T
So pretty! Altering a pattern is definitely not my strong point, but the dress is so pretty, I’ve just got to try.
Kathy
I’ve been searching for this tutorial for the past 2 summers haha! I was going to wing it, but thanks for the tutorial!