
How to sew leather with a home sewing machine, including a video tutorial
Hey y’all today I’m going to share all my best tips and tricks for sewing leather. Welcome to a post I thought I had already written, ha! I have a leather project planned for next week, and I was working on it and planning to link to the post I KNEW I had written about how to sew leather. I googled “Melly Sews Leather Tips” and nothing came up. Hmm. And then I searched my own site and couldn’t find it. So then I went back through my archives and guess what? I had included some tips within other leather projects, but I’d never written a leather tips post. So here it is.
AND I made a video for those of you who prefer to see and hear me talk about tips instead of reading them. You can watch the video on YouTube here if you prefer or it won’t load below.
This post contains affiliate links. As an Amazon Associate I earn from qualifying purchases. All affiliate links are identified with (affiliate link) after the link or a commissions earned statement above the link(s).
Links to tools in video, commissions earned on these links
Rolling presser foot
Leather needles
Heavy Duty Thread
Sewing clips
Point turner
Cutting mat
Rotary cutter
Tips for Sewing Leather:
- Let go of the idea of perfection
- Use a rotary cutter, mat and ruler
- Don’t pin.
- Mark pattern pieces with pen or marker on the wrong side of the hide, or use chalk on the right side of the hide.
- Use leather needles and heavy duty thread
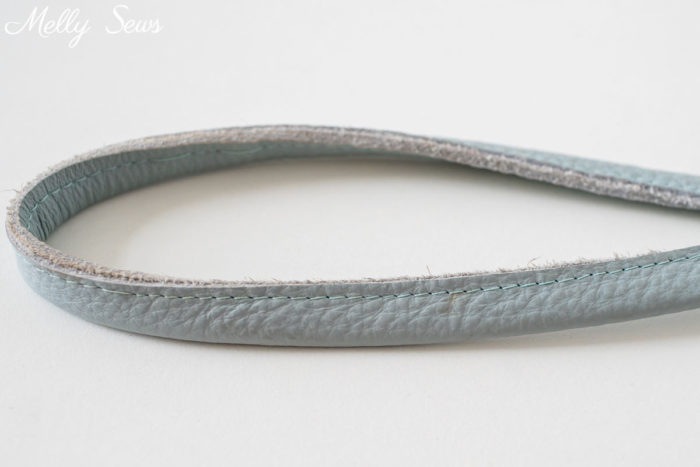
- Lengthen your stitch length
- Increase your presser foot pressure
- Consider a rolling presser foot or Teflon foot
Let’s talk about each of these leather sewing tips in more detail.
Let go of the idea of perfection
You can sew leather pretty well on many home sewing machines, but it’s not going to be the same as using an industrial machine meant to sew leather. It’s just not. Home sewing machines don’t have motors as powerful as industrial machines and aren’t built to accommodate very thick fabrics. In fact, using any leather thicker than thin garment leather, is going to be difficult if not impossible. If your leather is thicker you might be better off hand sewing, using a stitching punch (affiliate link) to pre-punch the holes and waxed thread to sew them. Hand sewing leather with the help of stitch hole punches in this way takes longer, but can give you better results, especially for topstitching.
Use a Rotary Cutter
A rotary cutter allows you to cut in one continuous path without stopping and gives you a nicer edge. If you’ve never used a rotary cutter there’s a tutorial here. Edges are often visible or exposed when sewing leather, so you’ll want them as smooth as possible on each leather piece.

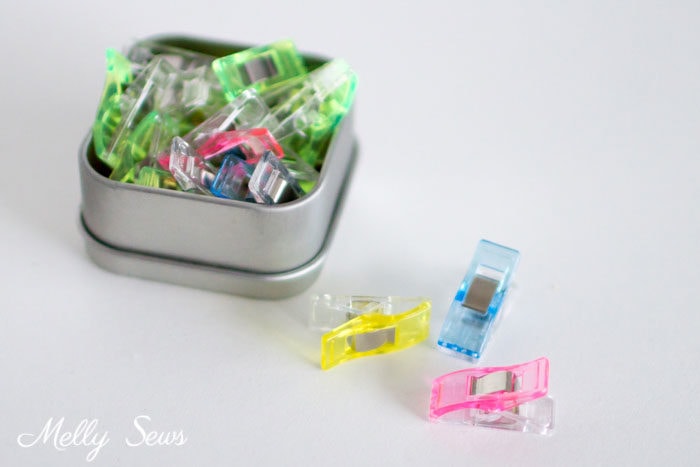
Don’t Pin
Pin marks will be permanent – when you make a hole in leather, either with a pin or needle, it stays there. Holes in leather don’t rub out like they do in fabric because leather is not woven or knitted from thread, so piercing it makes a permanent hole. Use clips to hold pieces of leather together if necessary. Sewing clips (affiliate link) as shown below, also known as Wonder Clips, are great for working with leather. If you don’t have sewing clips, binder clips from the office supply store can also work well. If you absolutely need to pin or baste, do this in a seam allowance that will be hidden in the finished project.
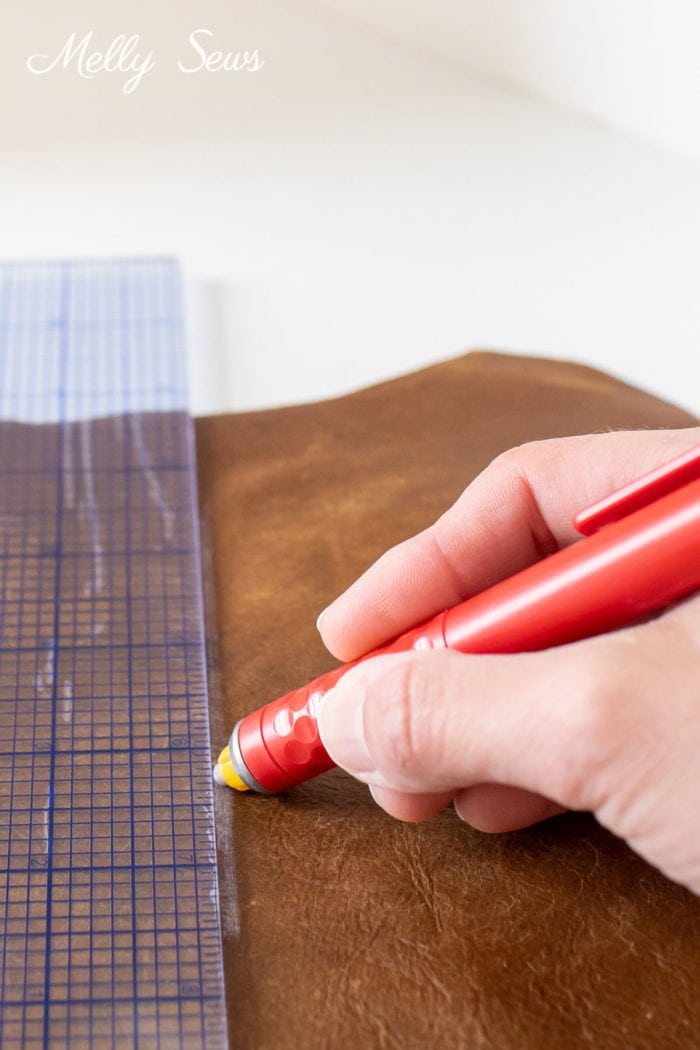
Mark pattern pieces carefully
To mark leather you’ll want to use pen or marker on the wrong side of the leather hide, or use chalk on the right side of the hide. You don’t want to use tracing paper and a tracing wheel, as that will make permanent indentations in the leather. For more on different options for marking all kinds of materials, see this post.
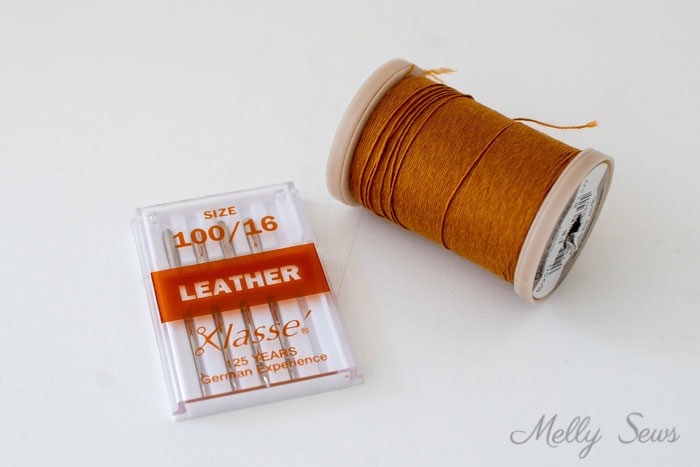
Use Leather Needles and Heavy Duty Thread
Switch to leather needles and heavy duty thread as shown below. The needles are a larger size to punch through the thick layers of leather without breaking. The thicker thread helps create strong seams even with fewer stitches per inch, which brings me to the next point.
Use a Longer Stitch Length
Because every stitch in leather creates a permanent hole, you want to lengthen your stitches. On my machine there is a separate basting stitch that is longer than I can lengthen my straight stitch, so I use the basting stitch setting. Using a longer stitch length also helps your machine, as it’s fewer stitches the machine has to make across any seam. I recommend saving your scrap leather to test stitch length/thread combinations and tension before your start sewing your project. Using scraps helps you make sure your machine will be able to handle your project before you ruin your leather.
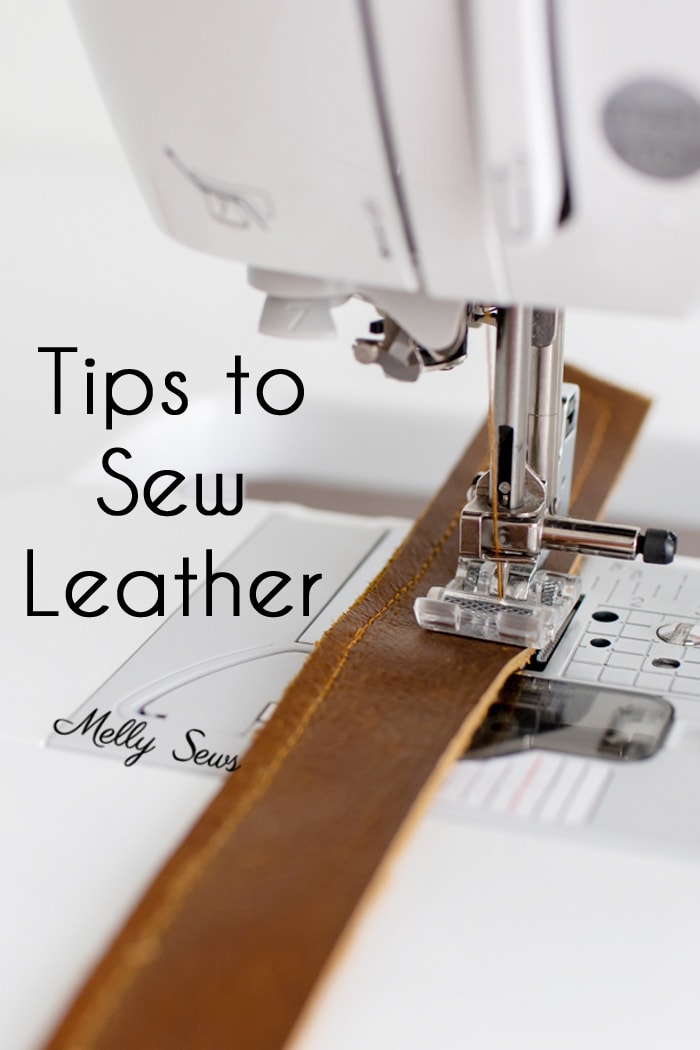
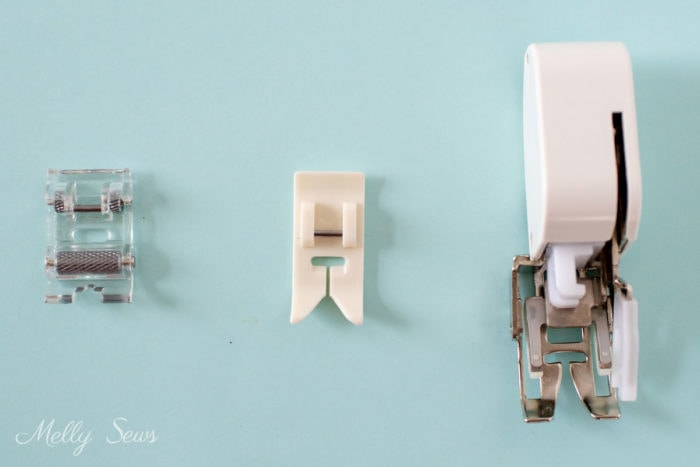
Pay Attention to Your Presser Foot
The basic presser foot on a sewing machine is meant to work with the feed dogs to move fabric along. Leather, however, might stick to that type of presser foot since it doesn’t glide like fabric. If the leather sticks and doesn’t feed smoothly, you won’t have nice, uniform stitches. In that case, a rolling presser foot, Teflon foot, or walking foot can be helpful. Those three options are pictured below, and this is another reason to practice sewing on scraps of your leather to see which one gives you the best results.
Costina
I hope will work for me too ! Thanks for sharing!
Elizabeth. Parks
Loved the video, i really learned alot from the video.
Great tips for leather.
ThanksElizabeth
Marthakandk
Thanks for sharing tips to work on leather.