
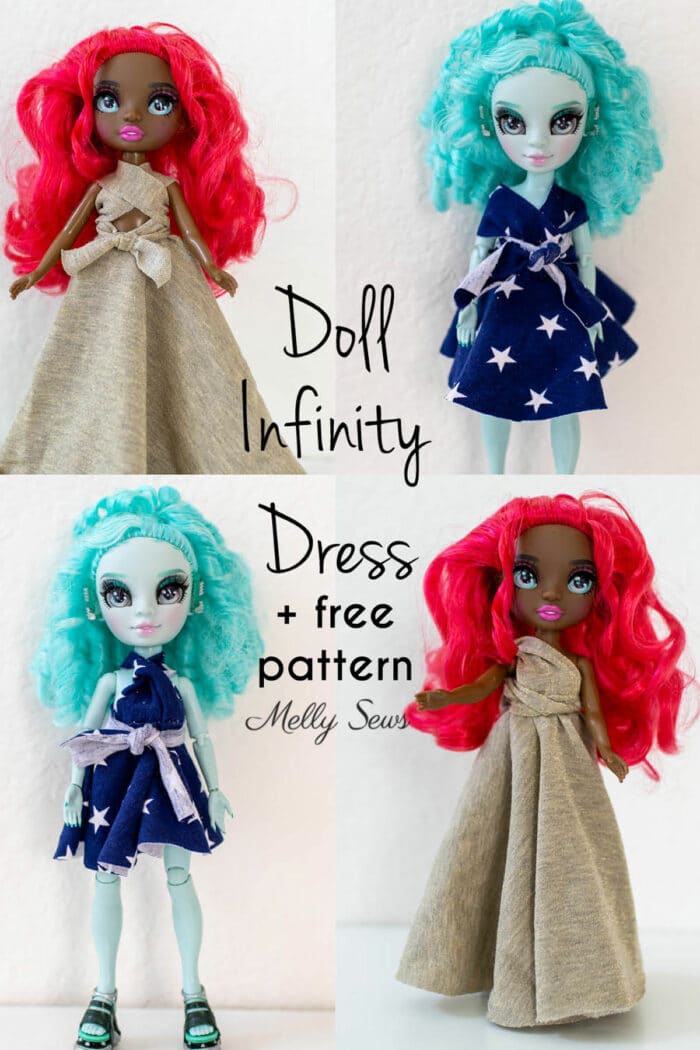
New to sewing doll clothes? Here is a free doll dress pattern & helpful tips and tricks for beginners to create beautiful outfits for their dolls.
Hey y’all, today we’re going to talk about how to make doll clothes. Many, many sewing enthusiasts, fashion designers and pattern makers, including me, got their start in sewing by making their own doll clothes. According to my mom I started sewing doll clothes decades ago, when I was 3 and not allowed to use the scissors.
I know there are many tutorials for making doll clothes, but I wanted one specifically for a young beginner. Recently my niece has expressed an interest in making doll clothes, so today’s post started as a 7th birthday gift for her. I wanted to design a sewing pattern that required very little hand stitching to make a dress that could then be worn in many ways. I didn’t want her to have to add a snap or any other type of closure, and I wanted her to be able to create many looks with the same pattern.
So I’ll be sharing how to sew this doll infinity dress with bodice ties and a circle skirt. I also have a free doll clothes pattern for this dress. If you’re sewing for a different size doll, I’ll also explain how to measure your doll to create the same type of dress pattern for your doll’s size.
Materials Needed
You don’t need a sewing machine to make this dress; this is all hand sewing. For this specific dress you’ll need:
- a piece of stretch knit fabric that is about 24 inches tall by 20 inches wide. You can use less fabric if you’d like to make the short skirt version of the pattern. For that view you only need 15 inches tall by 8 inches wide.
- All purpose thread
- A hand sewing needle
- Scissors
- Straight pins (optional). You can make this without pinning, but pins make it easier to hold things in place.
- A pattern – you can download mine or make your own. Instructions to do both are in the next section.
I chose to use stretch fabric to make this dress so that it is easier to fit and so that the raw edges didn’t need to be finished since stretch fabrics don’t fray. Easier stretch fabrics to work with include interlock knit and jersey. An old t-shirt is a great piece of fabric to use to start with too.
How to Get the Pattern or Make Your Own
To get this pattern, you must either be a free newsletter subscriber or have purchased a gallery access pass. Then click your preferred option from the buttons below. Existing newsletter subscribers should look at the bottom of the most recent Friday newsletter for the current free pattern gallery password. If you purchased the all access pass you’ll log in to your shop account to download the pattern. Note that the free version of the pattern does not have printable instructions so you’ll need to refer to this post for instructions.
 |  |  |
Remember that my free patterns are for personal use only and by downloading you are agreeing to those terms of use.
My niece is into Rainbow High and Shadow High dolls, so those are pictured here. But if you’re into Barbie (I started with Barbie doll clothes) or have an American Girl doll or some other type of doll you can still make this dress.
To make your own pattern, you’ll need to use a tape measure or a string and a ruler to measure your doll. Get the waist measurement of your doll as well as the chest circumference, height from waist to shoulder, and length from waist to however long you want the skirt to be. Use the math in the image below to draft the skirt piece of the pattern.
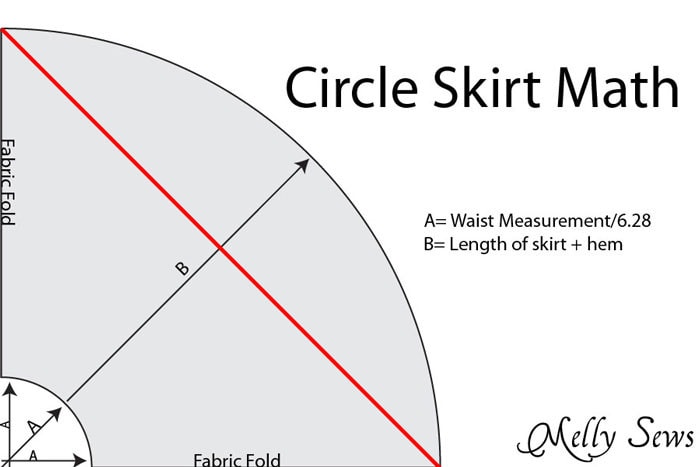
The waistband piece should be the doll’s waist measurement in length plus seam allowance. In height the waistband should be the measurement from waist to shoulder. The bodice tie pieces should each be 1/3 of the chest circumference and at least 3/4 of the doll’s total height. You can always make them longer if you’d like; up to 2 times the height of the doll.
Preparing Fabric And Cutting Out Pieces
Fold your fabric piece one time horizontally and one time vertically. Line your skirt pattern up to the corner and pin it in place then cut around the edges of the pattern. Don’t cut the folded edges of the fabric.
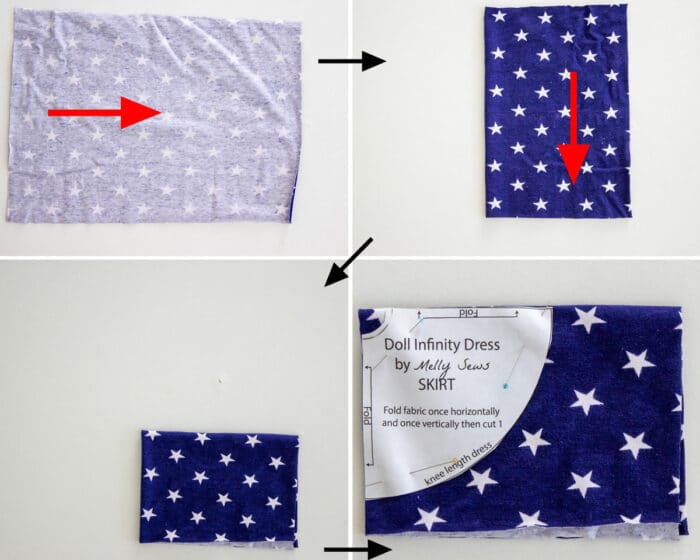
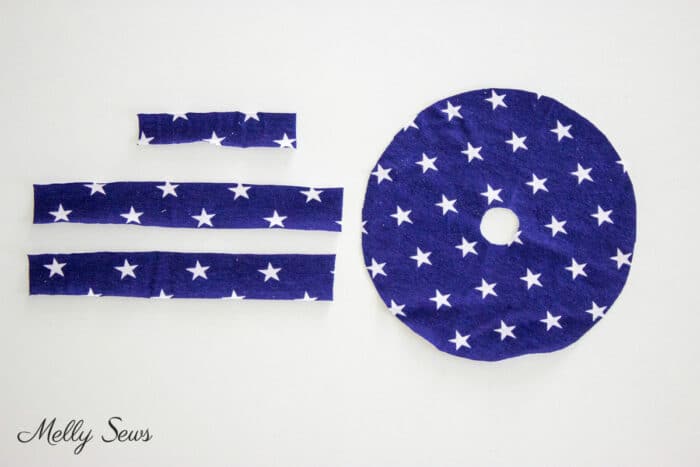
You should have:
- 1 skirt that looks like a donut,
- 2 front ties
- 1 waistband
Sewing Techniques For Beginners
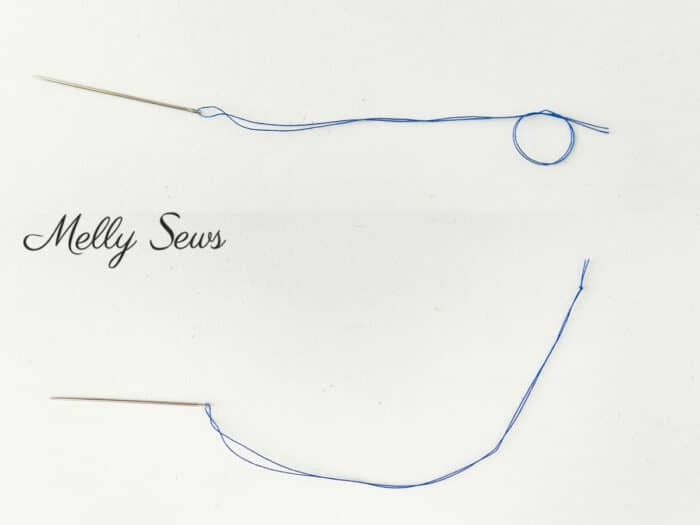
In this project you will need to be able to thread a needle, knot your thread, and sew a whipstitch. You can see videos of all these techniques in this post.
Below is an image of how to thread your needle and knot the ends.
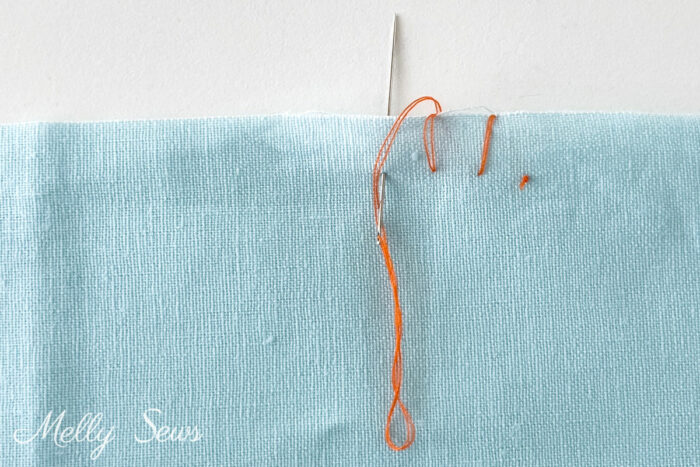
Once your needle is thread, the image below shows how to sew a whipstitch.
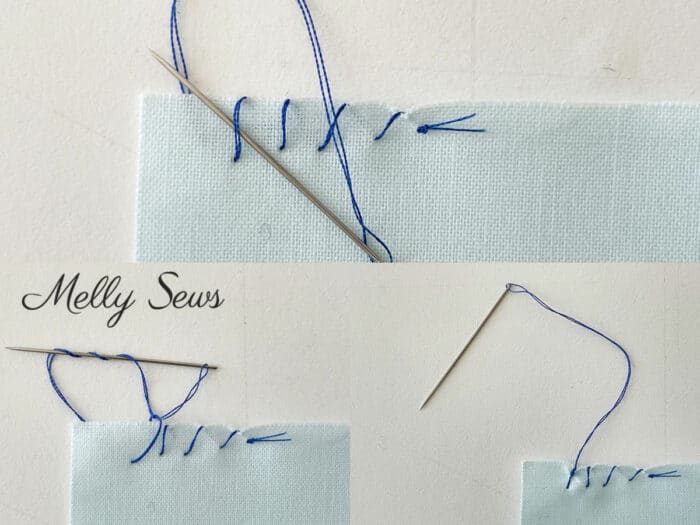
At the end of your seam or when you are close to running out of thread, the picture below shows how to tie a knot.
Assembling the Dress
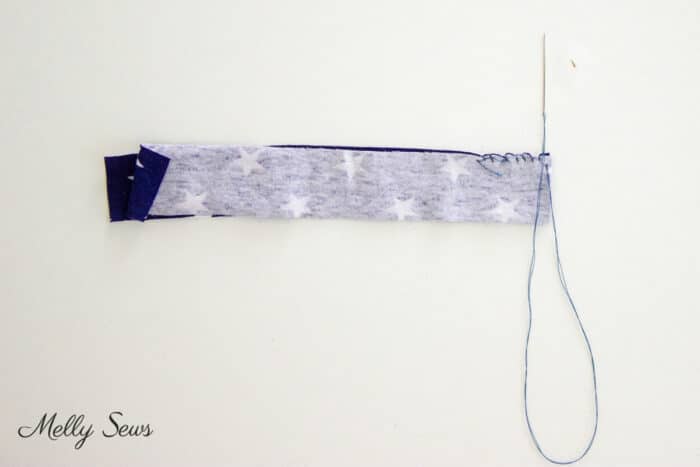
Put the ties right sides together. Whipstich about 1 inch on the edge. If you made your own pattern, you’ll stitch together about 3/4 of the waist to shoulder height.
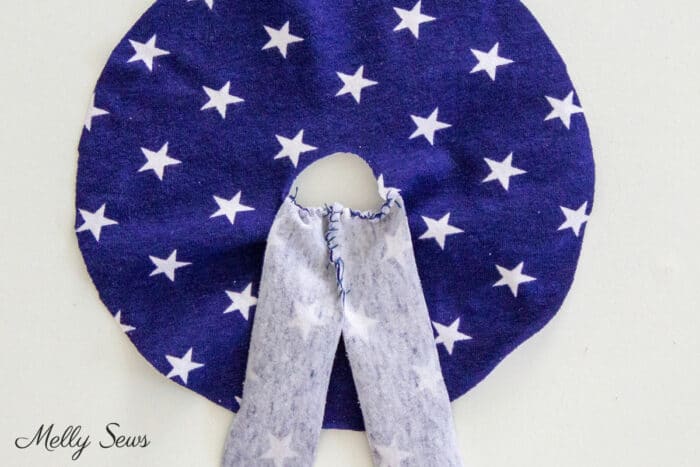
Fold the skirt in half. Line up the sewn edge of the ties with the fold.
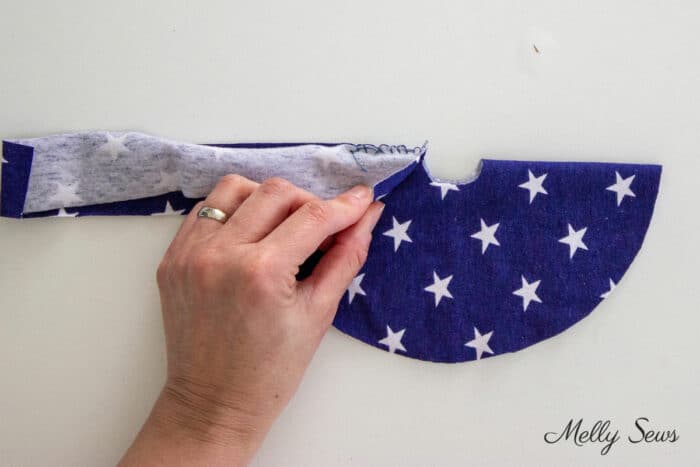
Unfold the ties and the skirt and whipstitch the ties to the edge of the skirt.
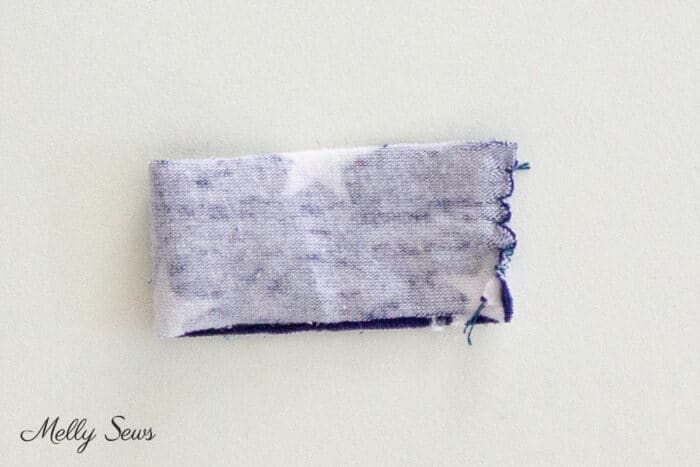
Fold the waistband in half right sides together. Match the short ends. Whipstitch them together.
Fold the wrong sides of the waistband together. Put the waistband around the skirt and ties.
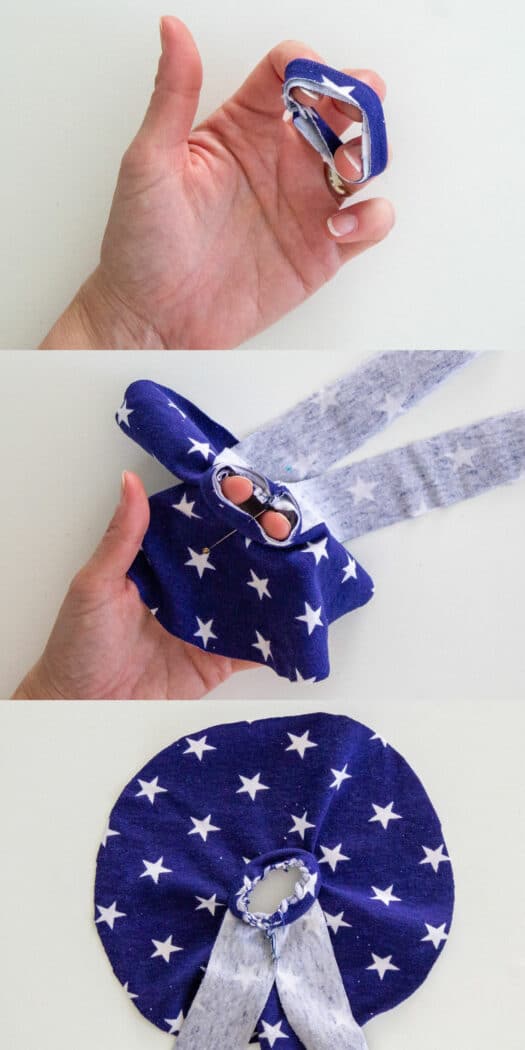
Whipstitch the waistband around the skirt. Make sure you’re sewing through both layers of the waistband, the skirt, and the ties.
You’re done sewing your garment! Now dress up your doll in her new stylish outfit. Search for ways to tie an infinity dress for ideas on how you can twist, cross and tie the ties to create different looks for your doll.
Beyond the Basic Dress
You can also play with using other fabrics for this dress as your skills increase. In this way you can create an entire wardrobe for your dolls. For example, you might want to use ribbon for the bodice. You could draw or sew decorations onto the fabric. You could add beads, or use your fabric scraps to make matching accessories like a hair bow for your doll.
Leave a Reply