
Learn how to give new life to an old recliner by reupholstering it with this DIY guide. Give your home a fresh look with this fun and budget-friendly project
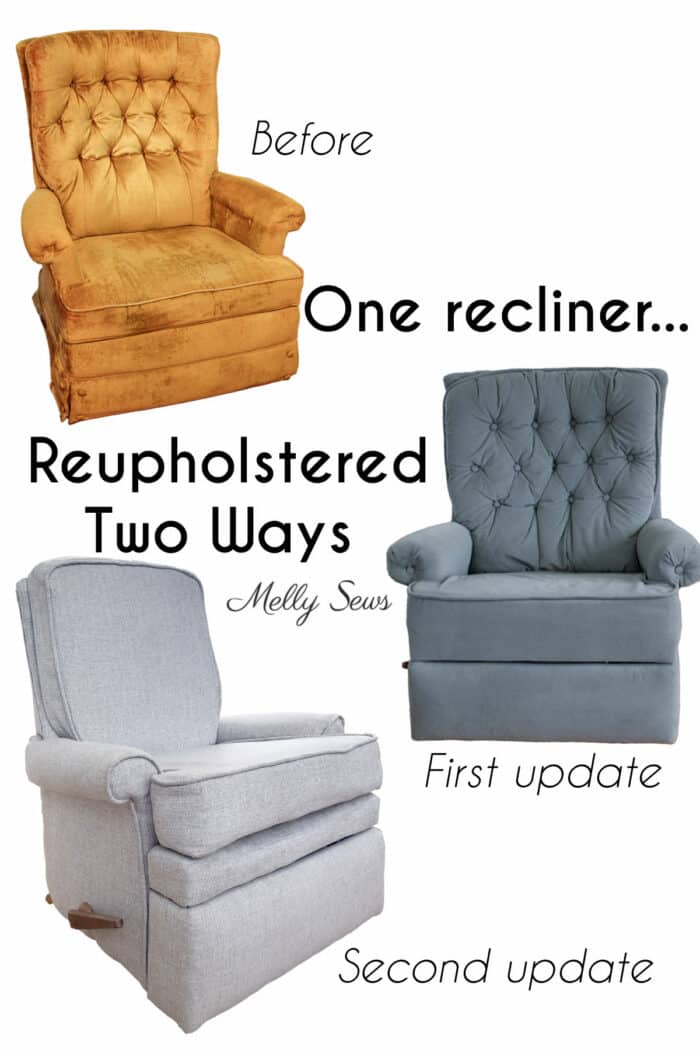
Today we’re going to take a look at how to reupholster a recliner. I’ve reupholstered the same vintage Laz-y-boy recliner pictured in this post twice in the last 10 years, and I’ve learned a lot doing it. So in this post I’ll share what materials I used to recover the recliner chair, how much it cost, and my best tips and tricks for doing it yourself – TWICE!
This is NOT a step by step guide on how to reupholster a recliner. I had that in mind when we started. But then I realized about 5 pictures in that it is a much more detailed process than I wanted to document. However, I will point you at tutorials and videos I used for help. I’ll also explain how I changed the lines of the chair the second time I reupholstered it to make it more modern and to make the cushions detachable with washable covers. Just know going in that this is not an DIY project for the faint of heart. Be prepared to use all your patience and problem solving skills and for this to take at least twice as long as you think it should.
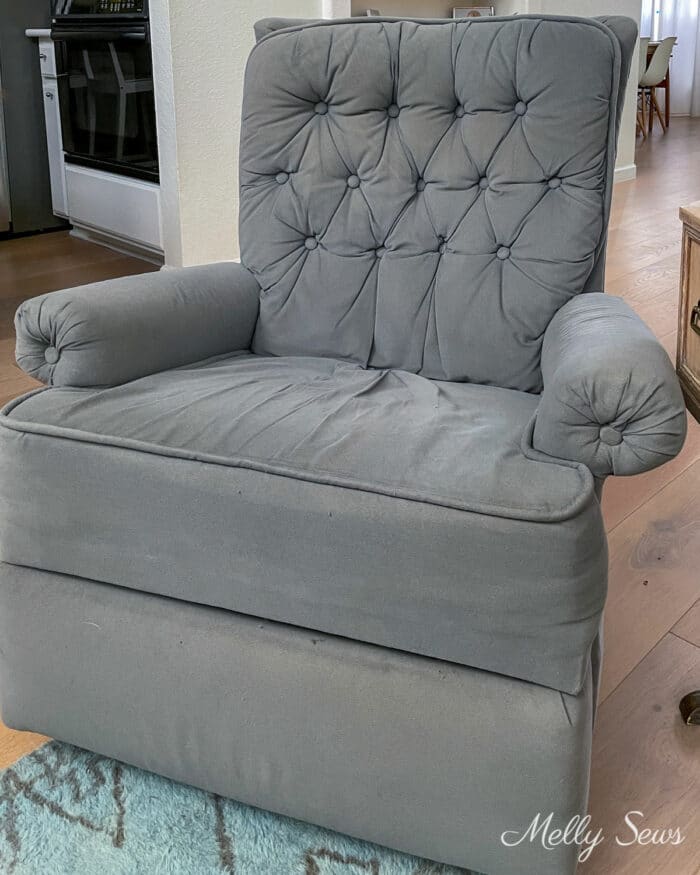
Where We Started – the Recliner Before
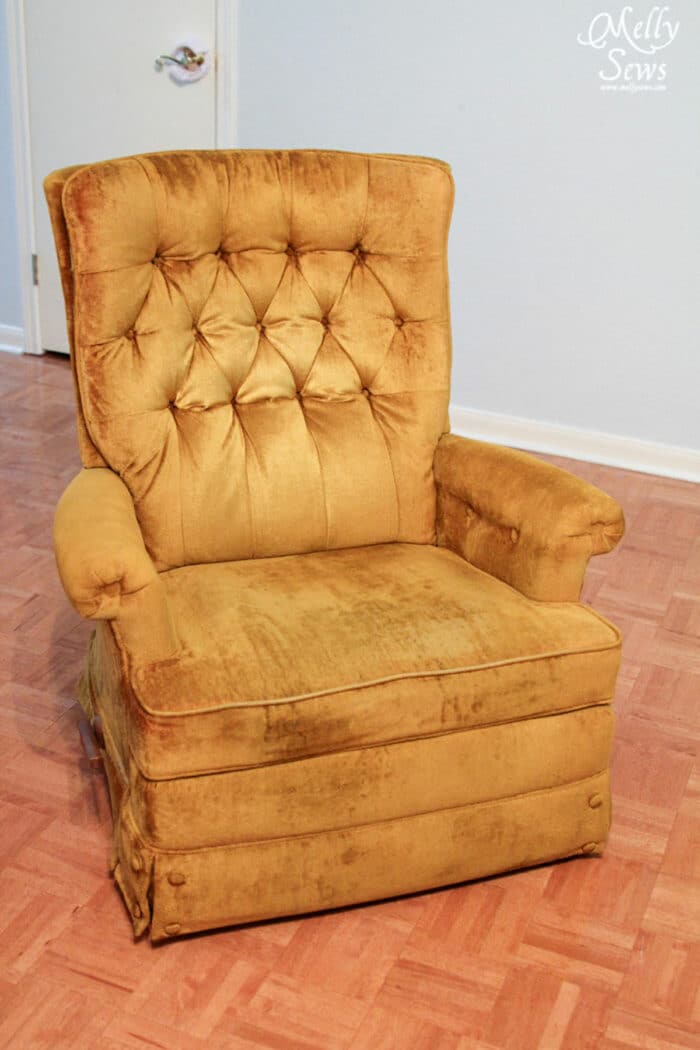
Here is the recliner we started with, pictured in our old house. We found our vintage lazy boy recliner on Craigslist and paid $60 for it in 2012 with the express intent to reupholster it. The chair is originally from 1972 – we know the year because we found a tag with the manufacturing date. It had a semi-attached back. Why is this important? Because a semi attached back cushion tufted recliner is probably the hardest reupholstering project one could undertake. But with little to lose, the Coach and I jumped in.
Gather Materials
This post contains affiliate links. As an Amazon Associate I earn from qualifying purchases. All affiliate links are identified with (affiliate link) after the link or a commissions earned statement above the link(s).
Before this project my reupholstering experience included dining seats, an office chair and items I reupholstered for the stage when I was a theatre teacher. But when reupholstering for the stage it just has to look good from the audience, which means you can skip steps, leave exposed staples and even use a hot glue gun. Those things don’t work for pieces that will be used in a home for daily living. This chair was definitely a learning project.
Supplies for Upholstery Projects
So…gather your upholstery tools. Here’s what you’ll need:
- Fabric (affiliate link) this is the exact fabric I used the second time we redid the chair, though it is showing as out of stock as of this writing
- Cotton filler cord (affiliate link) to sew piping
- Sewing machine and basic notions: needles, pins, marking tools, etc.
- Foam (maybe). We re-used the original foam the first time we reupholstered this, then got ourselves new cushions when we redid it the second time. I used this foam (affiliate link) for the back and this foam (affiliate link)for the seat cushion.
- Wide hook and loop tape (affiliate link) if you’re going to make the cushions detachable
- Zippers for the cushions if they’re detachable – should be same width as your chair
- Needle nose pliers
- Tack claw – I use this as a staple remover. You can also use a screwdriver but the curve and V indent in the tack claw make it much easier, and it’s an inexpensive addition to your toolbox.
- Hammer
- Flexible tack strip (affiliate link)
- Staple gun. If you can rent or borrow a pneumatic staple gun and an air compressor, it is light years easier to do, but a manual staple gun is a pretty inexpensive tool and it also works.
- Jigsaw or electric knife to cut the foam
I talk in the video in this post on slipcovers about how to estimate fabric yardage for an upholstery project. For this chair I used approximately 7 yards of fabric.
Tips for Upholstery Projects
Like I said, this isn’t a complete tutorial. My tips if you undertake something like this:
- Take more pictures than you think you will ever need. We took a lot and there were still a few things we couldn’t remember how to put back together without a lot of discussion.
- If you have access to or can rent a pneumatic staple gun, by all means do it. We borrowed my parents’ gun and it made a HUGE difference over previous projects we had done with a regular and electric staplers.
- This post is a great overview of reupholstering
- This one helped with the buttons
- This series of videos helped with the semi-attached back. It helped me to see it before we took ours apart. I was scared I wouldn’t be able to put it back together until I watched this.
- This video shows the flexible metal tack strip. That is how all the staples, etc get hidden on the chair back.
Remove Old Upholstery
The first step to reupholstering anything is to remove the old fabric. For that you will use the tack claw, hammer, and needle nose pliers. Have a trash can nearby to drop all the staples in as you remove them. In the video below which you can also watch here you can see a quick overview of how to use these tools to remove the staples that I made during the second reupholstery.
It’s generally useful to start by turning the furniture upside down – you’ll usually see staples there and as you start removing those you’ll uncover the next set, etc.
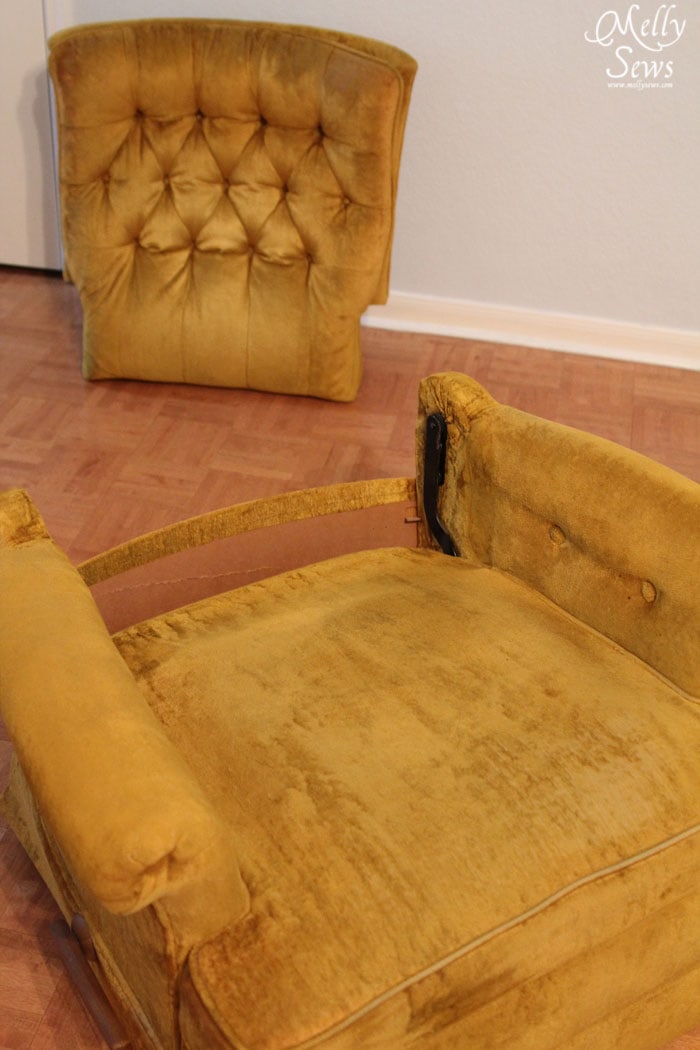
So here are a few shots I took as we went the first time. First, we detached the back from the seat.
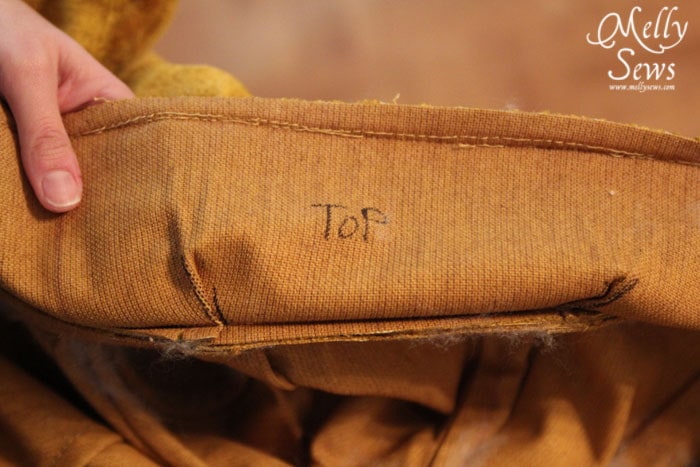
As you start taking fabric off, I HIGHLY recommend writing on the pieces you take off so you can figure out where they went if you are using them as fabric patterns.
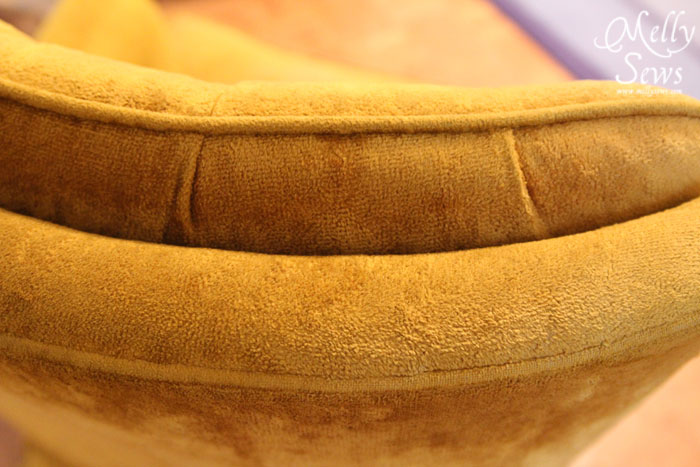
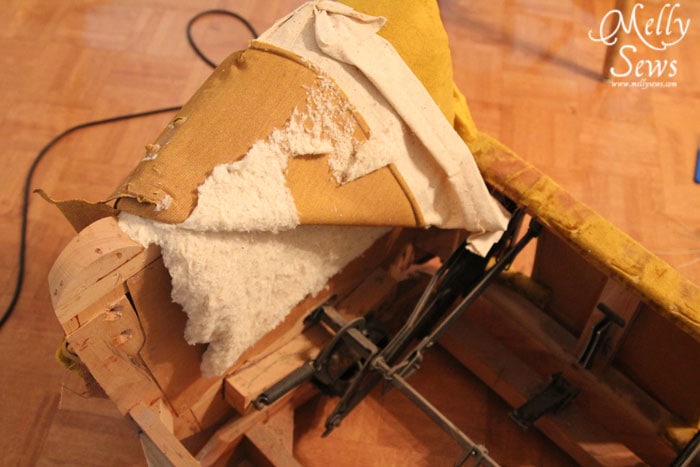
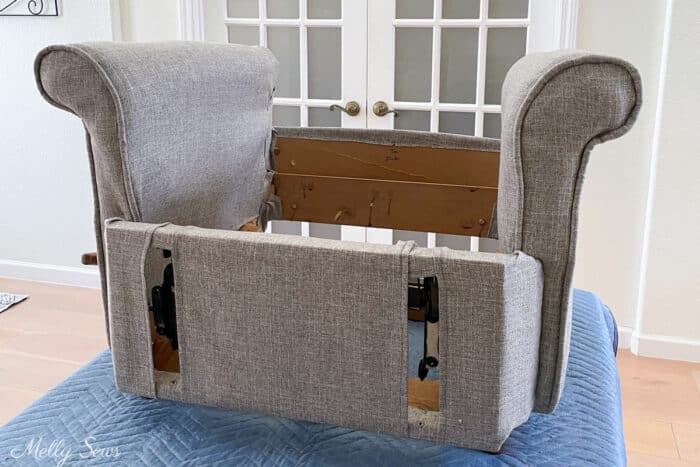
By this point I was convinced that the chair had resided in a household of cats. I had that special tickle in my throat (I’m allergic to cats) and we couldn’t get done fast enough. Below is what the back looked like once we had taken all the fabric and foam off of it.

And in the image below you can see the frame under the arms as well as the reclining mechanism behind the footrest.
Traditional Upholstered Look
After two dusty days of letting the kids play too much Kinect and watch too much TV, this was the chair.
We kept most of the same lines as the original chair, just in an updated fabric. However, I did gathered tufting instead of sewing down the excess fabric between the buttons. I just didn’t have it in me by that point to do the math and fitting for the sleeker sewn tufting. We also left the skirt off all the way around the chair. I upholstered the footrest as a solid piece instead of the faux skirt with extra piping and buttons that the original had.
Create A Modern Look with Washable Cushion Covers
I am happy to report that the cheap upholstery fabric and learning experience did last 10 years pretty well. The biggest issue was that the seat foam was starting to fail and that made the fabric not as tight over the seat. Which led to permanent butt wrinkles in the fabric on the seat. You can see those below. You can also see that after 10 years the seat back and footrest were starting to discolor.
In addition, since we originally redid the recliner, we moved into a new house. It no longer coordinated with any of our furniture, which was now more modern and different colors. Also my eye for design had developed a lot and this whole chair was tempting me to put it in the dumpster because it made me so unhappy sticking out like a sore thumb in our living room.

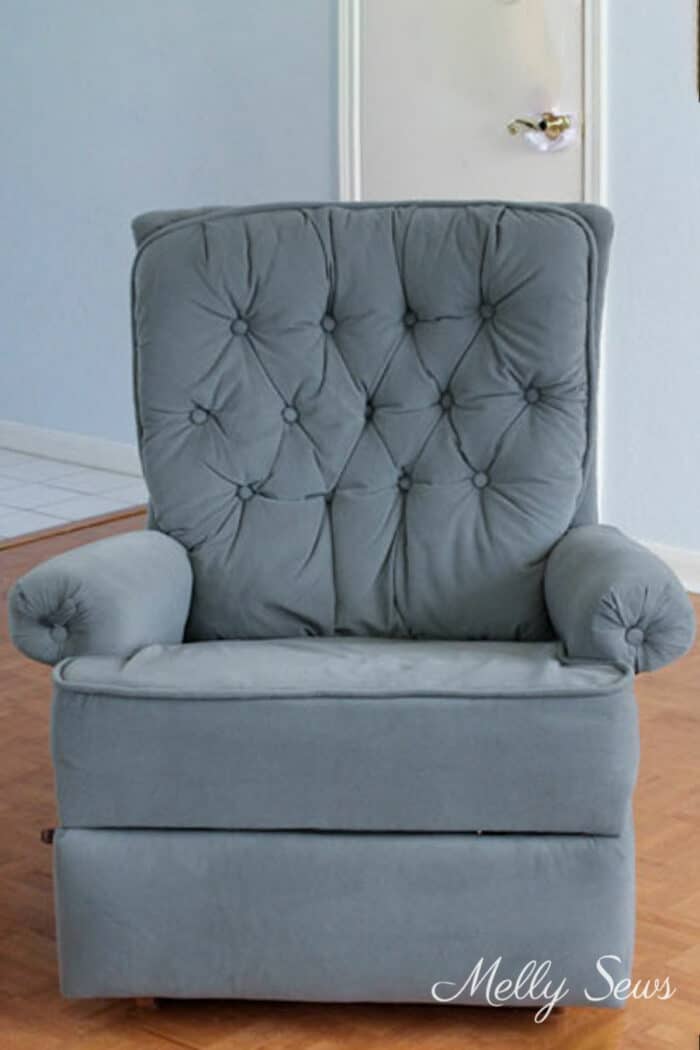
My goals for this redo were to clean up the silhouette to go with the rest of our furniture. You can see a picture of our current couch above. I also wanted to somehow make the cushion covers washable, since those areas took the most wear and tear. Luckily, I found new fabric that matched our couch almost perfectly. Having the same fabric on both pieces helps to make them look like the belong in the same room together. This works even if other style lines (like the arms) are still pretty different.
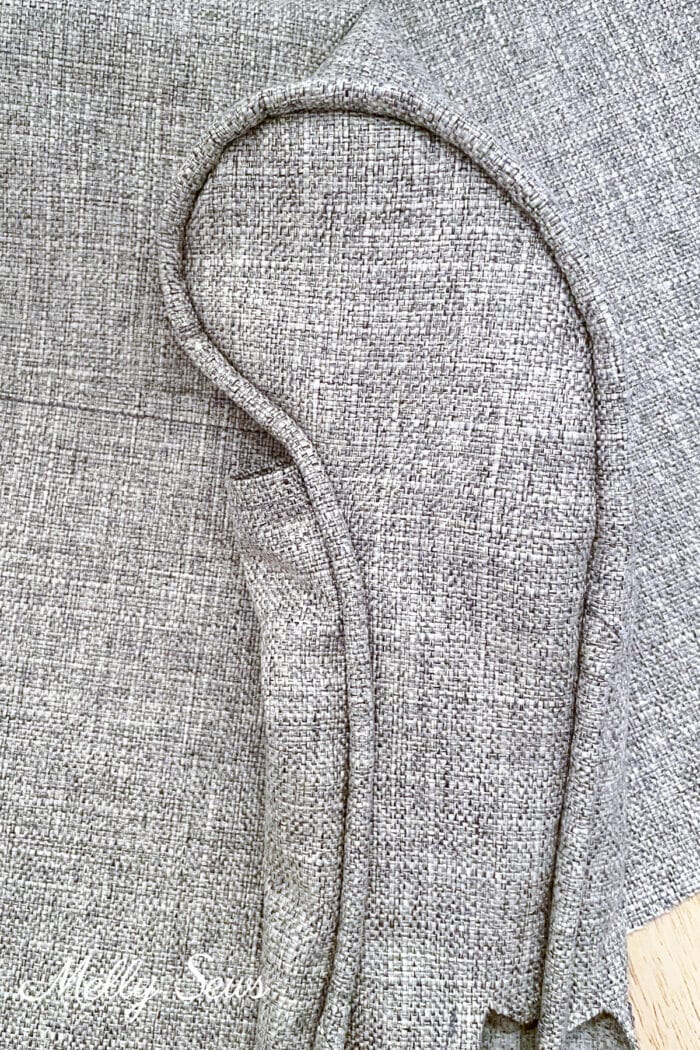
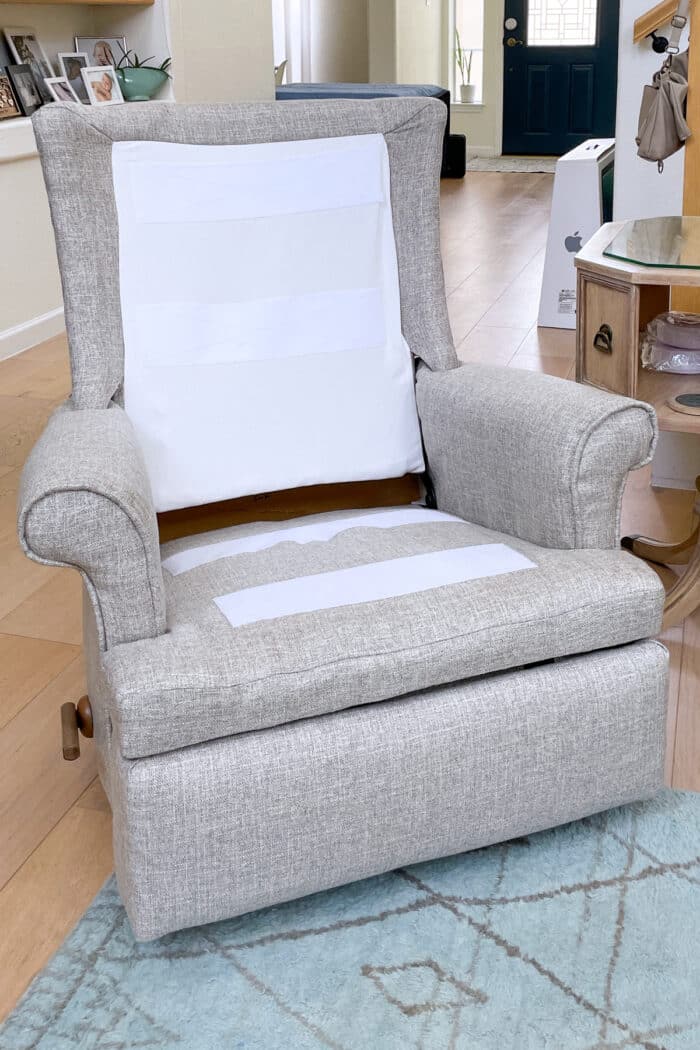
Above and below you can see the fabric and the shaped and piped arm style I sewed. Below you can also see how I finished the lower part of the chair. I reached in from the back to add stuffing under the batting layer on the arms of the chair to fill out the shape. This image was taken in the middle of that process, you can see how the arms are still lumpy. We did a lot of the work on a card table in our entry way because it was hot summer while we were doing this project.
To solve the detachable/washable cushion dilemma, I thought about why recliners have attached cushions to begin with. It’s so the cushions don’t slide around when the rest of the chair moves from upright to reclined positions. I decided that it was worth trying some heavy duty hook and loop tape to securely attach the cushions to the the frame but still be able to remove them. So below you can see the velcro I added on the chair back, as well as the seams helping shape the fabric onto the corners of the frame.
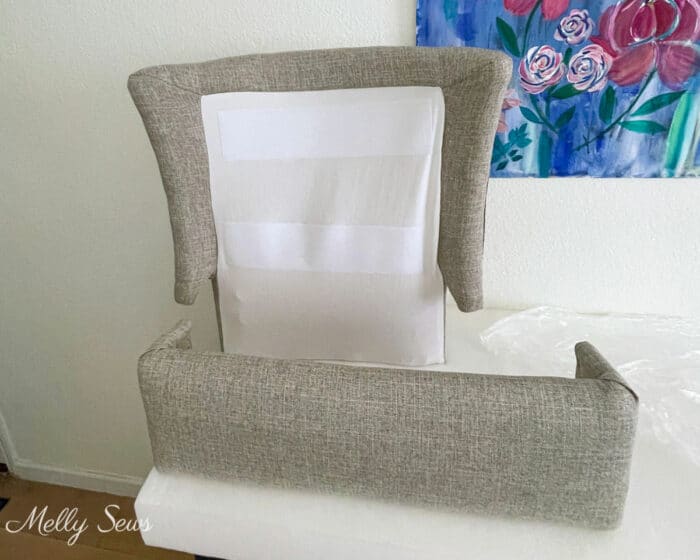
I put the opposite side of the velcro on the back of the seat back cushion. I also sewed it onto the fabric covering the seat of the frame and the seat cushion.
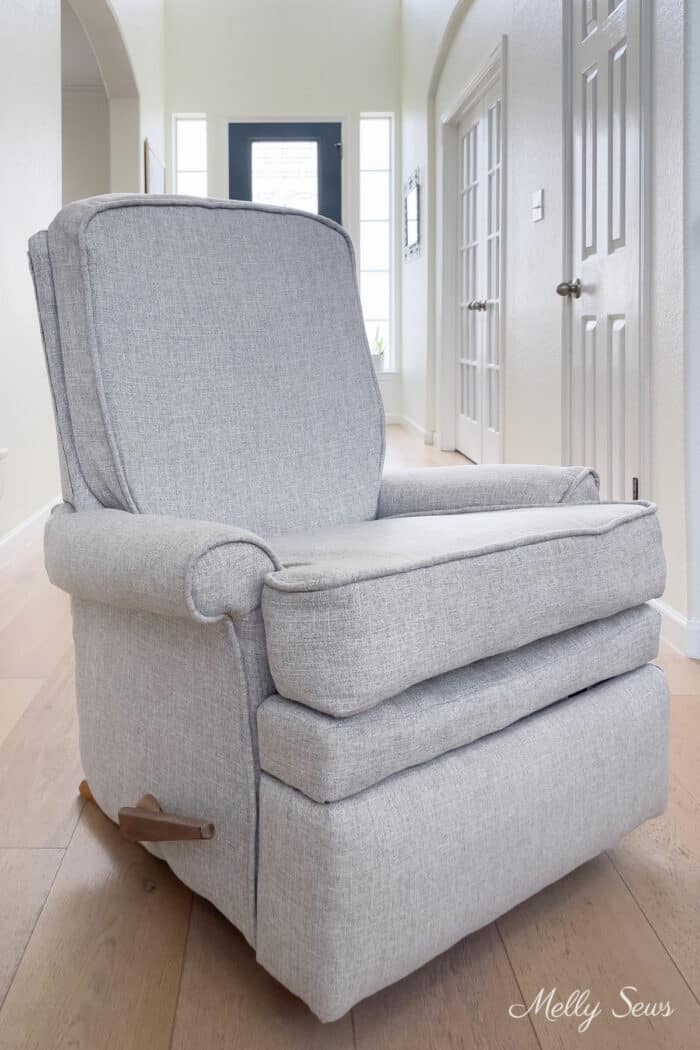
Finished Recliner – the Second Time
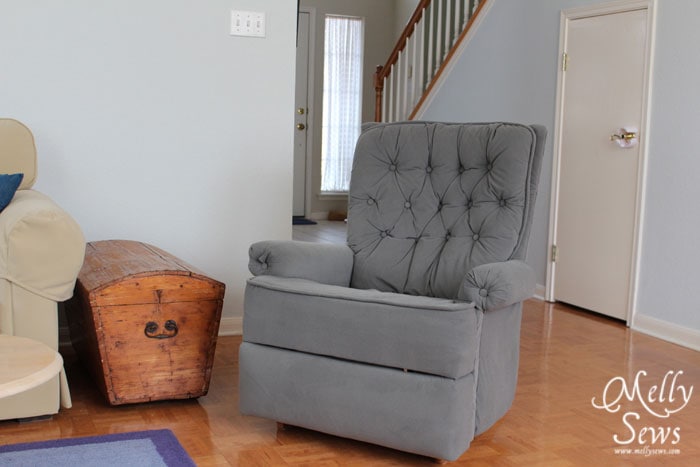
So below is the finished recliner with the cushions in place. Our old la-z-boy recliner barely resembles the chair in our living room now! The photo below was actually taken a little over a year after completing the project. Because yes, it has taken me that long to write this post. As you can see, the new cushions and fabric are holding up well.
Cost to Reupholster Ourselves
I bought 50% off clearance upholstery fabric and supplies for $80. So all told this chair cost $140 the first time we updated it. The second time I purchased more expensive fabric. Once the supplies and foam were added in I spent another $200. I didn’t count the cost of any of the tools we already owned or borrowed from my Dad in the cost either time. I think $340 for a chair that has served us for over a decade is a good deal. And since it is solidly built, I think it will continue to work well even if we update it again.
Tell me what you think – would you ever attempt to reupholster something?
Ajaire
This is seriously impressive. It looks so great! The semi attached back is the worst to try to do. Thanks for the helper links!
Kristi @ Addicted 2 Decorating
Oh wow…now THAT’S an ambitious project!! It turned out great! I’ve reupholstered many chairs, and many different types of chairs, but I don’t think I’ve ever had the courage to reupholster a recliner. I’m very impressed. Thanks so much for the shoutouts! 🙂
Karina
I really love these http://www.theshabbycreekcottage.com/2011/08/how-to-make-big-fat-flower-pillow.html
I made one recently and they look so pretty! One thing to be aware of though, where it says in the tutorial that you stitch the ends of the strip together to make one strip that’s at least 9 feet, I think it’s supposed to be 9 yards, because when I made mine I needed a 27 foot long strip! And I don’t have a ruffler attachment for my sewing machine, so I had to gather them by hand. It was worth it though, it looks fabulous.
Michelle jadaa
Wow you are brave!It turned out amazing!
Amanda
I have an old vinyl chair that we finally are having someone recover. Total cost was around $700. Pretty good considered the chair is a collectible. The man said he had never seen one like it, especially one that still reclined. I fear I am not detail oriented enough to recover furniture… But that said, I am so done with the green fabric on our glider and saw a neat re-do on Pinterest. Maybe that could be a good starter project
kelly
I’ve always wanted to try re-upholstery, thanks for posting those links, for reference. Yours turned out so nicely!
Shannon
Wow! This is really amazing, Melissa!
Jess at Me Sew Crazy
I so love reupholstering furniture, it is such a fantastic feeling! Your chair came out fantastic!!!
yvonne
Hmmmm, would I every attempt to reupholster something……As a matter of fact I would– I have! We bought a beautiful couch some years ago, and because we only had 2 real bedrooms, when my father came to stay with us after having open heart surgery, our poor son had to sleep on the couch for um, let me see, like 4 months. Usually I always had the couch cleaned twice a year, because it was brocade, and a light color. But I didn’t want to have it cleaned and him sleeping on it because I was concerned that he might get sick from the solvents–maybe. But then after everyone in the house continued sitting on it, and company as well, when I finally called the company out to clean it, it didn’t look like it should have, so I ordered a video on how to reupholster my big over-sized rolled arm couch. It was easier than I thought, although I use the term reupholster loosely, because actually my couch had an attached slip cover, and I slip covered it. I used a cinnamon colored embroidered satiny-like fabric, and I changed the throw pillows and made some envelope style, and two I made using suede on one side and the same fabric of the couch on the other. I bought boullion fringe for the bottom of the slipcover and it turned out very nicely. I even attempted to put a kinda thick cording around the upper back of the cover and the rounds of the rolled arms. Then I made an accent pillow for the Chair that we had in the living room, we loved it, now just yesterday, I was talking about slipcovering a chair in our bedroom. So I have to say Thank You for the inspiration! Once again, you’ve done a marvelous job. You’re so talented and courageous!
Jamie
I recently redid a chair just like the one you did. I ended up changing the style to avoid doing the semi attached back it turned out really well I left the original fabric and stapled the attached back down to make it appear seamless. It actually turned out rather well. I purchased fabric from amazon.com it was 1/3 the price of the same farbic in the store.
C A Cunningham
I have the exact same gold velvet vintage Lazy Boy to recover. Holw many yards of upholstery fabric were required?
Stephanie
Love this!We have a soiled ugly recliner my husband loves. The next school holidays I will try to recover. Got the fabric for $2 per yard!
Mary Garmon
I think I have this exact same chair. It is a limey green with gold cording. Most comfortable chair ever. Lazyboy needs to revisit this design. This was my father’s chair but mom wants it back, so it will go. Current recliners are just too big and the poly fill flattens out. I think I am going to try to locate another one and give it a go. Thanks for the
Mary Simmons
Hi! Great job!!
I am about to undertake the “recovering” of a similar chair. My teenage sons broke the reclining mechanisms so I am going to just fix it permanently in place. I should write a book about “how to fix or repair things your kids destroy”.
This chair is special to me because it was my moms, and she has passed now.
It rocks, which I love. Now, I have 5 yds of a grey – aqua duck.
I did an antique “grandpa’s porch chair” last month with excellent results. But this doesn’t look easy at all. I’m scared to death of the buttons.
Just going one step at a time. I have seeing friends and a sewing sister nearby for advice.
Thank you for sharing or I wouldn’t feel brave enough to try!
Elise Charest
The chair looks great! You’re awesome!
Carol Kuzilik
I have that Lazy Boy but as a rocker in the same fabric! It’s called The Grandma Chair at our house. I’ve thought about reupholstering it, but the grandkids balk at the idea. Maybe someday I will get brave enought to try it.