
Learn how to make a hooded poncho or wearable blanket with this simple tutorial including a step by step video.

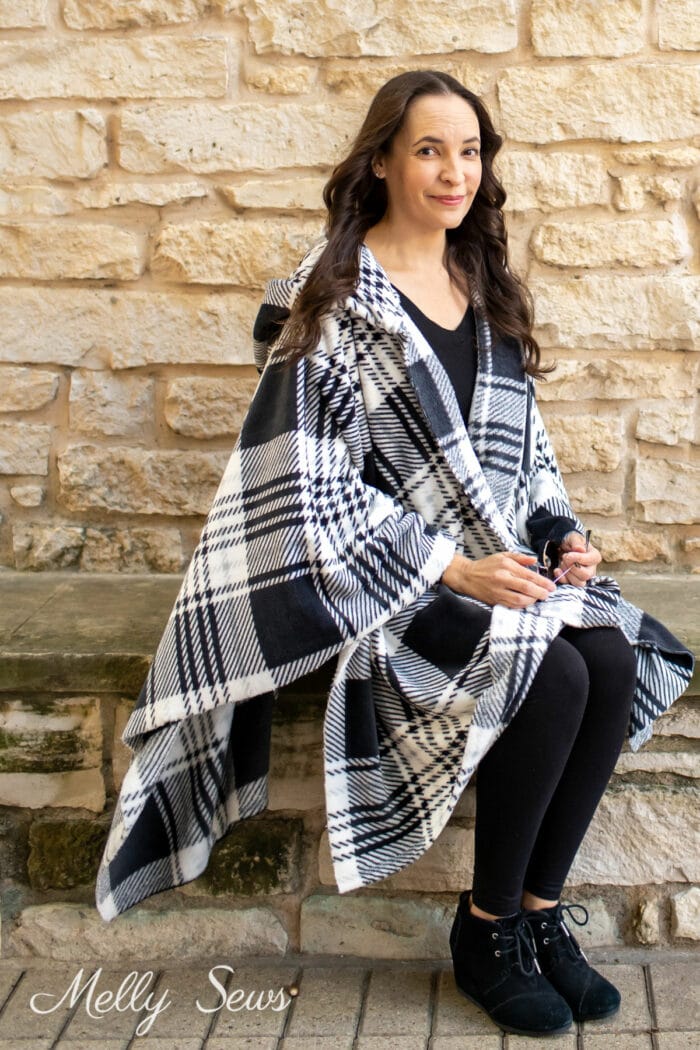
Hey y’all, today I’m showing you how to make a wearable blanket or poncho with a hood. This is yet another great gift you can easily make before Christmas. In this thick, double brushed fleece fabric, this blanket hoodie is super soft and snuggly. I love that it’s just as cozy to wear outside as it is to wear sitting on the couch.
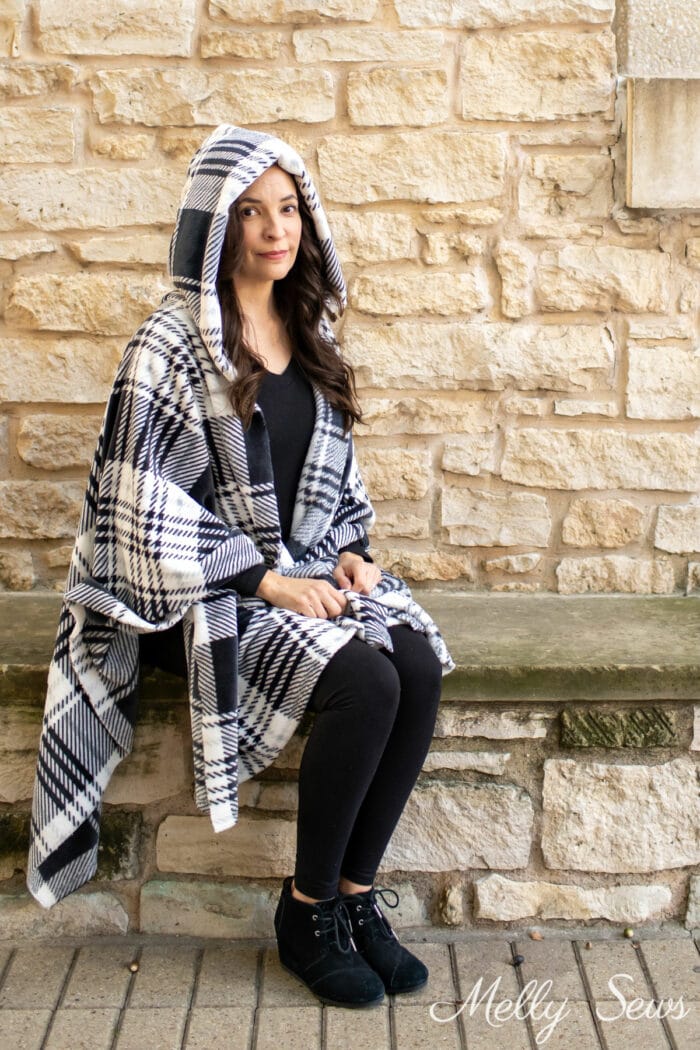
In the video tutorial in this post I talk about how to determine how long and wide you want to make yours, as well as how to draft the hood. This is a perfect project to sew as a gift because you don’t need a lot of measurements, you just need to know approximately how tall the person you’re making for is. That means it will work for kids, women, and men alike, you just modify your dimensions.

Another bonus is that there is no complicated pattern drafting for this. It’s similar to my fleece poncho with a cowl in that way. No free pattern necessary because this is just modified rectangles. And in the video tutorial I show you exactly how I transferred my measurements to make a hood and the poncho body.
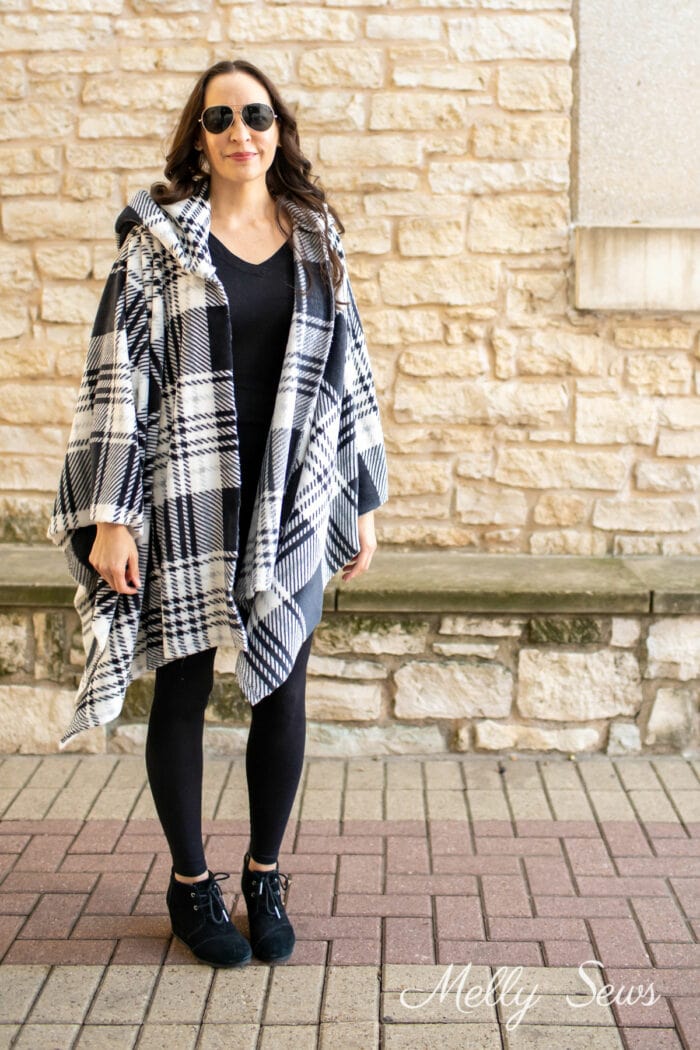
I like this better than the Oodie style pullover because it’s easy to pull off and on while sitting. And if you know someone with mobility challenges, this is a great modification so they don’t have to lift arms above their heads or stand to put it on. I’ve gotten some emails from people who have made my pullover poncho for chemo patients, and I think this type of hoodie would be better because it can be taken off and put on without messing with any tubes, ports or an IV attached to the person. I also think it would be a thoughtful gift for nursing home residents. When we’ve had relatives in nursing homes, they always seemed to be cold, so the hood option on this seems like it would be welcome.
This post contains affiliate links. As an Amazon Associate I earn from qualifying purchases. All affiliate links are identified with (affiliate link) after the link or a commissions earned statement above the link(s).
Materials And Tools For a Fleece Blanket Hoodie
To make your own hoodie blanket, you’ll need:
- Fleece fabric. I used 2 total yards of fleece for mine, 1 1/2 yards for the body and another half yard for the hood.
- Optional – button or large snap if you want to add a closure
- Sewing clips
- Long pins are helpful for finishing the hood
- Sewing machine, thread, needle, etc
- Optional – electric scissors really help cut through multiple layers of fleece easily.
DIY Video Tutorial for a Hooded Poncho
To see how I made my wearable blanket/fleece hooded poncho, watch the video below or on YouTube here.
Here are some general tips on working with thick, fuzzy fabrics that you might find helpful.
Step By Step Instructions for a Hooded Blanket
Time needed: 1 hour
How to Make a Blanket Hoodie
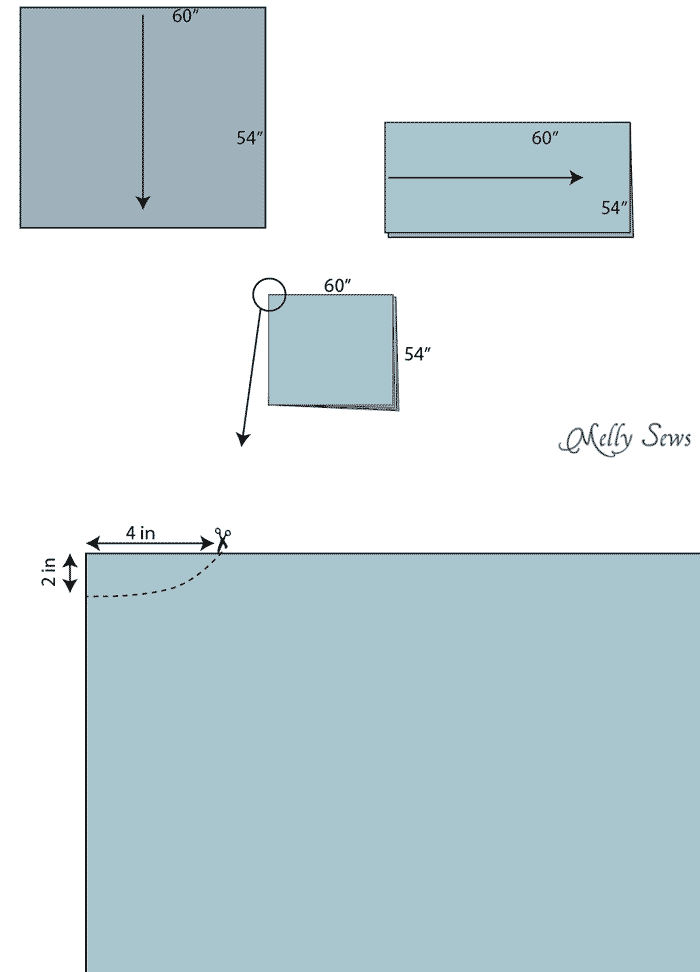
- Determine your height and width.
I made mine 60 inches high and 54 inches wide. Remember that a person’s arm width fingertip to fingertip is generally the same as their total height.
- Cut your neckline
Fold your fabric once vertically and once horizontally. Cut a curve 2 inches down and 4 inches wide at the folded point. Then cut a vertical line up the center front of the blanket.
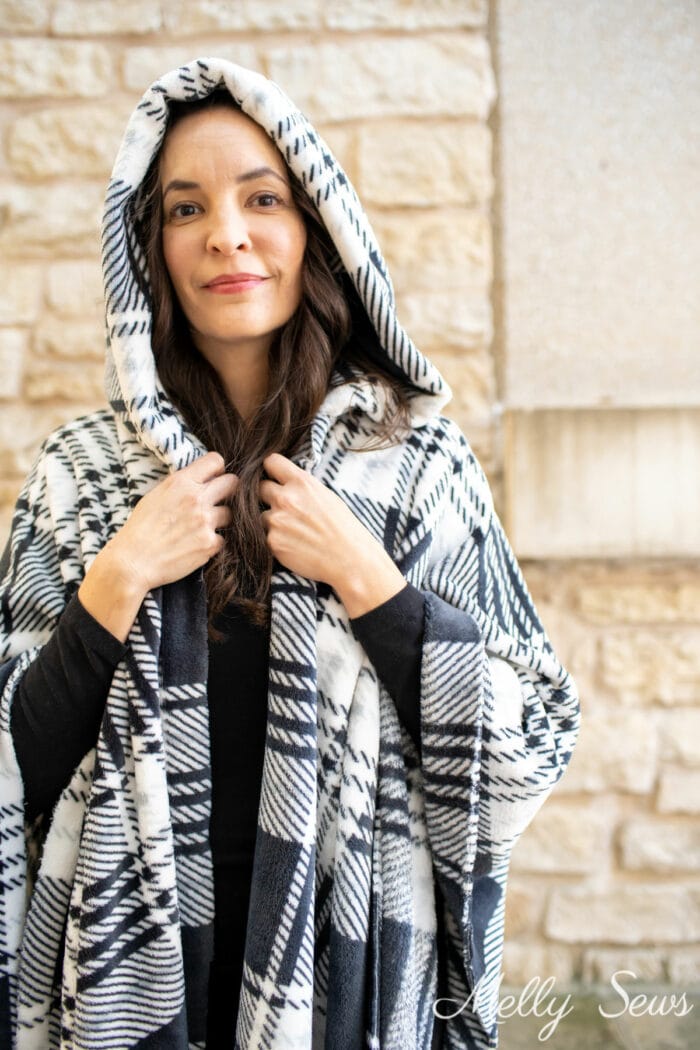
- Make your hood pattern.
Measure from collarbone to collarbone over and across the person’s head. Or for a petite to average size woman use the measurement 36 inches for a loose hood. Add a couple inches for a taller woman or man, subtract a couple inches for a teen, etc. Then measure the neckline on the body of the fabric you cut. Using a ruler, draft a hood piece with the half the neckline edge measurement in width and half the over the head measurement high. Round off the top back corner and the neckline (see video) and add seam allowance to the back edge. Then cut 2 pieces on the fold of the face edge.
- Sew hood pieces together
Open the hood pieces and then place them right sides together. Next, stitch around back and sides but not the neck edge. Use a stretch stitch if you are using stretch fleece.
- Sew hood to neckline
Turn the hood right side out, and then match the two seams you sewed. Push one side of the hood into the other, matching those seams (see video). Mark the center of the neckline on the body of the blanket. Match the seam of the hood right sides together with this center back point, then match the neckline edges to each other. You can sew all 3 layers of the fabric together at once (especially if you serge them), but I prefer to sew the outside layer of the hood to the neckline first, then push the seam allowances up toward the hood. Then I cover those seam allowances with the inside layer of the hood and stitch in the ditch of the hood to secure.
- Optional: add a closure
I don’t finish any of the edges of my fleece since it doesn’t fray. However, you might want to add a button and buttonhole to the center front below the hood to help keep the blanket on the wearer. You could also sew on a snap instead of a button.
Laurinda
OOO! This is my kind of coat! & I happen to have some unused fleece. & Perhaps a cozy wool blanket, too…
Tonya Adamski
Thank you so much for this. My son has sensory issues and is always craving soft blankets. This is going to be perfect.
Barbara Mack
Thank you, Melly, this is a good one for me and very welcomed as it will help lower my electric bill and keep me warm! I’m going to try to use some of my collection of $2.99 fleece blankets from Walmart. I think they might work even if I have to double them. I’m going to make mine first, then for the family. I like heat, my daughter sleeps under a comforter with the A/C on.
Thanks again.
Barbara Mack