
Make a draped skirt with this easy tutorial complete with pictures
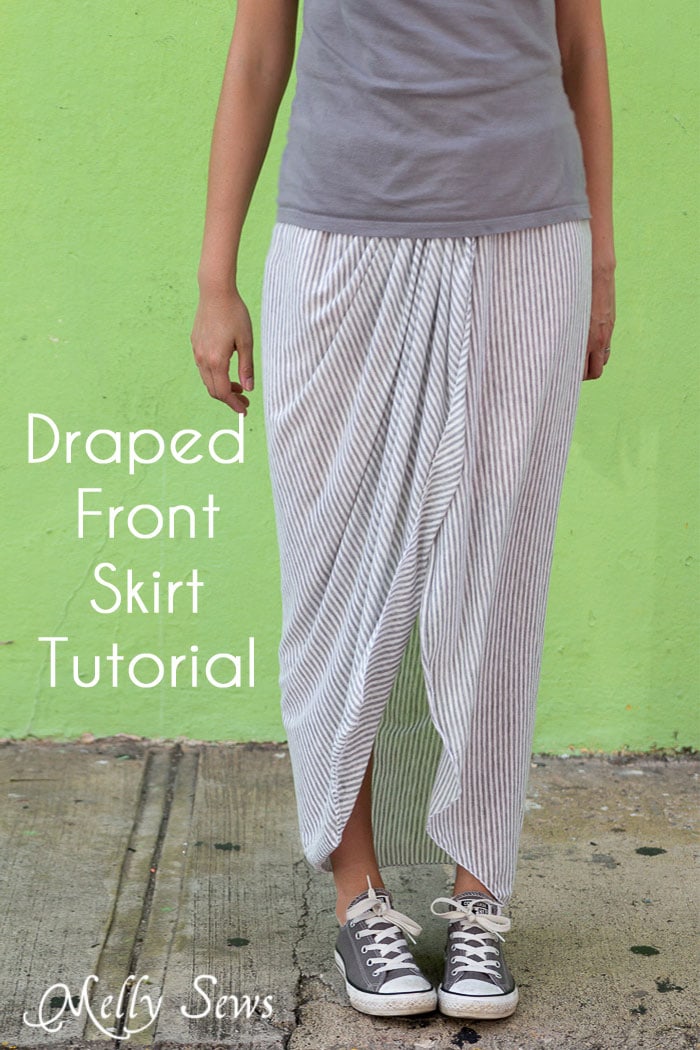
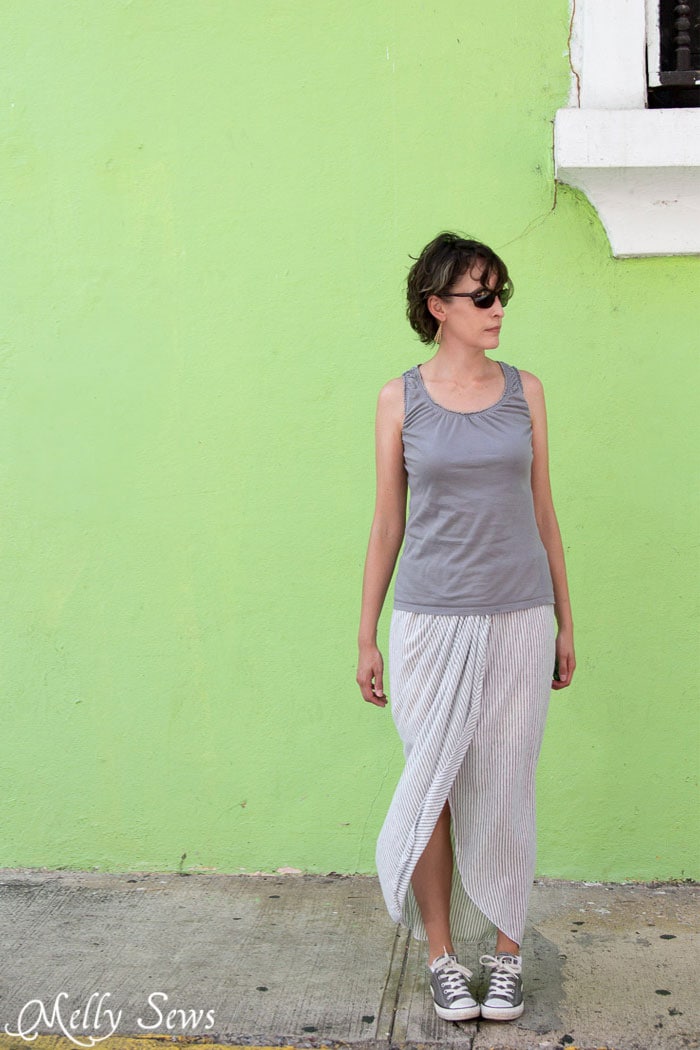
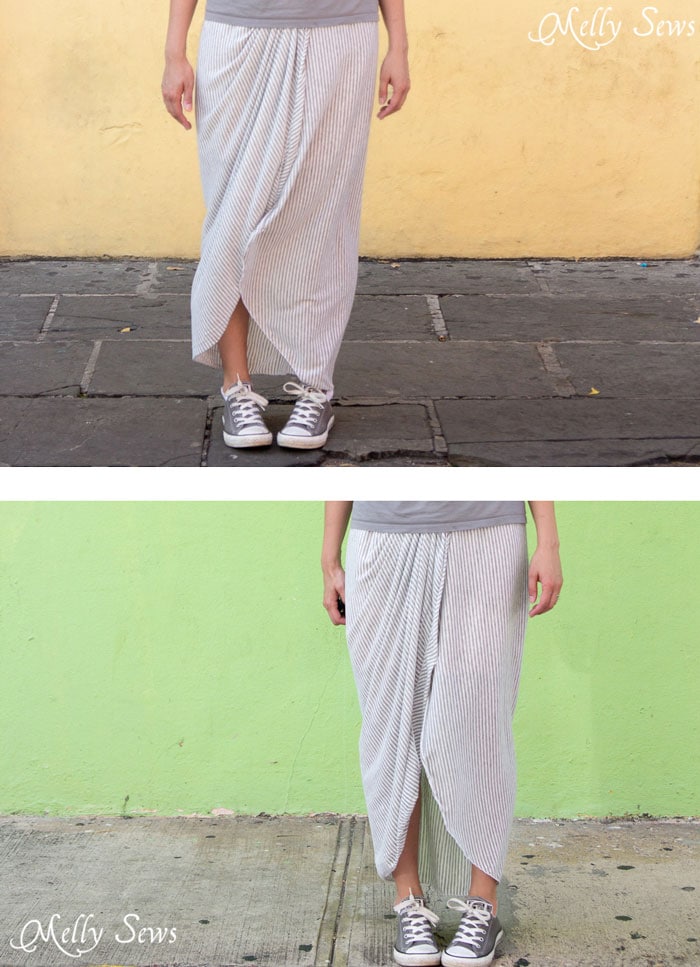
Hey y’all – I hereby declare this the month of skirts! To kick things off I’ve got a draped skirt tutorial for you. This is a lightweight knit ankle length skirt that hangs open to about the knee with an elastic waistband. No zipper needed for this easy to sew skirt! I have worn it both as you see in these pictures and as a swimwear cover, so it’s a great piece to have.
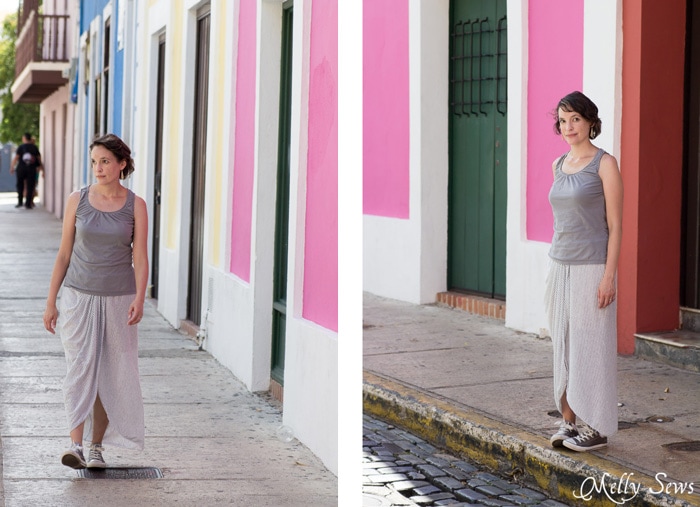
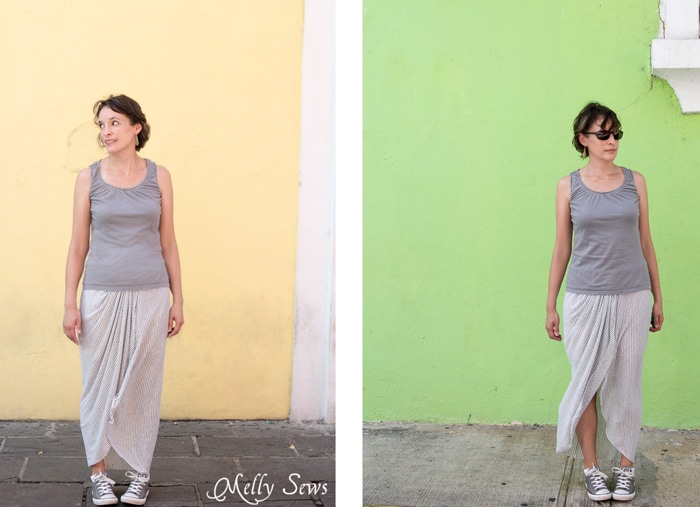
We were lucky to take a trip to Puerto Rico a couple of months ago, and though it was very, very humid and hot, I really loved the architecture and color in Old San Juan. The saturated pinks, blues, yellows and green make my neighborhood look boring by comparison. Wandering the cobblestone streets felt a lot like wandering a European city even though we were still in the United States, and I was glad to have both a breezy skirt and comfortable pair of shoes while we looked around.
This skirt is made with a knit fabric that I used on the cross grain because 1)it had a little vertical stretch 2)I liked the stripes running in this direction. I believe this fabric was a viscose/nylon blend. I also really liked the drape of this stretch fabric.
Draped Skirt Supplies and Pattern
To make this skirt, you’ll need
- Main stretch fabric – at least 2 yards, more or less depending on your size/desired length
- 1/4 yard of knit fabric for the waistband
- 1 yard of 1 1/2 inch wide elastic
Cut 1 or two pieces of fabric so that you end up with a flat piece of fabric that is your desired length and 3 times your natural waist measurement. Make sure that the squarish part of the skirt below is enough to fit around your hips. If you’re pear shaped, you might need to make your skirt piece more than 3 times your waist to make sure that the square part is at least the same measurement as your hips. Also remember you can seam pieces of fabric together to get the width you need if your fabric isn’t wide enough.
Need some guidance about lengths and other skirt measurements? See this post on how to sew skirts – there’s a chart in there you can download. You can make this skirt in any length from mini to midi length to maxi, so that chart might be helpful to figure out lengths.
Once you have your fabric, you’ll want to shape it like the image below, cutting half the skirt into a point and rounding off the other bottom corner.

You’ll also need to draft and cut out a waistband piece. Cut a piece of knit that is 4 1/2 inches tall and the same length and your waist measurement. This piece should stretch lengthwise.
How to Sew Your Skirt
First, you’ll want to hem before moving on. Sew a rolled hem all along the edge with red lines on the drawing of the skirt panel above.
That long triangular extension piece is what we’ll gather up to form the draped front of the skirt. I didn’t bother with gathering stitches, I just hand pleated and bunched the top edge of the extension, pulling it up to be even with the top of the rest of the skirt, as shown below.
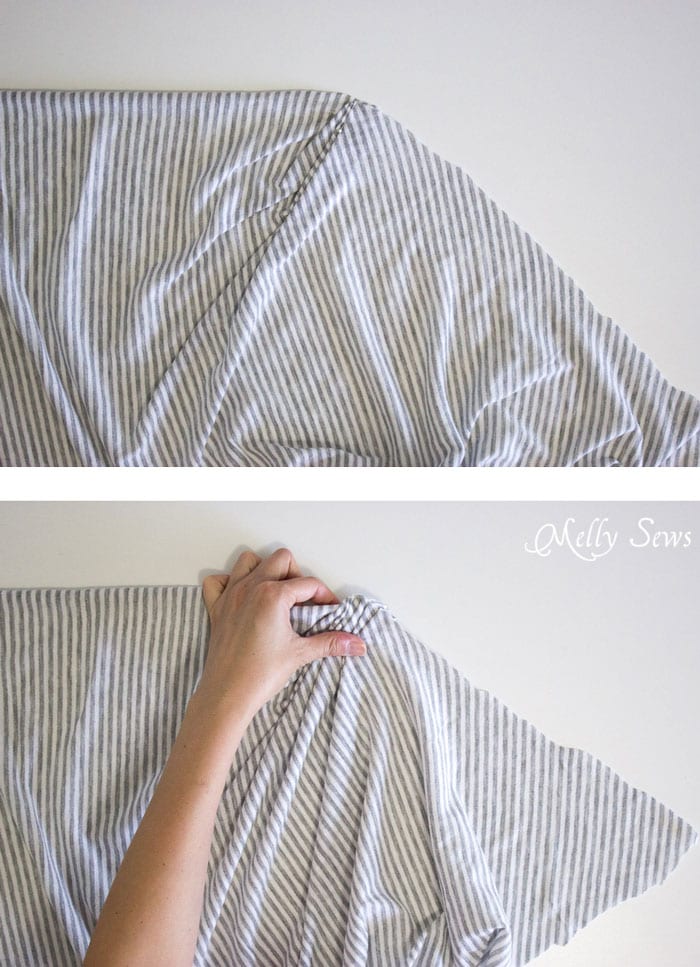
When you’re done, that edge should look like the image below. You can either baste or pin these gathers in place. Note that I wore this skirt at my high waist. Depending on where you wear the waistband, you might want to do more deliberate pleats and press them flat with a warm iron before stitching them down to reduce the bulk at the center front.
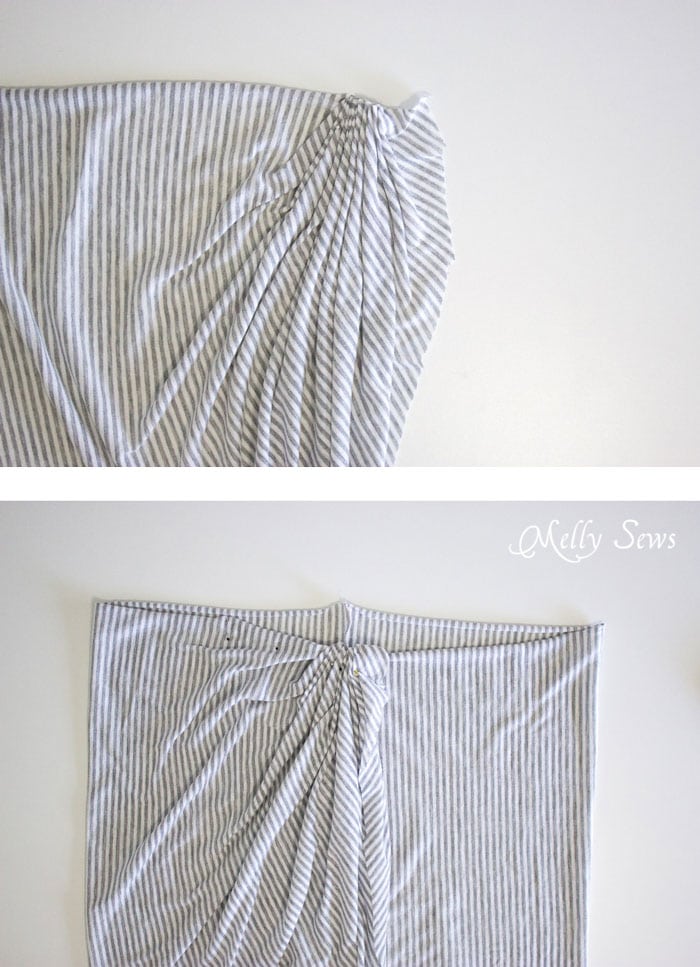
Now fold the skirt, wrong sides together, so the gathered/draped edge is on top of the flat edge of the skirt and they overlap about 4 inches at center front. There’s a picture of this step above and a diagram below to help make it clear. Pin the front layers together and baste the overlap.

At this point the skirt is still wider than your waistline. Attaching the waistband will gather that in.
Sewing the Waistband
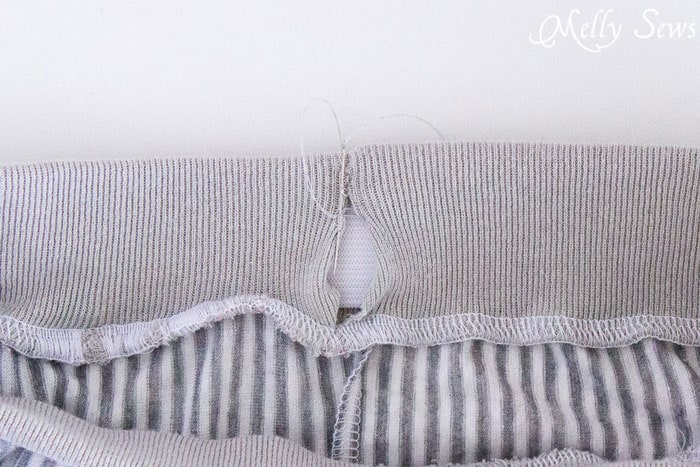
Fold the waistband in half, right sides together, matching the short edges. Sew from the top edge down 2 1/2 inches, backstitch, lift the needle and move the fabric 1 inch, then put the needle back down, backstitch, then sew the last inch of the seam.

Fold that waistband into a loop, wrong sides together and matching raw edges. Press. Pin the waistband at the center front, back and sides to the skirt, right sides together. Stitch through all layers (skirt and both waistband layers) stretching the waistband to match the width of the skirt. Insert elastic through the hole you left in the center back seam.
Use a hand sewing needle and a blind stitch to sew the opening in the waistband closed.
And you’re done! Find some brightly colored walls and go pose like a tourist. Or add a variation – a ruffle detail along the hem edge would be cute, or you might want to turn the skirt to the side so that instead of opening to the front you have a side slit.
Anne
Love it! And I’m more than a little bit jealous of your trip to Puerto Rico. I’ve got a Craft Gossip post scheduled for this afternoon that links to your tutorial: http://sewing.craftgossip.com/?p=83795 –Anne
Kristie
I love that you do themes each month. It makes sewing so much more fun! And this skirt is so perfect for the end of summer. Thanks for sharing a simple pattern!
Karen
The skirt looks great on you! Thank you for the tutorial.
Jeanne
Great tutorial! Simple and you don’t have to worry about a straight hem line at the bottom.
JOY
You are SO talented, and you make things look so easy! Thanks for sharing.
Chelle
LOVE this skirt & it looks especially GREAT w/ your shoes!! Thanx for the tute I’m excited to get started!!
Andria Baunee
Thank you! I am repurposing an oversized bridesmaid’s dress to go to a disco party and this is perfect to get that drapey front gather!!
Cheryl
You want to know why I love this skirt? Well, I’m going to tell you anyway. 😂 I can adjust it to whatever size I need. Yay. And that’s even after I sew it. A month ago I had to go to my Dr., and I weighed in at just a smidgen over 132. 11 days later I had to go back. I weighed in at 117. Now I’m down to 112, so this pattern is perfece for me. I’m 5’7″ and now I’m not afraid of wearing clothes that are “too young” for me, because I don’t give a flying myocardial infarction about what people think about my clothes. I will be looking at all of your long dresses. I dare not show my legs due to the sudden weight loss. My skin on my legs sort of hangs in ripples. I know. Waaay too much information. The docs tell me my tumors are very small, so I guess they’re waiting until they grow to do anything about them. Oh, well. What do I know? I’m only the patient. So,in the meantime, I’m going to sew anything I want to. It’s surprising how bold I get when I’m old and a little sick. Now, I’m going back to Friday’s mail and see if I can get in to drool all over your patterns (figuratively speaking). And. I’ll try very hard not to drool on my iPad. I’ve been told it really doesn’t like it. Anyway, I’m off to the mail from last Friday and see if your password is still there. Oh! I even bought me some black stretchy fabric with colorful skulls for leggings, and I have an embroidery design that will almost match. Close enough for government work. The next time I have to go to the VA to see my docs, that’s what I’m wearing. Quite apropos, don’t you think? I want to thank you so very much for sharing your patterns with all of us. You have been such an inspiration for me. I’ve also bought a few of your patterns. I think the Abrezio will fit just perfectly. Cherylt
Stewart
Really beautiful piece! And great step by step guide.
Diane Varney
lovely-I will have to try this one.thanks,Diane,|=Scotland