
Hey y’all – today we’re going to talk about how to embroider by hand, and how to do 3 very basic embroidery stitches: the back stitch, the French knot and the satin stitch. Last week when I posted my embroidered Valetta top I realized I didn’t have a good guide for the 3 stitches used in that embroidery pattern. So I created one!
Hand embroidery is a great way to get into embellishing, because it requires a very small investment in supplies, and it’s sewing that you can take with you anywhere. The embroidery pattern I used on my Valetta is available here.
I made a video to demonstrate the stitches, which you can watch below or on YouTube here if it won’t load for some reason.
Here are the supplies I use; these are affiliate links, so if you purchase through them you’re helping support the site at no additional cost to you – thanks!
- Embroidery hoop. I use this one but readily available wood hoops found at craft stores also work fine, though you may have to tighten your fabric multiple times.
- Embroidery floss. I use DMC 6 strand, which is readily available in hundreds of colors at most craft and fabric stores.
- Embroidery needles
- Fabric. You can embroider on pretty much anything, just make sure that if it’s a loose weave or knit fabric intended for a garment that you add interfacing to the back to stabilize
- Washable marking pen
- Optional – light box for tracing
- Embroidery design of your choice – you can even create your own!
And if you need close up stills of the stitches, here they are.
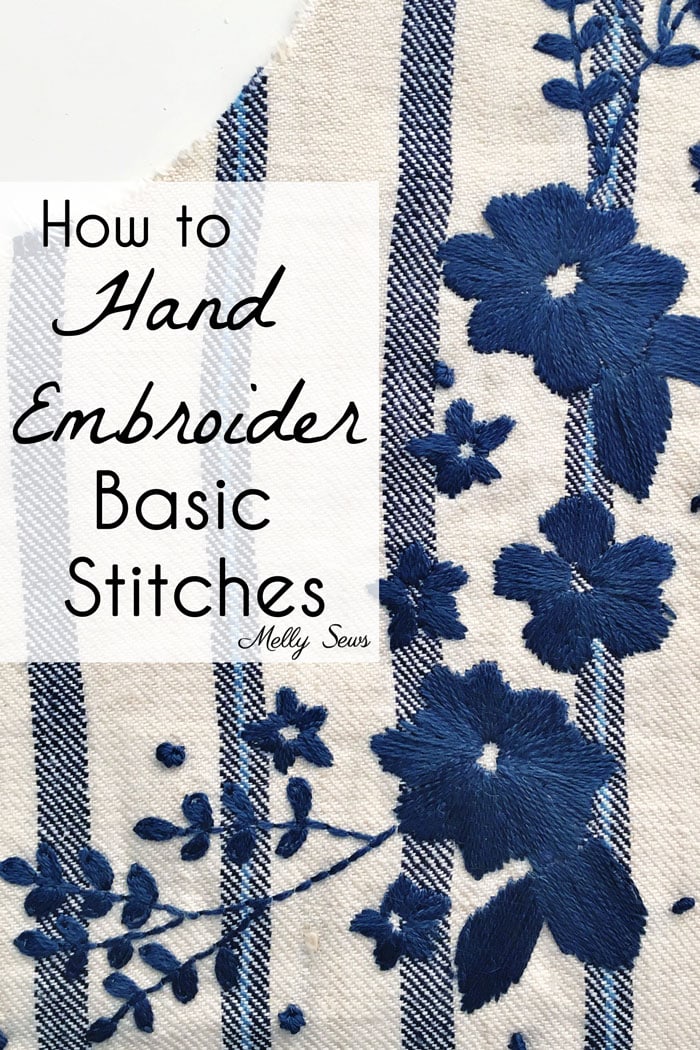
First up – the back stitch. Useful for outlining and things like stems, you simply bring the needle up a stitch length away along your line from your previous stitch, then take it back down through the end of the previous stitch. This creates a line on both the front and back side of the work.
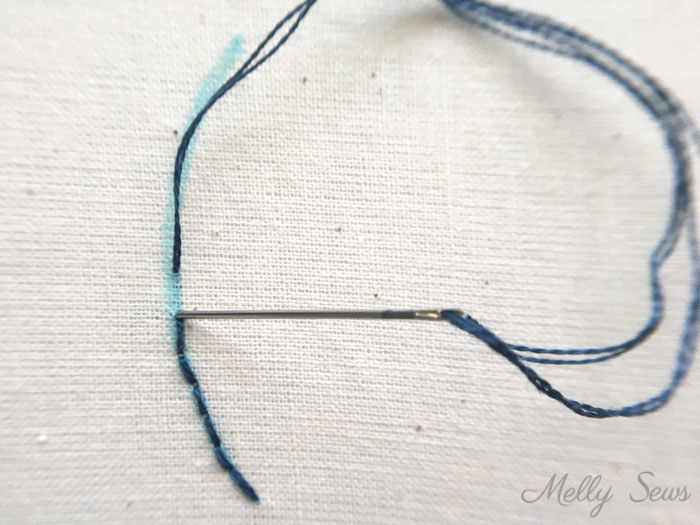
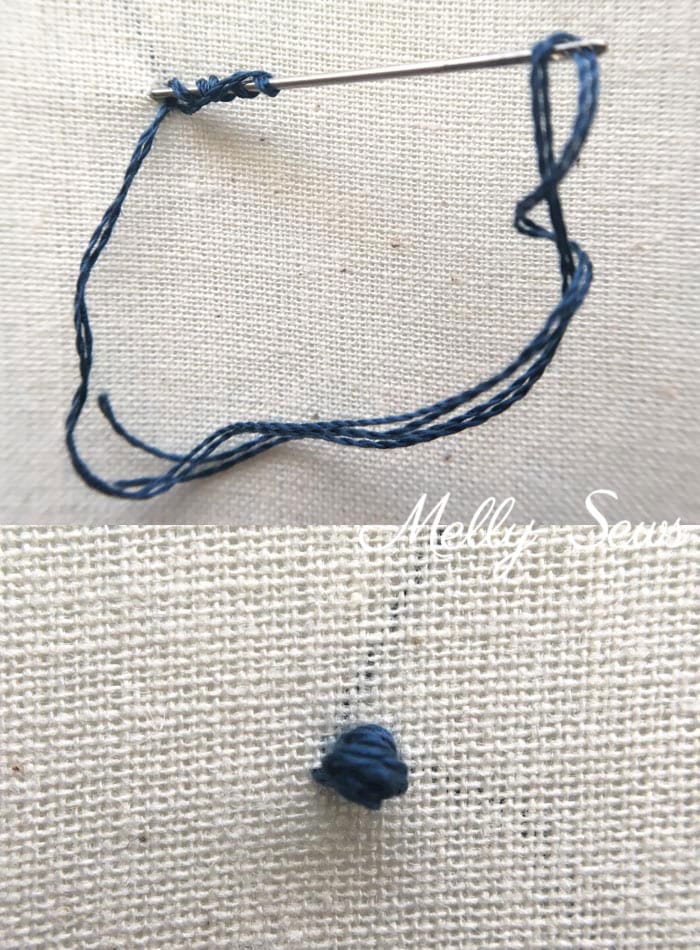
The French knot – bring the needle up, then wrap thread around it multiple times (I like to do 6 wraps). Holding wraps tight, insert needle right next to where you brought it up, and take it down through the wraps to the back side of the work, leaving a raised knot on the surface.
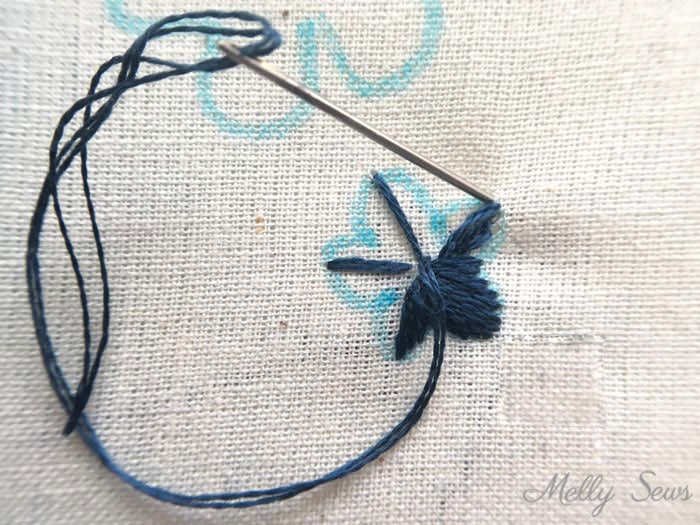
The satin stitch. These are just straight stitches placed right next to each other. The key is to bring the needle up on the same side each time, then take it down on the opposite side each time, creating the fill on both the front and back of the fabric. I also like to add “guideline” stitches around my flowers to help me space my stitches and guide the direction of the stitches for each petal.
And that’s it! Now go create some gorgeous embroidered work.
Vuyokazi
Thanks you Melissa, much appreciated. I love embroidery project but I always think it is difficult to do so