
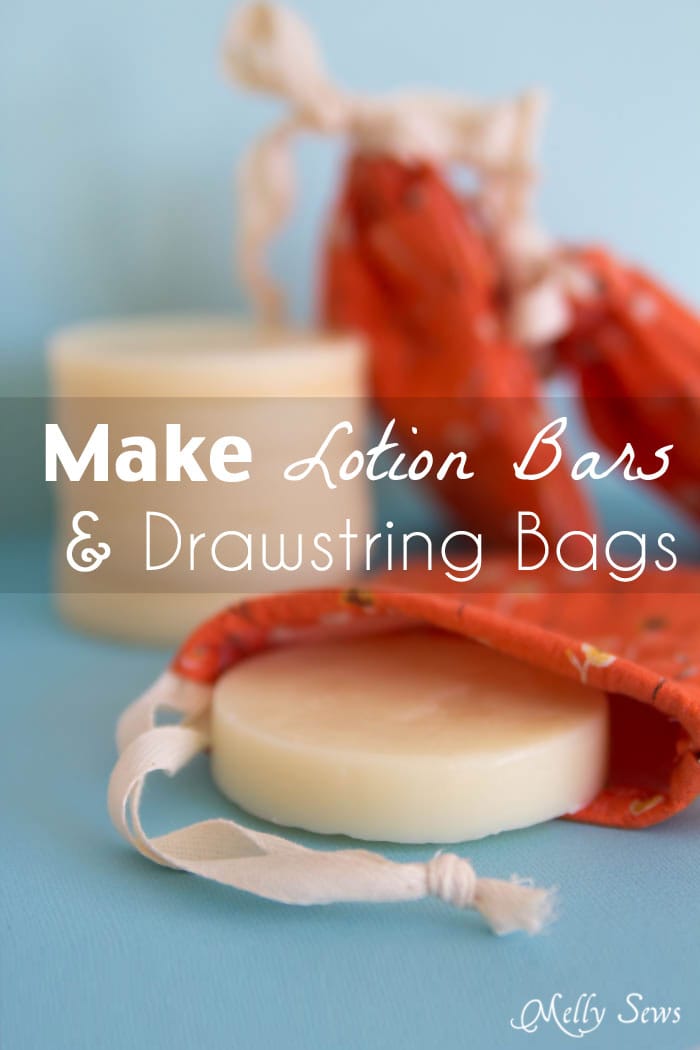
Hey y’all, today I’m sharing a great gift that you can make assembly line style – first make lotion bars, then sew drawstring bags for packaging. These are perfect to keep on hand when you need a last minute gift (which happens to me more often than I’d like to admit) or you can just keep them for yourself. I have to admit – I’ve given away about 3 of the lotion bars I’ve made and personally used up about 5, ha!
Lotion bars have been my favorite after shower body moisturizer for years now, ever since my best friend gave me one as a gift. I got addicted to the Oatmeal, Milk and Honey scent she picked out for me, and I loved how it kept me moisturized and smelling nice without making my skin greasy.
Before that gift, I’d never heard of lotion bars. And after buying them for years and years, I decided to try making them, and I won’t be going back to buying now! I can make a whole batch for what I was paying for 1 or two bars.
The first batch is going to cost the most, because of start up supplies. But after that, not so much. You’ll need:
- Oils. I use Apricot, Almond, Sunflower and Safflower in mine, because those were what were listed in the ingredients of the ones I used to buy.
- Beeswax. I bought 1 pound at the craft store. I think next time I’m going to look into buying local beeswax, but the craft store block has worked fine, and I still have enough for at least one more batch.
- Fragrance. You can use essential oils or your can order fragrance. Just make sure you get an oil to scent the bars, because anything water based won’t mix. Kind of like salad oil plus vinegar…the non oil based part just beads up and rises to the surface of the lotion bar when it cools. Ask me how I know. I bought Oatmeal, Milk and Honey scent from Brambleberry *Note – fragrance is optional; if you’re dealing with scent sensitivity, you can totally skip it. The bars without it will smell mostly like beeswax, and that scent will be less if you use white beeswax that has been filtered.
- Optional – a silicone mold. You don’t HAVE to have this, because you can also line cupcake tins with paper liners and use that to make your bars, but if you think you’ll make more than one batch the silicone mold is nice to have since the bars pop out easily and don’t have paper to peel off. I also got my silicone mold at Brambleberry.
- A double boiler pot. Or put one pot in another, like I do, since I don’t have a double boiler. You just don’t want to expose the oils/beeswax to direct heat.
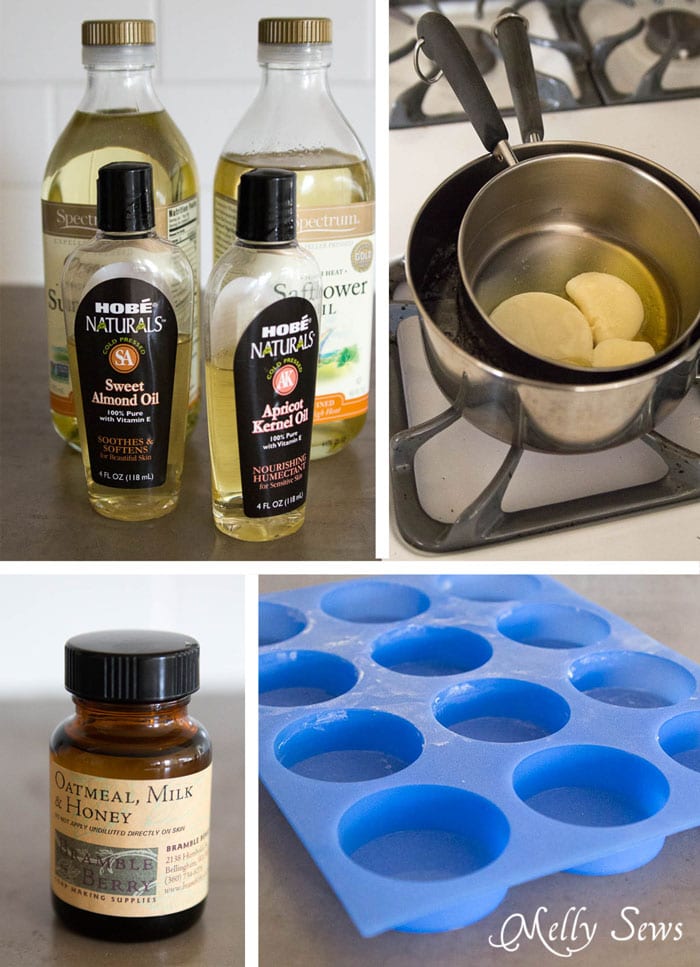
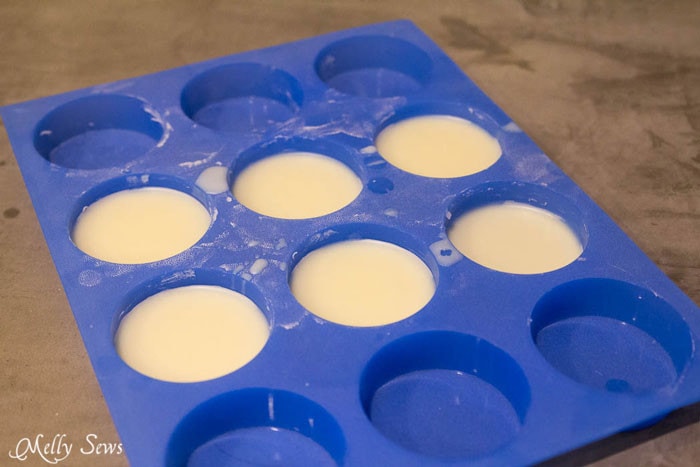
My recipe for lotion bars is pretty simple – it’s 1/2 beeswax to 1/2 oil plus fragrance. Or, more specifically, I put in 1 cup of melted beeswax, and then 1/4 cup of each of the oils I use, and 1 ounce of fragrance because I like a lot of scent in these. I melt the beeswax then add the oils and fragrance. You may see the oils cloud up in the beeswax when you first pour them in, like in the image below, but then they melt in after a few minutes. Stir and then pour into your mold.
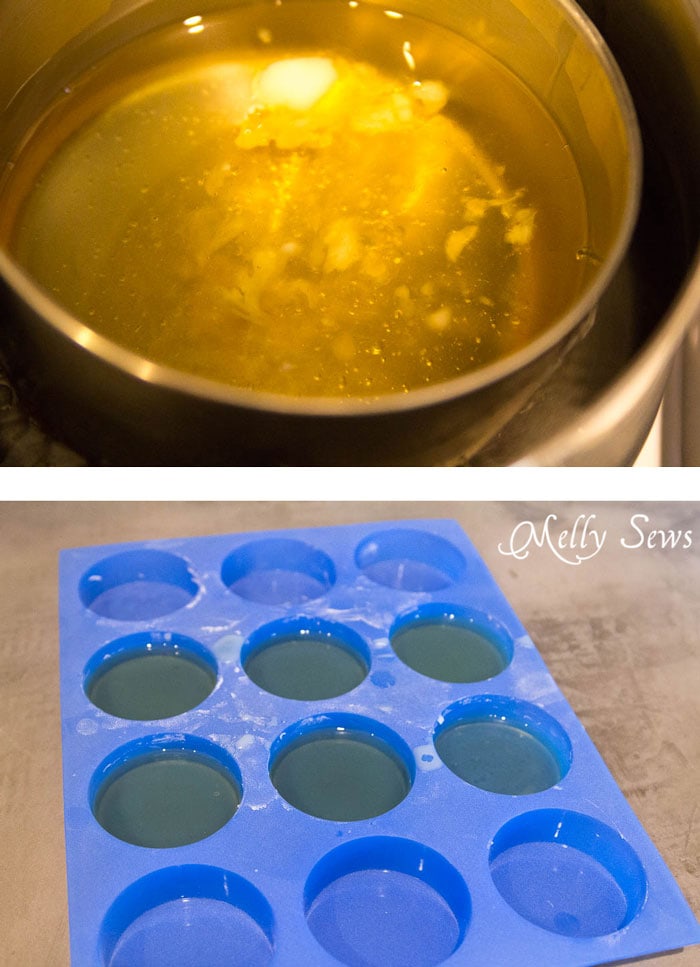
When the bars cool, they look like the image below, and because the silicone is flexible, they pop right out.
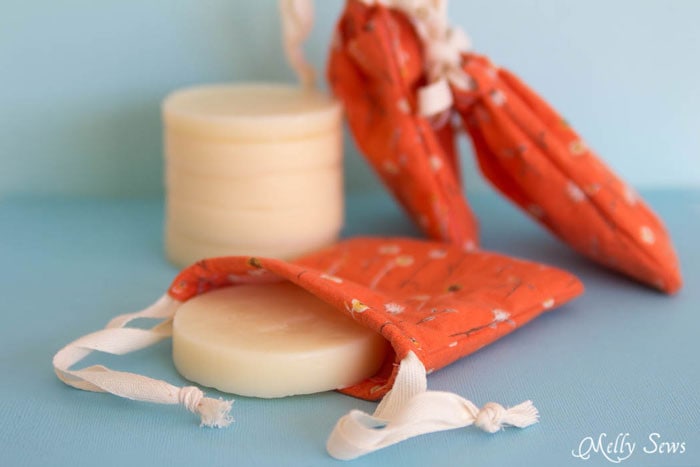
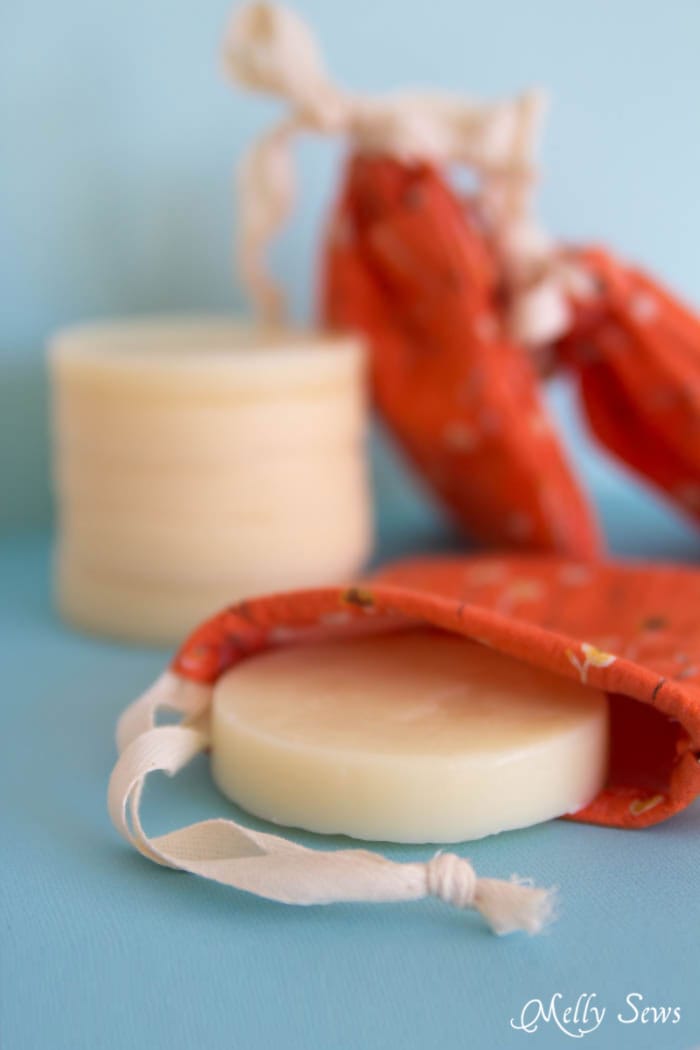
Drawstring bags lined with fusible vinyl (affiliate link) are perfect for storing and gifting these. The vinyl prevents the oil from the bars from soaking into the fabric.
To make the drawstring bags, you’ll need:
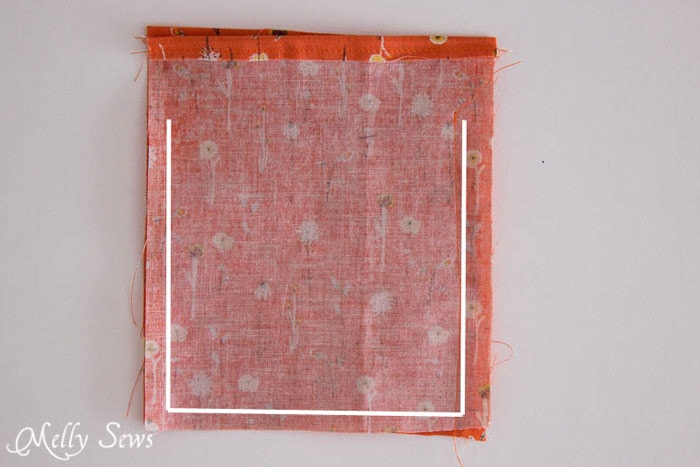
- Fabric. You’ll need 2 rectangles for each bag. Mine measure 5 1/2 inches wide by 6 1/2 inches tall. I cut one piece 5 1/2 inches wide by 13 inches tall to fuse the vinyl, then I cut it in half after fusing.
- Fusible vinyl (affiliate link). Cut this to 1 inch shorter in width and length than the fabric.
- 2 ribbon or twill tape ties, 18 inches long each

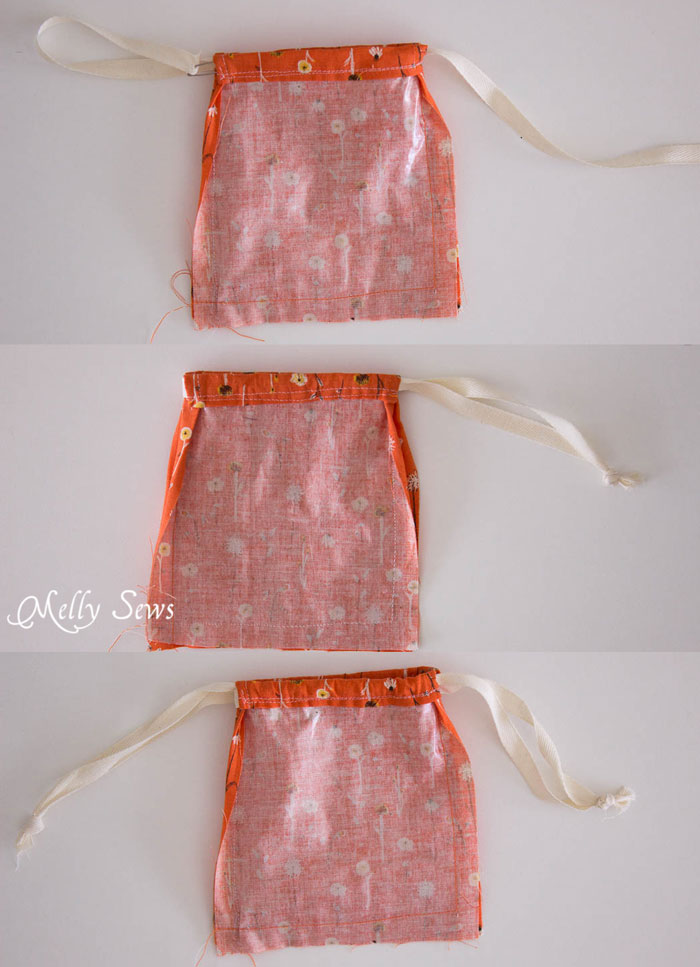
To sew the bag, first fuse the vinyl to the wrong side of the fabric, with 1/2″ margins all around the vinyl.
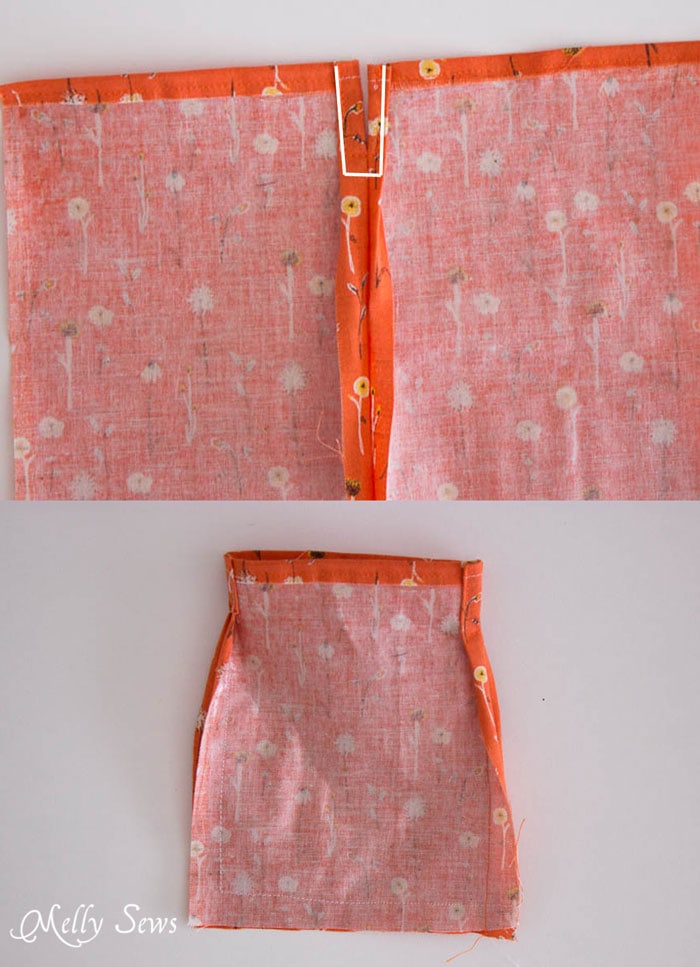
Turn a short edge under 1/4” and stitch down. Repeat on the other piece as shown above.
Lay your two pieces on top of each other, right sides together, and stitch with a 1/2” seam allowance around 3 sides, stopping 1 1/2 inches below the top edge.
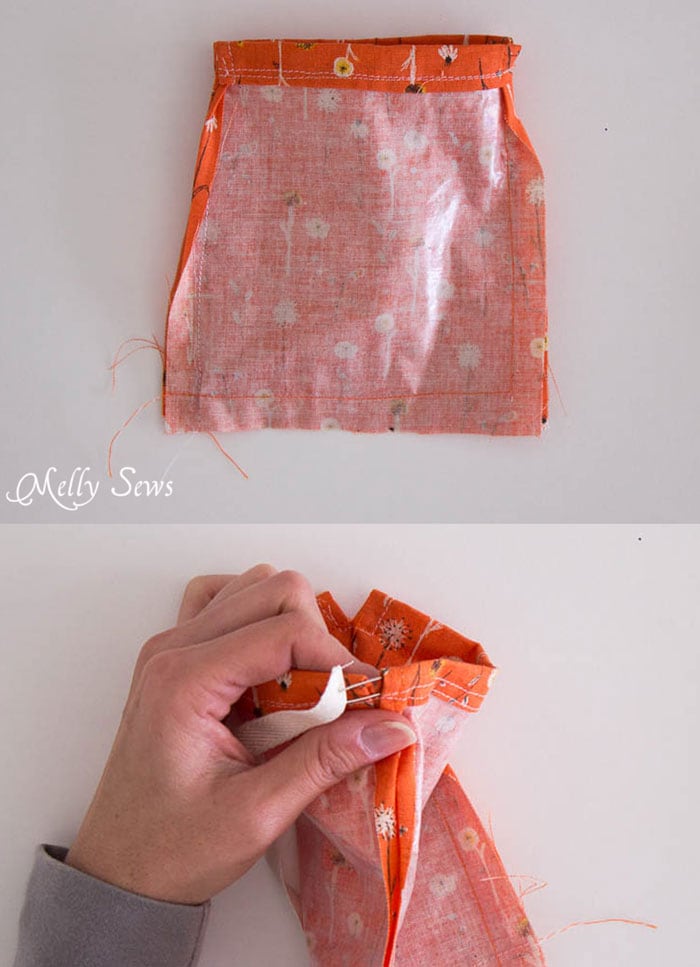
On the side seam, press the seam allowance flat, then turn the raw edge under toward the seam. Stitch into place around top opening. Note that the photo below was shot with only one side seam finished so you can see what I sewed; on your bag it won’t actually lay this flat but will look instead like the next image.
Turn the top down 1/2 inch on each side and stitch bottom edge (the edge you stitched in the first step) to form casing. This is two separate seams so that there are openings in the ends.
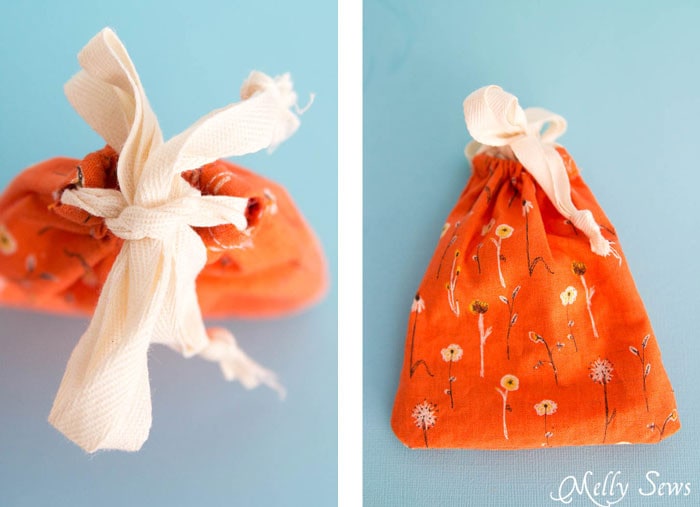
Using a safety pin, thread one tie through one casing, go across the gap and back through the other casing so both ends are on one side of the bag. Tie ends together. Starting on the opposite side of the bag, repeat with the other tie.
You should have two handles now, and when you pull both of them, the bag will close.
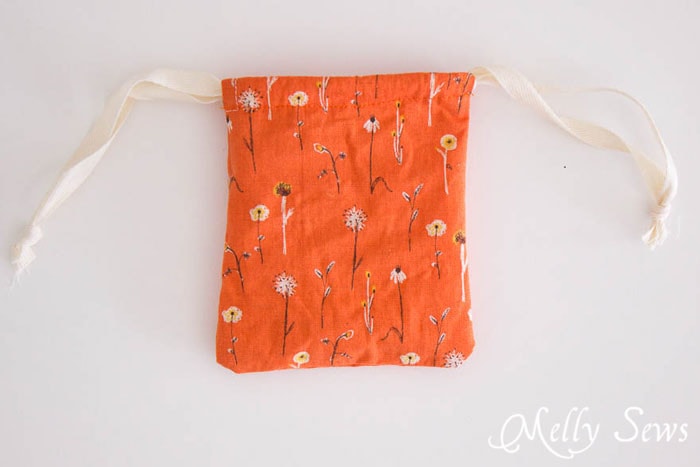
And that’s it! Put your lotion bar inside, and tie those handles in a bow if you’d like.
To use the lotion bars, just rub against your skin. Your body heat melts the oils on the surface, and the beeswax in the bar helps seal in the moisture.
Samina
What a great idea! I bet my son would love to help with his (except for the stove parts).
Kristie
I am saving this for a mothers day gift. Plus it will probably take me that long to collect all the ingredients. 🙂 Thanks for sharing a great idea!
Anne
We need some of these!! I’ve got a Craft Gossip post scheduled for later today that features your tutorial: http://sewing.craftgossip.com/?p=85737 –Anne
RoelErick
“Your body head melts the oils on the surface”
Ehm, I do believe this would work with any other part of your body too.
Also, “body head” implies you have other heads than the one on your body – I’m hoping the FBI won’t find out!
😉
Melissa Mora
LOL – have to tell my mom she’s slacking – I usually get morning texts when typos like that slip through!
Charis Tompkins
These sound beautiful. One question – could they be made without any essential oil added to them? I have some people who are very sensitive to scents.
Melissa Mora
Absolutely – updated post to reflect that.
Martha
I had never heard of lotion bars before reading your blog about them. I decided to give it a try, so I made lemongrass scented lotion bars. They turned out great! I made the drawstring bags too. They are going to be great little Christmas gifts. I only had one left for myself, so I may be making another batch real soon.
DJ
Just want clarification-this isn’t soap, that you’d use with water; it’s lotion, so you’d use it in place of regular hand lotion? I’ve never heard of this before, so wanted to make sure of what it is before I gift any! Thanks!
Muriel
Very nice post thank you!
Peg
I made these lotion bars with the intention of giving them out over the holidays. I didn’t like them at all. After investigating in the materials needed they turned out very greasy to the point that after using one bar I threw the rest out. The only place they were good for was the bottom of my feet and vasoline still is the best there. Now I have all the oils and wax leftover.
Melissa Mora
It’s unfortunate that you threw them out. The recipe can be adjusted to your personal taste; just re-melt the bars. Add more beeswax if you feel they’re too oily, or more oil if you feel they’re too waxy. You can also try different oils or unrefined shea butter as part of the ingredients.
Connie
This is just one of many recipes for lotion bars available on the net. Look them up and play around with it. You are sure to create something you like, and will be happy that you know what is in it. You could also use some of the left over ingredients to make soap or lipbalm.