
Make a silk lined waterproof bonnet or modify for a DIY scrub cap
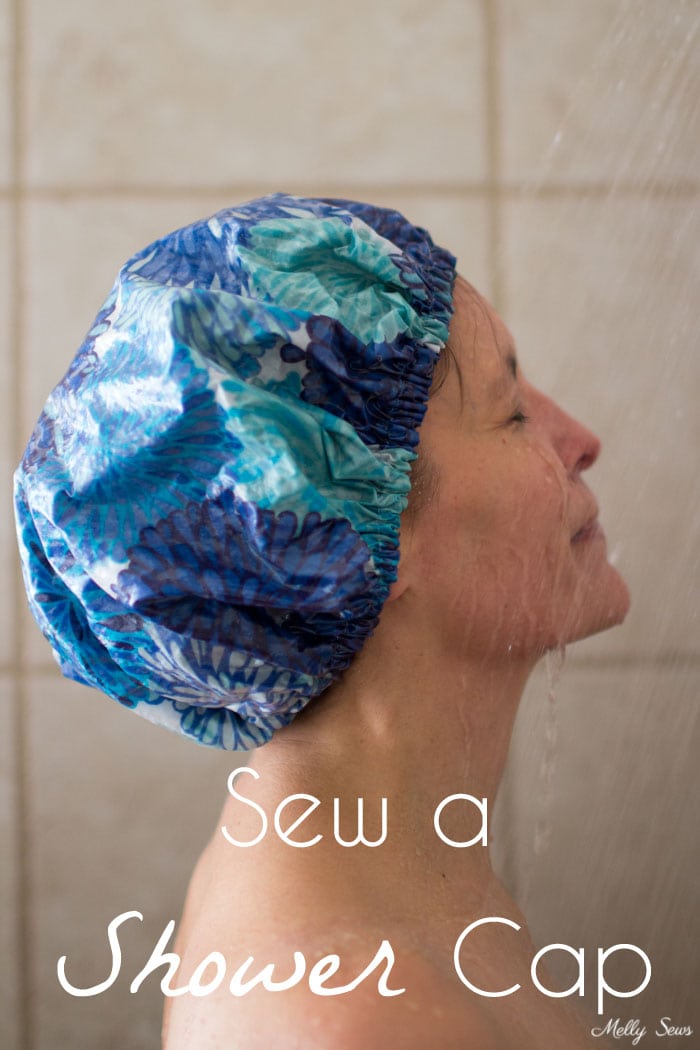
Hey y’all, welcome to today’s tutorial, how to sew a shower cap. This may seem like a strange tutorial when the month’s theme is pajamas, but I’m just going to justify it by saying that I generally shower right before putting on my pajamas, so in my head they’re connected. Plus, if I’m the one giving myself themes to write about, I can also decide what goes with said themes, right?
I remember growing up and seeing my grandmother using a shower cap – she was also the type to go get her hair set and done and not wash it between settings. As a kid I thought that was strange, because I had to wash my hair far more often. But now? I totally use a shower cap. If you’re interested in the story of my hair, you can read more here and here, but the short version is that I learned how to better take care of my hair and now I shampoo far less often (still more than once a week though – running gets my hair too sweaty), and sometimes (especially in winter) the shower cap comes in handy to keep my hair dry in the shower.
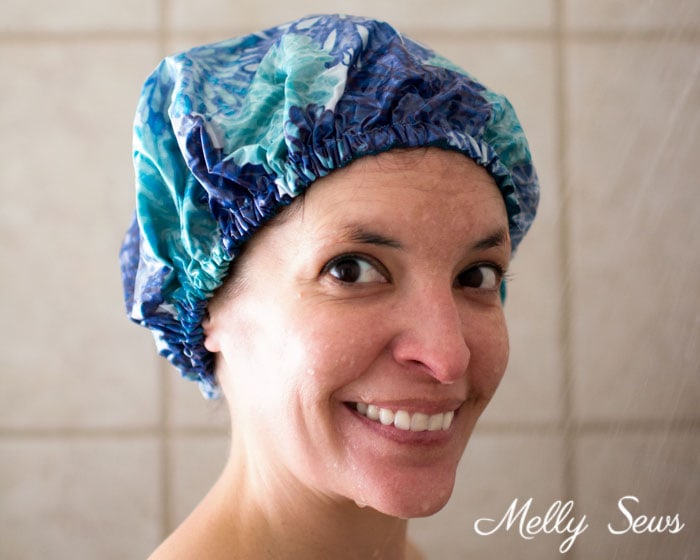
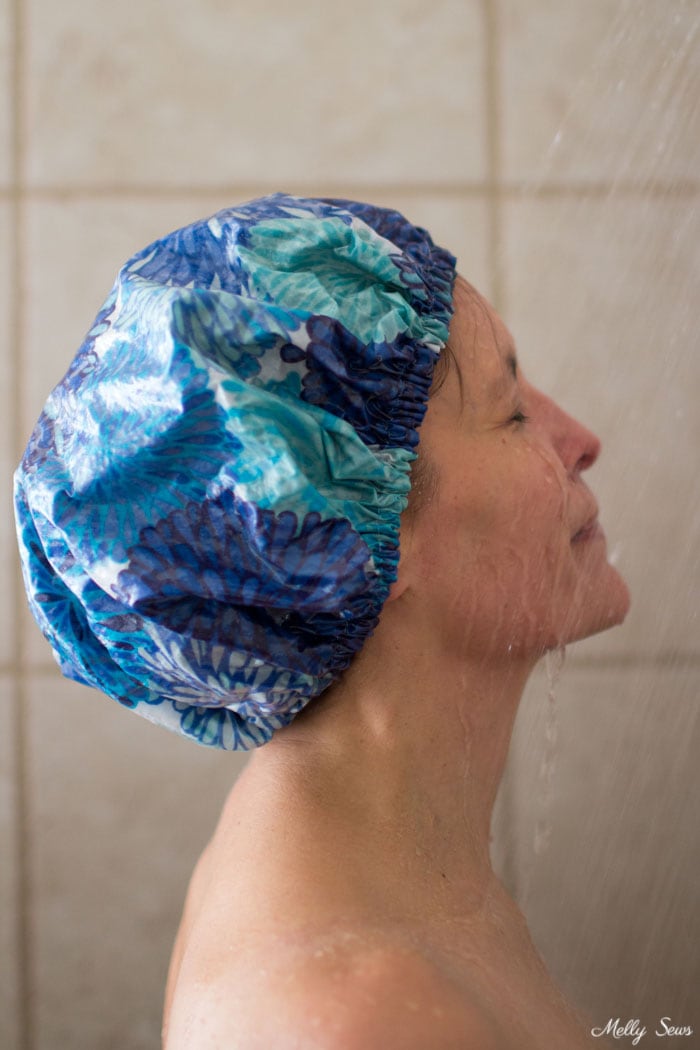
And while you can buy plastic shower caps cheaply, they don’t last very long in my experience and I try to be more conscious about what I’m able to reuse and what I throw away. So I sewed a shower cap, and you can too! You can even modify this pattern to use as a scrub cap – just don’t use the iron on vinyl, as a scrub cap doesn’t have to be waterproof.
You’ll need:
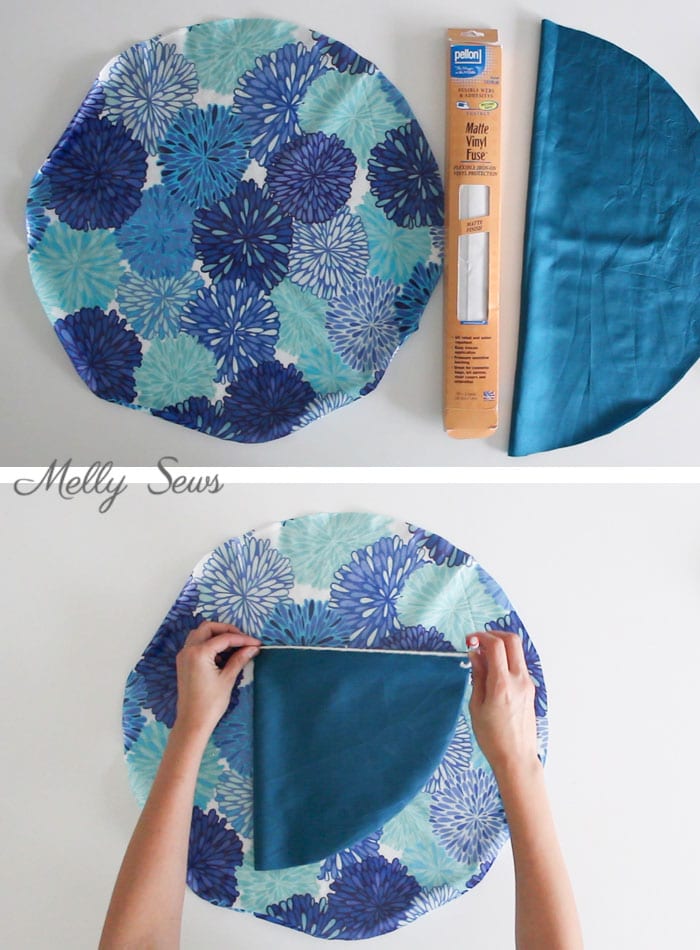
- About 2/3 yard of fabric, unless you’re making that 9 inch radius cap, then you can get away with 1/2 yard. You’ll need this amount of your waterproof outer fabric and satin for the inner fabric. You don’t have to use satin, but I like how the smooth surface of satin is less likely to snag and frizz my hair. For waterproof fabric, you can use vinyl or PUL fabric. You can also make waterproof fabric by fusing iron on vinyl (affiliate link) to regular cotton fabric, and that gives you a lot more options for prints. This is what I did.
- 3/8 inch elastic, also about 2/3 of a yard
I’ve got the video tutorial for this project below, or if you prefer to watch on YouTube you can find it here. Scroll past the video for the written instructions.
First, you’ll want to determine the radius of your circle for the cap (radius is halfway across). This should be somewhere between 9-12 inches, and it depends both on the size of your head and the size of your hair. Since my head is small and my hair is fine and fairly thin, I went with 9 inches for my cap.
Once you figure out your radius, you can use a string tied to a fabric marker to make 2 circles, one of outer and one of satin fabric. Fold your fabric in half once vertically and once horizontally, then hold the string end at the folded corner and measure out your radius to mark an arc. Cut on the arc and open your fabric to the full circle.
Next, place your fabric pieces right sides together and sew around the edges, using a 1/4 inch seam allowance and leaving a gap for turning.
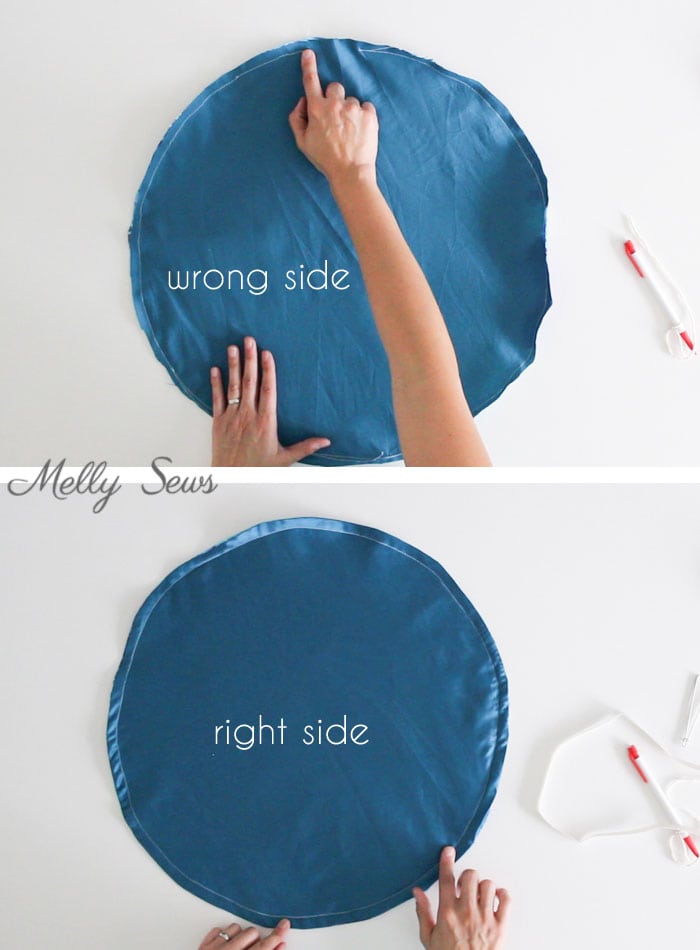
Turn the circle right side out and press the edges. Press the raw edges of the gap to the inside, but don’t sew the gap closed.
Sew another line of stitching 1/2 inch in from the press edge of the circle. This will form the elastic casing.
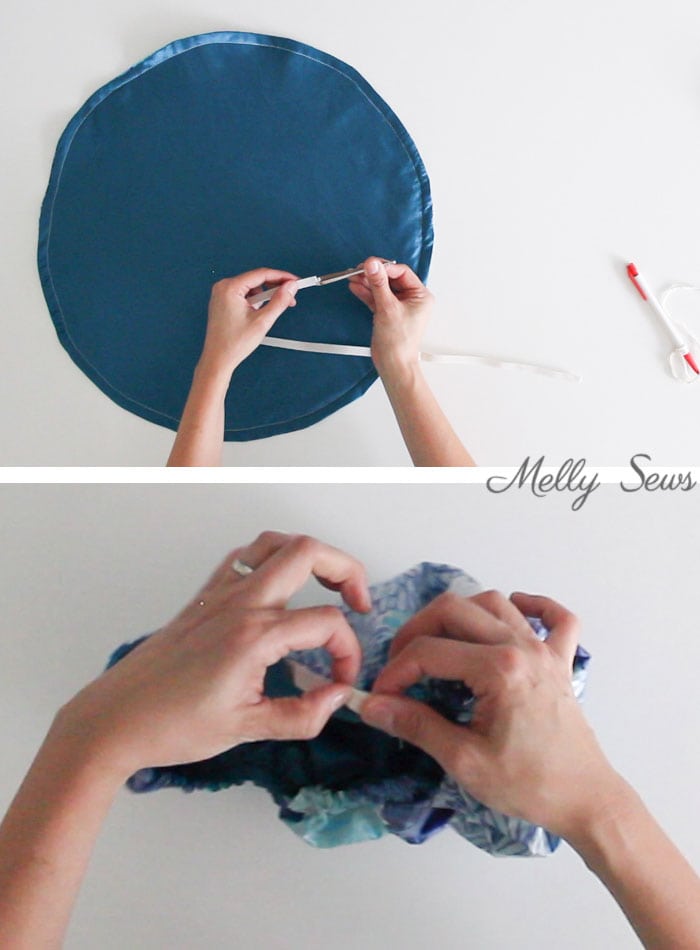
Measure enough elastic to go around your head where you want the cap to sit. Thread the elastic through the casing using a safety pin. Overlap the ends of the elastic and sew them together with a zig zag stitch. Then sew the opening of the casing closed with a little bit of topstitching and you’re done!
Glenda
Thanks for the tutorial of a very practical project! Love your Instagram page.
Nicole
Awesome! I was just thinking I needed to make a shower cap because the one I recently bought is way too small to cover all my hair and my big head. Thanks for the tutorial.
Debbie Dale
I think all the ready made shower caps are too small for my big head, lol.. thanks for posting.. just might have to make my own..
Ashley
I never would have thought to make my own shower cap! I use one frequently and, while I love the results, I don’t like how it feels on my head (cheap, scratchy, plastic-y). Thanks for the idea and tutorial!
Margaret Chambers
These would make great “bowl covers” for the large bowls we use in our kitchens that need to go into the refrigerator for temporary storage. They would also look cute in seasonal fabrics for covering dishes and baskets on picnic tables. You really have some great patterns and very helpful ideas and hints on your site. Thank you. Margaret
OC Koz
I was just looking at shower caps on Amazon since I’m tired of the $1.00 plastic ones that lose the elastic after a few months- perfect timing!
Margie
Lovely idea!! Thank you for your innovative and sooo different sewing projects????. Looking forward to the next ones….
Cindy Brooks
Thank you! I’ve been thinking about making a shower cape using terry cloth. I don’t like the way the water from the steam beads up on waterproof materials, so I thought I’d give it a try.
Lara Trottier
I love this, I’m going to make a couple for my mother-in-law.
Barbara Gilbert
Nice cap! I don’t have enough hair yet (post-chemo) to worry about getting it wet because it dries in a flash, but I do want a bowl cover for my KitchenAid mixer and this fits that bill also! I’m thinking about making a rectangular one for a casserole dish also. I’ve seen a lot of shower caps that make a casing out of bias tape and that’s just fiddly to the max. Your technique is easy, and I’m all about easy since chemo also robbed me of all my energy. Sewing saves me from total sloth-dom!
Conchita
I wanted to make a silky cap for my curly hair at nights…and this was the perfect tutorial… very easy to follow thank you ☺
KatyM
I use silk for my thick, curly/frizzy hair at night, too.
Silk also works great after washing as it cuts WAY down on the frizz. If I have to wash it at night, I french braid it on both sides morphing into a french braid on the back of my head, pop on a silk scarf and in the morning it’s dry, not frizzy and perfectly curly/wavy!!
This pattern makes it so much easier than a scarf!!
Thanks.
Lily
Thank you! This is going to make the perfect sleep cap for my long hair at night!
Rachel L Ridgeway
Thank you for this free pattern!
I just made seven caps to give to my sister to use in the hospital that she works in. These caps are greatly needed at this time and we appreciate your pattern!
Vivian NOLEN
Thanks for the tutorial. I’ve made one before but had too much on the edge. I like your pattern better. I think I have some fabric that’s actually waterproof. Ahh fun thing to make on a rainy day today.