
Sew a sweet summer apron dress for girls
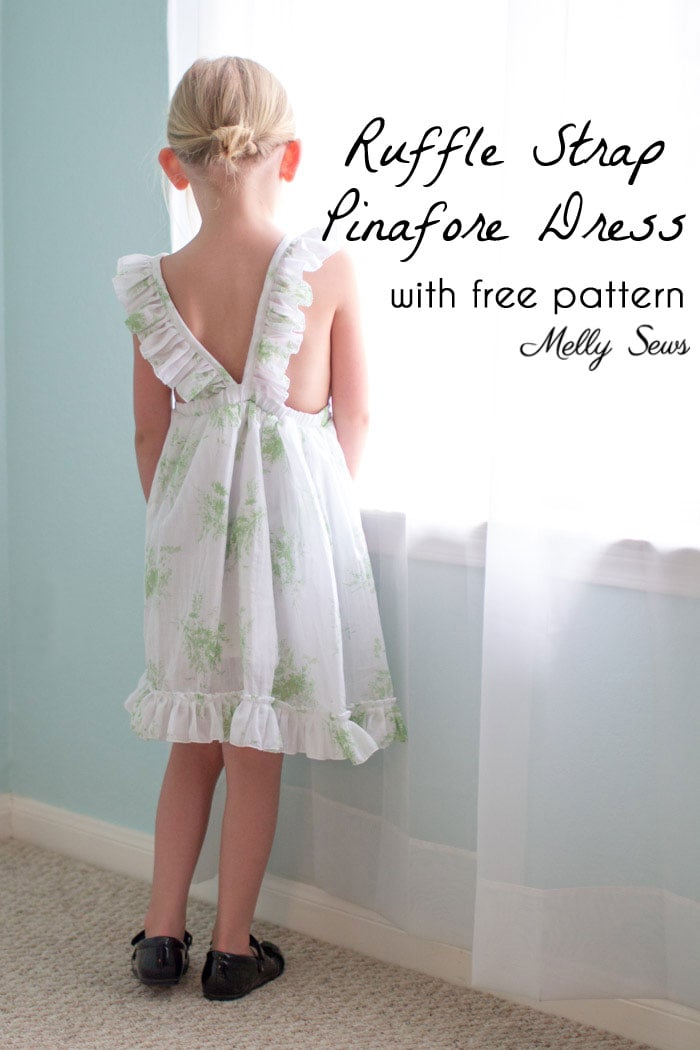
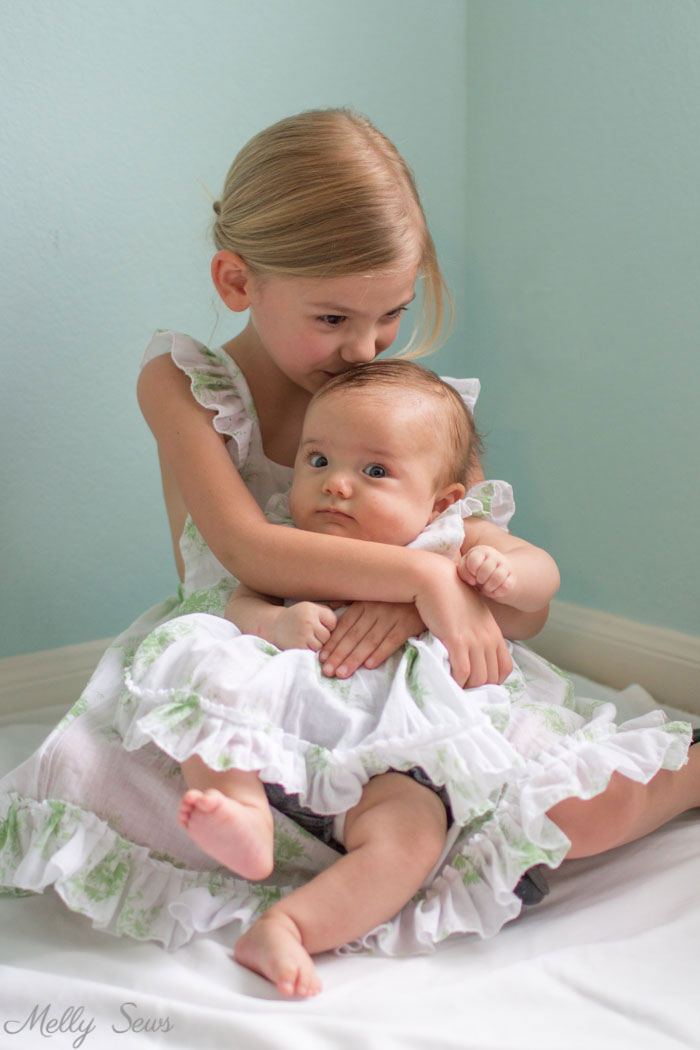
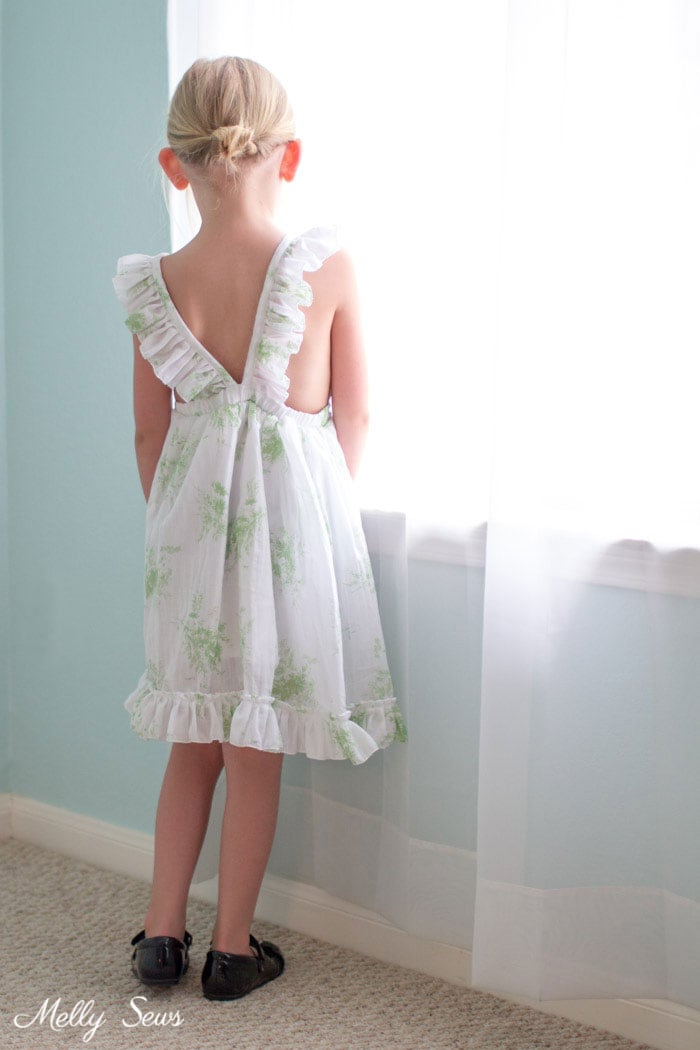
Hey y’all, today I’m going to share how to make this ruffle strap pinafore dress and I’ve got a free pattern for both the 0-3m size and the girl’s size 5. Ever since I made my nieces matching Easter dresses, I’ve been wanting to sew another matching set for them, and this sundressing series was a great excuse to do just that.

This fabric is somewhere between a gauze and a voile, and I got 12 yards of it at a thrift store here (Austin Creative ReUse). With that much fabric in such a light weight, it seemed to beg for ruffles, so that’s just what I did.
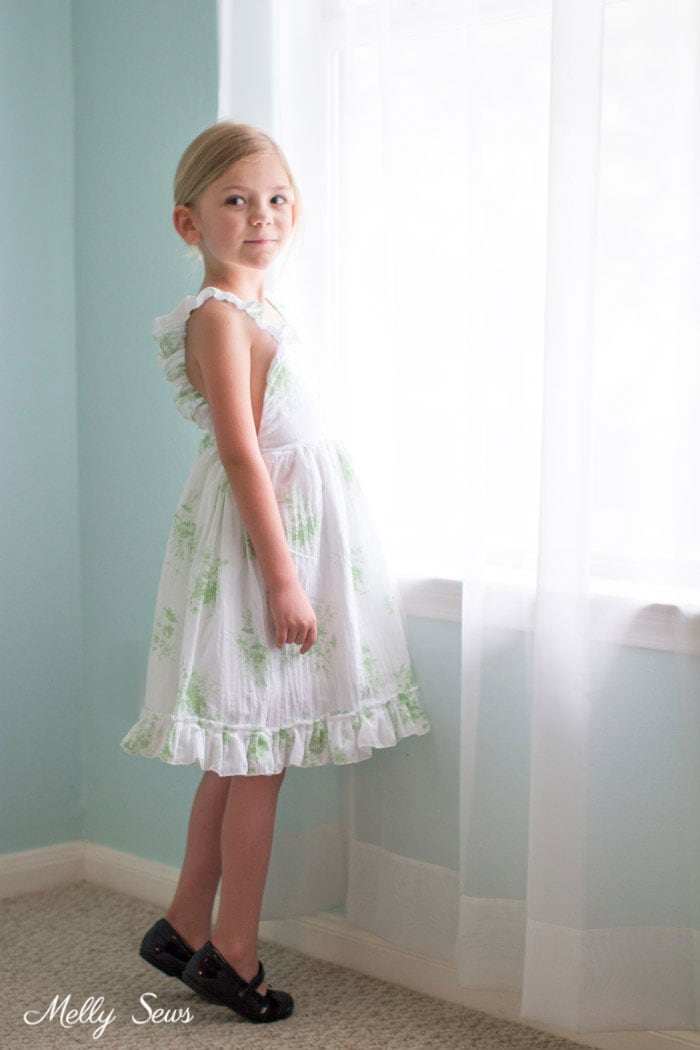
The light weight is also perfect in combination with the open back for our hot summer temperatures.
This little one refuses to do anything during tummy time except suck her thumb, but you can see she’s got a cute cross back on her dress too.

Want to make your own? You’ll need:
- 1-2 yards of fabric
- 2-3 yards of ruffle, 1 1/2 -2 1/2 inches wide
- 1 inch wide elastic
- 1/2 inch wide double fold bias tape
- the pattern, see below
How to Get the Free Pinafore Dress Pattern
The pattern is in size 0-3m and size 5. To get this pattern, click your preferred option from the buttons below as a newsletter subscriber or gallery access pass purchaser. Note that the free version of the pattern does not have printable instructions.
 |  |  |
Please note that all my free patterns are licensed for personal use only (no selling items made from this unless you purchase it) and by downloading you are agreeing to this license.
The pattern is one page for the bodice piece, and then it has a list of all the rest of the pieces you need to cut out, which are all rectangles. Follow the instructions to cut out all your pieces.
The video below shows how to sew these, but if you prefer a written tutorial, scroll on by for written instructions. If the video doesn’t load for some reason, you can also watch it on YouTube here.
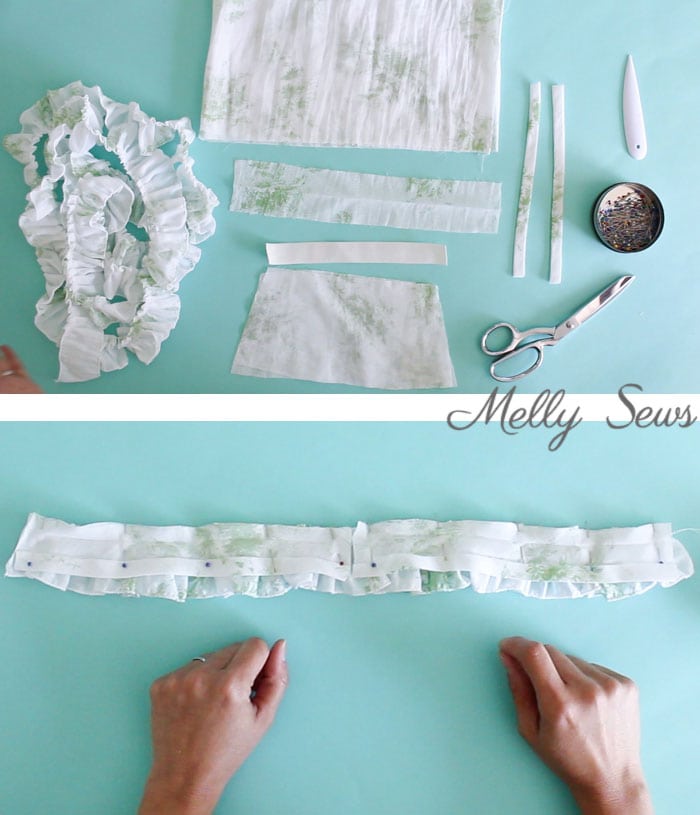
Here are all the materials laid out.
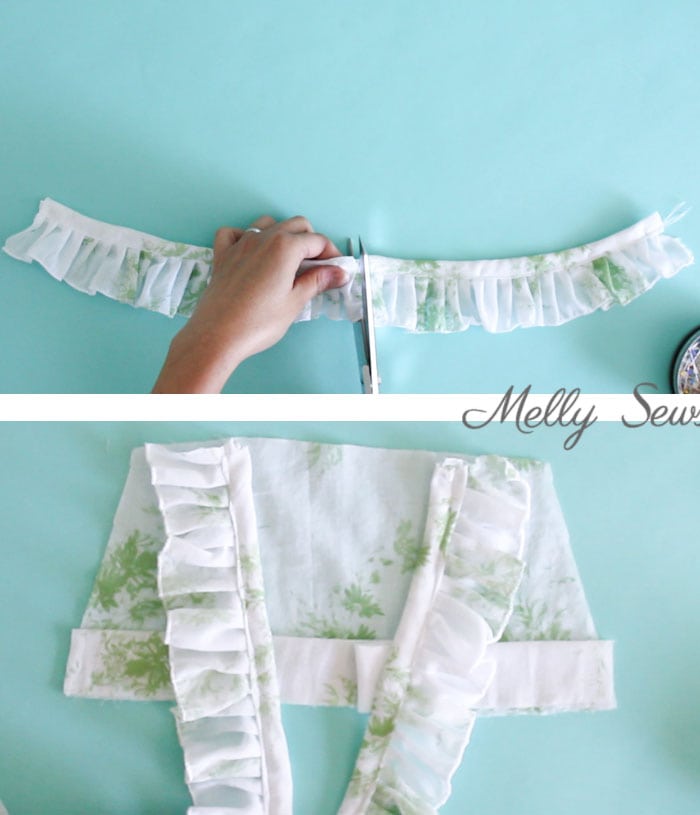
To start, cut off a length of ruffle that is the same length as the two bias tape pieces put together. Unfold the bias tape and pin right sides together with the ruffle as shown above. Stitch in the fold closest to the raw edge. Need more help sewing bias tape? See this post.
Fold the bias tape around the raw edge, and stitch again, enclosing all the raw edges inside. Cut the two straps apart.
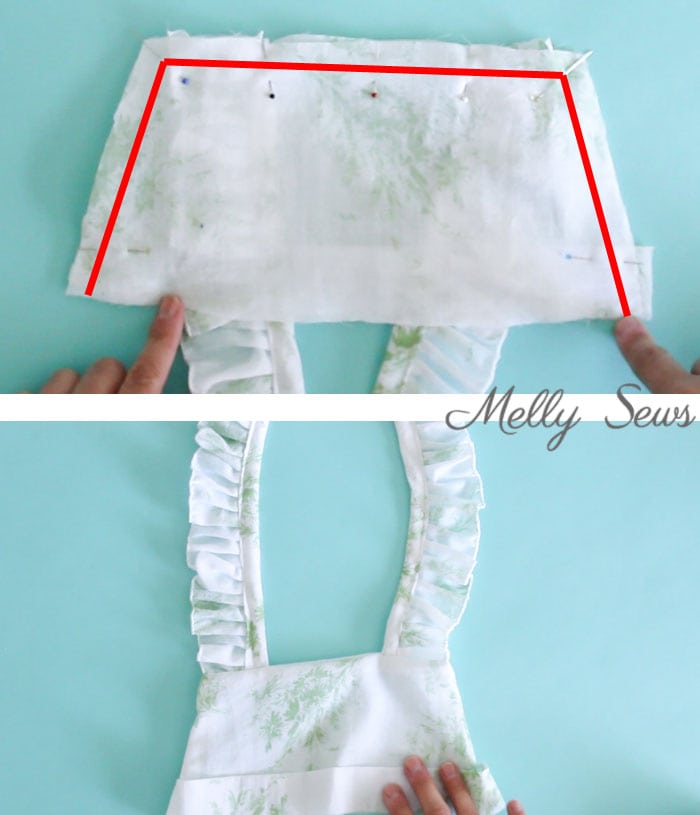
Fold the waistband WRONG sides together, matching the long edges and press. Place it on top of one bodice piece, right sides together. The waistband is longer than the bodice by design, match up the side edges with the bottom corners of the bodice. Then lay the ruffles right sides together with the bodice, matching the outer edges as shown above.
Place the other bodice piece right side down over the first bodice piece to sandwich the straps and waistband in between. Sew on red lines as shown below.
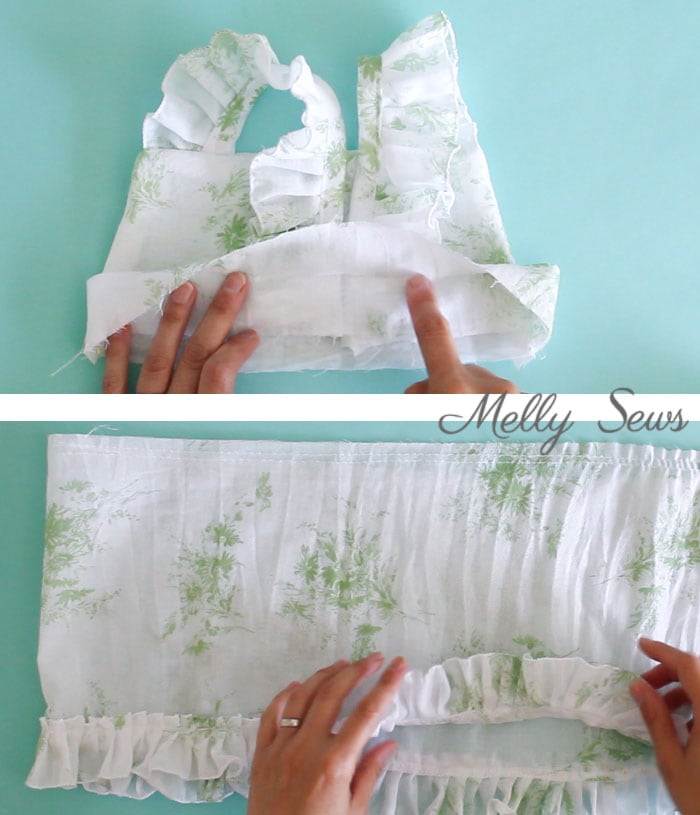
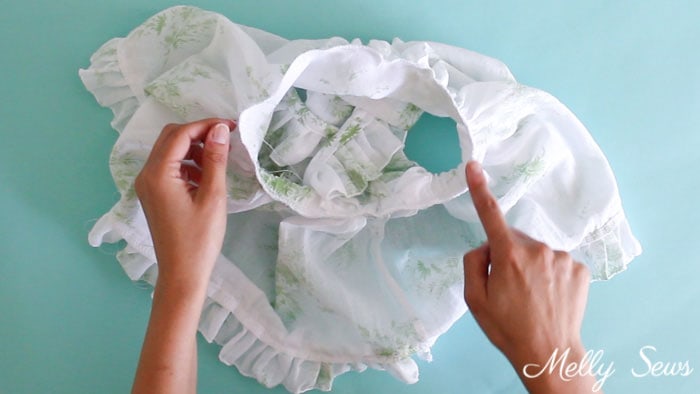
Turn bodice right sides out and press; it should look like the piece above.
Mark the center back of the waistband, then pin the straps on either side of center. Stitch the straps across the pressed fold line in the waistband.
Prepare the skirt piece(s) by placing right sides together and matching short ends to sew into a loop. Then finish the bottom edge with a small hem or a serger. Then sew the ruffle in a loop and stitch it over the bottom edge. Next, sew basting stitches along the top edge of the skirt to gather it.
Gather the skirt to the same width as the bodice, making sure gathers are distributed evenly. Need help with gathering? See this post.
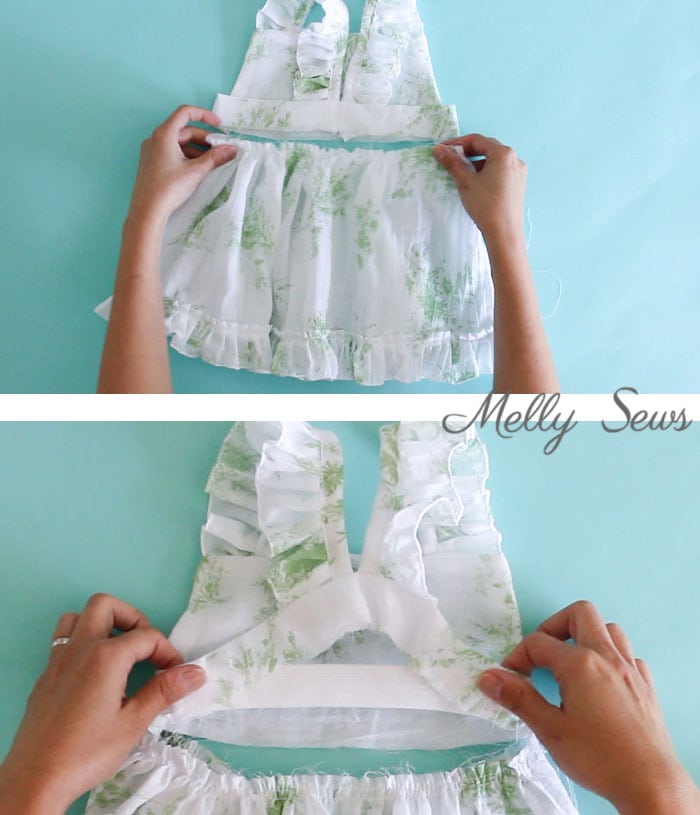
Push the elastic into the waistband, and stitch across the elastic a couple times at each side edge. It will look like the image above. Match the center of the elastic with the center of the waistband and pin those together, with the elastic inside the waistband.
Turn the skirt wrong side out, and with the bodice right side out, place the bodice inside the skirt and pin the waistband to the waist of the skirt. On the back waistband, you’ll need to stretch the waistband flat as you pin it to the skirt. Baste all of this together, then finish with a serger or with a bias tape finish (the same way the edges of the straps were finished).
And that’s it, you’re done with your pinafore dress!
Theresa
Forgive me if already stated, what’s the seam allowance?
Shivani Vashi
Hi Mellissa,
Recently I have started sewing like a month ago and i made cushion covers and bags in the begging.
I follow you(Melly sews) and made everyday with dana .You guys are amazing and Thank you so much for the instructions:)
I made one simple dress and ruffle skirt for my 3 year old dress. Now i am going to make ruffle strap pinafore dress .
I love this pattern
I bought Ruffle Strap Pinafore Dress and jewellery case patterns and make it soon..
Thank you so much once again 🙂