
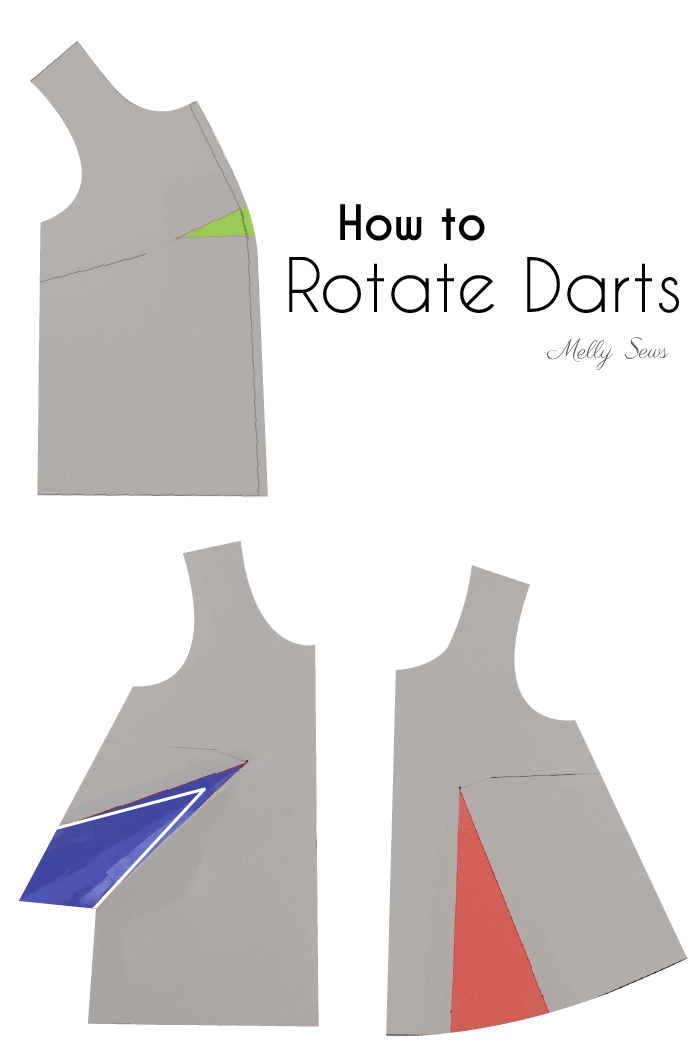
Today I want to share with y’all a bit about rotating darts in sewing patterns. This is one of the basics of pattern design manipulation, and once you get it down, there is a never-ending number of styles you can create.
As a quick overview of the concept, I made this little video, which you can also watch on YouTube here if it doesn’t load below.
Ready to see what you can do with some of those dart rotations?
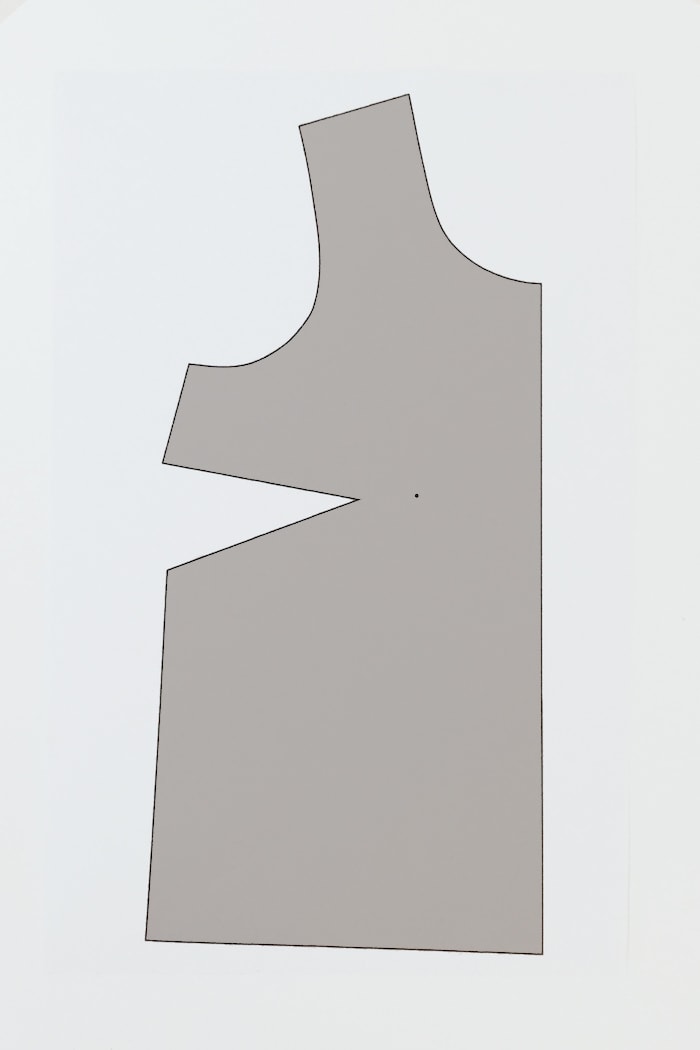
We’ll start with a basic bodice with a side dart. If the apex is not already marked on the pattern, do that now. (Note that this post is about design changes, not fitting. It assumes the bodice already fits you and the dart and apex are in the right spot. If you need help getting to that point, see this post.)
First I’ll show you how to rotate out the dart to create a swingy top pattern.
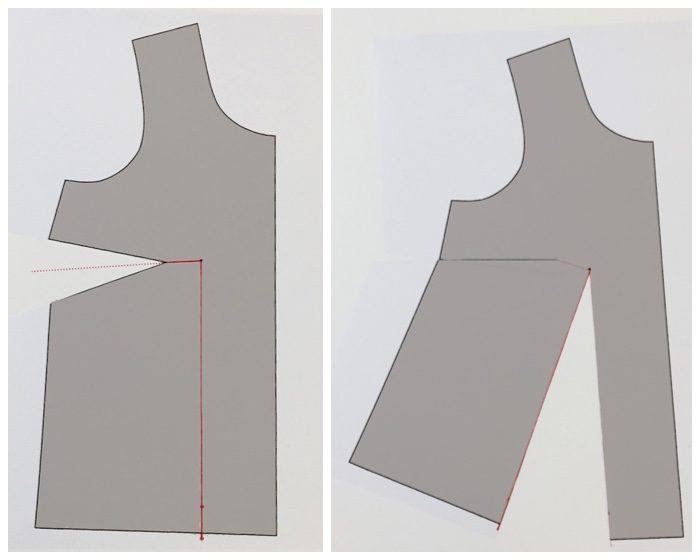
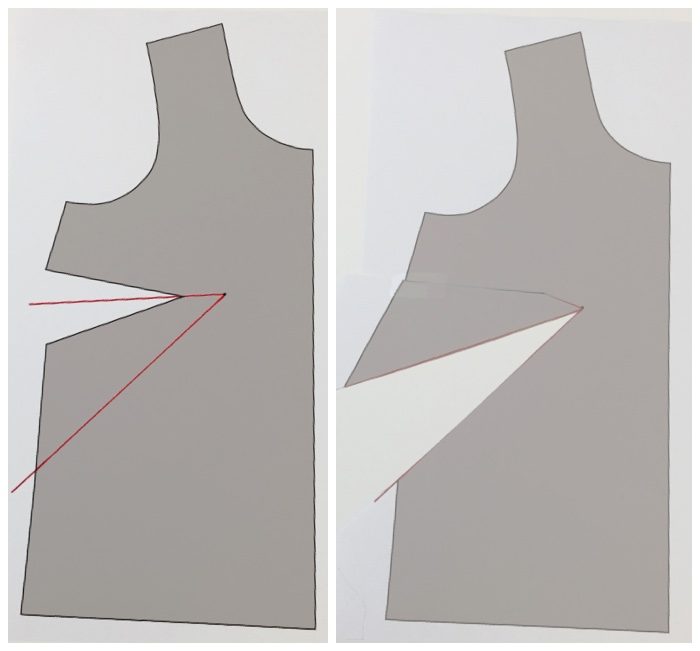
Draw a line from side seam to bust apex. This line should bisect the side dart. Draw another line parallel to center front, from the apex down to the bottom edge. These are the lines shown in the left graphic above.
Then cut along the lines, leaving a hinge at the apex. This just means to leave a tiny bit of the paper so that you can pivot the pattern without it actually coming apart at this spot. Pivot the pattern to close the side dart, which will open up the wedge you see in the graphic on the right above.
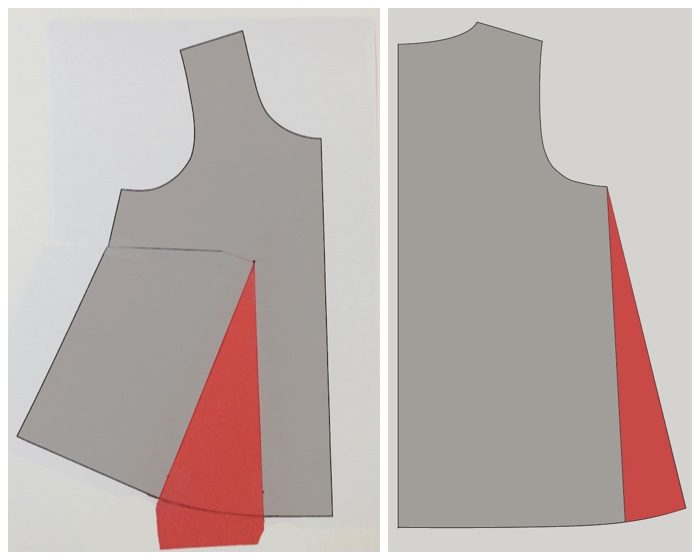
Place a piece of scrap paper behind the open wedge and tape in place. Draw in the rest of the hemline. Although the back generally doesn’t have a dart on a top pattern like this, you’ll want to make a similar alteration there as well. You can do this by pivoting out the side seam, as shown above.
Next, let’s change a standard side dart to a French dart. Some might prefer this for a different look, or even for fitting purposes. Here’s how to do it.
First, measure the distance between the end of the dart and the bust apex! You’ll need this in a minute. Then draw the same line through the side dart as you did for the swingy version, then draw a second line from the apex down to where you want the dart to form along the side seam. There’s no right/wrong here, it’s just where you want it to be placed or how long you want the dart line to be.
Cut along the lines, again leaving a hinge at the apex. Closing the side dart will open the new French dart as shown above.
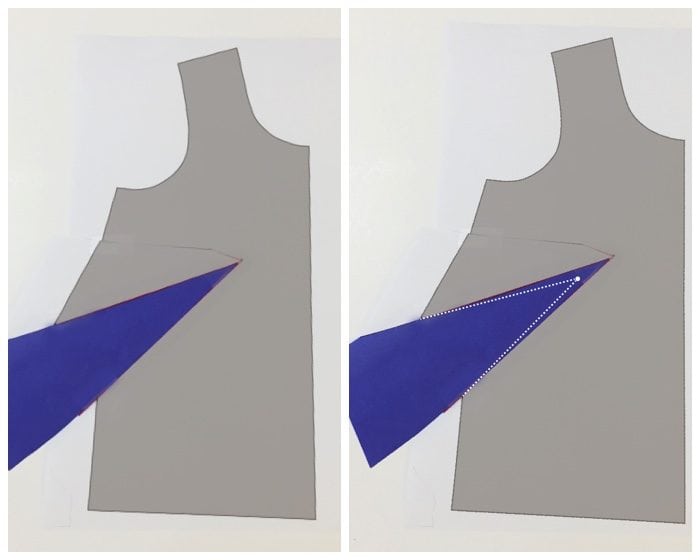
Place scrap paper under the new dart wedge and tape in place. Next, you have to draw the actual dart, because currently the wedge ends right at the apex, which is not what we want for a well-fitting dart. Remember that measurement you took above? You want the dart to end the same distance from the apex as the side dart did. So make a mark there, then redraw the dart legs.
Make sure you end up with dart legs that are the same length. This might involve changing the angle of the dart slightly, so tweak it until you get there.
Finally, you need to true up the dart so that it will have the right amount of fabric to get caught in the side seam when it’s sewn.

To do this, you want to fold out the dart on your pattern piece. Bring the legs together and be sure that the dart on the back of the paper is folded down towards the hemline. With the paper folded, take your scissors and cut along the side of the pattern piece.
When you open it back up, you’ll have your finished pattern piece with the new French dart.
Let’s go through how to do one more design alteration. Did you know you can easily change a side dart into center bust ruching?
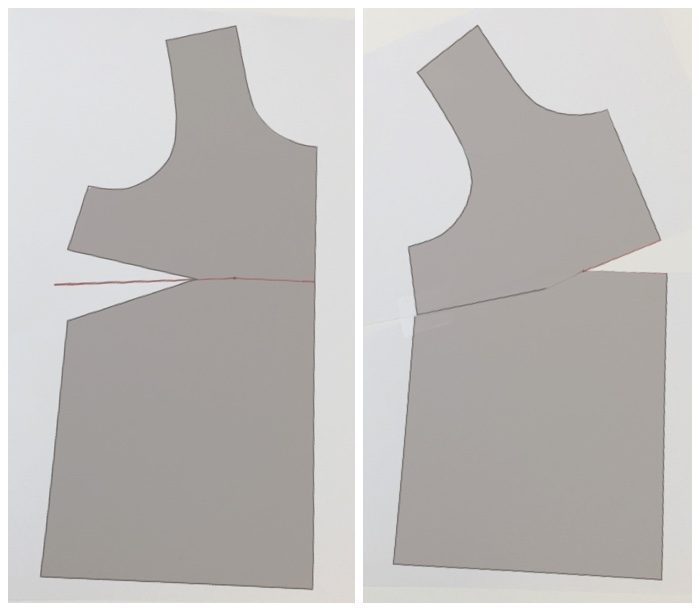
For this one, you’ll draw the same line through your side dart to the bust apex, but the second line you’ll draw is from apex to center front. Make sure the line is perfectly perpendicular to the center front. Cut each line from the pattern edge, leaving a hinge at the apex.
Rotate the side dart closed, opening up the wedge at center front as shown.

Place scrap paper under the wedge, tape in place, and connect the center front. The second picture shows that you’ll need to add a center front seam allowance for this style if your pattern was originally cut on fold. When sewing, you’ll gather the area in green, stitch the center front seam, then proceed with construction.
MJ Favata
Great Fitting tool
MPaula
Thanks for this tutorial. I much prefer to sew with darts coming from the bottom. Somehow, it seems neater. I will try this on my favourite shirt (blouse) pattern.
Lisa
Thanks so much! You make it look so easy, I’ll have to give it a try!
DG
Thank you. Much appreciated tutorial.
Claudette Eccleston
Large pictures, easily understood words, clear, short, simple, great tutorial!