
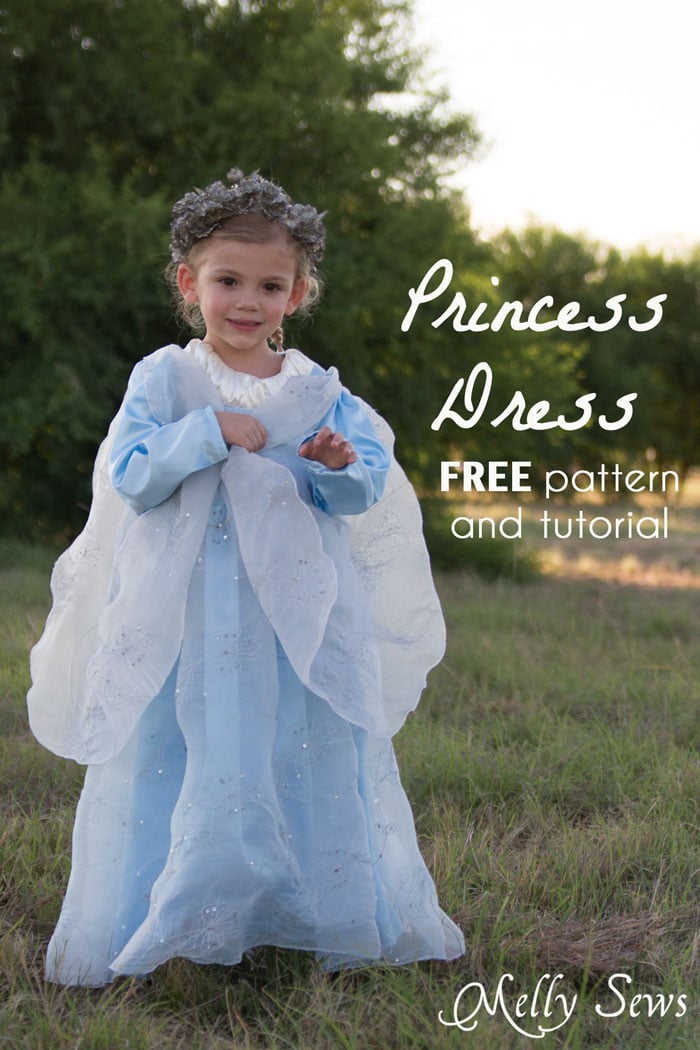
Hey y’all- Halloween costume sewing is in full swing over here, so today I’m sharing a tutorial for this Princess Costume with a free pattern.
Now technically, the kids are going as characters from The Princess Bride this year.
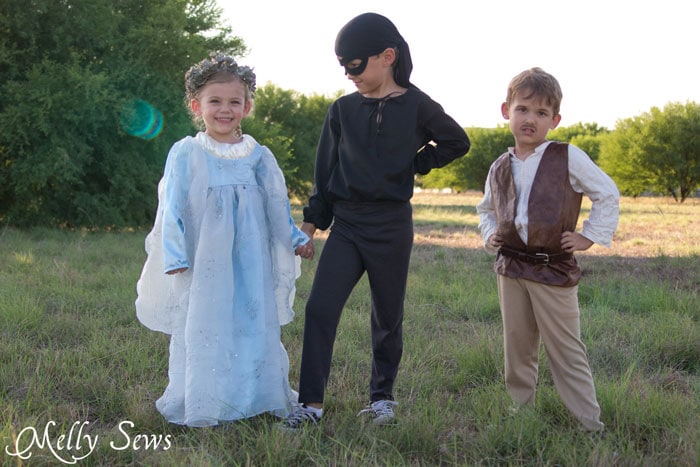
But don’t tell my niece – she’s convinced this is an Elsa costume, and that Inigo Montoya is actually Kristoff. I’m glad this 4 year old at least is not super attentive about details – as long as the dress is long and blue, she’s Elsa and we’re not going to argue that she’s actually Buttercup.
But…the fact remains that this is entirely inspired by Buttercup’s wedding dress. So, to make this princess dress, you’ll need:
- 2 yards of satin for the main part of the dress
- 1-2 yards of sheer fabric for overlay and sleeves. You only need one yard if you only want the sleeves, but if you want to overlay the entire dress you’ll need 2 yards
- 1/4 yard of contrasting satin for the pleated detail at the neckline
- A 12 inch zipper
- The Fiesta Frock pattern
The free pattern is in girls size 3T – chest 22″. If you need to make the pattern bigger or smaller, check out this post. To get it, click your preferred option below to get the free pattern only as a newsletter subscriber, or you can buy the full digital pattern.
 |
 |
 |
Please note that all my free patterns are licensed for personal use only (no selling items made from this unless you purchase it) and by downloading you are agreeing to this license.
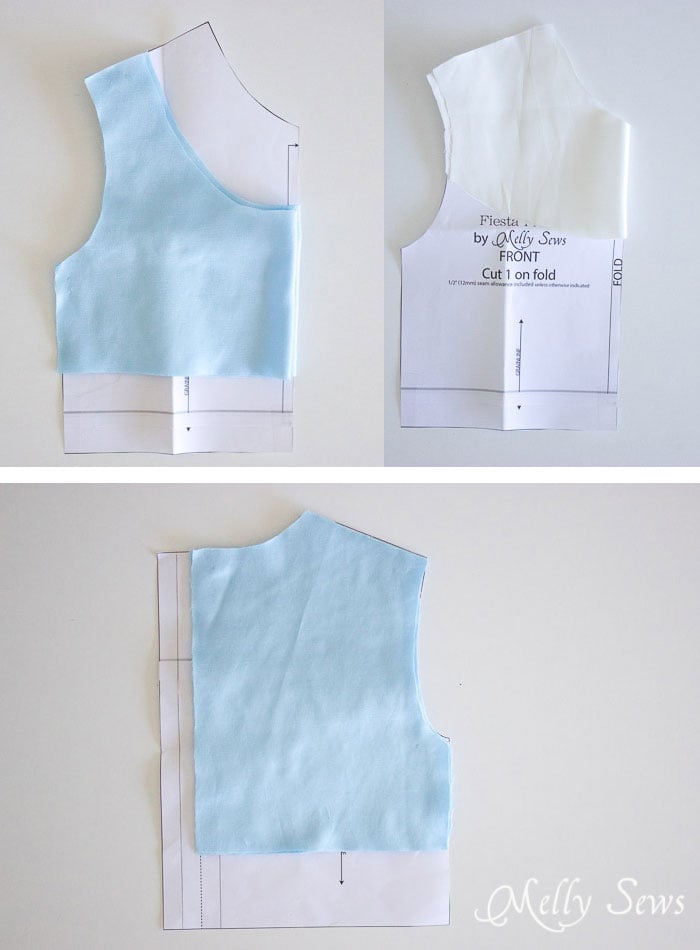
You’ll need to modify the pattern a little. First, cut 2 inches off the bottom of the front and back bodice. Fold the back bodice on the fold line. Then, create a new front bodice with the neckline lowered 2 inches. Finally you’ll also need to create a front bodice facing piece as shown below – it should be the width of the shoulder of the front bodice.
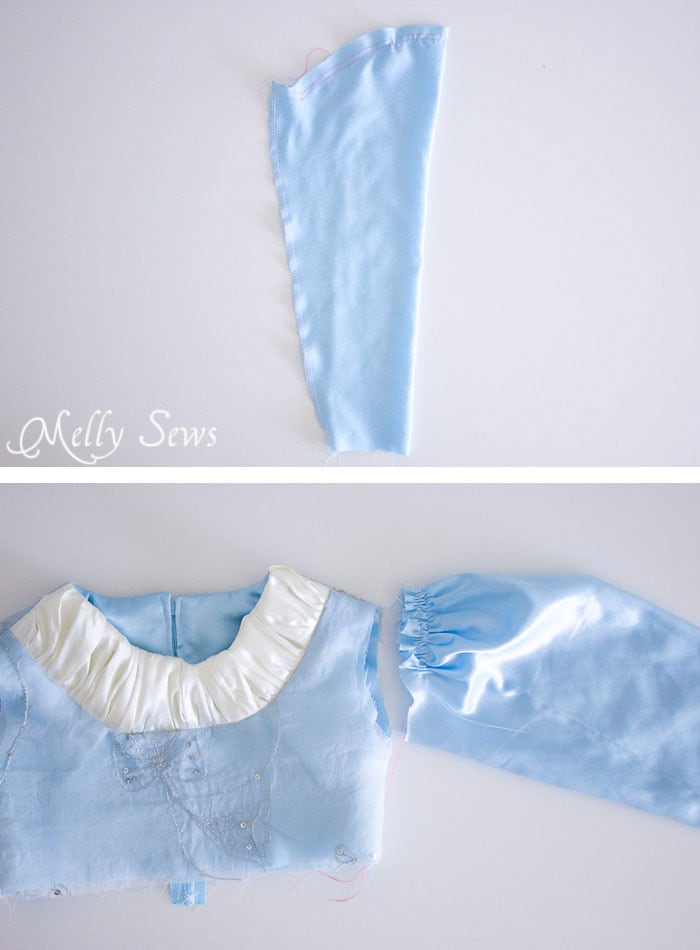
You’ll also need to modify the sleeves. First, lengthen the sleeve to 16 inches from cap to wrist, and the wrist should be only 4 inches wide (so that when the sleeve is opened, the wrist is 8 inches). This will require you to redraw the sleeve side seam at a different angle.
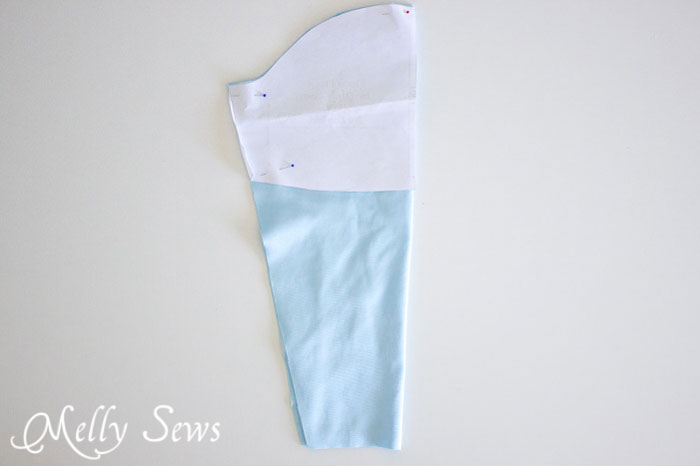
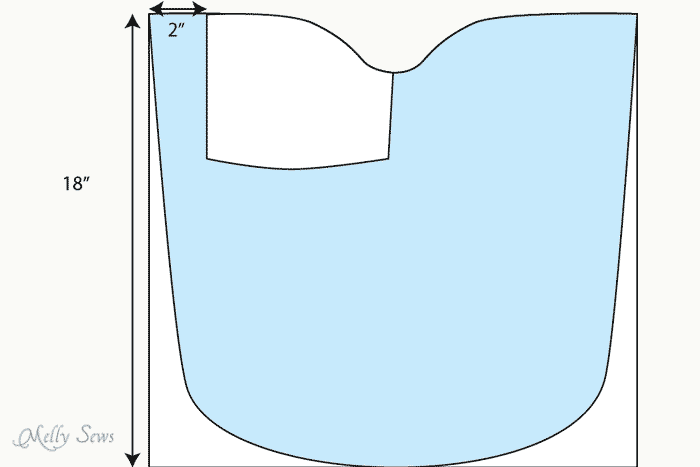
For the oversleeves, you’ll lay the sleeve pattern on the fabric, trace the sleeve cap, then flip it along the side seam edge and trace the sleeve cap again. Add 2 inches to each side of your new sleeve piece, then make it 18 inches long. Finally, round off the bottom edge of the oversleeve.
So your cut list looks like this:
- 2 front bodices on fold from satin
- 1 front bodice on fold from sheer fabric for overlay (optional)
- 4 back bodices from satin (2 right, 2 left)
- Skirt – 2 panels – 30 inches wide by 28 inches long of satin, and 2 more from sheer fabric for overlay (optional)
- 1 strip of fabric 44 inches wide by 3 1/2 inches tall from the contrast satin.
- 1 front facing on the fold of the contrast satin
- 2 oversleeves from the sheer fabric
Seam allowances – use 1/2 inch seams unless otherwise noted.
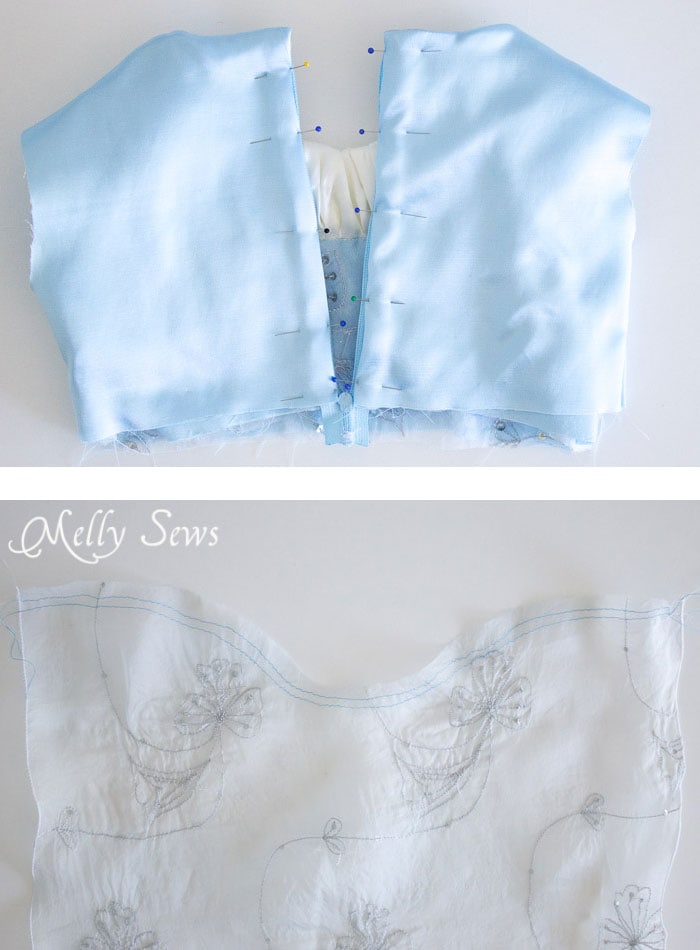
Begin by sewing basting lines down the long edges of the satin strip to gather it.
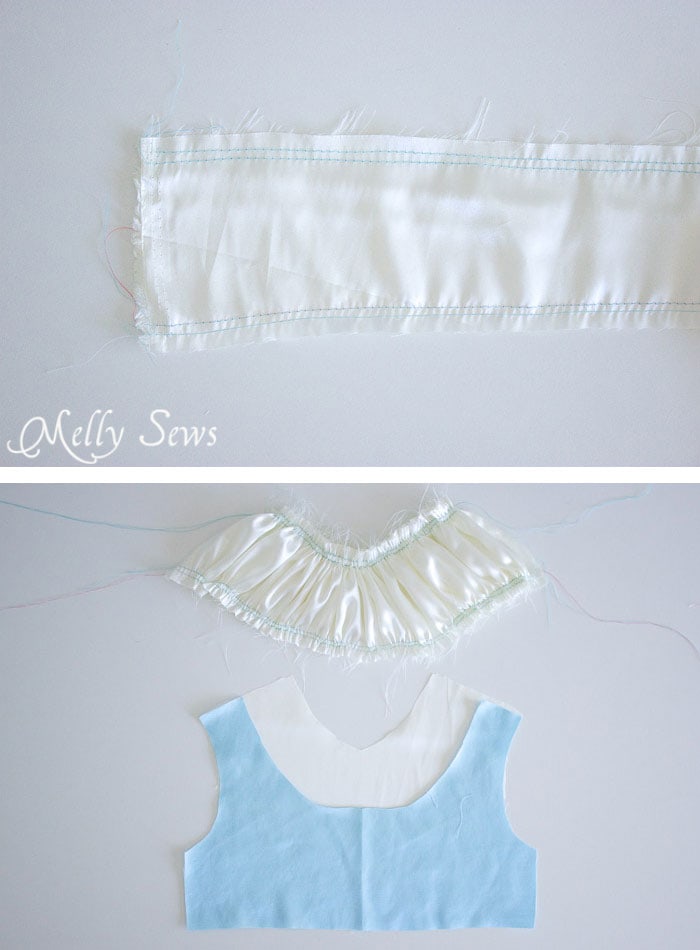
You’ll gather the top edge of the strip to the same length as the neckline on the facing piece. The bottom edge needs to be gathered to the same length as the top edge of the front bodice. Need help with how to gather? See this post.
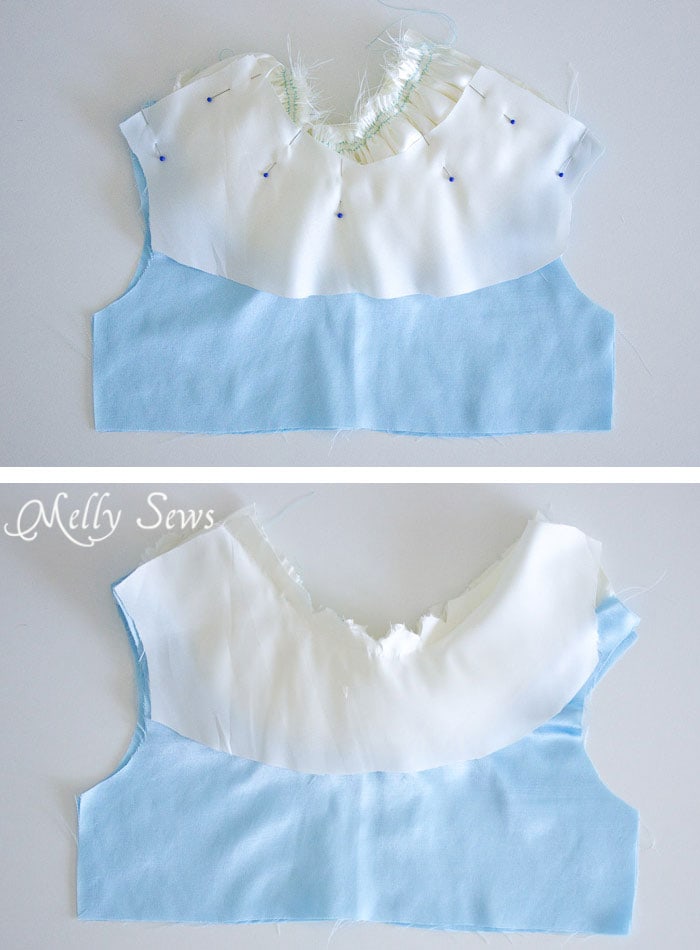
Pin the long edge bottom edge of the gathered strip to the neckline in between the bodice front with the overlay on top and the bodice lining. Make sure the right side of the satin is right sides together with the overlay. Start by pinning the center and then pin toward the edges. Stitch.
When you turn the bodice right sides out, it will look like above.
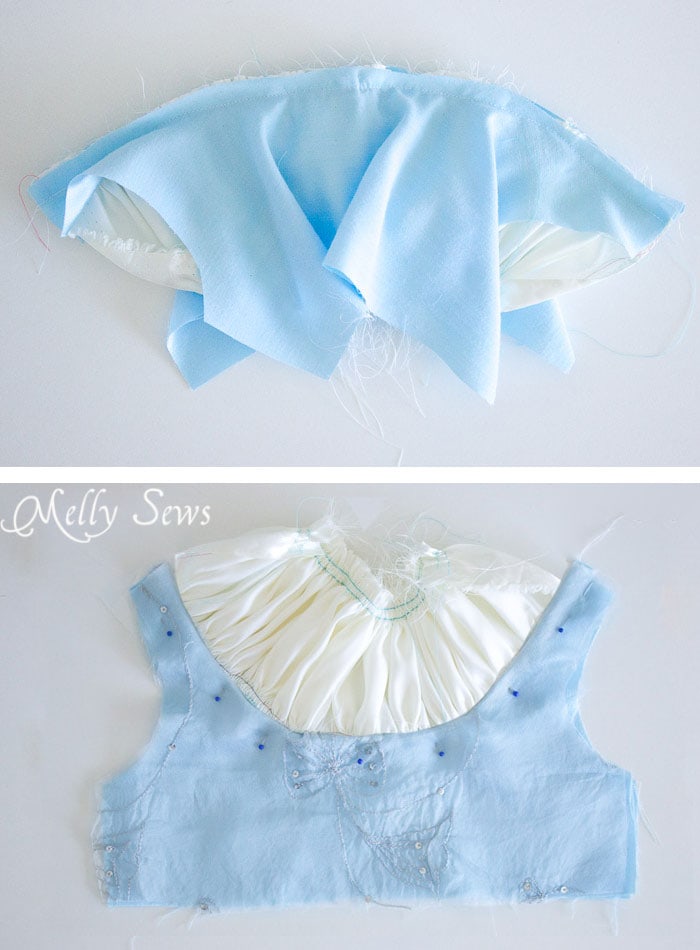
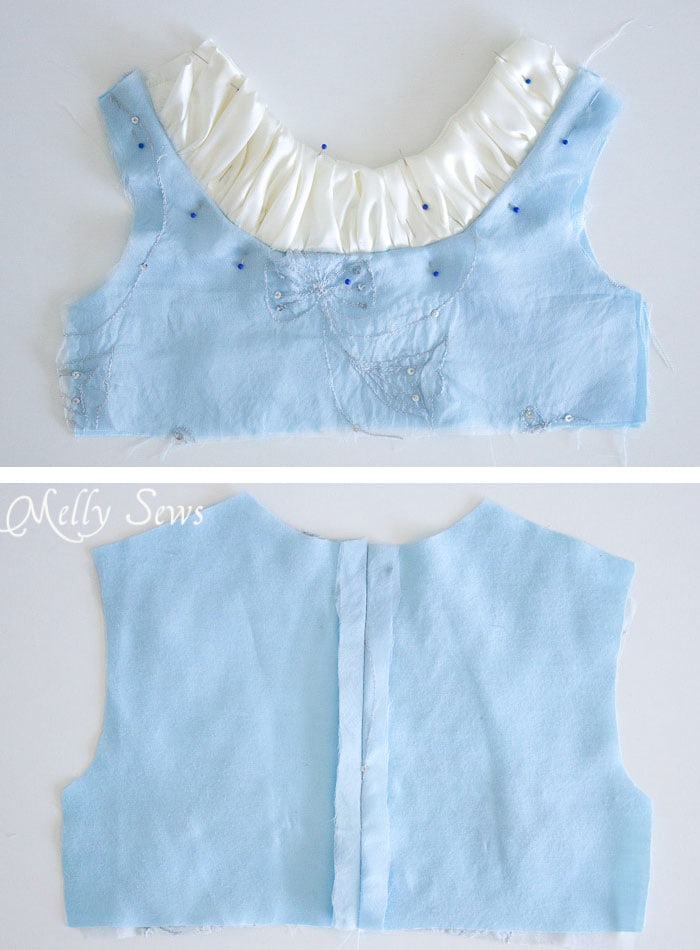
Next, pin the facing right sides together with the gathered strip. Don’t worry if your strip isn’t perfect, you’ll trim it in the next step. The important part is to line facing up with the armscye and shoulder edges of the rest of the bodice. Sew along the seamline of the facing.
Trim the gathered part to the facing edge if needed, then cut notches in the curves.
When you turn the facing to the back side, it will look like the bodice front below. Stitch in the ditch of the seam between the gathered part and the bodice to secure the facing onto the back side of the bodice. If desired, you can fold the raw bottom edge of the facing to the wrong side to minimize fraying before stitching.
Baste 2 of the the back bodices and overlays together and insert the zipper. For more help with zipper insertion, see this post.
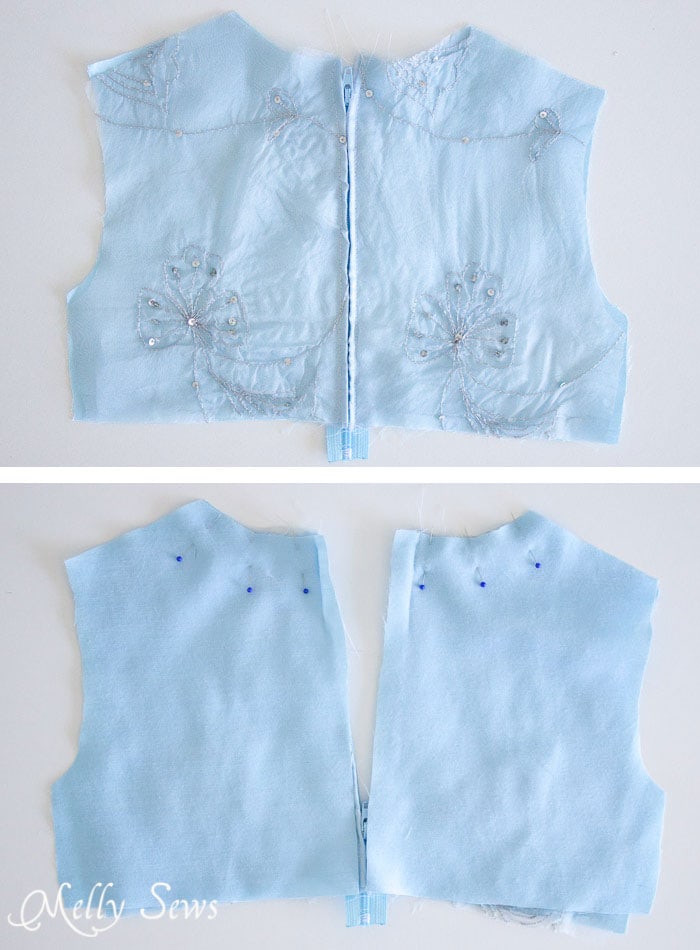
Place the back linings against the back bodice right sides together. The linings will extend 1/2″ past the zipper edge. Stitch along the neckline edge.
Place the bodice front right sides together with the bodice back, matching the shoulder seams. Fold the back lining pieces over the front bodice and match shoulder edges, then sew shoulders, sewing through all layers (front bodice, front lining, back bodice, back lining, and overlays if you used them).
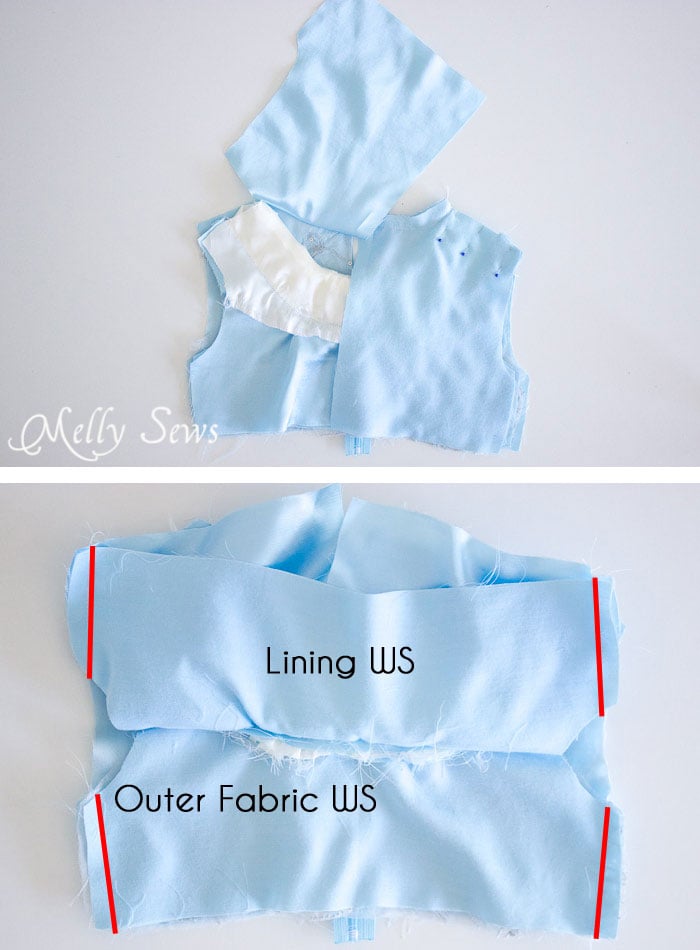
Fold the bodice to match the side seams, matching the back lining to the front lining at the side seams and the front bodice to the back bodice at the side seams, right sides together. Stitch the 4 side seams.
On the inside of the back bodice, fold the lining toward the wrong side on the back of the zipper. Sew again along the zipper stitching line from the right side to secure lining along zipper edges.
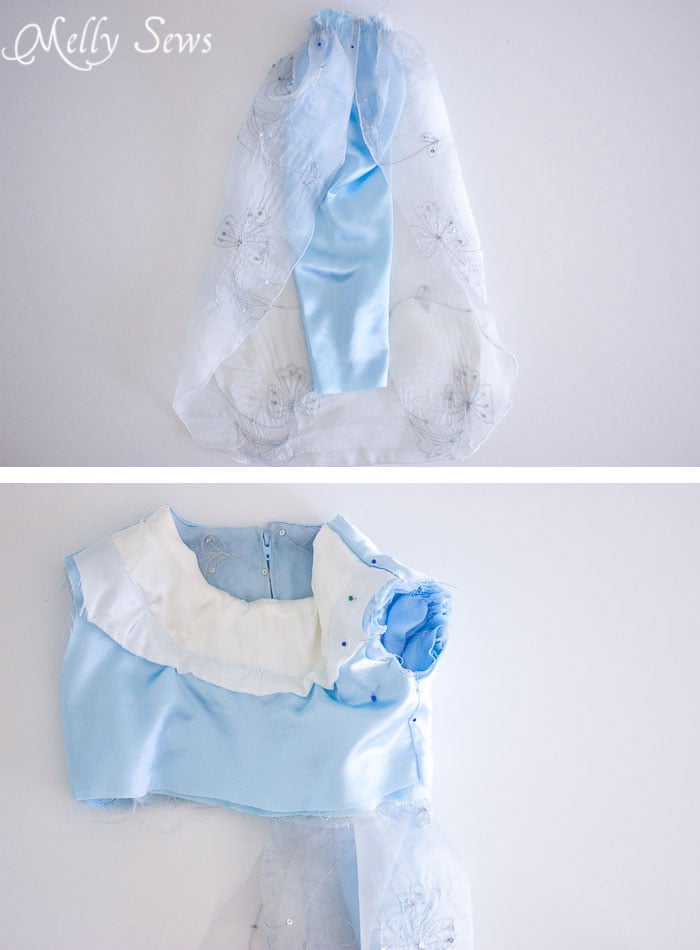
Finish all but the sleeve cap edge of the oversleeves with a rolled hem. (Here’s a post on how to sew a rolled hem if you need help) Sew basting lines for gathering along the top of the oversleeves as shown above.
Fold the sleeves right sides together and stitch the side seams. Finish these seams. Sew basting lines for gathering along the sleeve cap of each sleeve.
Gather the sleeve caps to match the armscye lengths, concentrating the gathers toward the top of the sleeve cap. Mark the top center of each sleeve cap with a pin
Next, pin the underarm part of the sleeve to the oversleeve. Then gather oversleeves to fit the sleeves, overlapping them very slightly at the top center of each cap. They should be pinned wrong side of the oversleeves to the right sides of the sleeves.
Pin the sleeves into the armscyes, right sides together, matching the top center of the sleeve cap with the shoulder seam and matching the underarm seam with the bodice side seam. Stitch sleeves in place, and finish these seams (see this post for help with seam finishes).
Sew the two skirt pieces right sides together at the side seams. Repeat for the overlay. Gather the skirt and overlay together to the same width as the bodice. Place the bodice right sides together with the skirt at the waist and stitch them together, through all layers. Finish this seam.
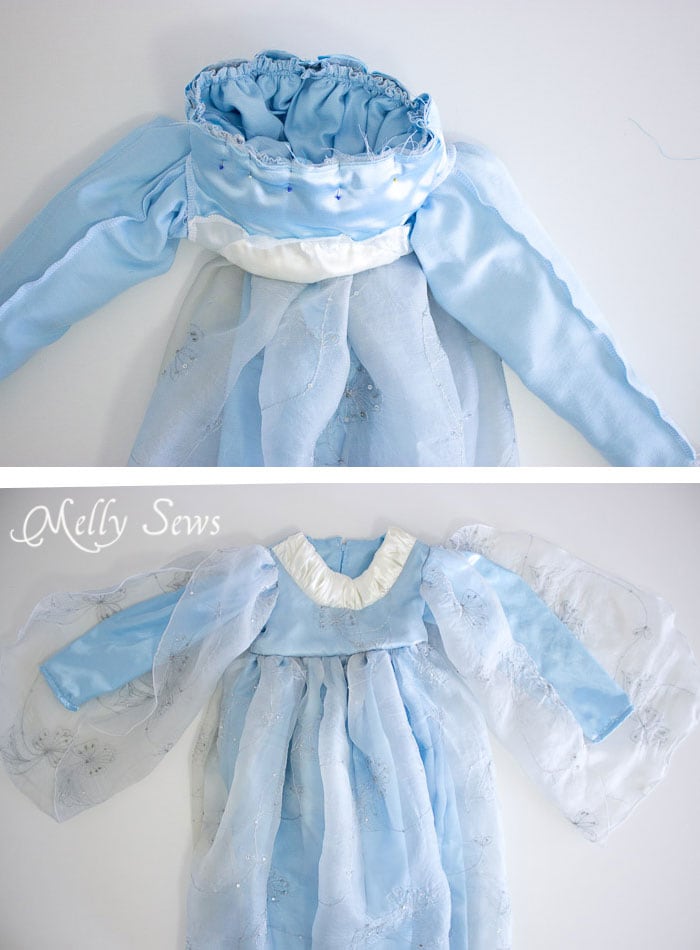
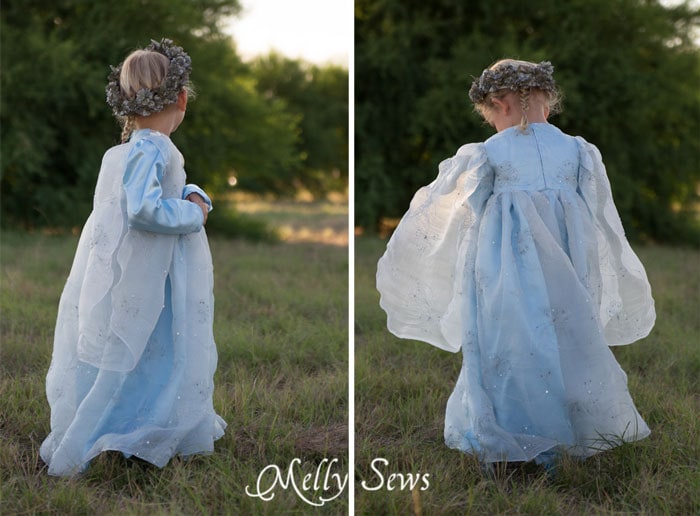
Hem the skirt, overskirt, and sleeves and you’re done!
The crown I made is super easy. Just cut a 1 inch wide strip of posterboard to head circumference plus 2 inches. Overlap the short ends 2 inches and staple together. Hot glue fabric flowers around the outside of the crown, then spray paint the entire thing with silver paint. 
And you have all the ingredients for a pretty pretty princess costume!

Kristie
So cute. And now I want to go and watch that show!
Alice
So cute! Her smile says it all! I love that your littlest guy looks exactly like the character in the movie. Nice mustache.
Michelle
I LOVE LOVE LOVE that movie! You did an amazing job with this. Perfect Buttercup! I love all the others too:)
Anne
Gorgeous! And Princess Bride!! I’ve got a Craft Gossip post scheduled for later today that links to your tutorial: http://sewing.craftgossip.com/?p=84827 –Anne
Jane
AwwwAww! I love the costume theme. I’m going have to sell that to my kids one year. Gorgeous job.