
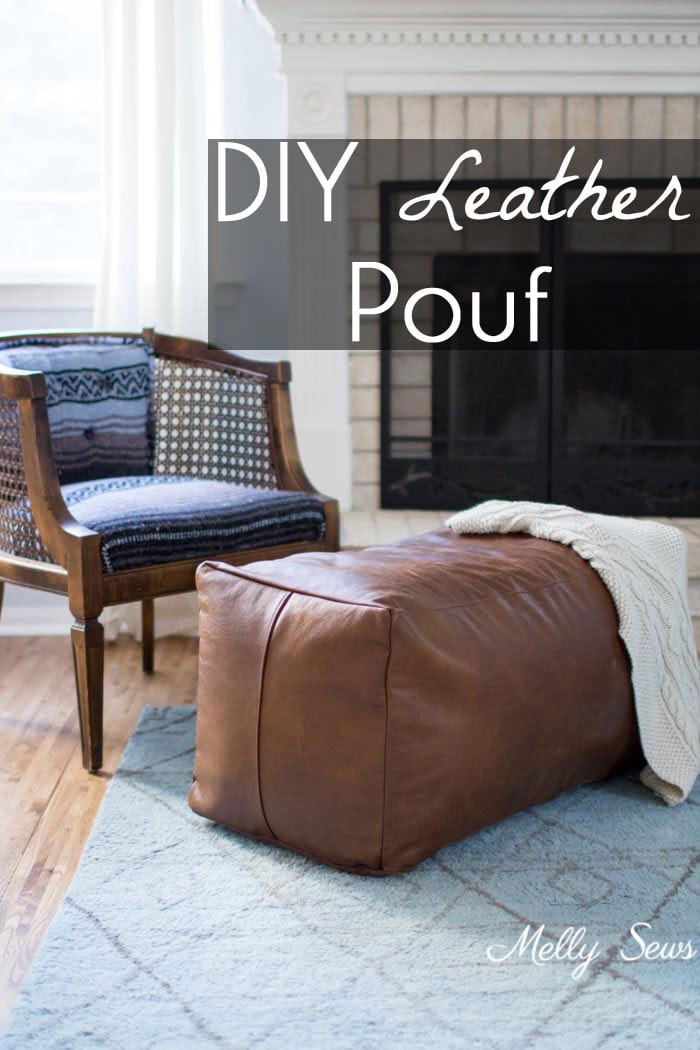
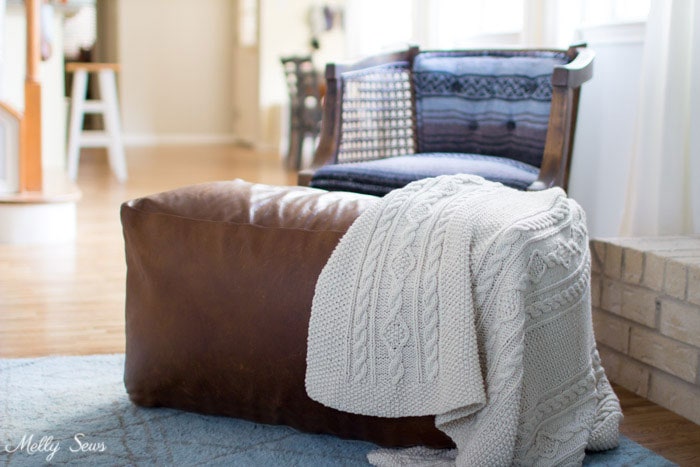
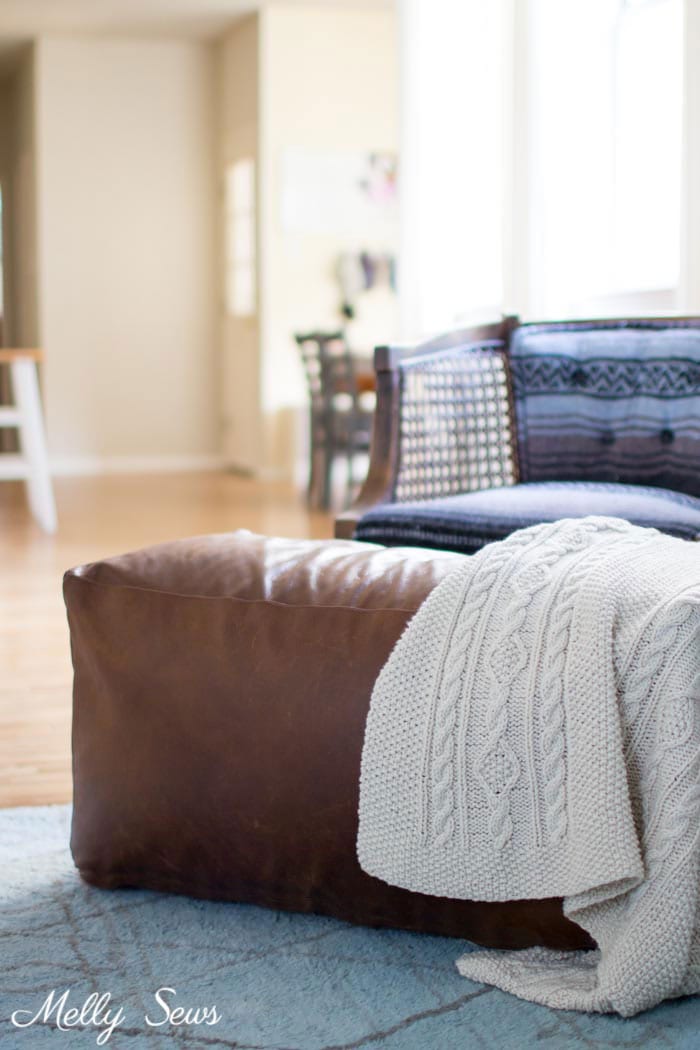
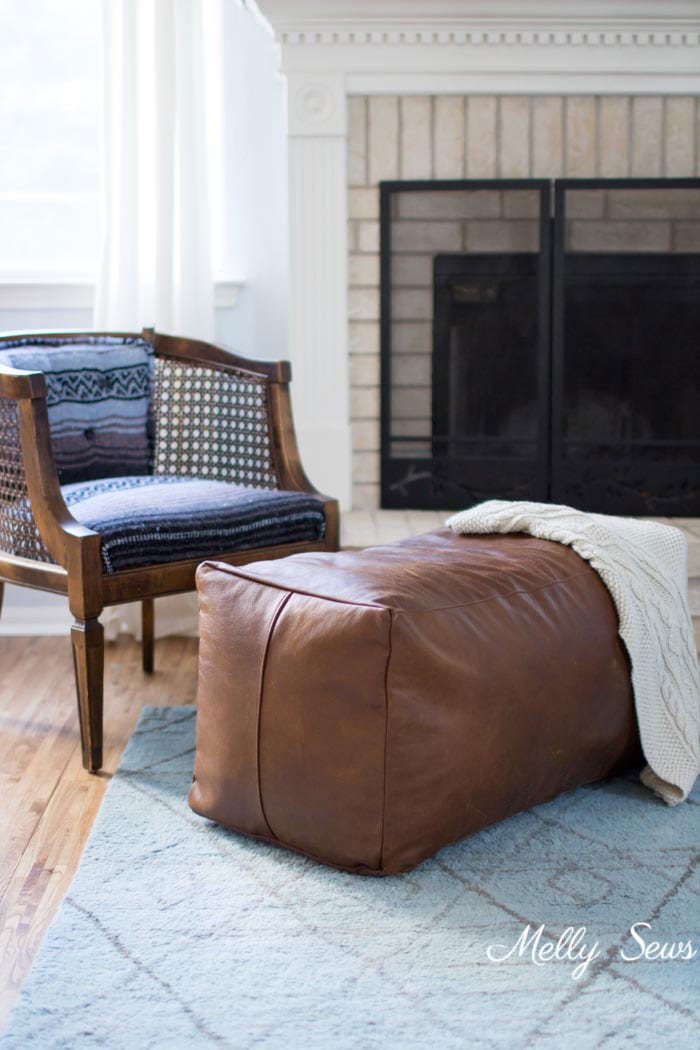
Hey y’all – today I’m sharing this tutorial on how to make a leather pouf or ottoman. I’ve had this project in mind for a loooong time, and finally got a chance to sew it. And now I’m wondering why I waited so long, because I love it.
The leather for this was generously provide by Leather Hide Store and honestly the thing that took me the longest about the whole project was deciding what samples to get and then choosing between the samples. I ended up going with the Montana Buckskin which is the sample on the left in the image below.
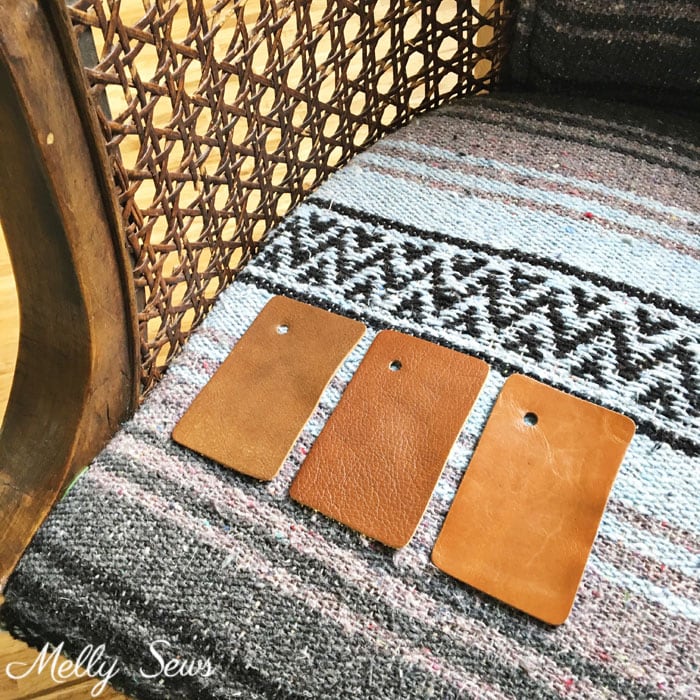
I like how the leather already looks worn in and vintage; one of the reasons I love vintage pieces is that they already have a patina that you usually can’t get in new furniture and accessories. But this feels like it’s already got some of that and will age well.
Leather Hide Store also has a handy leather upholstery guide here to help you figure out how much leather you’ll need for a pouf, ottoman, chair, or other upholstery project.
Want to make your own? Mine measures 32 inches by 16 inches high. To make the same size, you’ll need these supplies (links are affiliate links which help support this site)
- Leather or fabric, about 30 square feet of leather or 2 1/2 yards of fabric. You can also make the bottom out of fabric if you don’t have enough leather
- One upholstery zipper at least 32 inches long (buy longer and trim down to size)
- One upholstery zipper 18 inches long
- Pouf insert – I made my own using muslin fabric and 2 1/2 bags of bean bag pellets. To sew, follow the same instructions as the cover, just skip the zippers and leave a hole to stuff the insert, then sew that hole closed.
Tips for Sewing Leather
- It is important to cut smoothly. Use sharp scissors and long strokes, or better yet a rotary cutter and ruler.
- Don’t pin. Pin marks will be permanent. Use binder clips or wonder clips to hold pieces together if necessary.
- Mark pattern pieces with pen or marker on the wrong side of the hide, mark with chalk on the right side of the hide.
- Use leather needles and heavy duty thread.
- I like to use a roller foot and increase my presser foot pressure a little.
Cut your leather to the following dimensions. You will probably have to piece your leather to get some of the pieces you need; you can see I pieced the 17×17 end pieces.
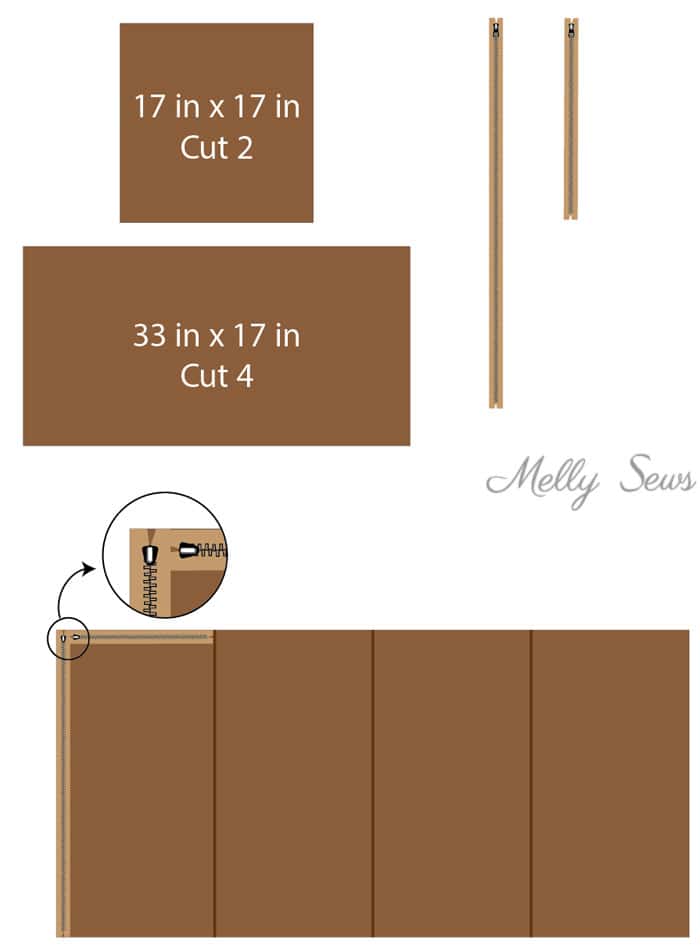
You’ll sew your long zipper to one long piece, and sew the short zipper to the short side of the same piece of leather. The two pulls should meet at the corner. That way you can unzip the entire corner of the cover to get the insert inside. For more about sewing zippers (including how to shorten them), see this post.
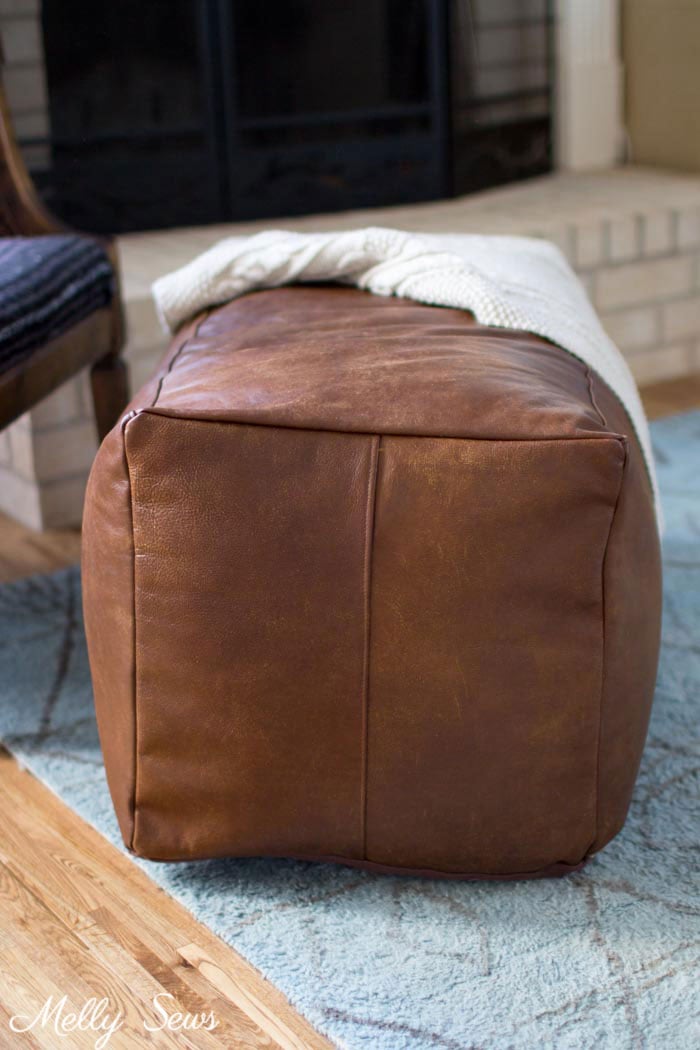
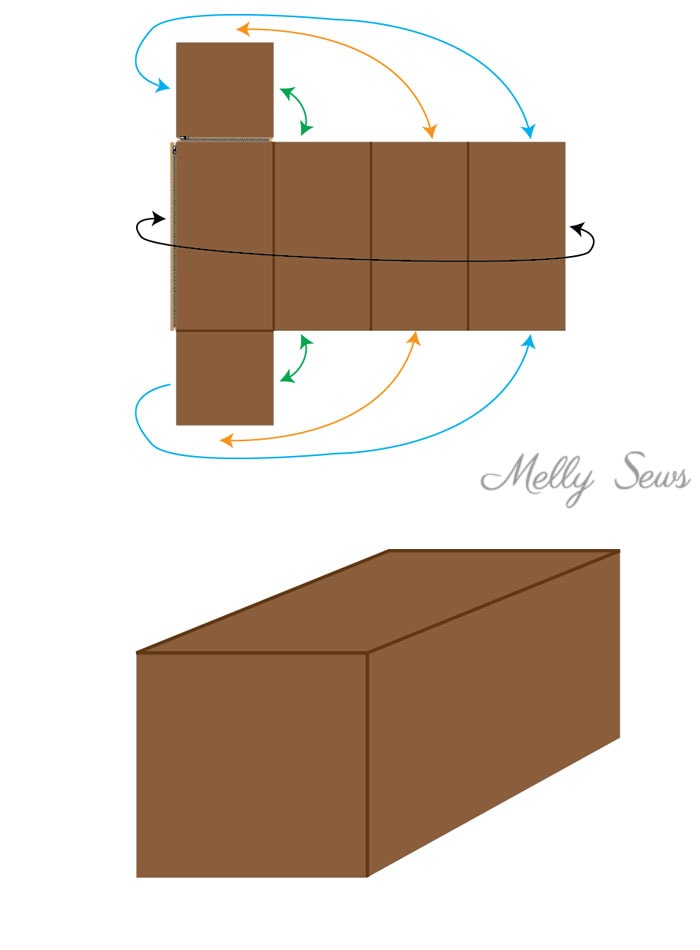
Next sew all the long pieces together so you have one large piece of leather. I used 1/2 inch seams and finished them as explained below.
How to Piece Leather
Piecing leather just means sewing multiple pieces together to get the final size you need. Since leather doesn’t unravel, you can piece by literally just laying one piece on top of the other, both right sides up, and sewing one or two lines of stitching at the overlap to hold them together. However, that will leave unfinished edges showing, which could be OK depending on the look you’re going for.
I decided to get a little fancier, and sewed my pieces right sides together, then pressing the seam allowance to one side and topstitching from that side. Since that meant 3 layers of leather stitched together on one side of each seam, it gave the seams a little dimension and hid all the unfinished leather edges. And then I liked this look so much this is how I did all my long edge seams as well.

After you’ve sewn your long leather piece together, sew the 17″ pieces onto two short sides to form a T shape. Then use the diagram below to match sides and turn your T into a cube. I chose to sew all of these seams right sides together, and then unzip and turn the cover right side out, but if you pieced leather with raw edges out you’d probably want to construct your seams in the same way.
As mentioned above, you can make your own insert. To sew, follow the same instructions as the cover, just skip the zippers and leave a hole to stuff the insert, then sew that hole closed. You want to stuff the insert very firmly; I thought 2 bags of pellets would be enough for mine, but it wasn’t and I ended up using half of another bag to get the firmness I wanted. If you use less it will make your pouf lower than an ottoman and more bean bag-like. And a tip for stuffing with pellets – pin the fabric of your insert all around the opening in your bag with the bag edges inside the insert, then invert. And be patient as the pellets slowly transfer from the bag to your insert. This is the only way I could do this without needing another person or getting pellets everywhere.
Finally, insert your bean bag insert and then zip up the cover. And enjoy an new seat/footrest!
pennyfp
That is SUPER COOL! I don’t think I’m brave enough for leather, and I don’t think my old machine would be able to do the job, but I’m thinking denim is a possible practice piece! The kids would LOVE it!
Christine
It came out so beautiful!
JoAnn McNeill
Awesome! Moving in a year and would love to make one then 🙂 You said two 1/2 bags of bean pellets and I see when I click on the link that each bag is 100 liters. Thanks so much for this great tutorial.
Anne - Leather Hide Store
This looks so amazing! I LOVE how it turned out and the Montana Buckskin was the perfect choice!
Mai
This is gorgeous! the seams turn out very neat and professional. I’m looking to make something like this. Thanks for the tutorial!