
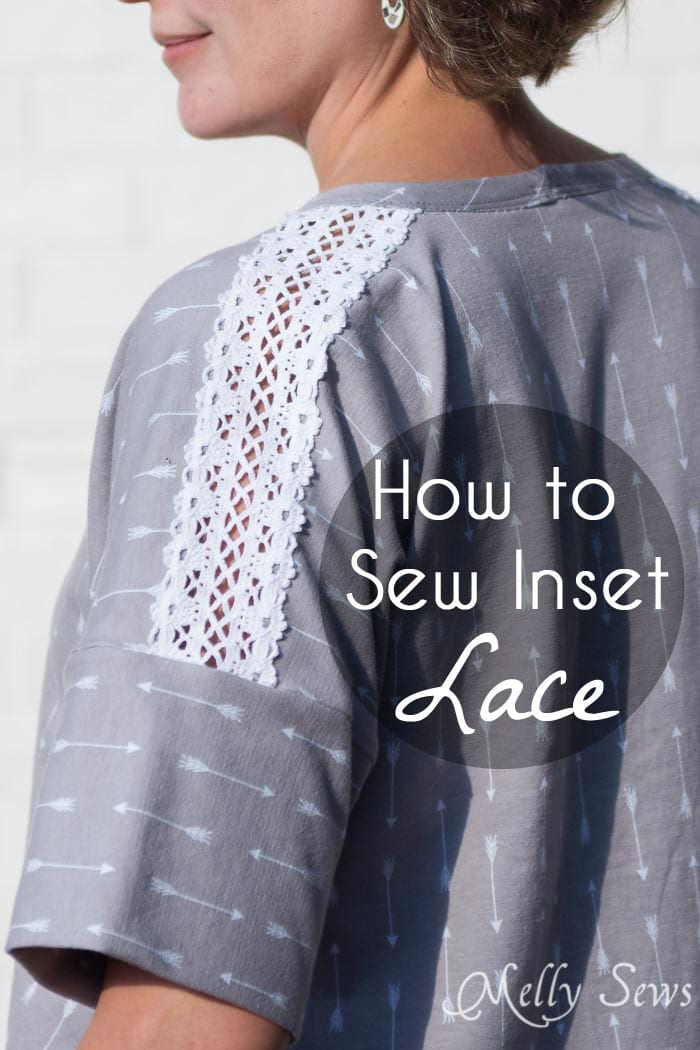
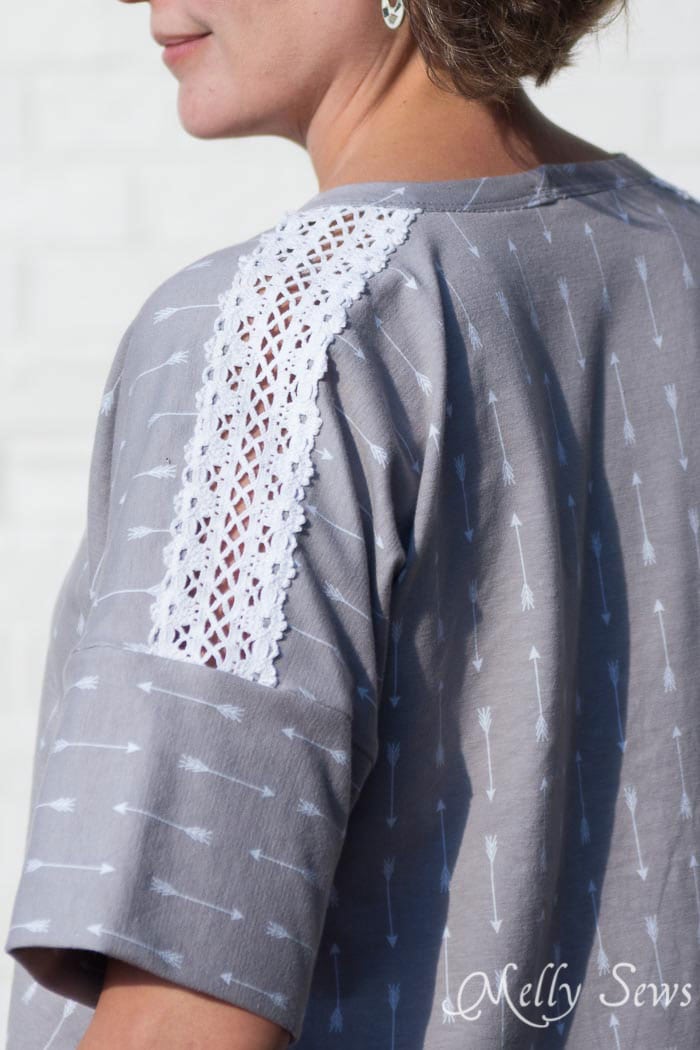
Sometimes you just want comfy basics to put on so you just don’t even have to think. And then sometimes you want those basics to have little details that make them uniquely yours. This shirt fell into the latter category for me, so today I’ll be showing you how to do a lace insertion. You can see more of this shirt in this post.

Y’all, to tell the truth, my sewjo has been hard to come by lately. A bunch of projects that have ended up not quite right combined with life in general lately have conspired against me. But the thing is, sewing is not just my creative outlet and my sanity, it’s also my job. But when I force myself to power through, sometimes I get a project like this one, which was an easy sew and I love the result.

I’m going to show you both how to insert lace in a seam (like I did) and how to sew lace insertions anywhere else on a garment.
First, you need lace that is the same on both edges. Well, I guess you don’t NEED that, but generally symmetry looks better in this kind of application. You either want both edges to be scalloped (as the lace I used is) or you want two straight edges.
Next, if you are adding the lace to a seam, baste that seam.
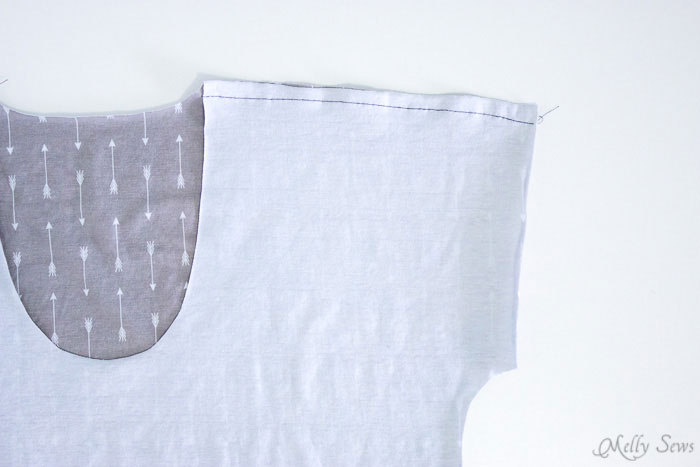
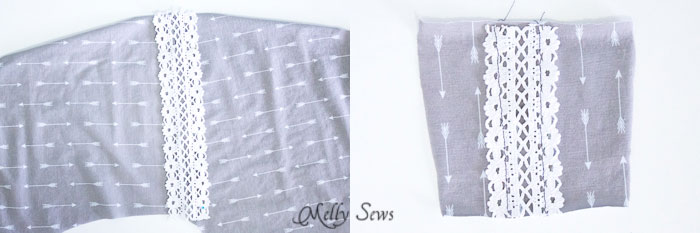
Then lay the fabric flat and center the lace over the seam on the right side. If you’re adding the lace anywhere else, simply line up the lace on top of the fabric where you want to insert it and pin.
In the picture below, I’ve got seam insertion on the left and mid fabric insertion on the right. You’ll stitch down both edges of the lace to secure it to the fabric, very close to the edge of the lace. For seam insertion, make sure that the seam allowances aren’t caught in your stitching. The open part of your fabric will be the width your stitching lines are apart; as you’ll see below I didn’t go all the way to the edges of my lace. I also used contrast thread on my sample to hopefully make it easier to see, though you’d want to use matching thread.
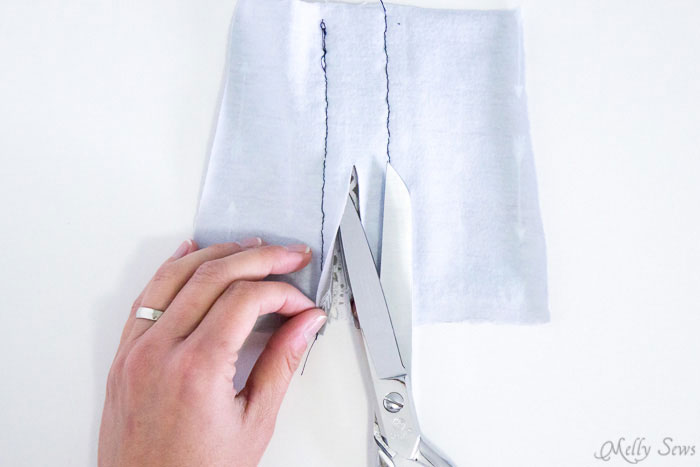
For in seam insertion, remove your basting stitches now. For mid fabric insertion, cut your fabric carefully – make sure not to cut the lace – in the middle of your two stitching lines.
Once again, seam on the right, mid fabric insertion on the left. Fold the fabric away from your lace and press it.
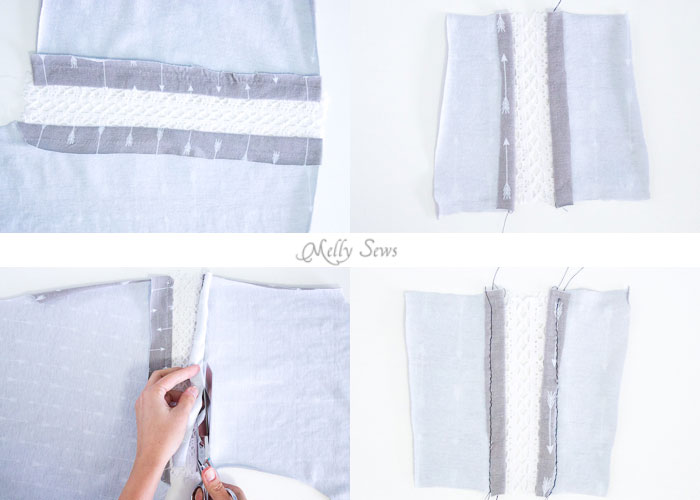
Then stitch again, either on or just next to your original stitching line to keep the edges of the fabric from rolling back out. Cut away any excess fabric beyond your stitching.
One more note – I’m using knit fabric here, which doesn’t fray. But if you were using woven fabric, you’d want to use a narrow zigzag stitch instead of a straight stitch, because that would keep the fabric edges from fraying.
And you’re done with the lace insertion! Continue to sew the rest of the garment as if the lace was part of the original fabric.
Emily
What a nice detail!
Kristie
Gorgeous shirt! I want to make shirts with details like that….but finding the lace is always my problem!
Thanks for sharing.
Anne
Pretty!! I’ve got a Craft Gossip post scheduled for tomorrow morning that features your tutorial: http://sewing.craftgossip.com/?p=90553 –Anne
pennyfp
Ooooh!!!! Wonderful!!! I “salvaged” some lace from another garment and now I know what I’m going to do with it!!!
You rock!!! Hoping you get your sewjo back in full force. I sympathize… (((hugs)))
René
OMG, thank you for reminding me that I have some that can be repurposed into a project like this!
Marley K. Tarlton
Martha Pullen did have lots of lace.
I did buy some from her. Check her out.
http://www.marthapullen.com
In Alabama. I guess she still in business
PsychicSewerKathleen
Melissa this was a brilliant tutorial – thank you! It’s how I always used to put in zippers but I never would have thought of this for lace and it’s brilliant! Love your lace shoulder – very sexy 🙂
Debi Mason
Melly – thank you so very very much! I adore this lace tutorial!
Marti Morgan
I have some beautiful crochet doilies, tablecloths, bedspreads that my husband’s grandmother made and there are just TOO MANY to use. I have been thinking of using those as insertions and rerally appreciate this lesson. Thanks