
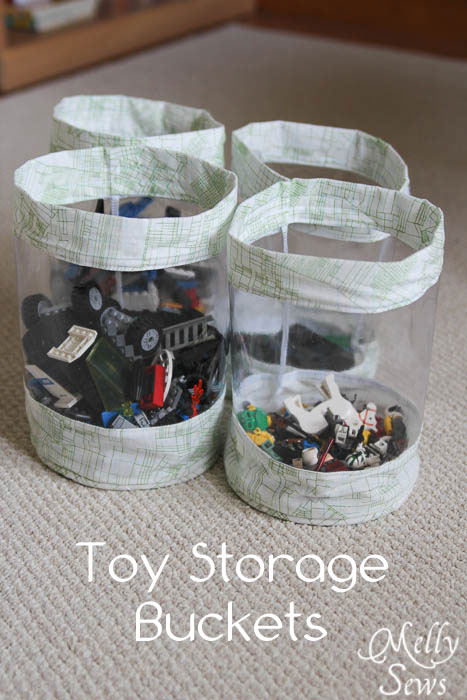
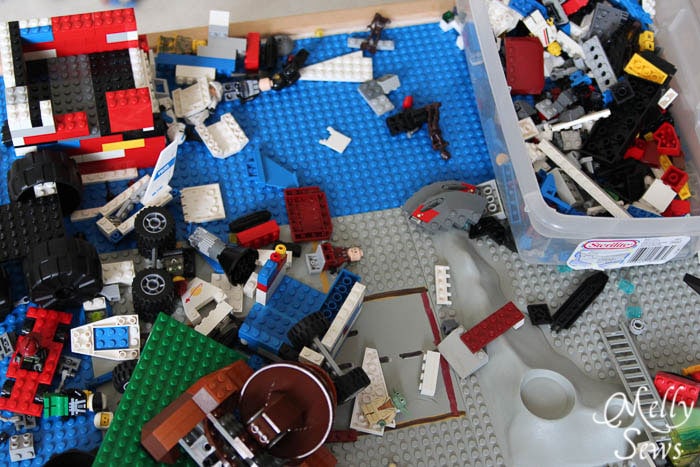
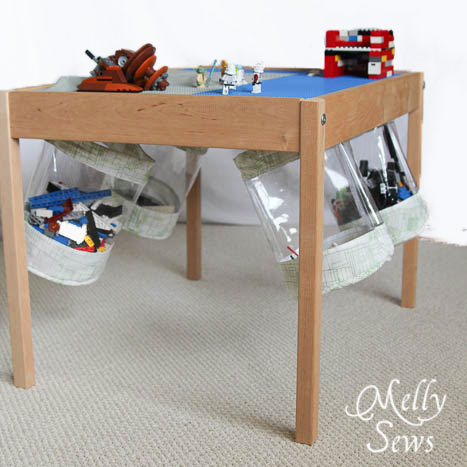
Today I’m sharing a fabric storage bucket tutorial. My boys are at an age that they have discovered Legos. And my husband still has all his from when he was little. Which has led to a Lego mess in our house…and I swear the second picture somehow looks cleaner than it actually is. But you can still see those little pieces waiting to embed themselves in your bare feet.
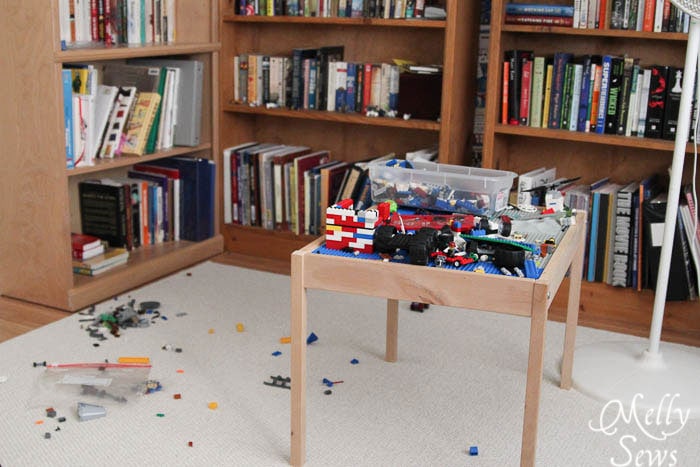
And how can they even build on that crowded table top? It was time to get this under control.
To make your own storage buckets, you’ll need:
- Fabric
- Piping (optional)
- Clear vinyl
- Heavy Duty fusible interfacing
- Sew on Velcro, at least 3/4″ wide
- Tissue paper
- Hot glue
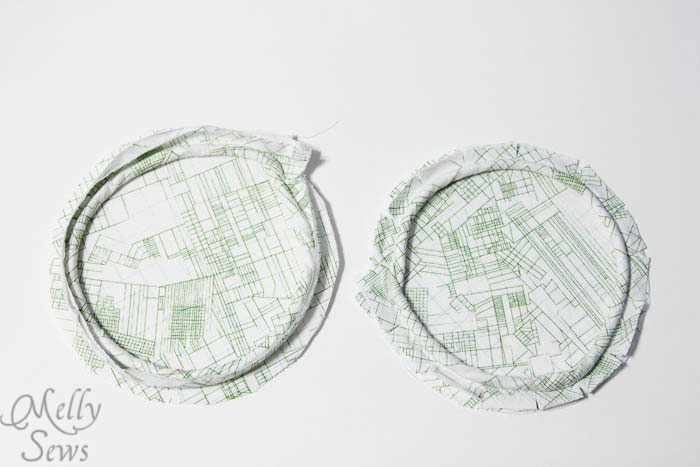
From your fabric, trace a circle. I used a tea saucer, and then added a 1/2″ seam allowance with my compass ( You can also use two pencils taped together to do this). My fabric circles were 7″ in diameter. 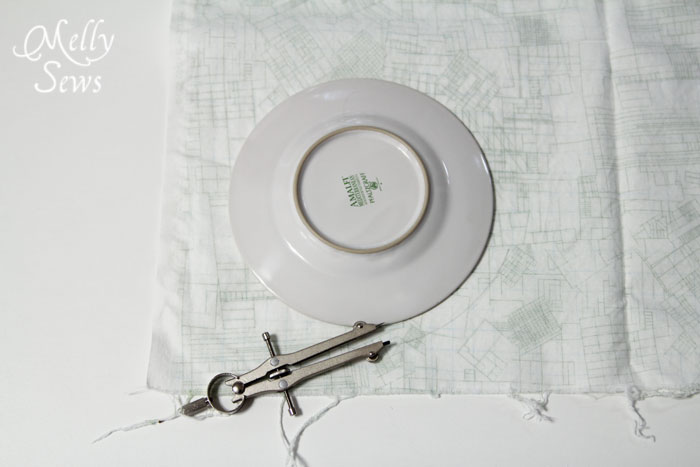
Cut out our circle, then cut it out of interfacing as well.
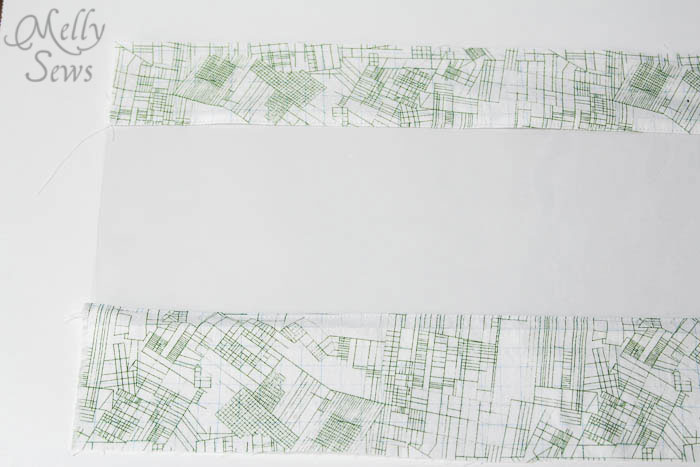
From your fabric, for each bucket, cut two rectangles. One should be 4 inches high by the circumference of your circle + a seam allowance wide. (Mine were 4″x20″). The other should be 3″ x the same length as your first rectangle.
Cut a rectangle from your vinyl that is 6″ high by the same length as your other rectangles.
You also need 1 piece of interfacing 2″ high by the same length as your other rectangles, and one that is 1.5″ high by the same length as your other rectangles.
Fuse the interfacing to the wrong side of your circle. Fuse the 2″ strip of interfacing to the wrong side of your 3″ strip of fabric, 1/2″ in from each edge. Fuse the 1.5″ strip of interfacing to the 4″ high strip of fabric, 1/2″ in from one long edge.
Sew one narrow and one wide strip of interfaced fabric to each long edge of the vinyl, using a 1/2″ seam allowance.
To sew the vinyl to the fabric, place a piece of tissue paper between your sewing machine bed and the vinyl. This will help so the vinyl doesn’t get stuck in your feed dogs. The tissue paper will be easy to tear away from the stitching line.
Topstitch with the seam allowance pressed toward your fabric, again using tissue paper to ensure the vinyl feeds through your machine.

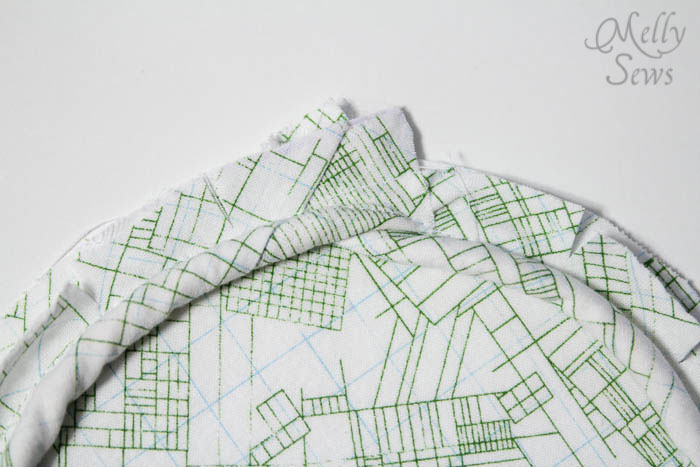
If you are using piping, sew it to the edge of your circle using a zipper foot. (Want to know more about piping? Check this piping tutorial)
When you first stitch the piping, the seam allowance will stand up like the circle on the left below. Clip into the piping seam allowance up to (but not through) the stitching line every 1/2″ or so and it will lay flat, as on the circle on the right.
At the beginning/end of the piping, pull a small amount of the piping out of the tube, cut off, and then overlap the ends as shown.
Match the short edges of your vinyl/fabric rectangle and sew it into a tube (note – I ran out of interfacing so you can’t see it on the bottom of this tube, but it should be there).
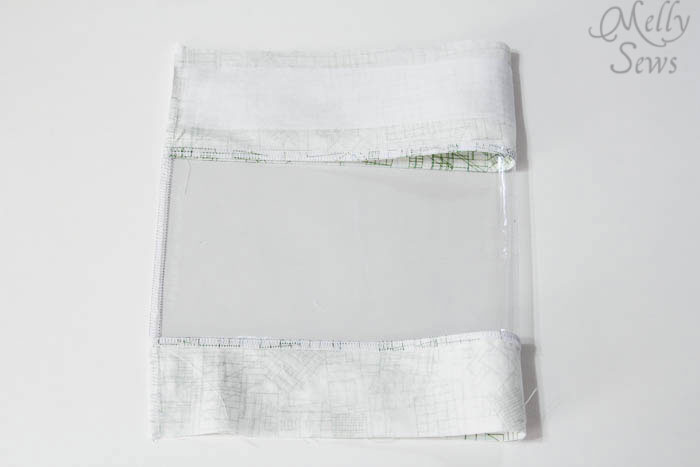
Pin the tube to the circle, right sides together as shown. The narrower band of fabric gets pinned to the circle. Stitch around the circle.
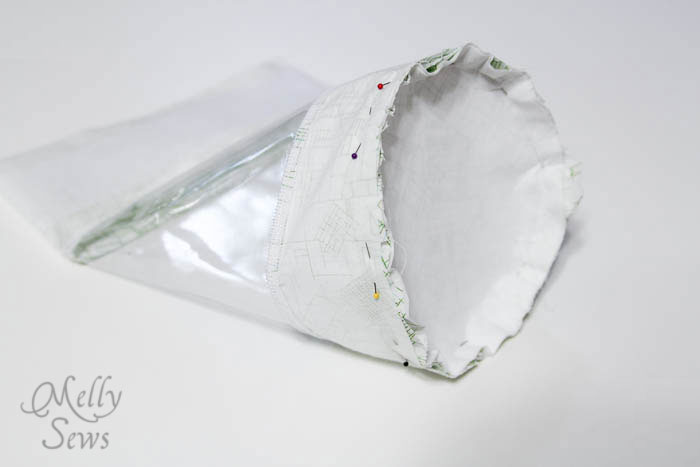
Fold the top edge of the fabric down 1/2″ and press. (If your interfacing ended up closest to the vinyl instead of the top, no worries. It will all work out on the next step).
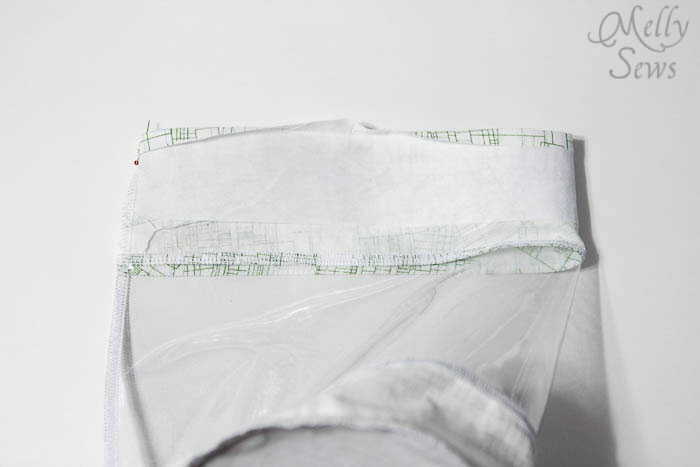
Fold the top band down again, covering the seam allowance. Pin in place and stitch down by stitching directly over your topstitching from the earlier step.
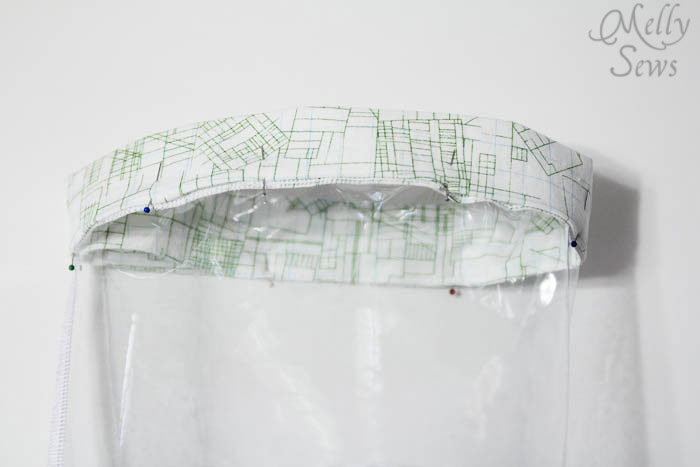
Turn your bucket right side out.
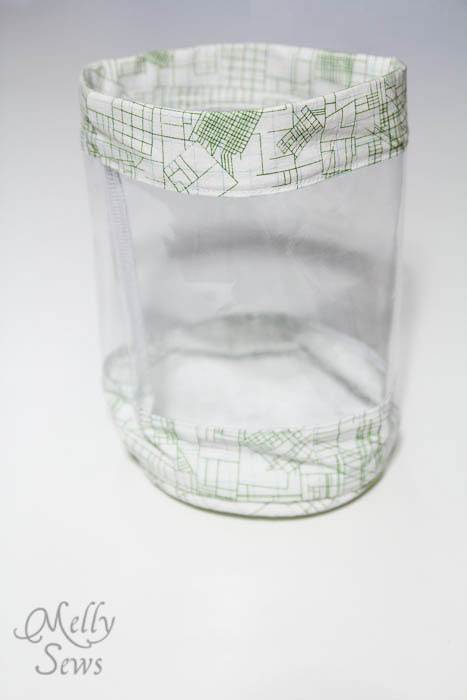
To make these buckets hang under a table for storage, stitch a piece of velcro (the soft side) to the outside of the bucket.
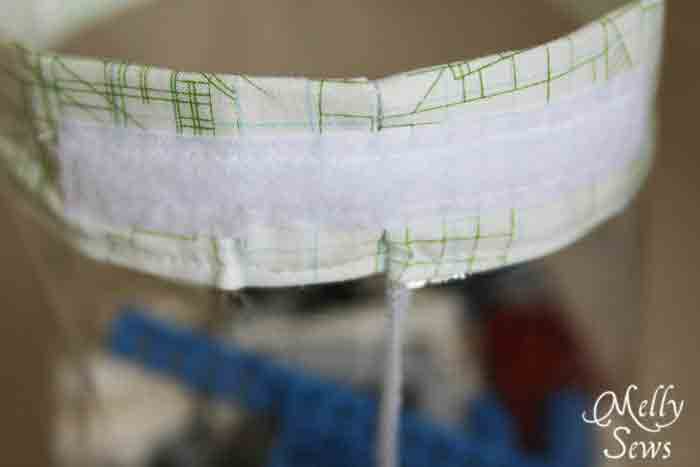
Hot glue the rough side of the velcro under the play table.
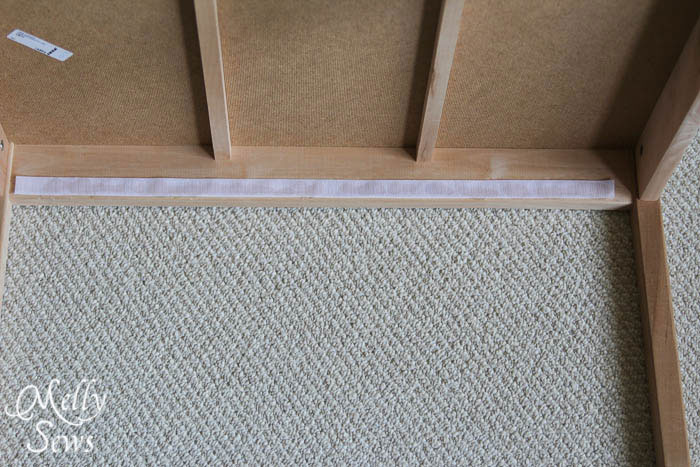
The velcro will hold the bucket off the floor and under the table.
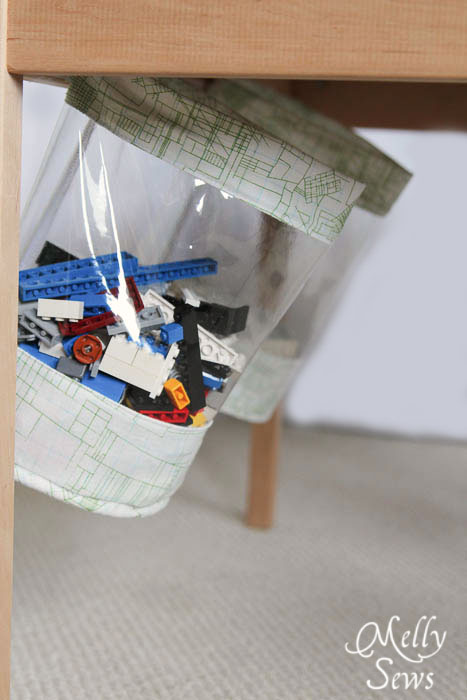
Enjoy a clean floor and clean table top!
Marieke
Such a smart idea!!! I may have to make a ton of these… Maybe also to organize my notions!
Cindi
I love it! I think this would be cool to make for the grandkids of any age! On my list for Christmas. I will add a top with a drawstring and it will be perfect!
Anne Weaver
Buckets that attach to the table! Brilliant!! I’ve linked to your tutorial over at Craft Gossip:
http://sewing.craftgossip.com/tutorial-clear-sided-fabric-buckets/2013/09/17/
–Anne
emilia
REALLY like the Velcro under table idea. SUCH a great genius brain you have!!
yvonne
Wowwee! These are very NICE. I have been thinking about making something to put my hair ‘stuff” in, i.e. rollers, combs, hair bonnet, etc., these would be great, Also, they would really accommodate some of my art stuff, and my sewing notions. Thanks again for the great ideas.
Karyn
Great idea! I like that it hangs out of the way, but still easily accessible.
Jess
awesome idea! I love that they are clear, so you can easily see what’s in them!
Tricia
I love them. That is such a neat idea. Any way in the house you could use them and if you used oil cloth instead
of fabric you could also have them in the garage. He is always looking for little things to put his stuff in. He fixes stuff.
Betsy
Any tips for finding clear vinyl? And what is it like to sew with? Any special needle/foot needed?
These are brilliant, especially the velcro under the table edge.
Janine
Joanne fabrics any fabric store should have in the home decor section on a large roll. If you use tissue paper like suggested in the tutorial it will sew easier and lengthen your stitch. .
Marni @ Haberdashery Fun
These are great! I also love sewing with vinyl and love what you came up with!!
Evelyn Kelly
Wow…I liked these storage buckets. How beautiful these are!!! Melissa, this is very creative. I will surely try to make these storage buckets for me too.
BeckyThompson
Oh this is too cool! I have a ton of quilting pre-cuts and scraps that need an organized home and these are perfect to hang off the shelves on a wall in my sewing room! I’m completely out of room on existing shelves. I love that you can see through to find exactly what you need. I’m going to make nesting ones and mail them to my DIL for my grandson’s new fascination with Matchbox cars too. Thank you for the incredible organization idea!
Maria
Excellent for the sewing/ craft room as well.
Cornaline50
Many Thanks for this DIY !!!!
I Just made it for my son !
You can see it in my blog : http://pooksfamily.over-blog.com/2014/02/seau-en-tissu-pour-rangement-jouets.html
See you soon !
Lucie
Thanks for responding to my needle question so quickly (it was ona different post). Now I have a new question: what gauge did you use? Went to Jo-Ann’s today and they had different gauges.
Sherry
I would love to put a top with a zip around closure, would you know how to do that? I have never really mastered zippers but recently have made some bags with zipper pockets but have no idea how to put on on this bag. My granddaughter would love this for doll clothes and accessories. I can picture it with a carry handle too :0)
Resi
this is sooo nice! such a clean and classy way to clean up toys. Just a question: how would these hold up in a washing machine? We live in South America in a very dusty area and add to that little grubby hands grabbing at the bags…well…any mother understands 🙂 thanks so much for the tutorial!
Z
Awesome, I shll.male rectangle once for my sewing room , wash room, dresser etc.
Thx for sharing
Sharon Shetley
I am going to make smaller ones to organize my desk..paper clips, etc. and my sewing area for small things that get scattered. Thank you
Teresa
So neat but I don’t think I could do it!