
Learn how to sew a continuous placket that you can add to a shirt or top with this step-by-step video
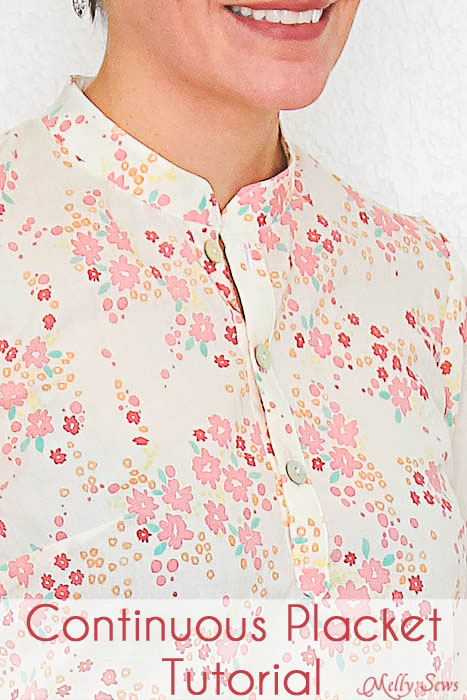
As promised from Tuesday’s post, today I’m going to share a continuous placket tutorial that can be added to any shirt or dress to turn it into a popover style like the one I’m wearing in these pictures. By the way, no, I did not cut my hair, these images with short hair are from 2014.

Video Continuous Placket Tutorial
Below I have a quick video which you can also watch on YouTube here that shows how to sew this type of placket. For more details and images, keep reading after the video.
Preparing The Garment
You can add plackets to all kinds of top, shirt or bodice patterns that are cut on the fold. While I show this one on the front of the shirt, there’s no reason you couldn’t put it on the back if you wanted. You can also use all kinds of fabrics, though of course some fabrics are easier to sew than others. In the video above I sewed a front placket of quilting cotton onto my Hathaway Tank pattern.
You can even use this technique to sew the plackets above shirt cuffs, though if you do that I’d suggest not making the placket quite as wide as I do in this tutorial. I’ll discuss sleeve placket widths further down this post.
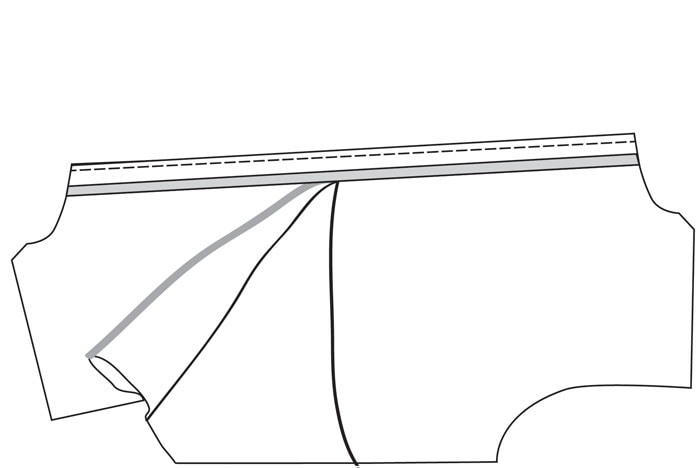
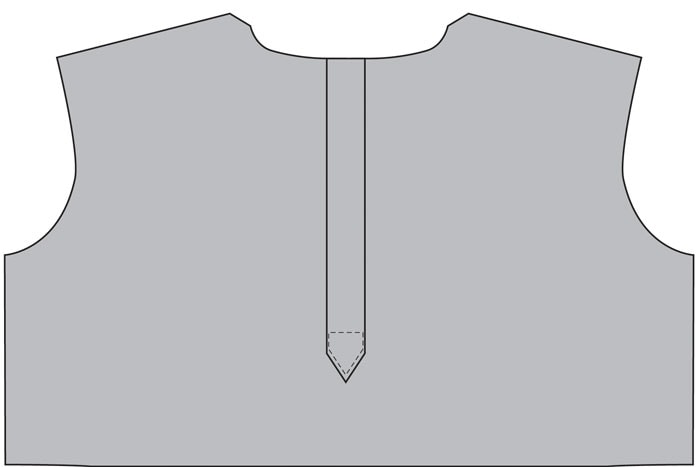
To begin, determine the length of placket opening you’d like to add. For mine I did 8 inches. Mark a line this length down the center front of your shirt. Make lines the same length 3/8″ to both sides of your center line. Connect these lines across the bottom to make a rectangle. Mark a dot 1/2″ up from the bottom on the center line. Connect this do to the corners or your rectangle to make a triangle.
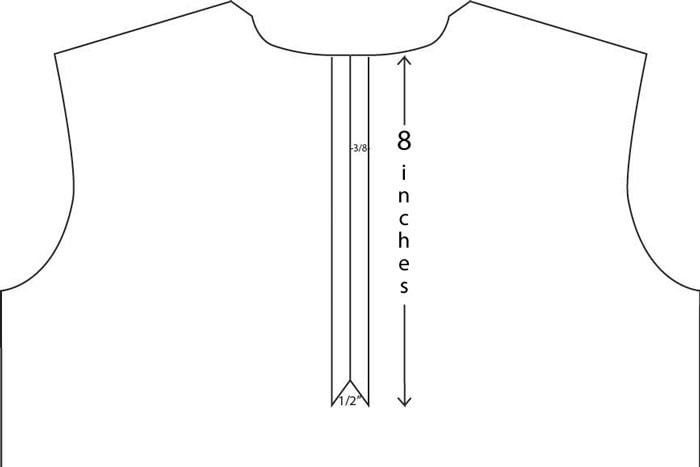
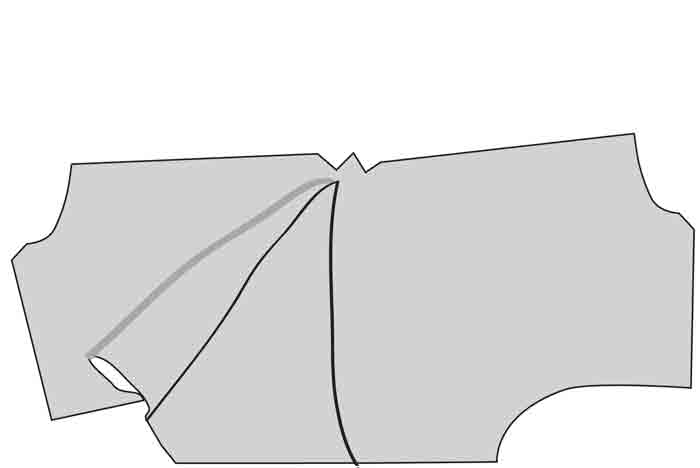
Cut down the center line until you get to the point of the triangle, then cut on the sides of the triangle. Spread your shirt open flat along this line.
The Placket
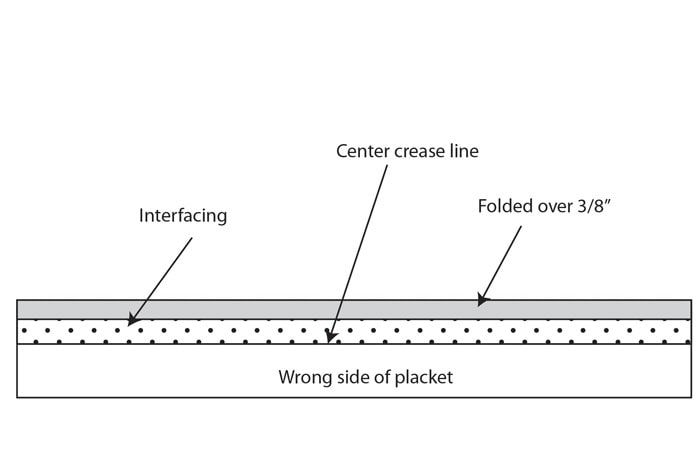
Cut a rectangle that is 2 x the length of your placket opening + 1″ and 2 1/2″ wide. This rectangle will be your placket and the finished width will be 7/8 inch. Fold it in half, wrong sides together, matching the long edges and press. Then cut a length of fusible interfacing that is 3/4″ wide and the same length as your placket piece. Fuse this to the wrong side of your placket, lining the edge of the interfacing up with the crease from ironing the placket. On the same half of the placket, press the long edge in 3/8″ toward the wrong side.
If you are sewing plackets on cuffs, you can make the opening 1/4″ marks from the center instead of 3/8″ and change the placket width to 1 inch instead for a finished placket that is 1/4 inch wide. The math for the strip of fabric to cut for the placket is (seam allowance x 2) + (finished width of the placket x 2). So in my example with 3/8″ seams I need 3/8″ x 2 which is 6/8 or 3/4 inch, then to that I need to add the finished width of the placket x2 so 7/8 inch x 2 is 14/8 or 1 3/4 inches. Adding my two numbers 3/4 and 1 3/4 together gets me to the 2 1/2 inch placket width.
Sewing The Placket
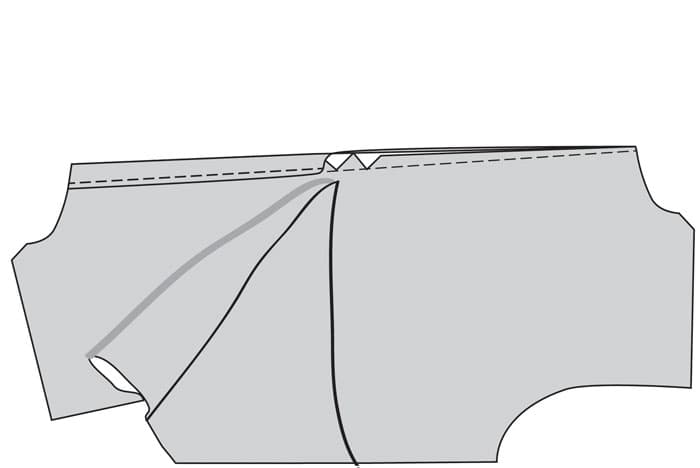
Next, with the wrong side of the shirt fabric and the wrong side of the shirt placket facing up, align the unfolded edge of the placket with the placket opening. Pin. Stitch through both layers, using a 3/8″ seam allowance. The stitching line should just barely cover the points cut in around the triangle, and the placket should extend a little beyond the neck edge on each side.
Turn the shirt to the right side. Fold the placket around so that the folded edge just covers the seam on the inside that you made in the previous step. Press and stitch. For this step in particular it can be helpful to look at the video above.
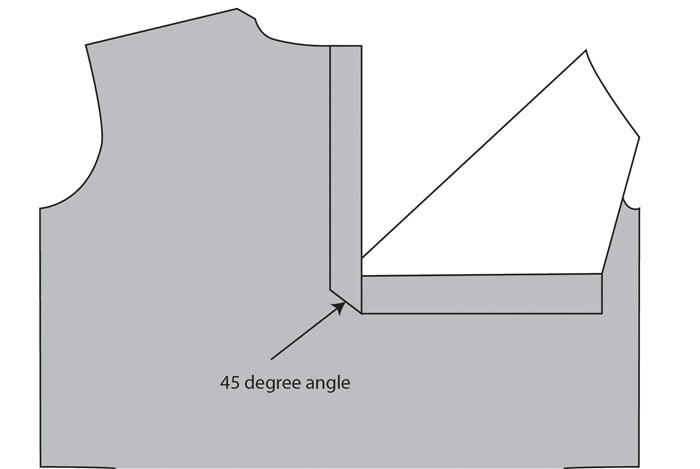
Fold one side of the shirt down as shown, so that you can create a 45 degree angle at the bottom of the placket. Press.
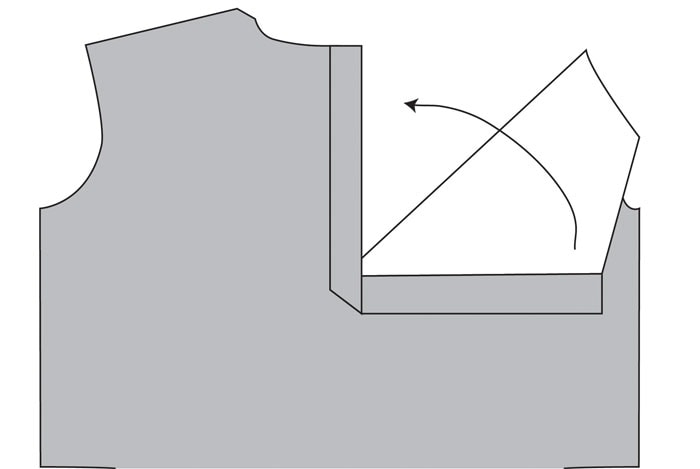
Fold the side of the shirt up, holding the point of the placket with one finger, and overlapping the placket, creating a point at the bottom of the placket. This can be a little fussy, so take your time folding and pin the placket together once you have a nice point.
Finishing The Placket
Stitch around the bottom of the point to secure the placket. It can help to use a mallet first to flatten the layer at the bottom of the placket. It can also help to use the self leveling foot on your machine if you have one. If you’re not sure, check this post to see the self leveling presser foot in action.
Once your placket is secured, cut the strips that extend beyond the neck edge of your top.
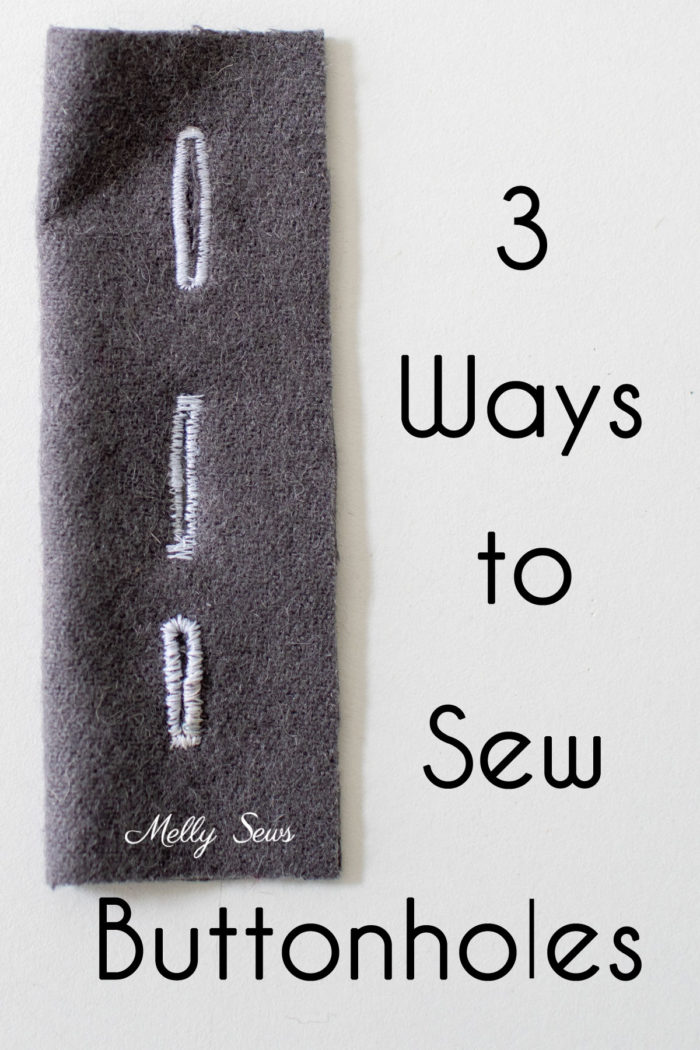
Mark and sew your buttonholes on the top part of the placket if you’d like to add buttonholes – you don’t have to have buttons. You can also use snaps or just keep the placket open. For more help with sewing buttonholes, see this post.
Technically, the way I’ve inserted this placket in both the shirt I made myself and the diagrams is the way you’d do this on a men’s shirt. On a women’s shirt the right side of the placket should be overlapping. So if you want to get technical, fold the other side of the shirt down when you are folding the placket in place, so that you end up with the right side on top instead of the left. Hopefully you find this placket tutorial helpful!
Beverly
Thanks so much! I’ve only ever put in one placket in my life and I was using a pattern from one of the big 4 so the directions were not nearly as concise and useful as yours! I always learn such useful new things from you. Thanks so much for sharing with us all!
Anne
Thank you for sharing this tutorial! I’ve linked to it over at Craft Gossip: http://sewing.craftgossip.com/tutorial-how-to-make-a-continuous-placket/2014/01/09/
–Anne
Teresa
I’ve read placket instructions many times and I’m always lost. This one makes sense! Thanks Melissa! And I love your shirt, by the way 🙂
Margaret
Thank you so much Melissa!!! I have been trying to “clone” a RTW shirt dress with a partial placket down the front and had no idea how to sew it. Your instructions have just made my whole week!!
Natalie
Thank you for this tutorial, looks a lot easier than some of the instructions I’ve read 🙂
MandyDink
THANK YOU!!! I have sewn several mens shirts from 60+ year old patterns, and the directions always say “insert placket”… and that’s it! I’ve usually figured it out, but they never look as clean as I’d like them too. I have a feeling this tutorial is going to help dramatically!
Sopo
The placket tutorial is so great! I so hope you could create a tutorial for that stand-up collar pictured above! I’ve sewn a similar collar a few times, and all of those times I’ve had to tweak the pattern pieces to fit everything together… there must be a trick! THANK you!
Shelley
It seems whatever I’m seeking for my sewing, I find it on your blog. Great tutorial and exactly when I needed it! Thank you for sharing.
Kristie
Thank you for putting this tutorial together. I am constantly referring back to this, to make sure I am doing it right. And my plackets turn out great every time. Thank you!
Louise
Thank you so much for this – I’ve been wanting to use this on nightshirts instead of sewing a centre front seam.
Lee
Once again your tutorial has got me out of a pickle. Always concise and informative. I enjoy reading your e mails and picking up snippets (what a lovely word) of wisdom.
Many thanks
Liz
Thanks so much for the placket tutorial. Can this be used on knit fabric and can I adjust the width of the placket to make it look wider on the finished tee shirt.
Jessie
Thank you so much for your tutorial – it has helped me a lot with my first button placket. Wonderful explanation!!!