

In this tutorial I’m going to show you how I used a blazer from a thrift store to make a blazer pattern. This is useful when you want to recreate a garment you already have, but you don’t want to destroy the garment in the process.
So here’s what we’re starting with. I found this size 4 blazer for $3.

OK, I’m going to be using the rub off/ pin pattern technique I outlined here. This is the same technique I learned from the book Patternmaking for a Perfect Fit (affiliate link)
To start with, I did the front piece.
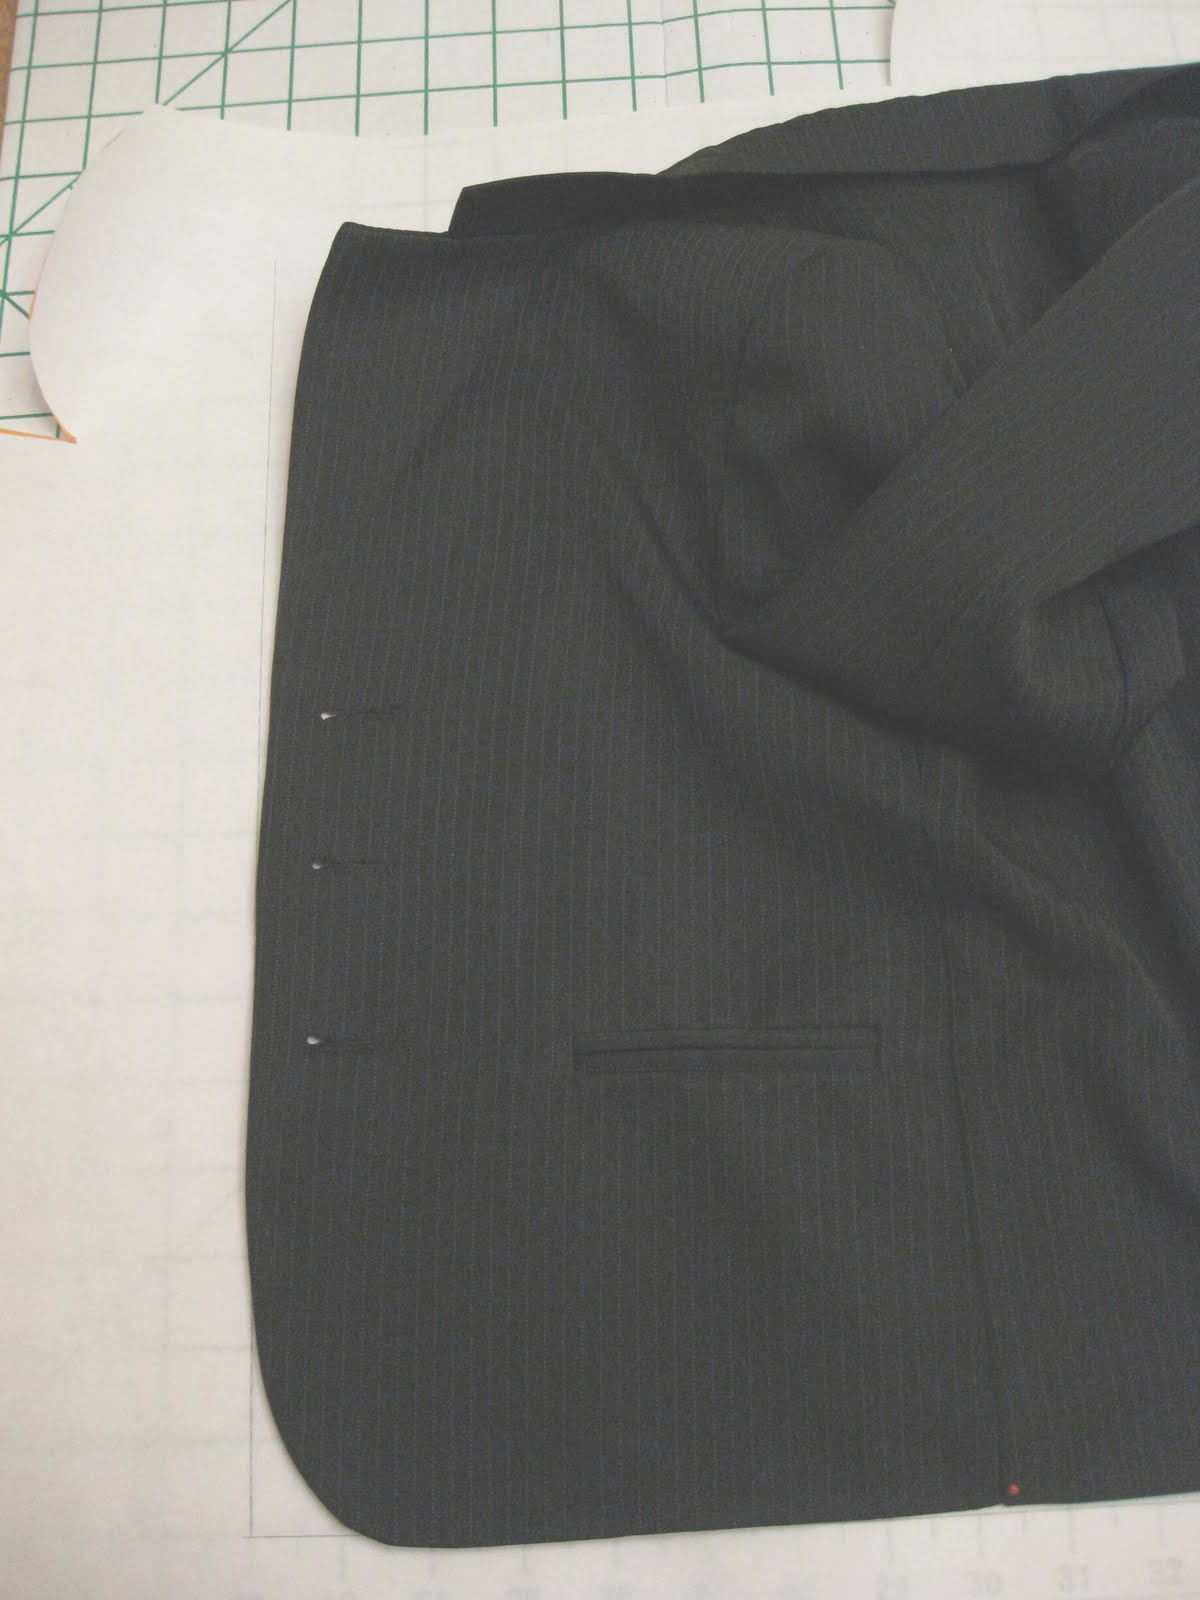
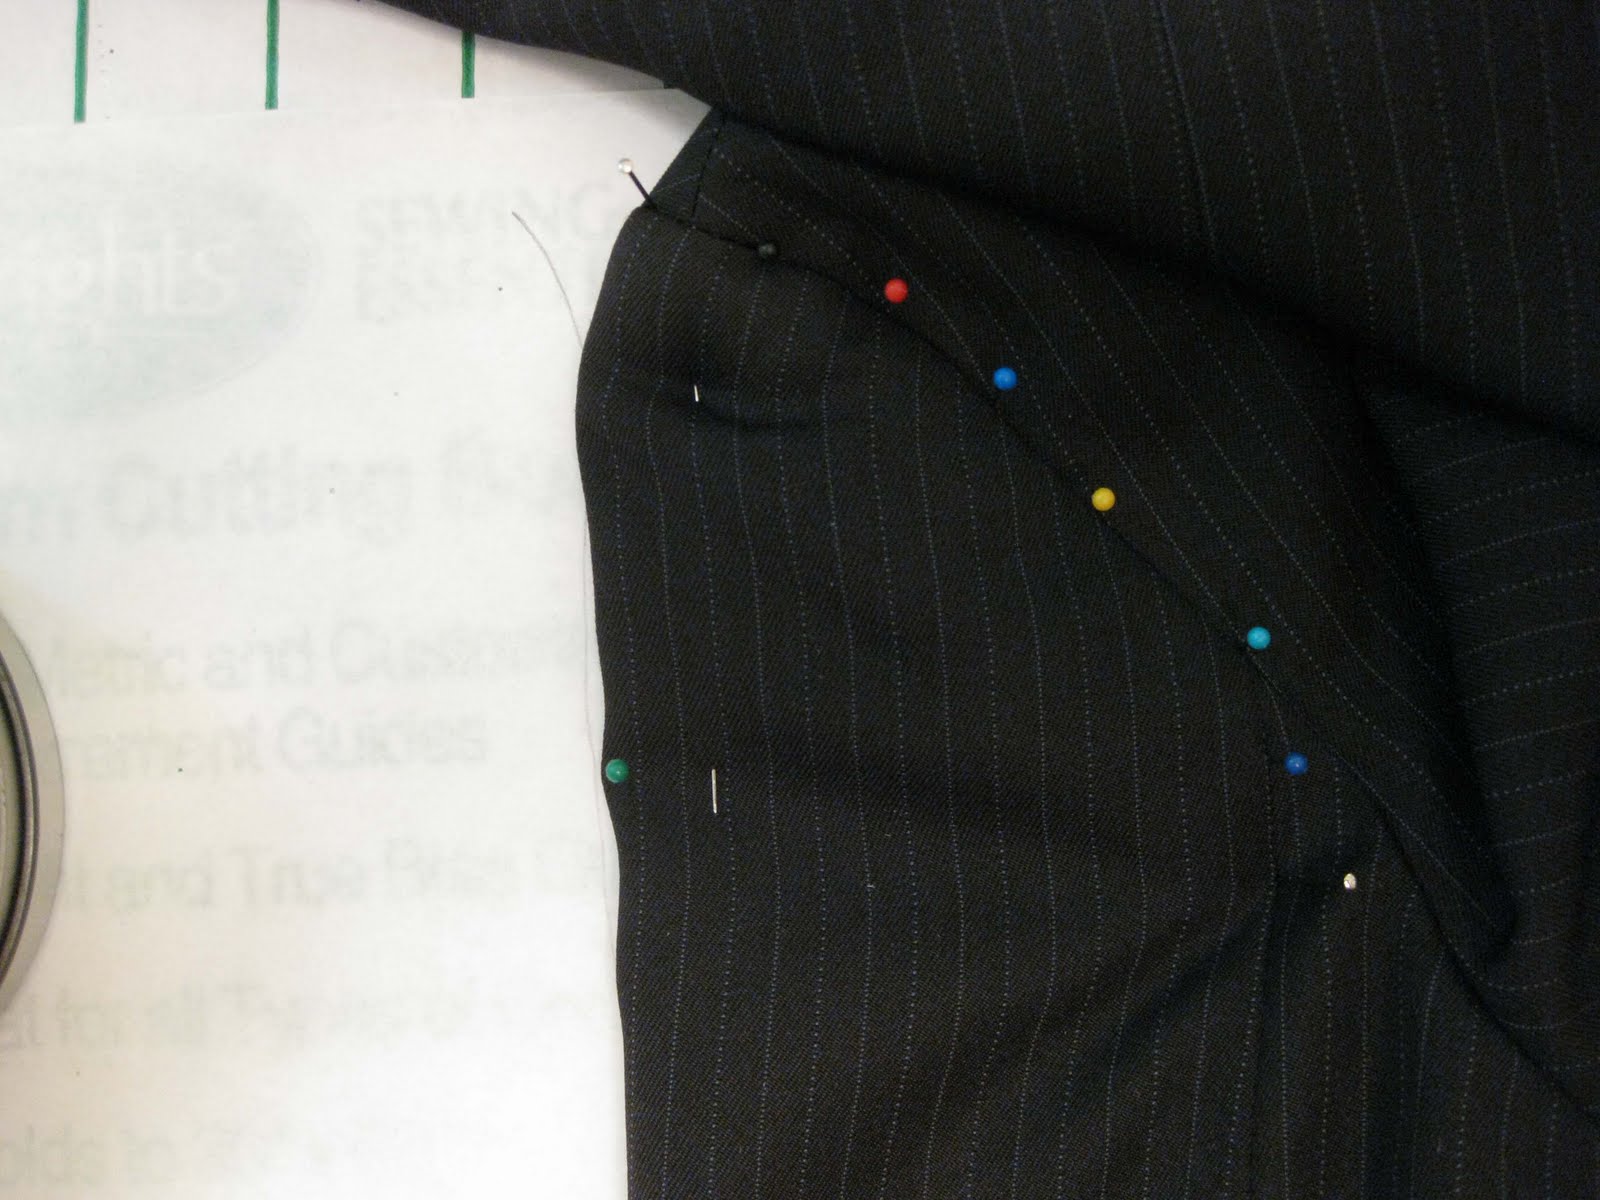
I drew an L on the paper, lined up the side edge and bottom edge, traced the curve, and drew right through the button holes to mark them. Then I started adding pins to the side seam and the pocket.
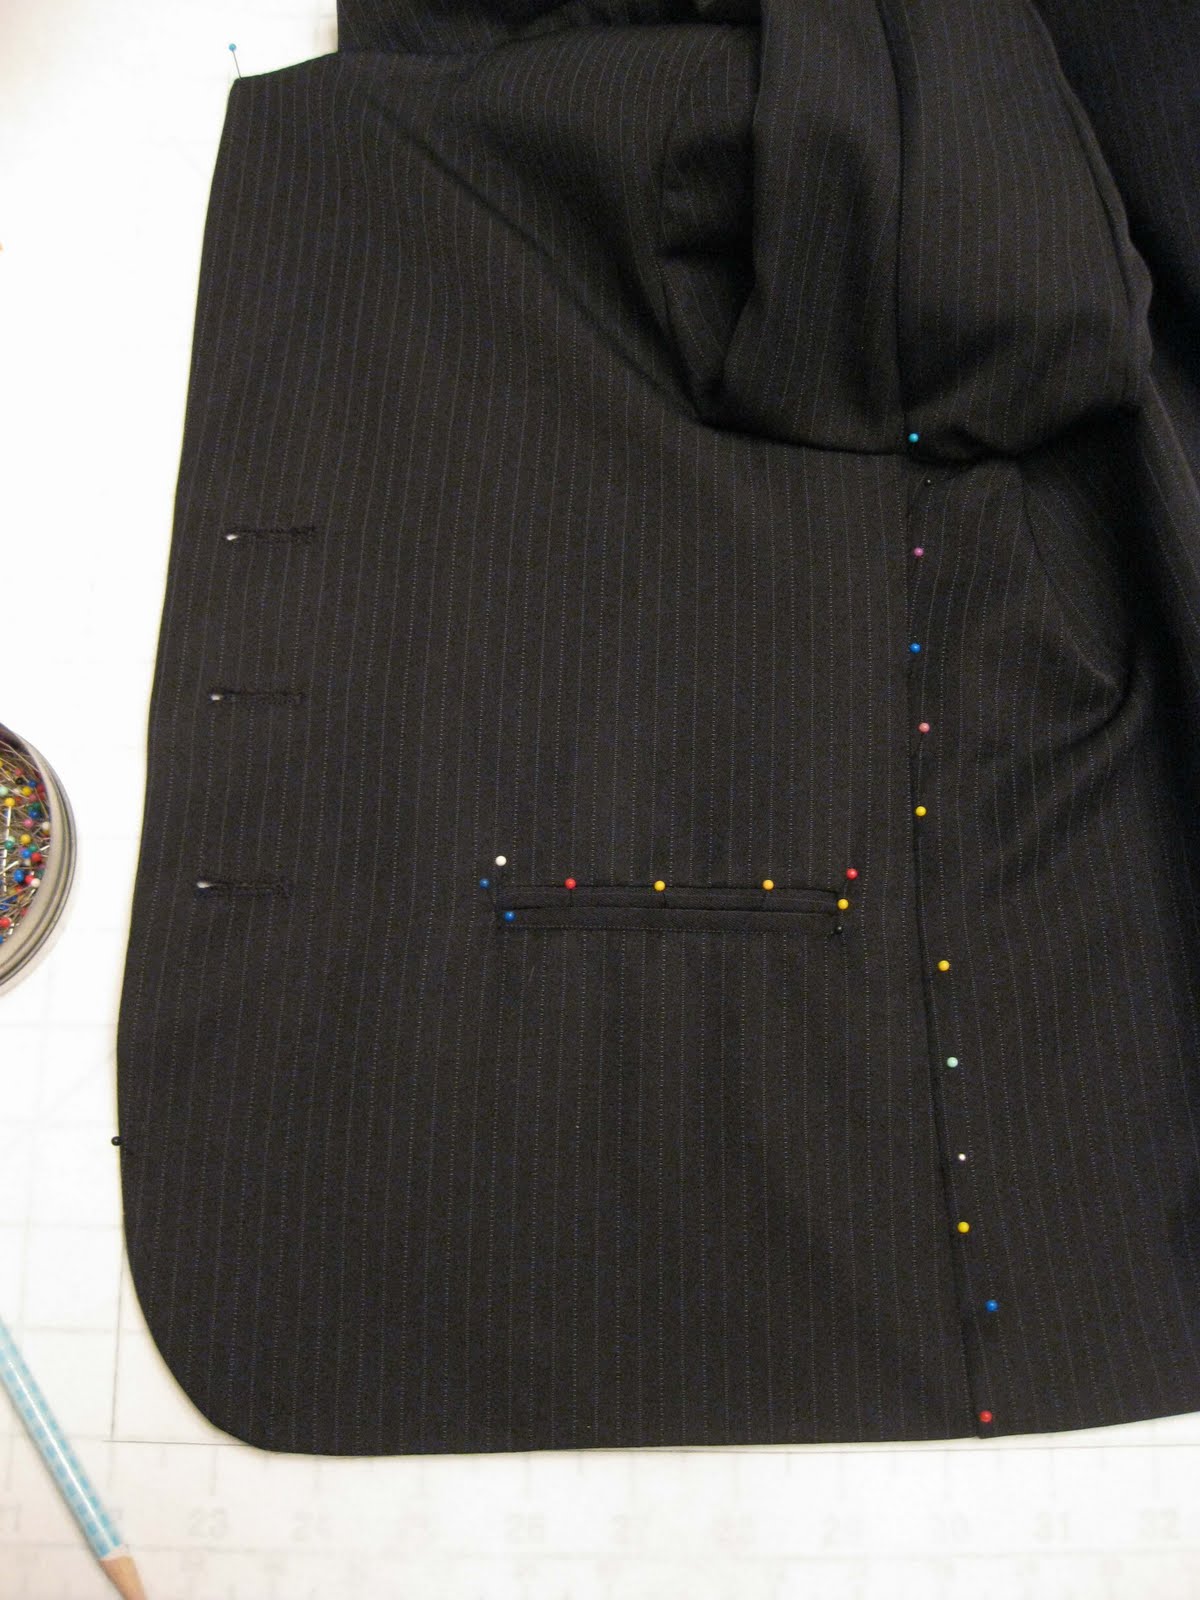
You’ll notice that the top of this piece doesn’t lay flat. I started removing pins from the bottom, keeping a couple pins in place where the side seam met the armhole, and then would flatten and pin a little part, remove a few more pins, flatten and repeat. I also pinned the left edge to the line I drew to help stabilize the jacket as I flattened and pinned the seams.
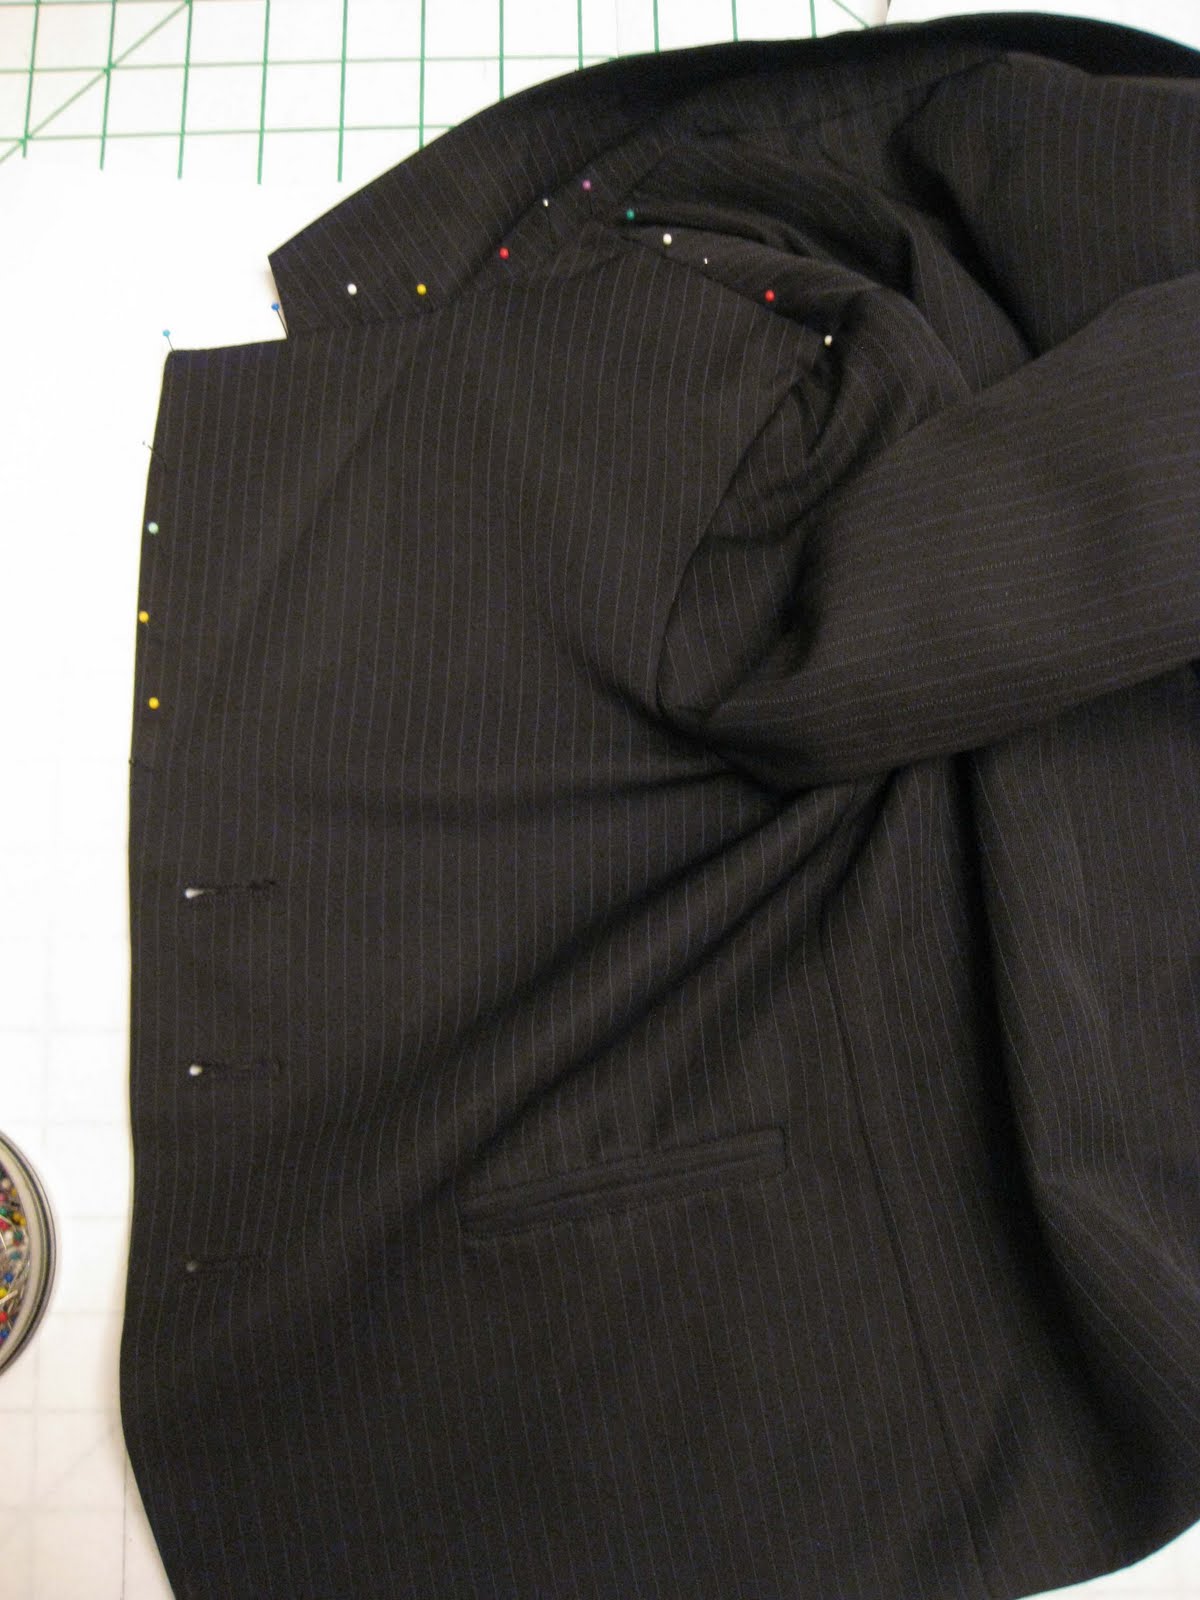


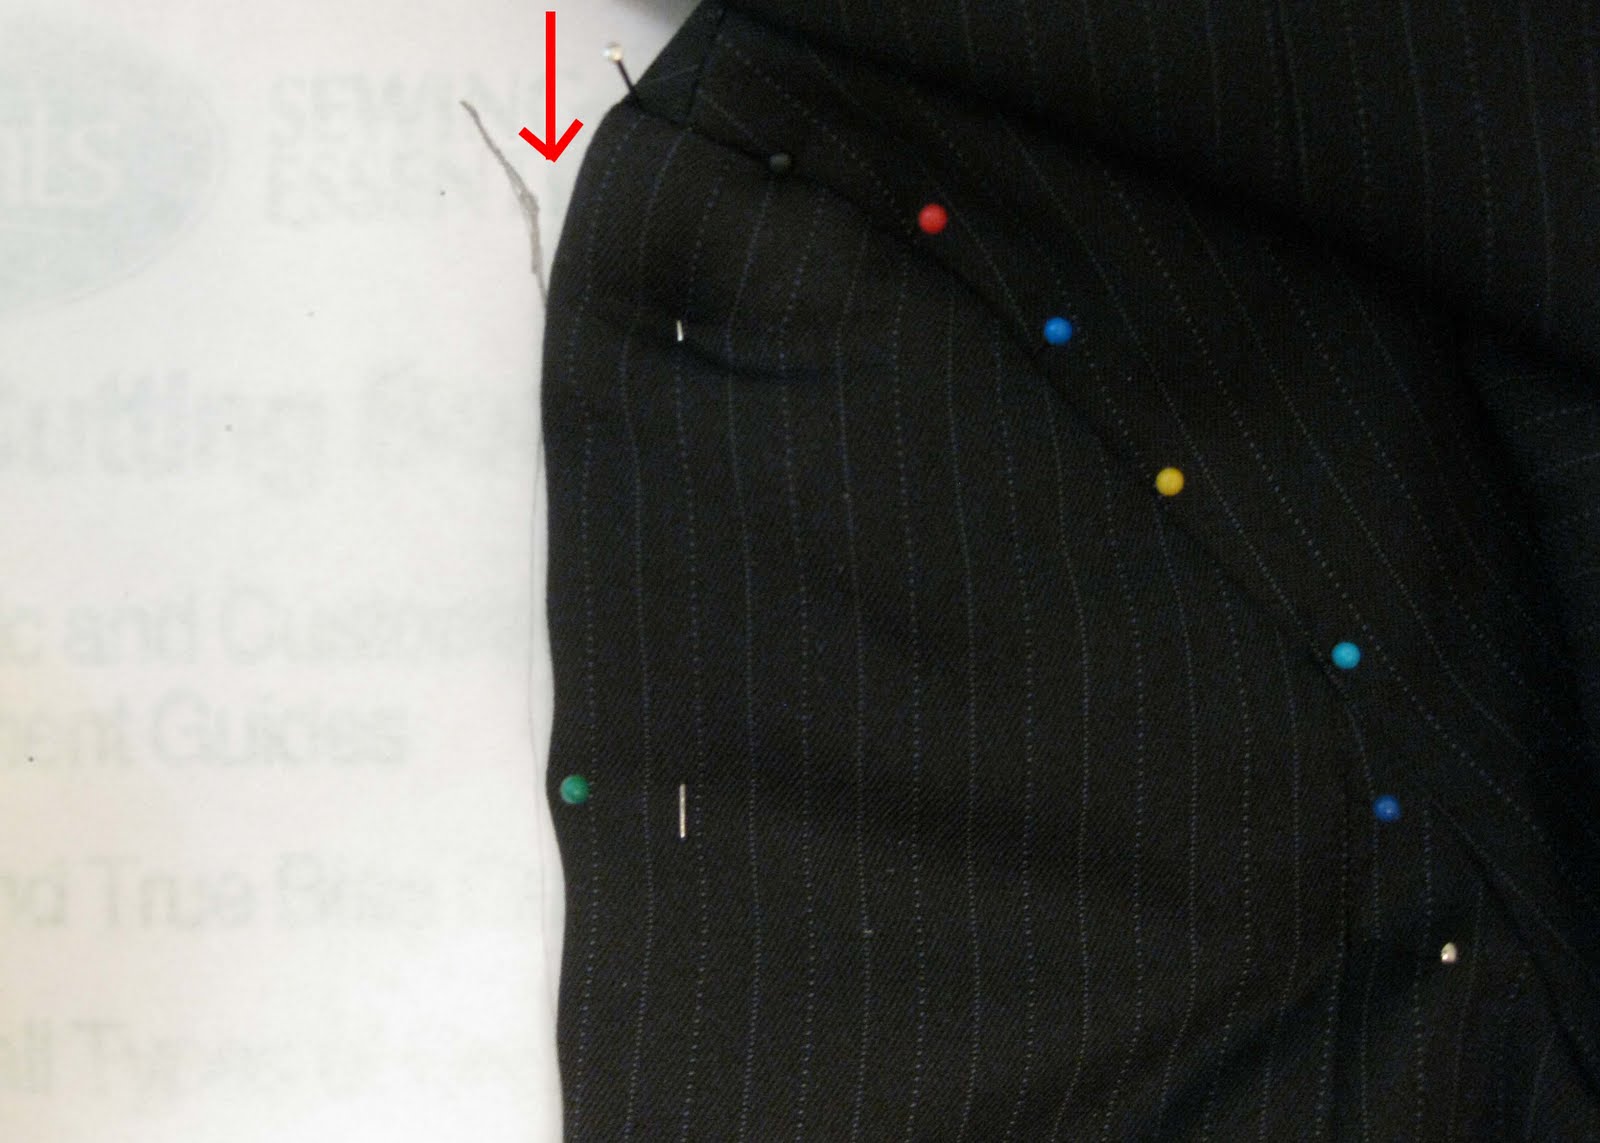
Another problem you may run into happened to me at the point where the side seam met the underarm. During all my flattening and pinning of the armhole curve and shoulder seam, this spot got pinned several times. So what I ended up with looked like this:

As you can see, I didn’t use any of the precise pin marks to determine where my corner was, I went off the lines I was drawing and tried to keep my edges fairly straight.
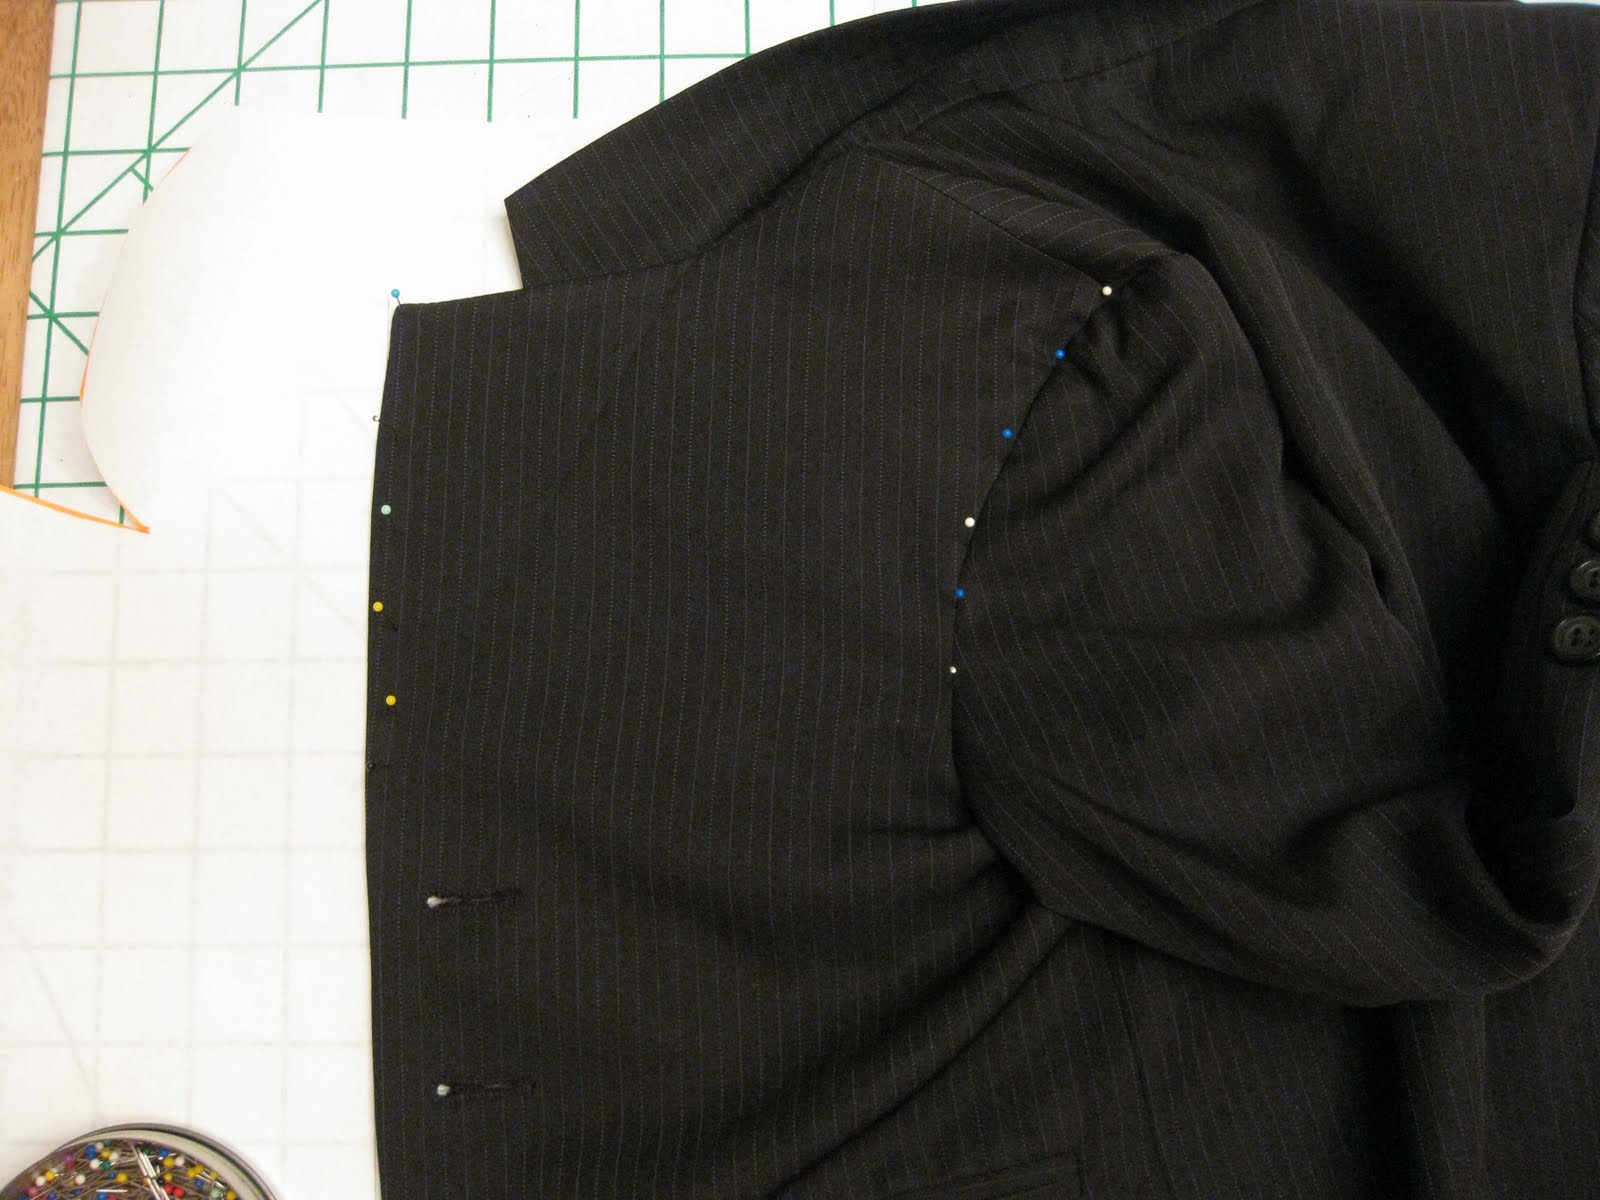
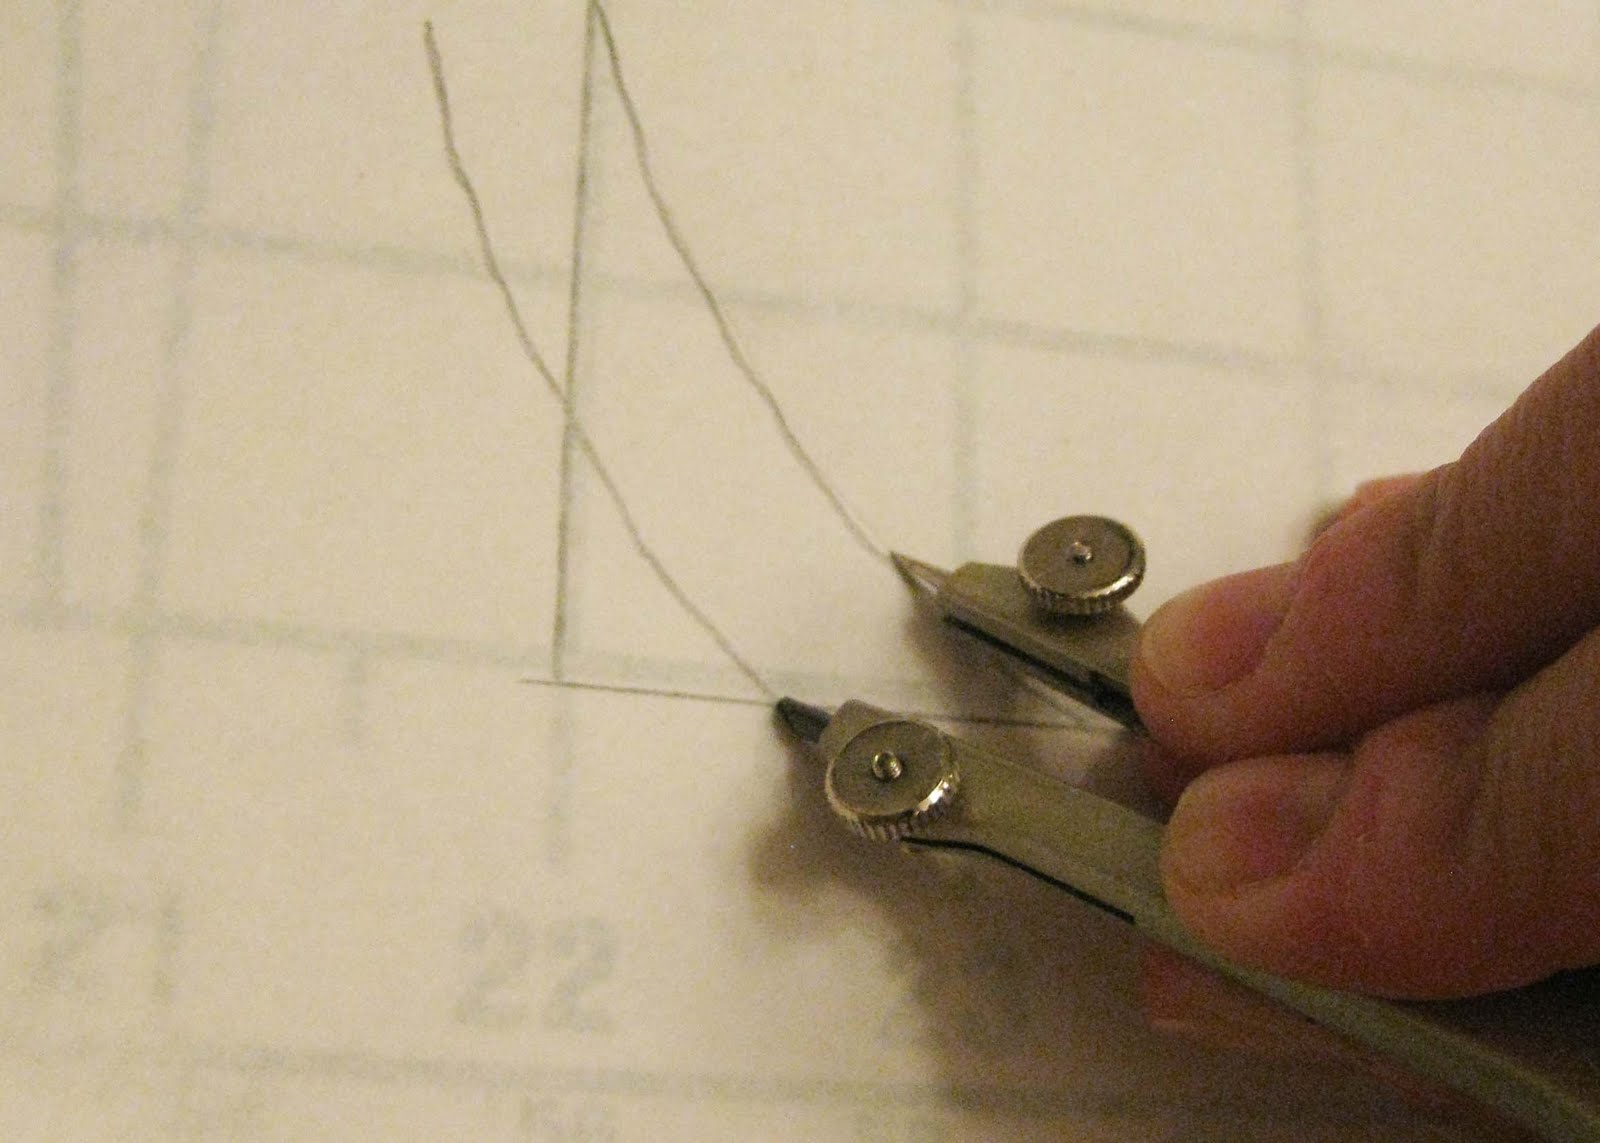
OK, now on to seam allowances. This piece has a lot of curves, so I like to use a compass to help. Set it to the width of your seam allowance (in my case 1/2 inch)

Now use the pointy end to trace your existing line, while the pencil makes a new line that includes the seam allowance. Like this:
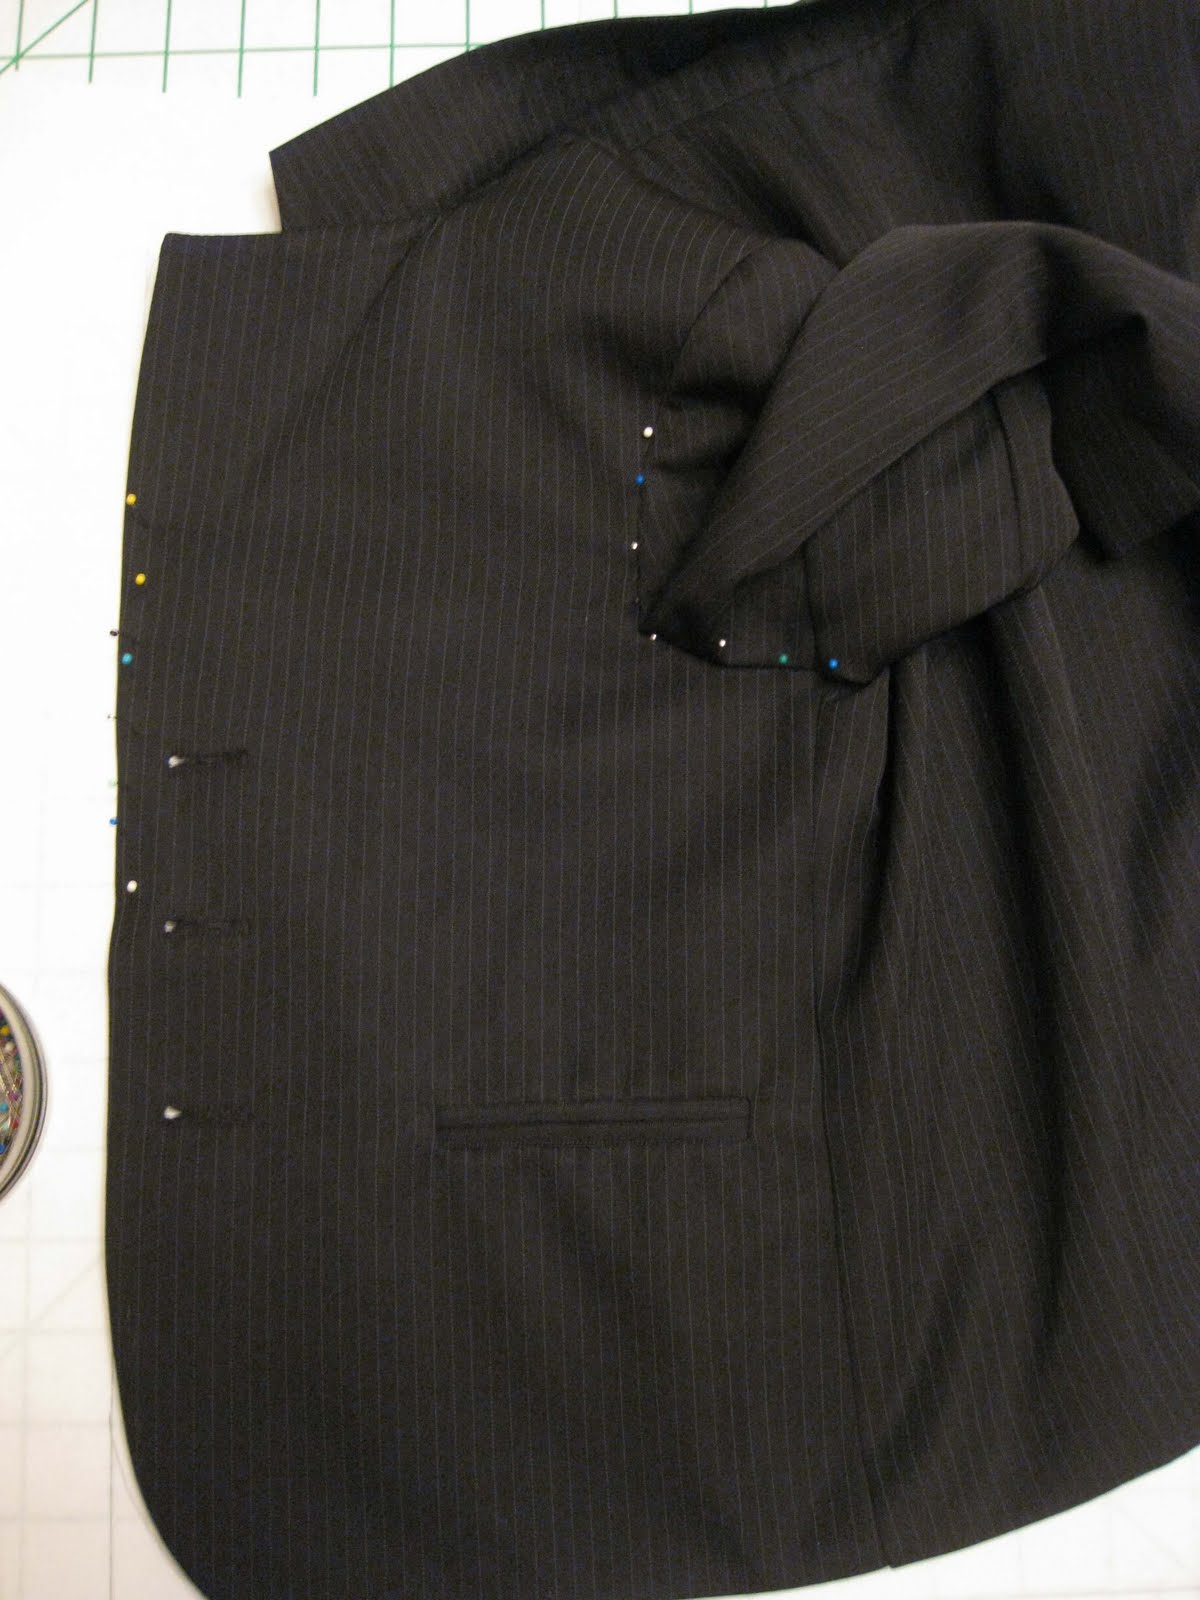
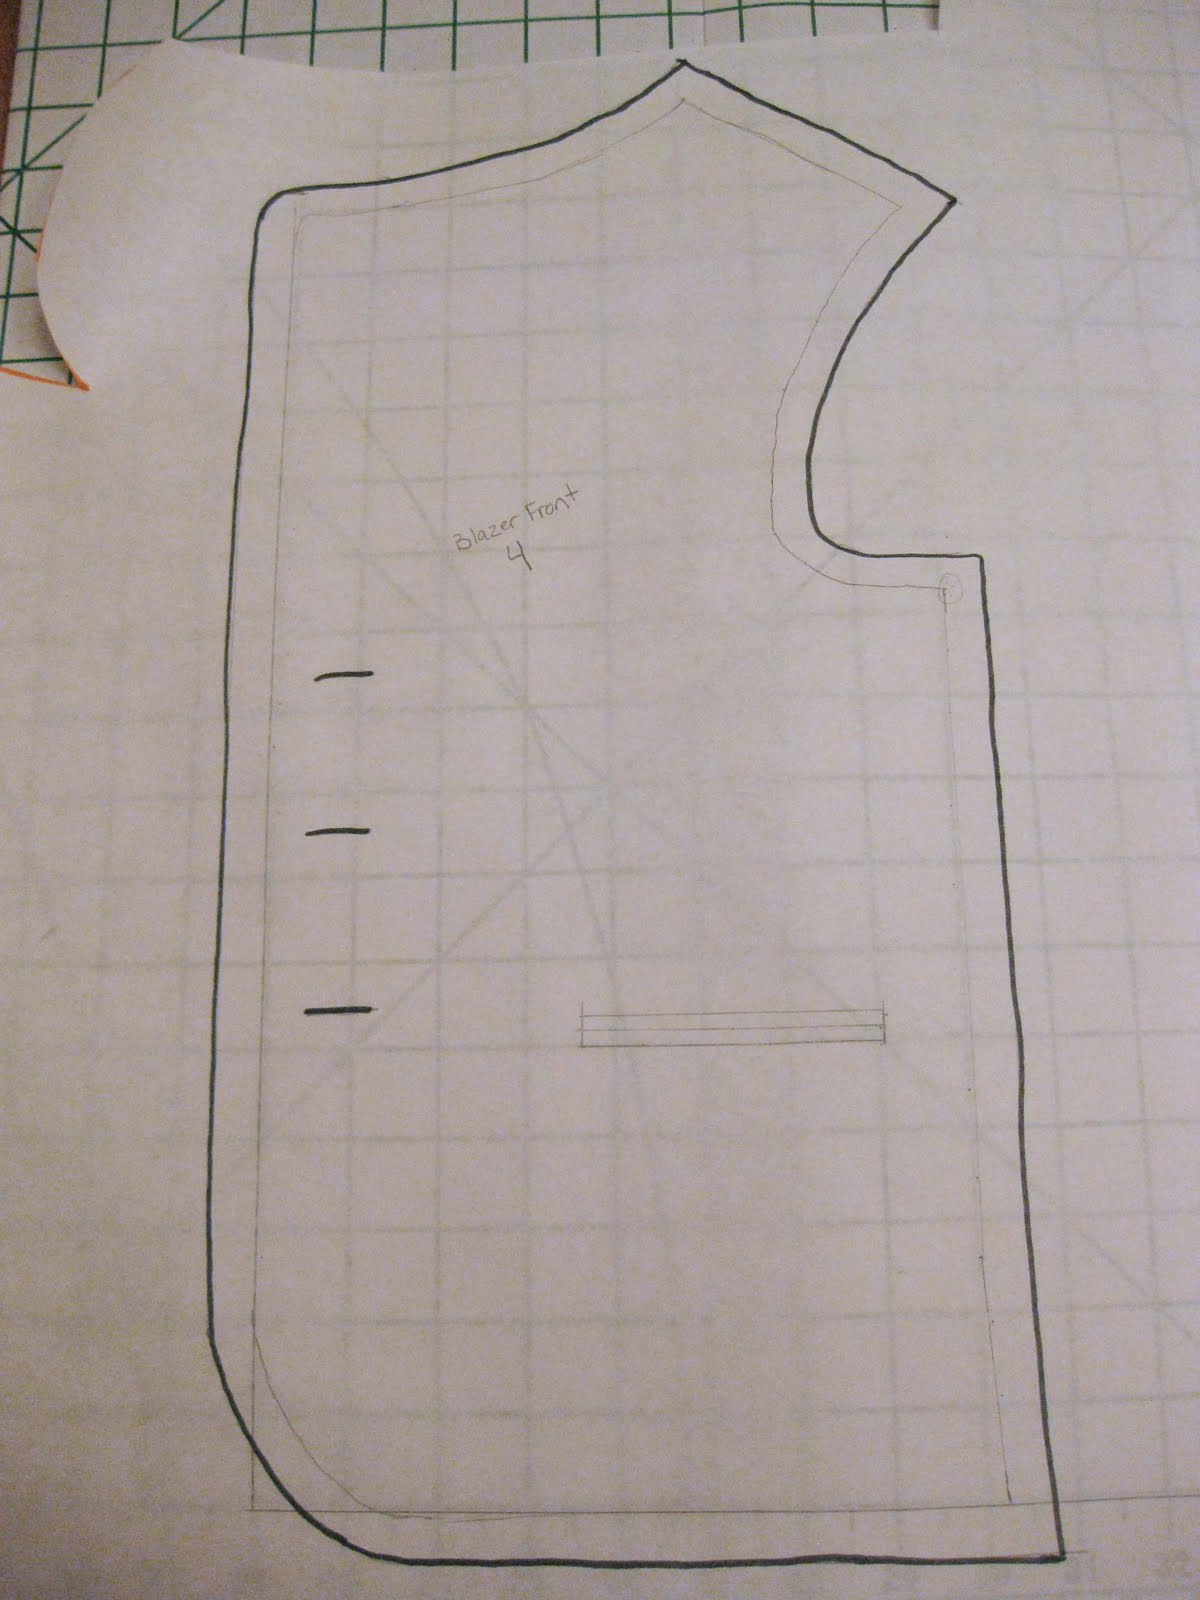
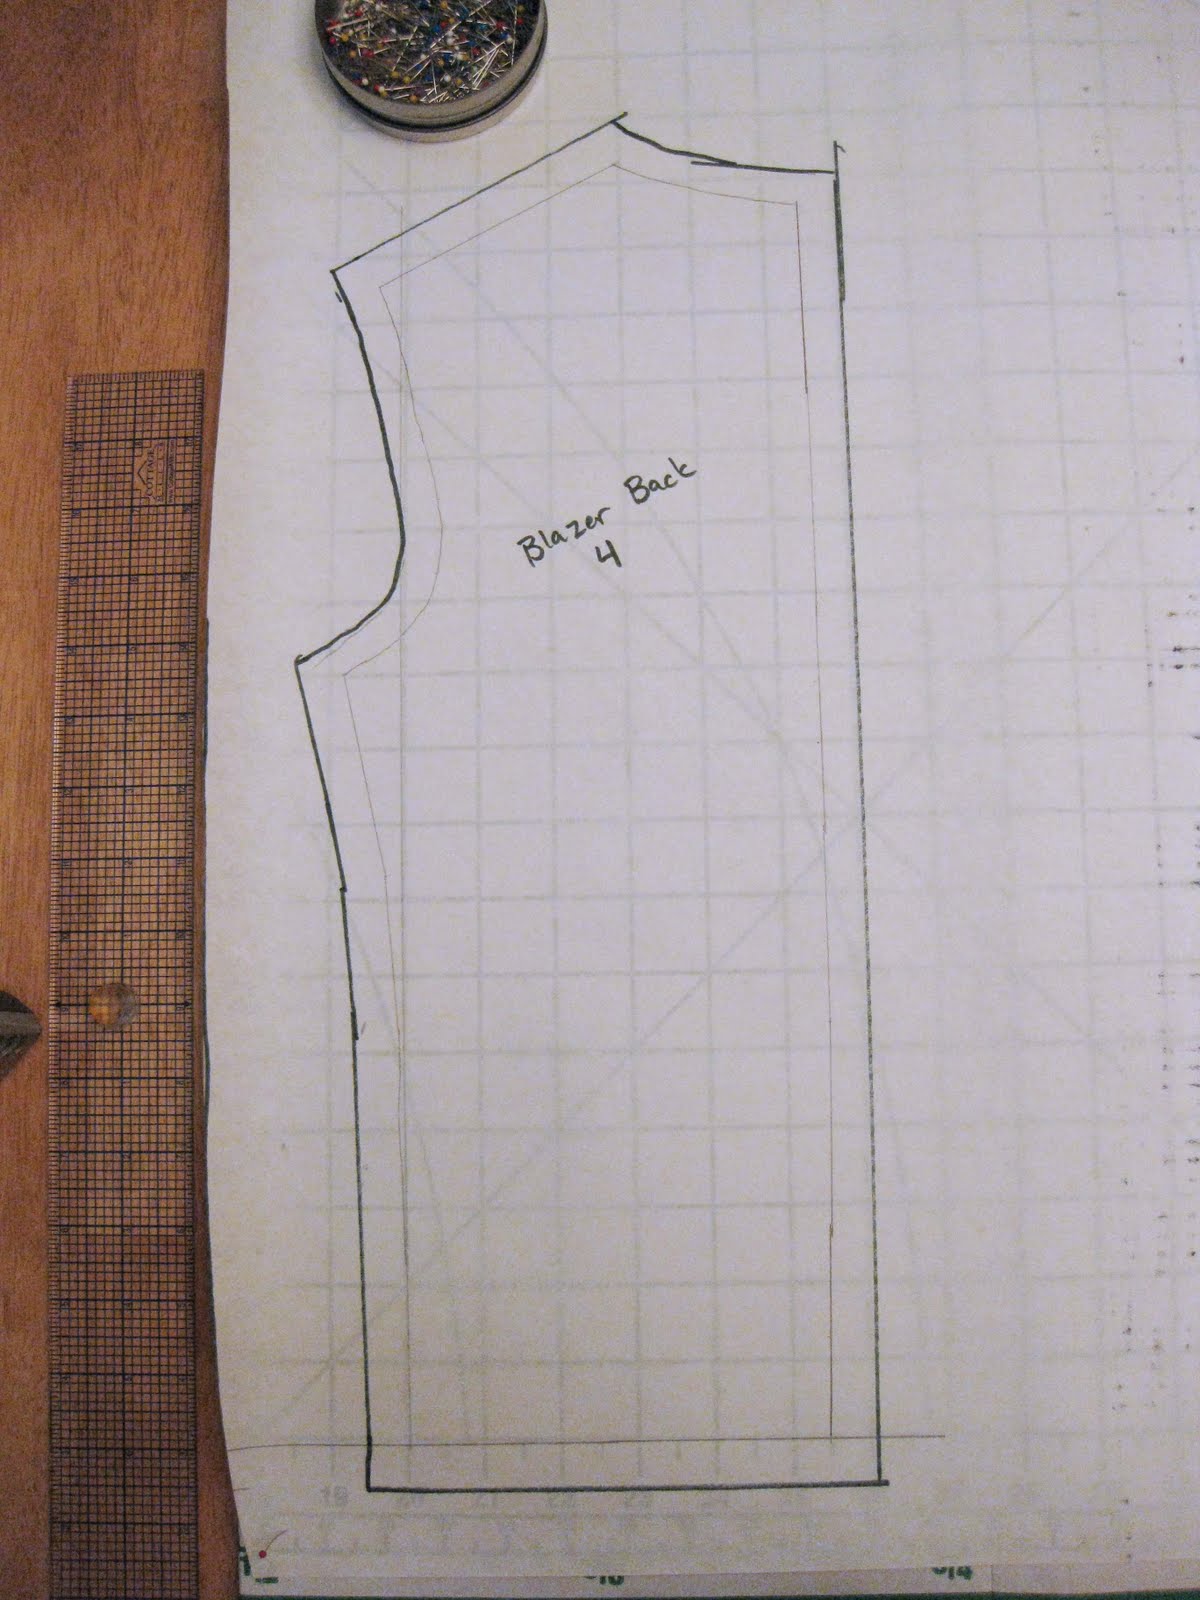
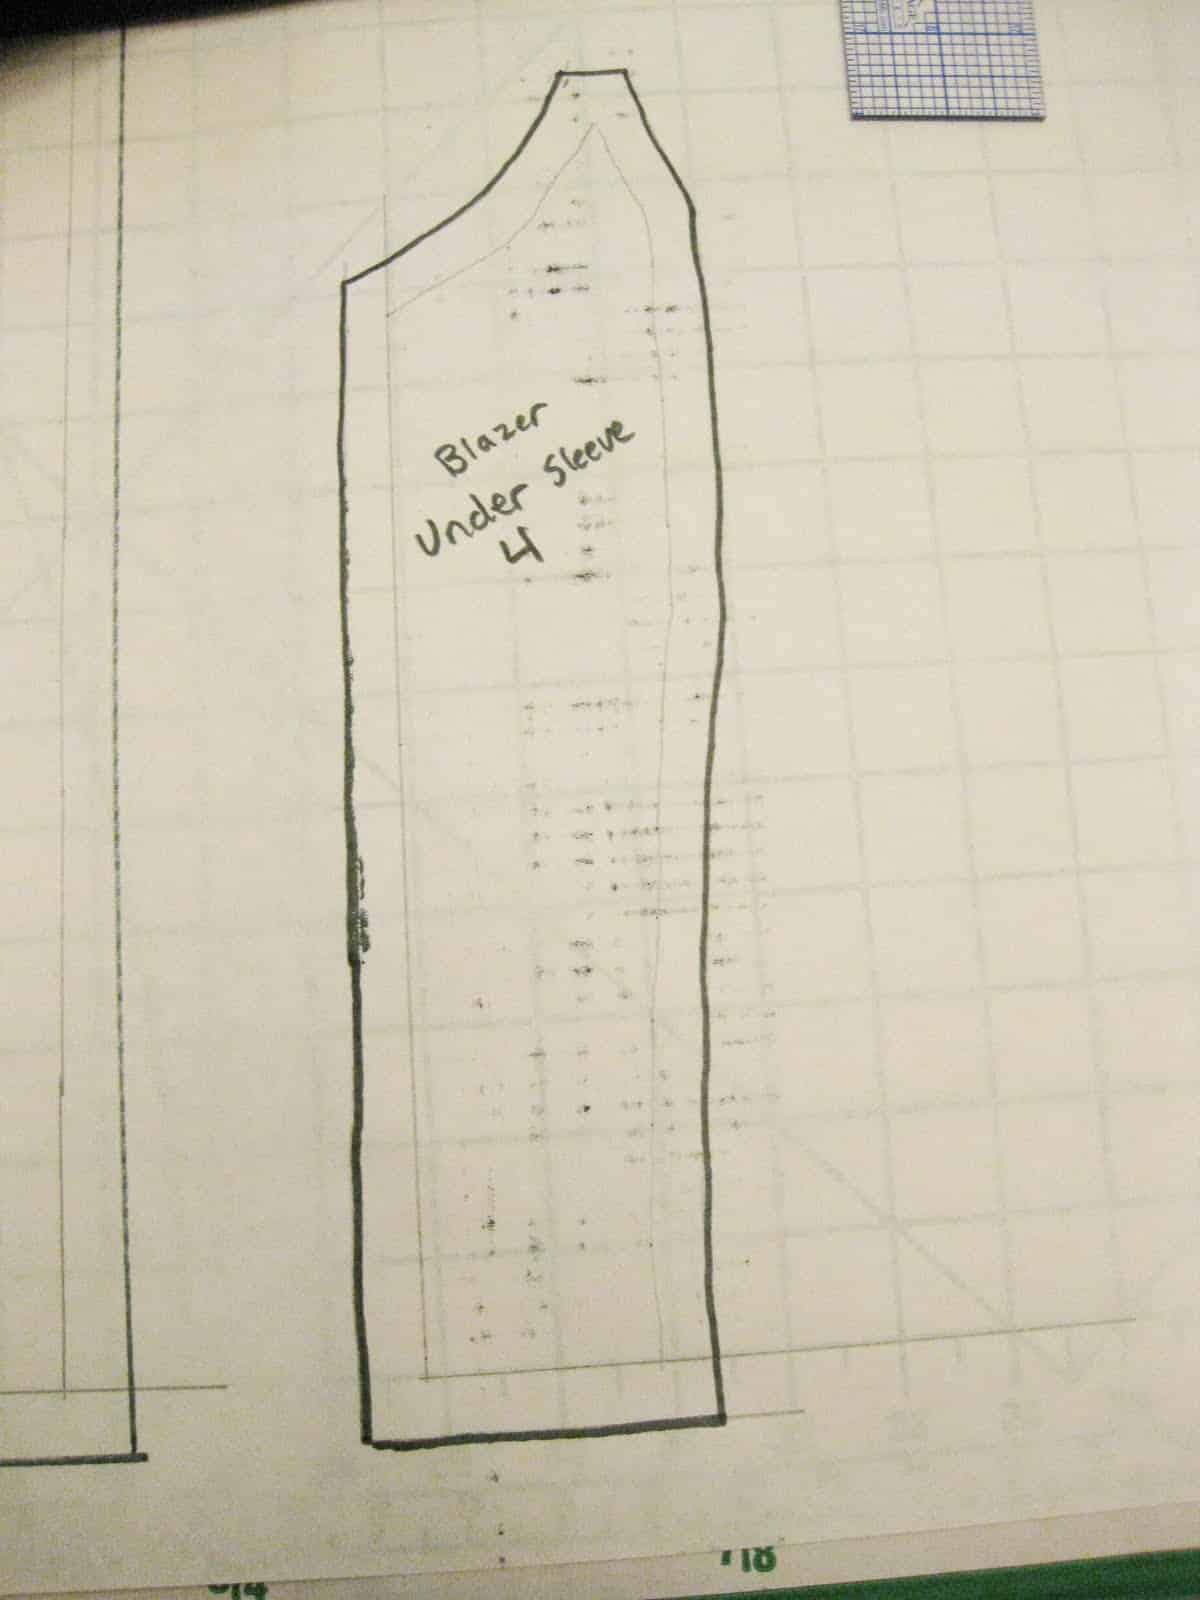
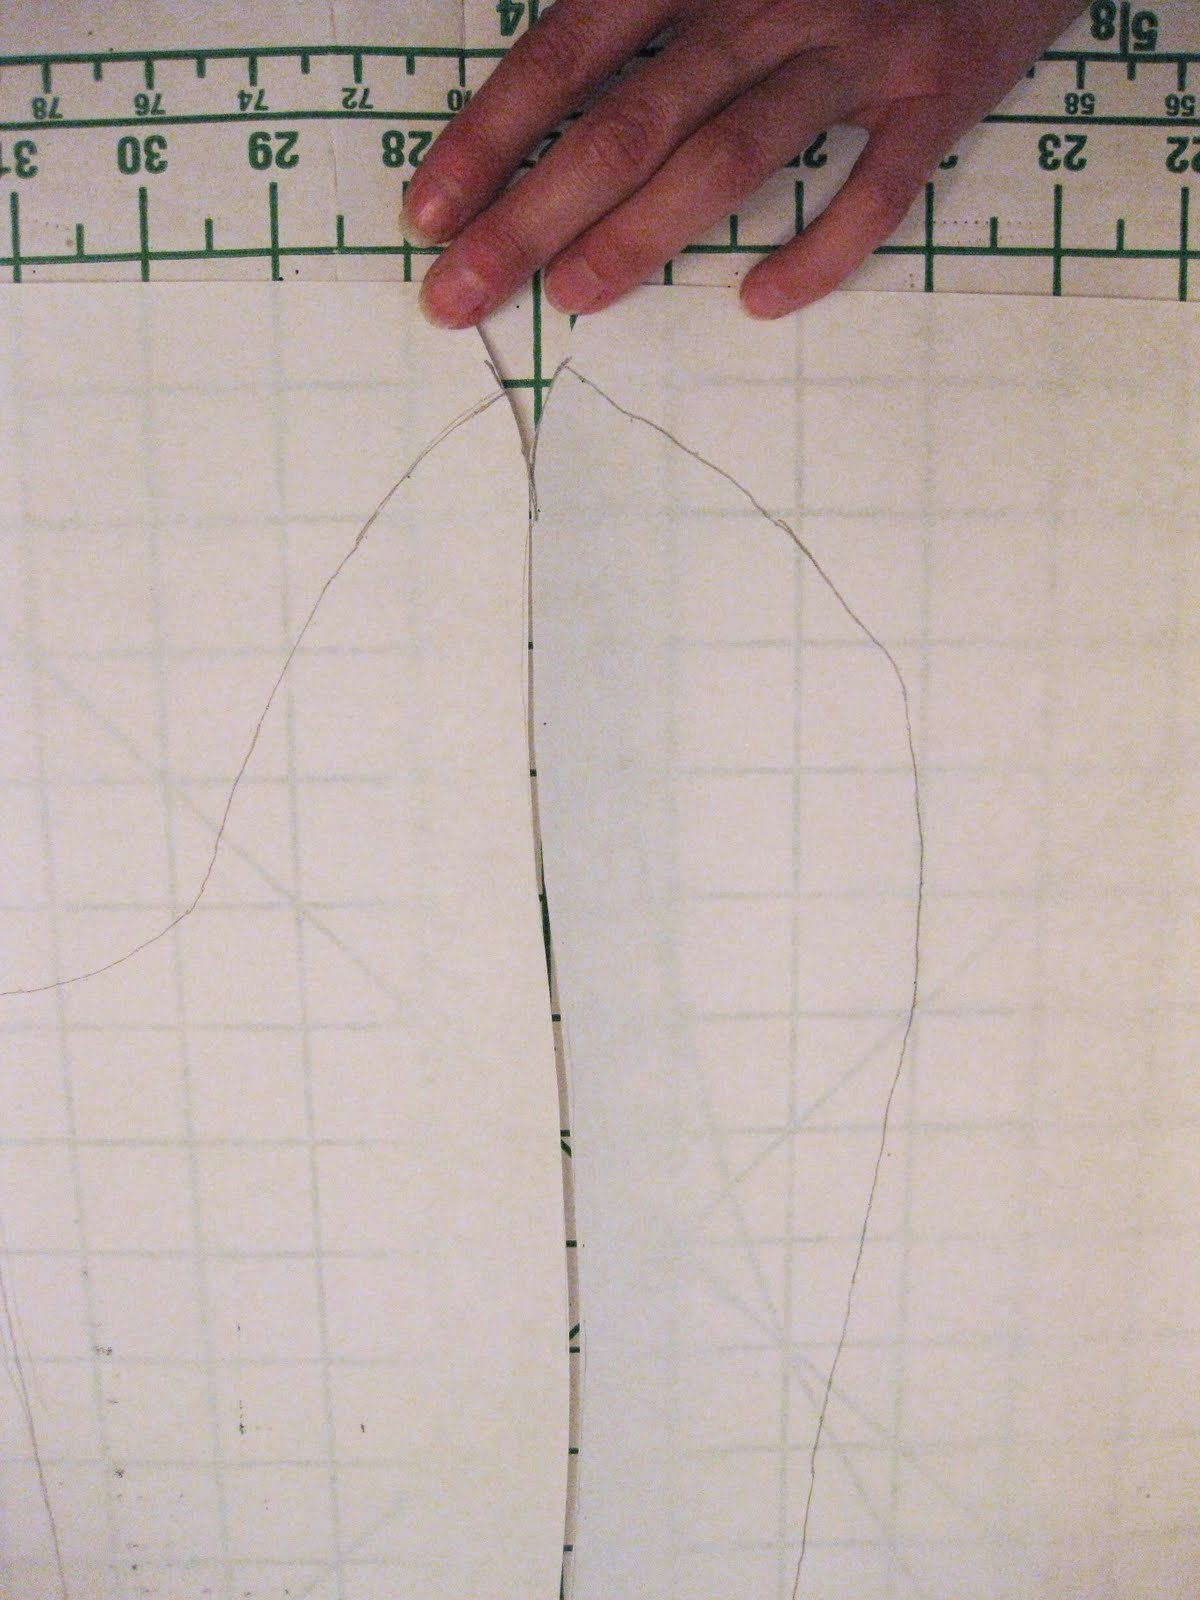
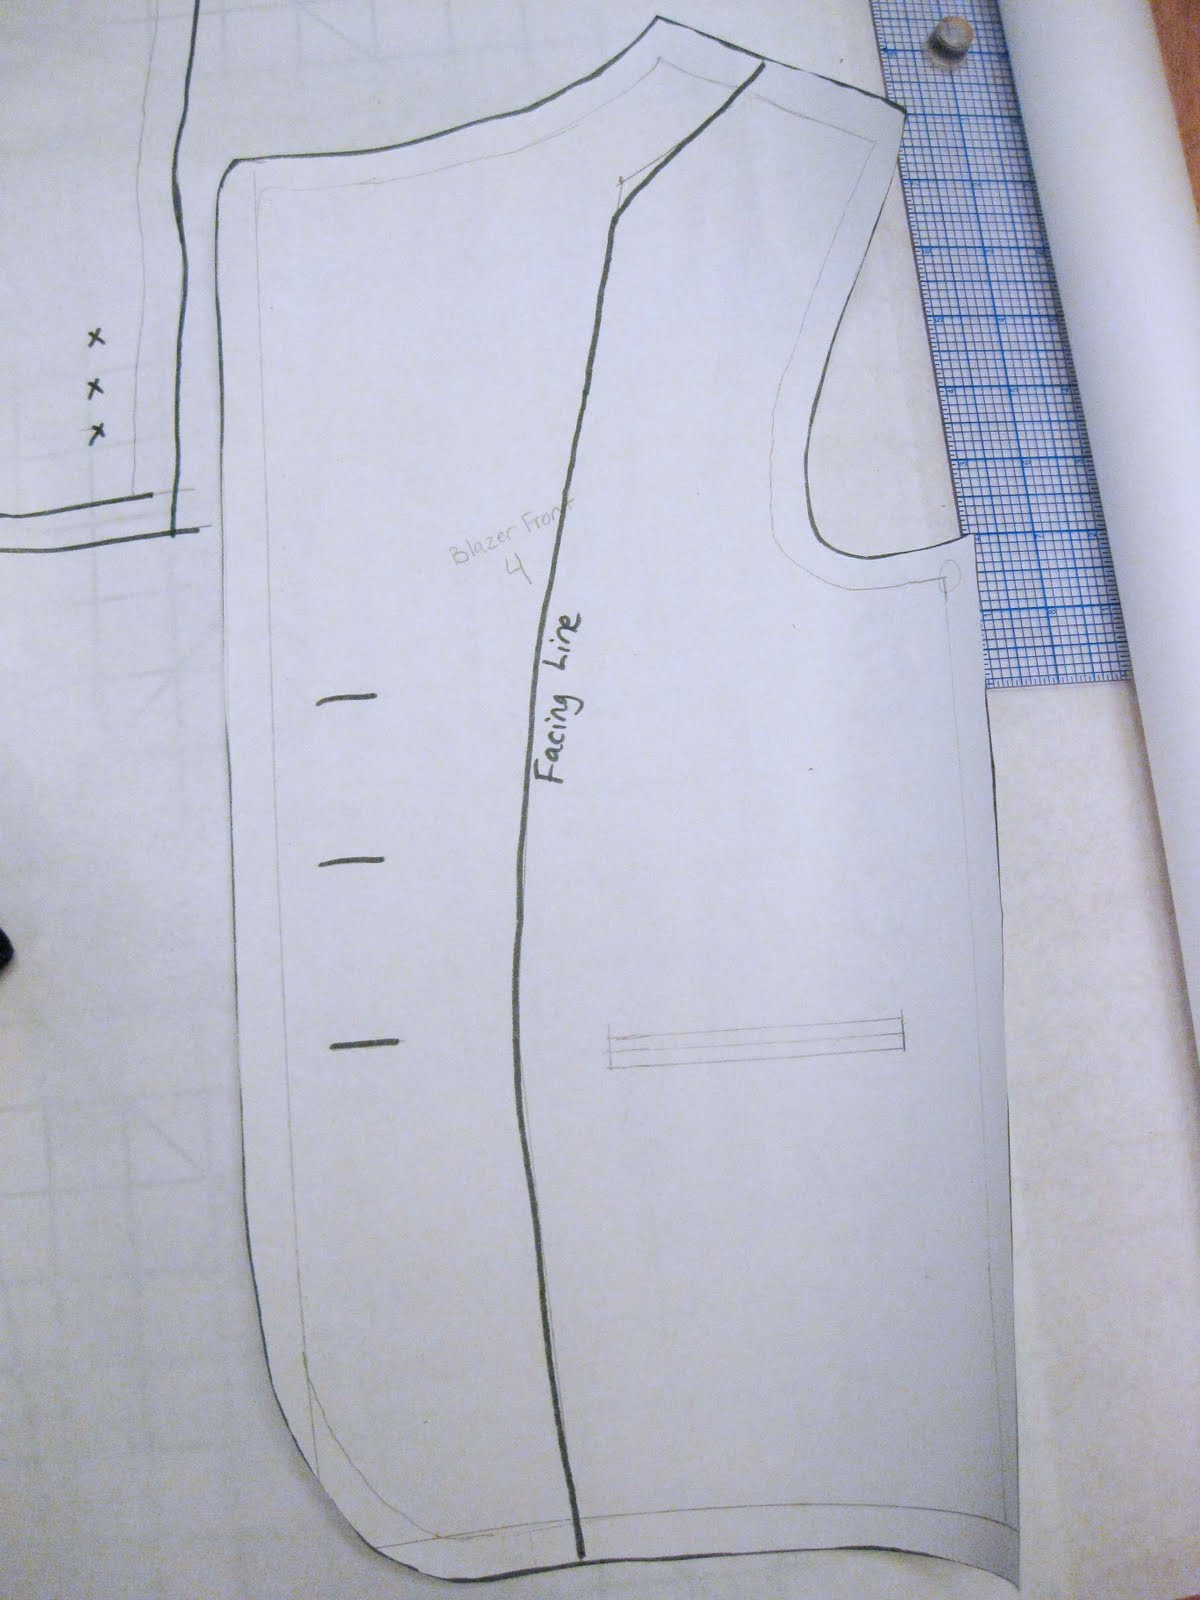
Now, here’s my finished pattern piece:

Trace the outside edges, the pin the seam, which should be easy since the collar should lie flat. Now you have this (ignore the uncut front pattern piece at the bottom of these pictures):

Now, we have to tidy this piece up since a collar is a symmetrical piece. If you just use the tracing as is, there will be slight variations between the right and left side. So, first measure from widest corner to corner, and then make a mark in the exact center above and below your ruler.


Use your compass to trace the edge of the cut piece, adding seam allowances.
Now cut out just the newly traced piece, and make sure to place on the fold when you pin it to your fabric.
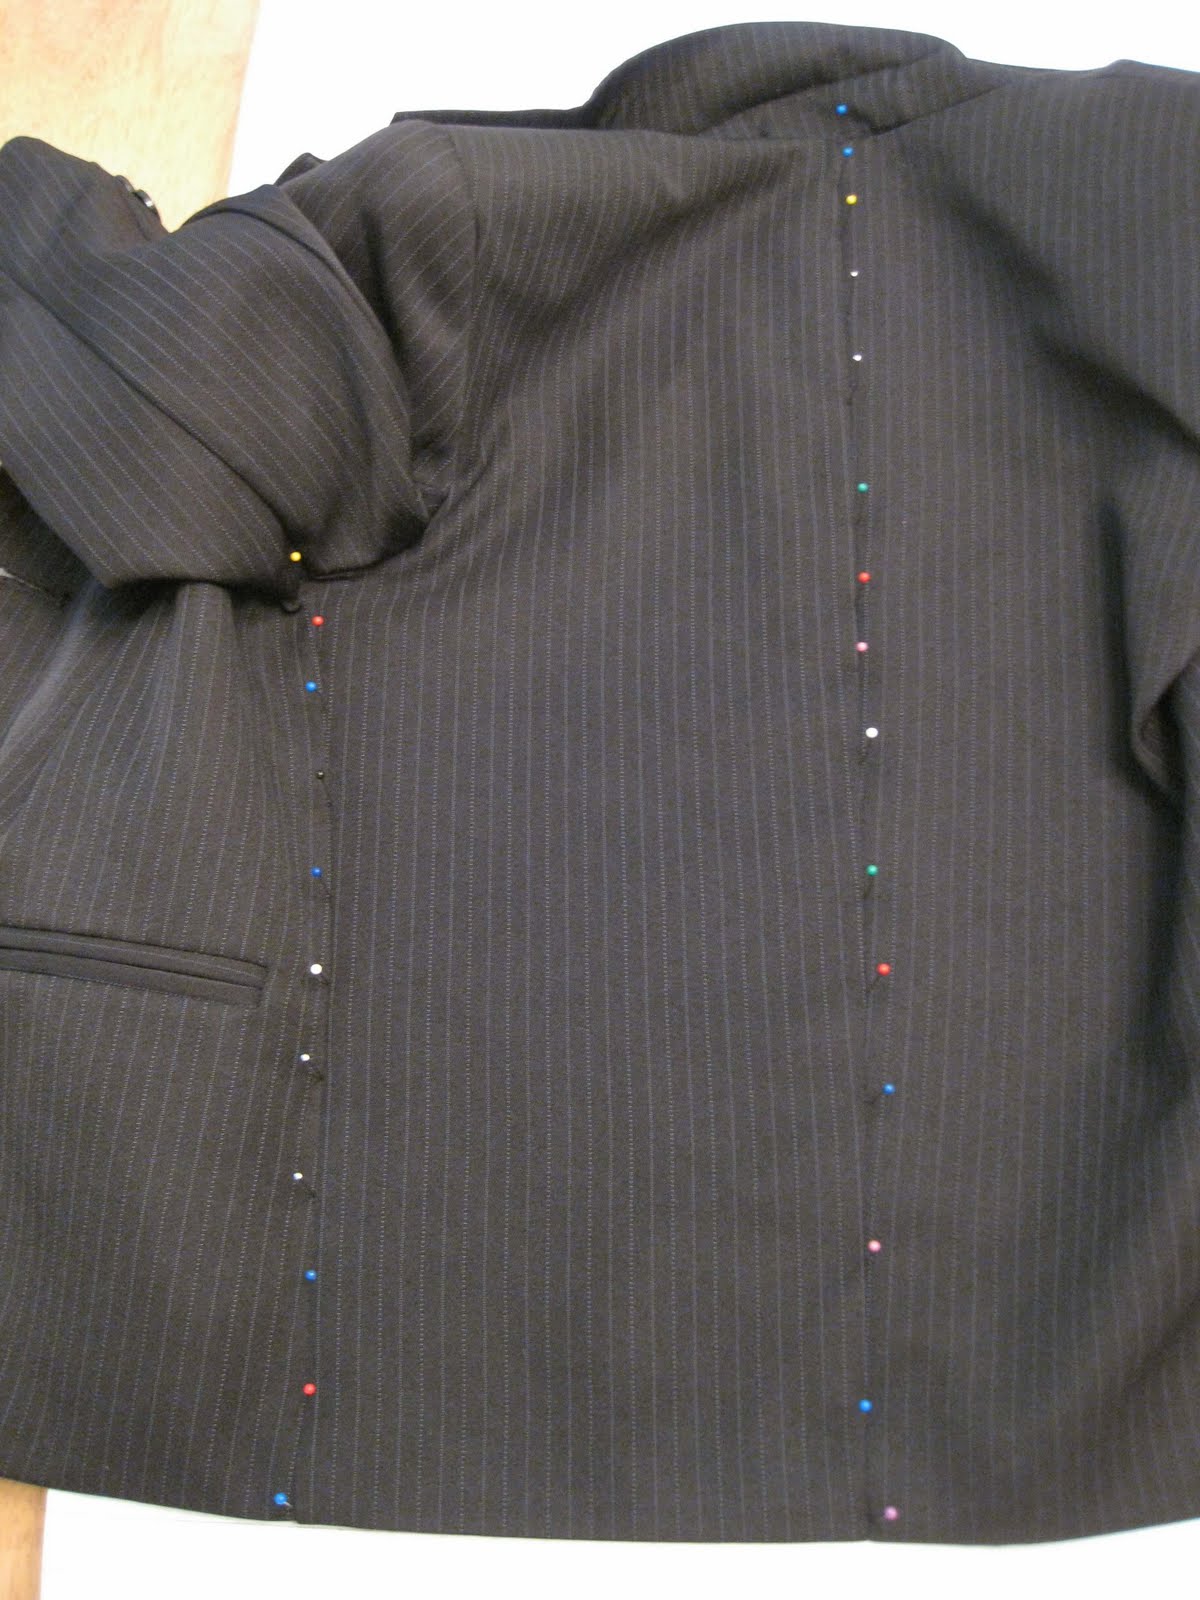
OK, on to the back of the blazer. This will lay pretty flat, except around the armhole, so it will work much like the shirt front did. Draw your L and line up the bottom edge with it. Fold the fabric back to lay the side seam against the vertical line and pin in place.

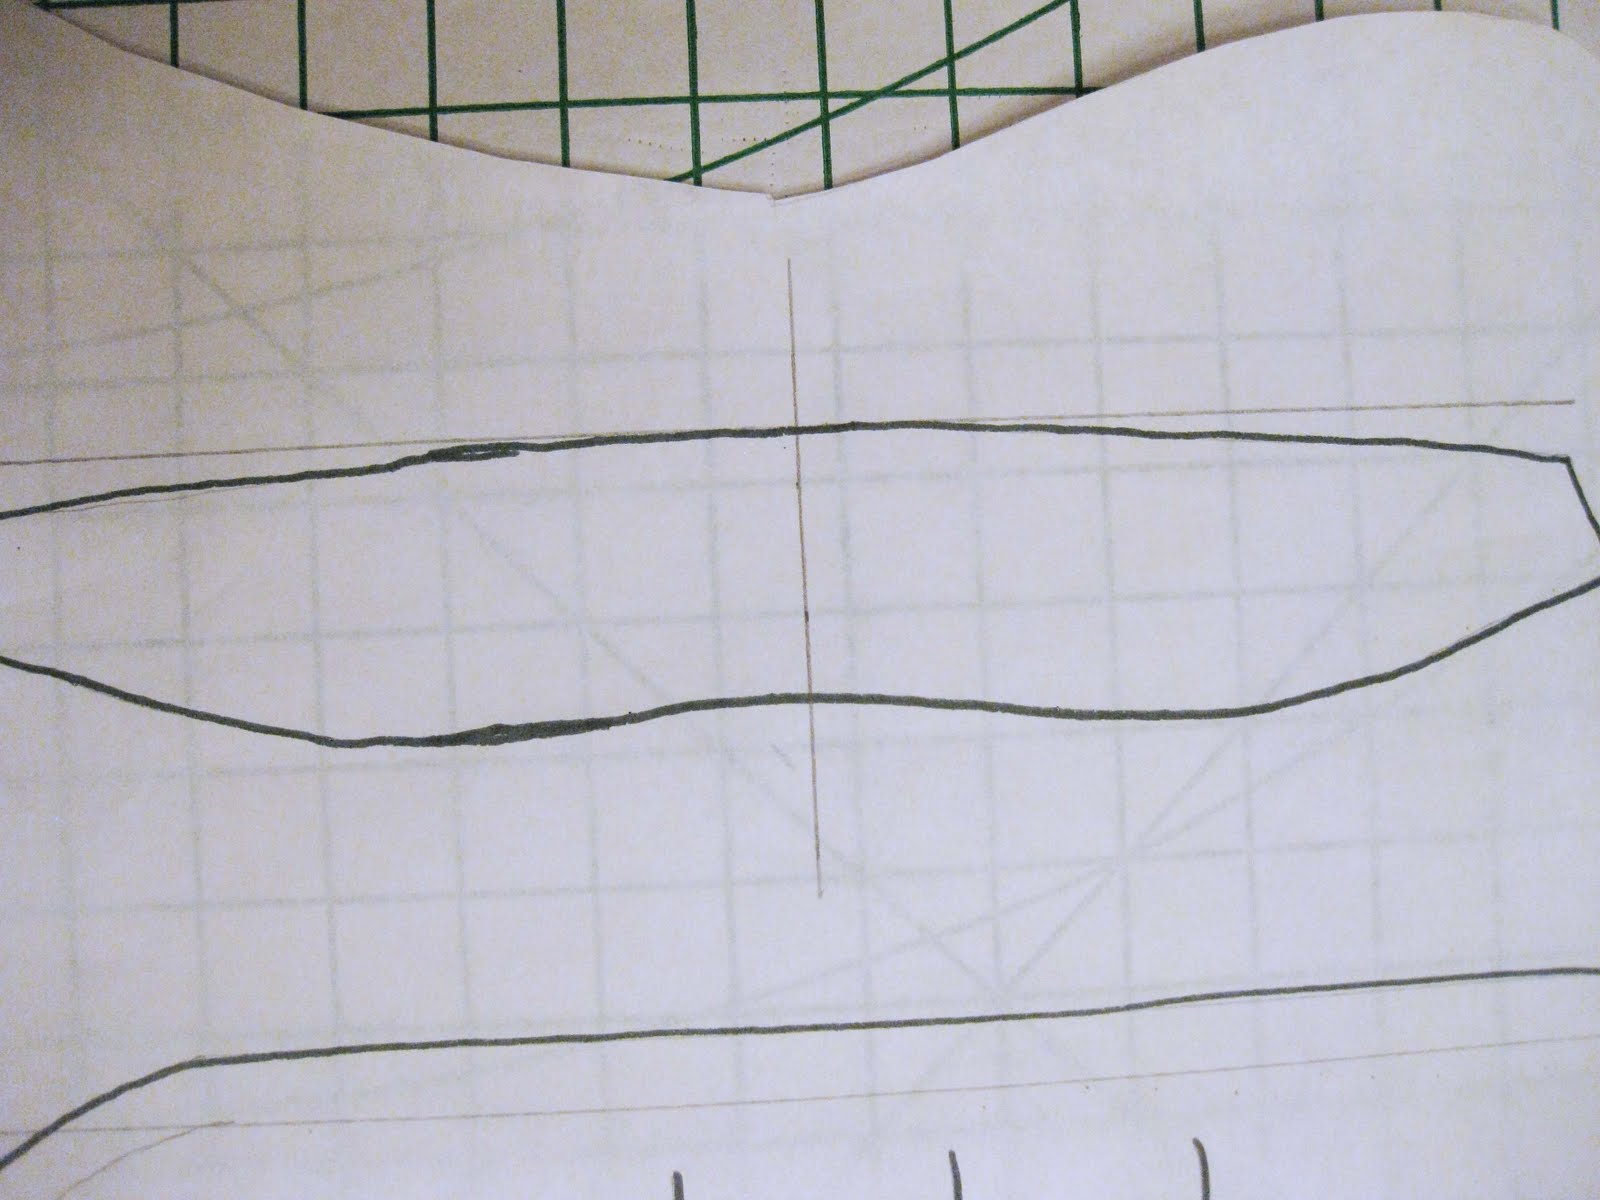
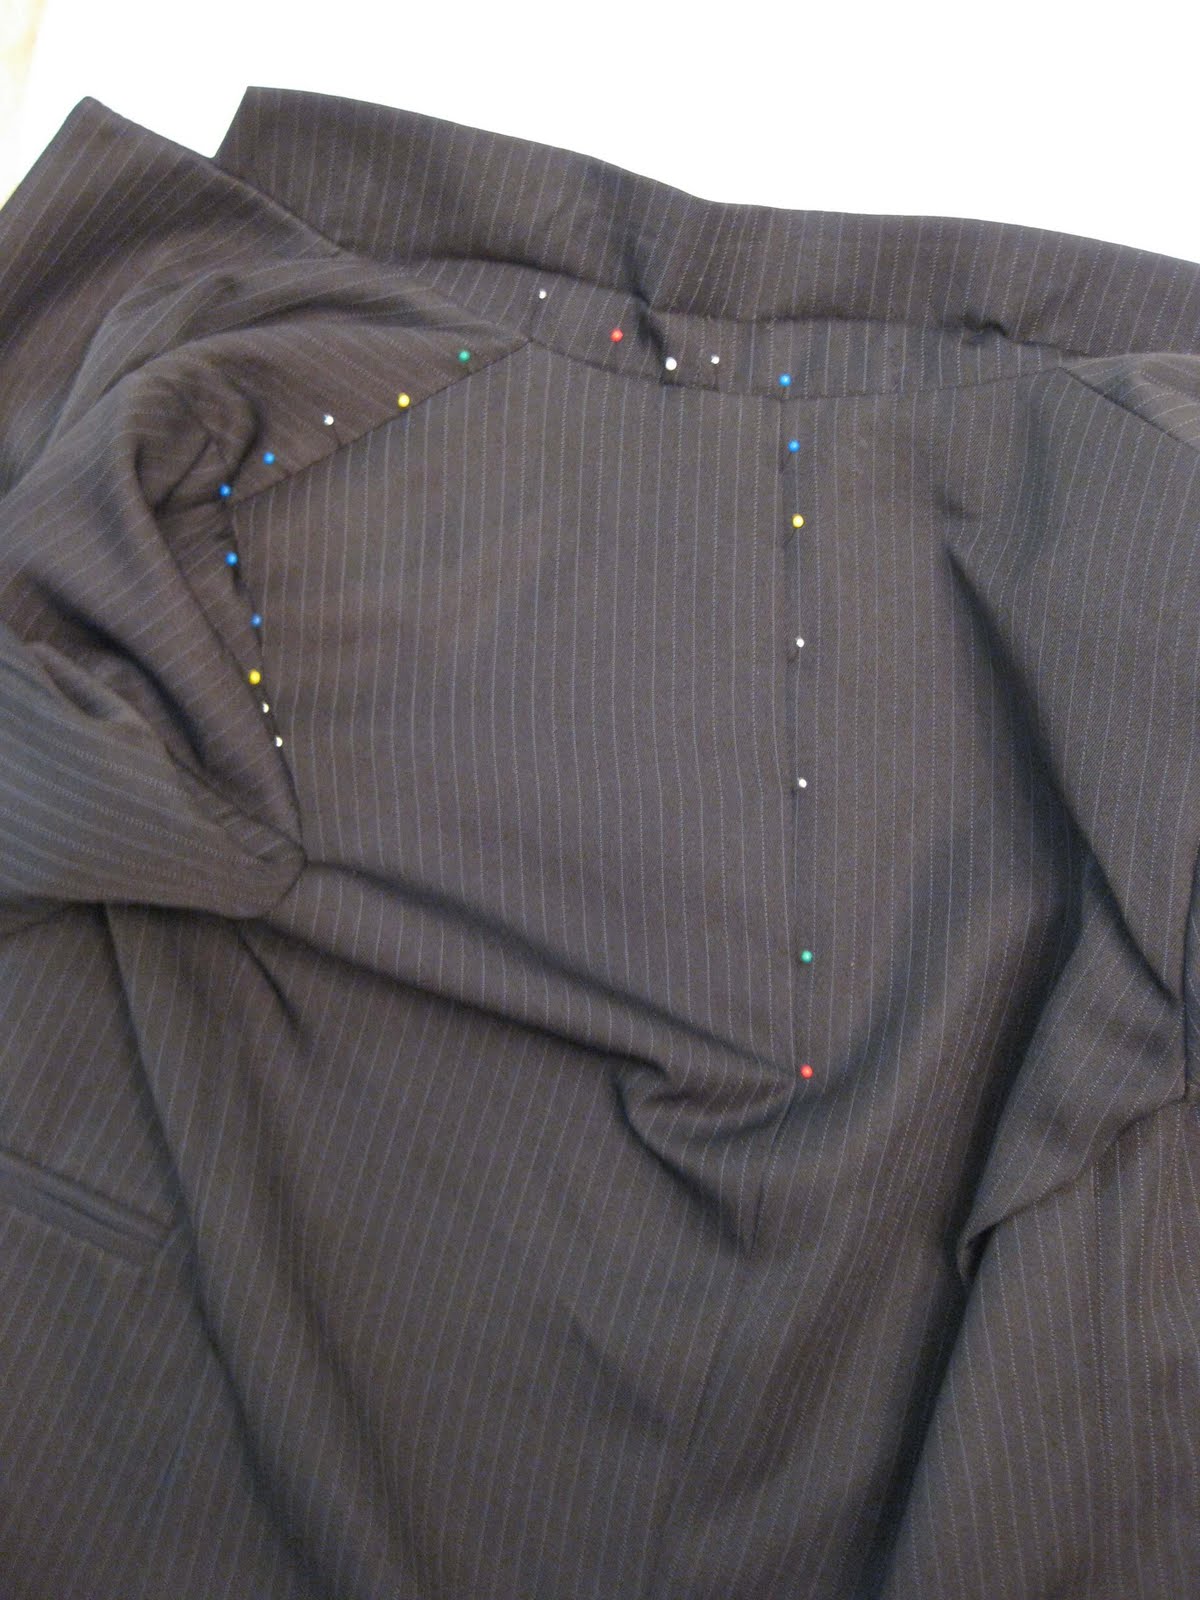
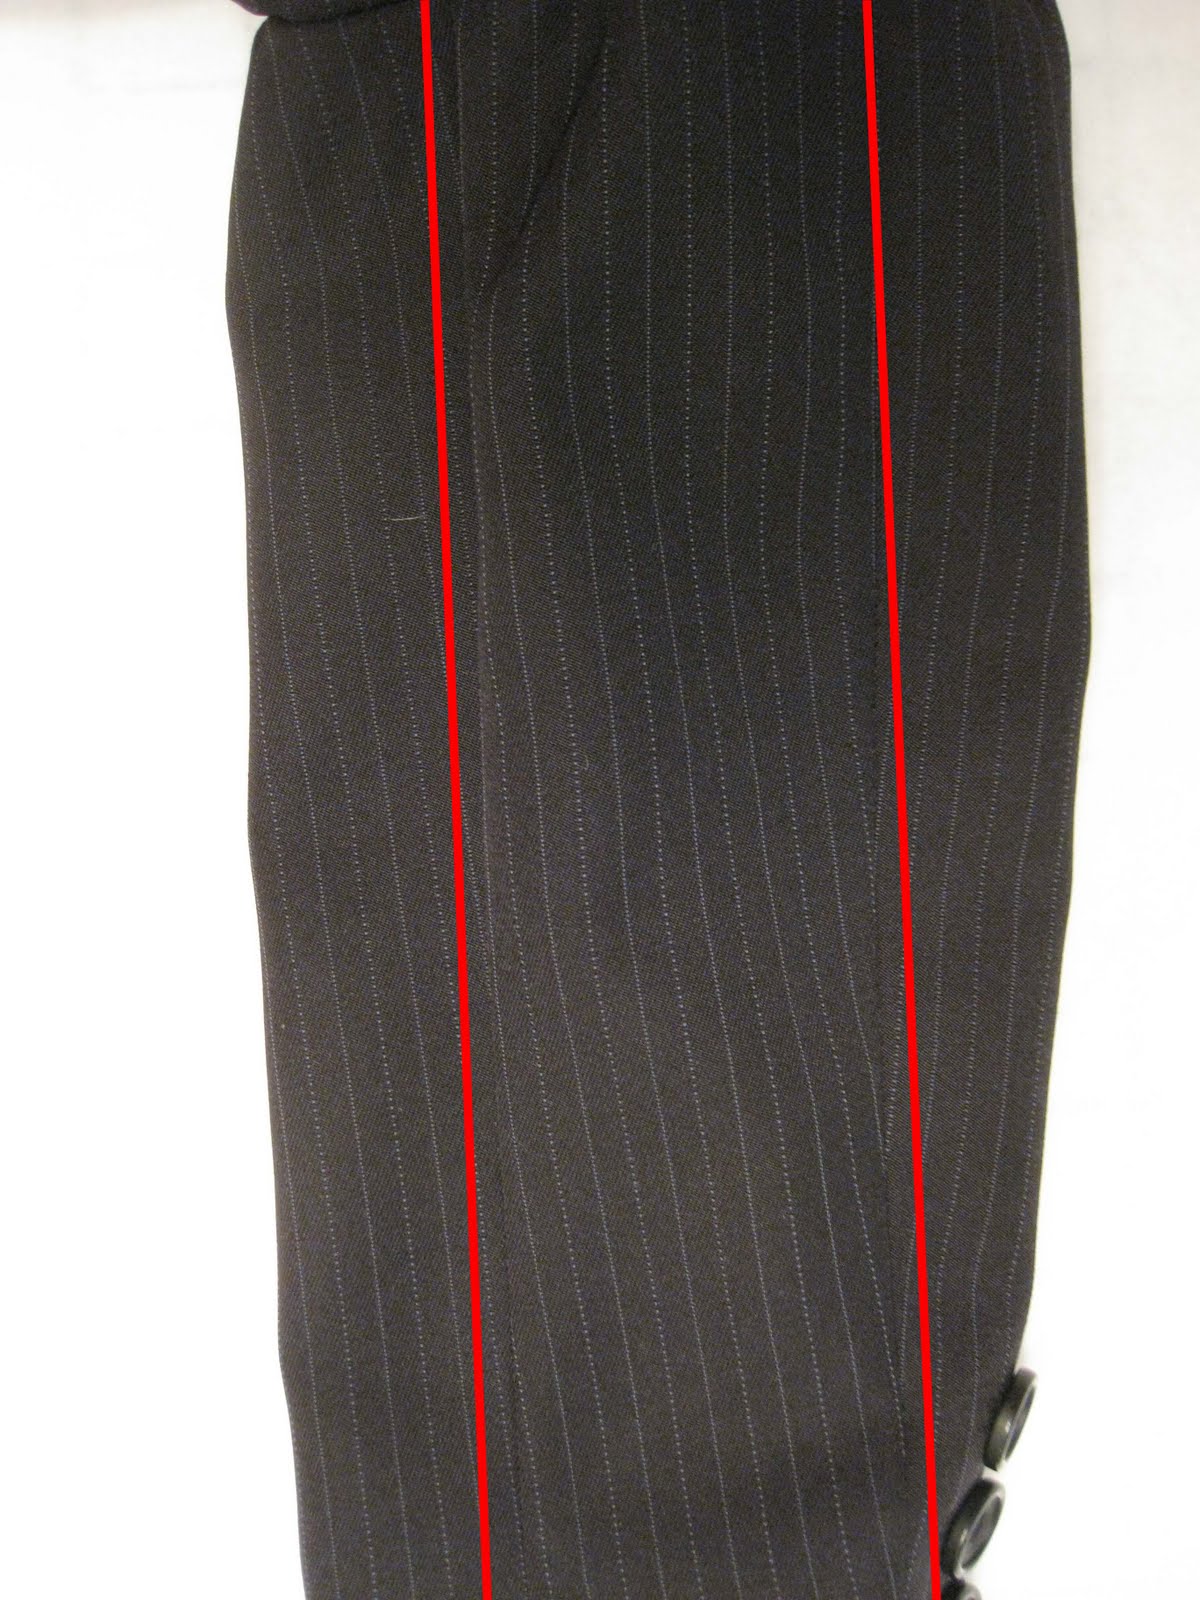
Now, it would be tempting to assume that the side and center back seams are completely parallel and perpendicular to your bottom line, and here’s where the pinstripes on this blazer tell a different story. Look at the close up:

As you can see by the converging lines, the center back seam gets wider toward the top of the jacket. So go ahead and pin it out instead of just doing beginning and end points and connecting them with your ruler later.
Smooth and flatten in stages, just like you did on the front, trying to keep some pins in the center back seam to avoid pulling the jacket completely out of whack.

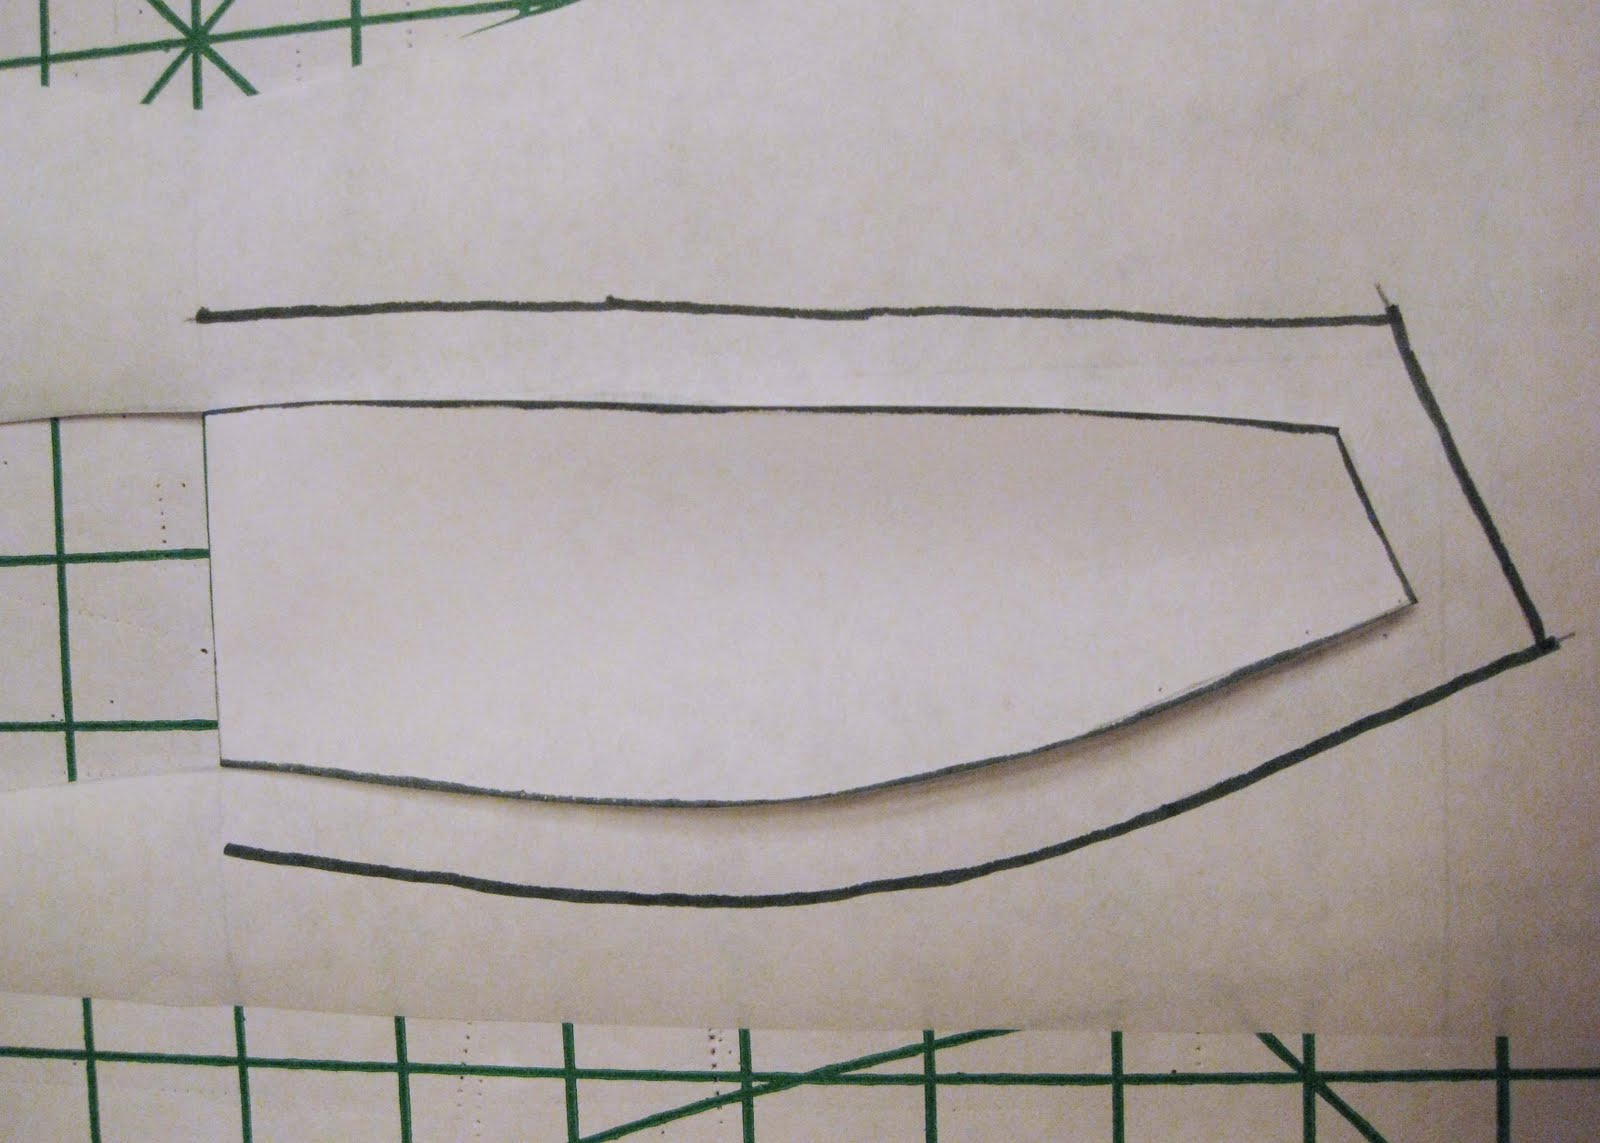
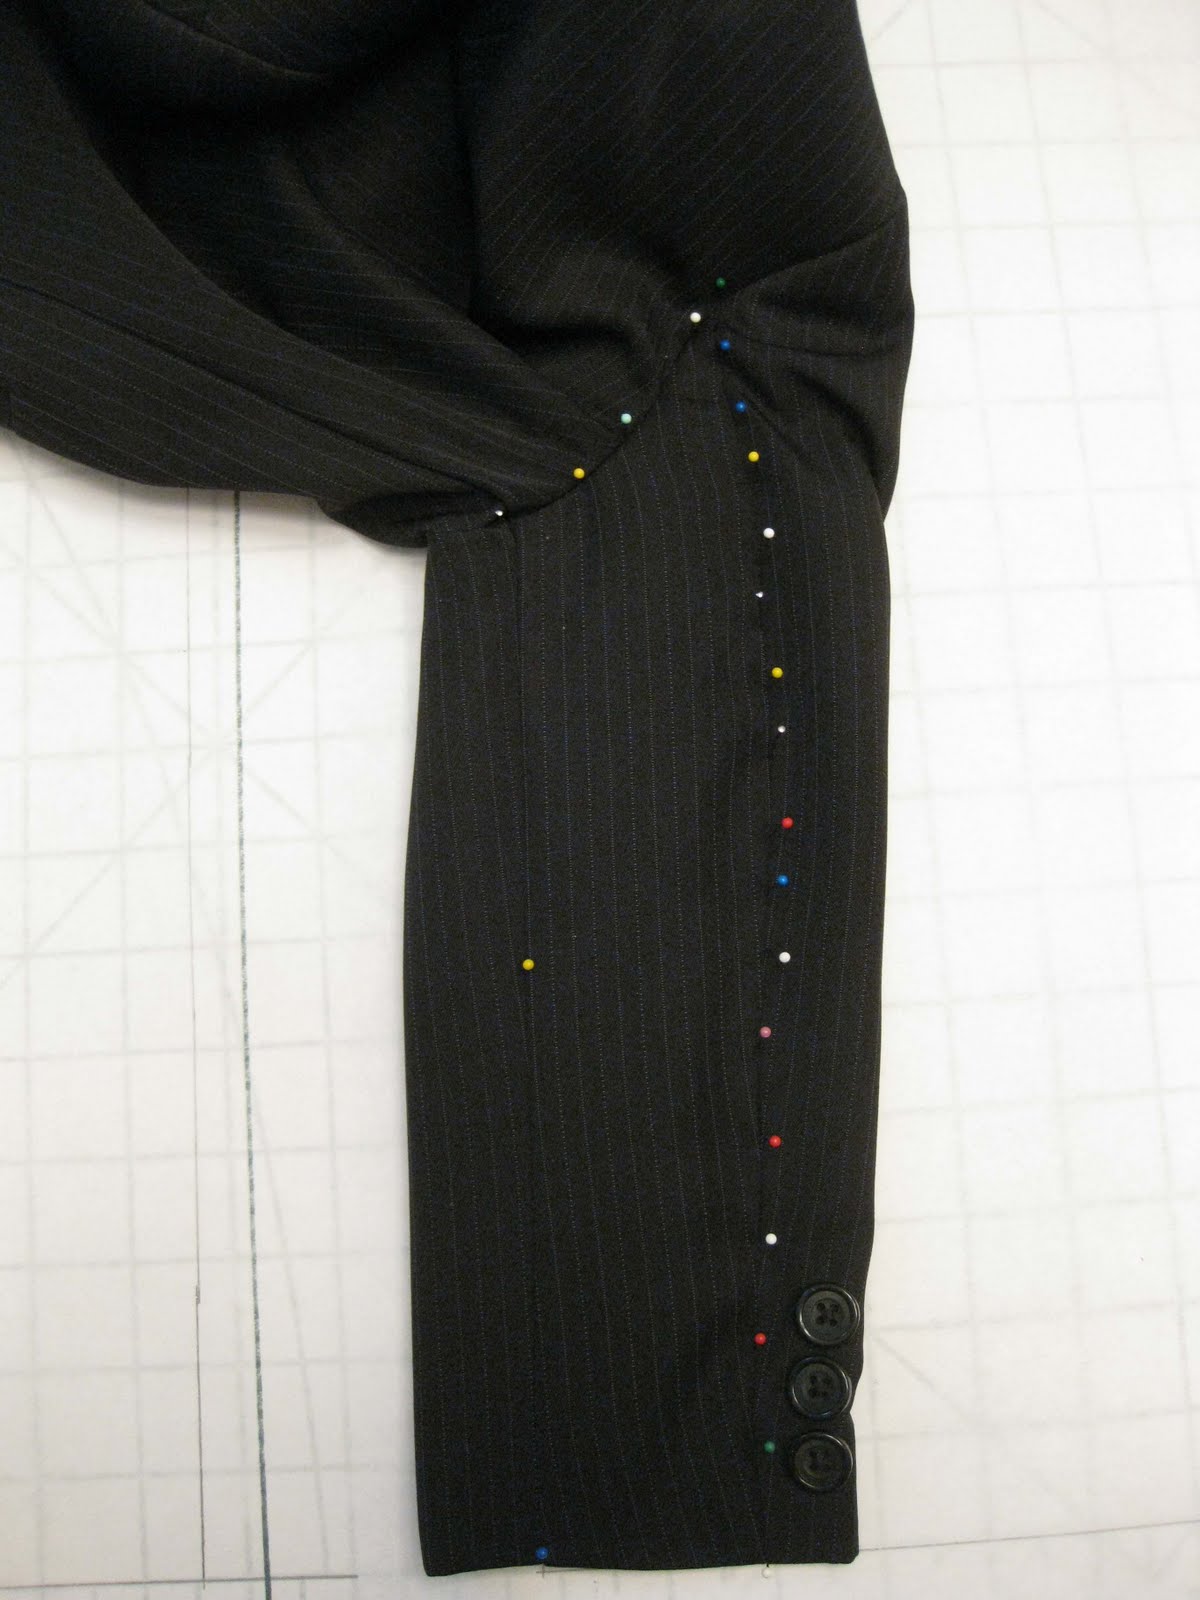
Now for the sleeves. Looking at this sleeve, I can see it is made of two parts, an upper and under sleeve. The red lines in the picture below are just outside the seam lines:
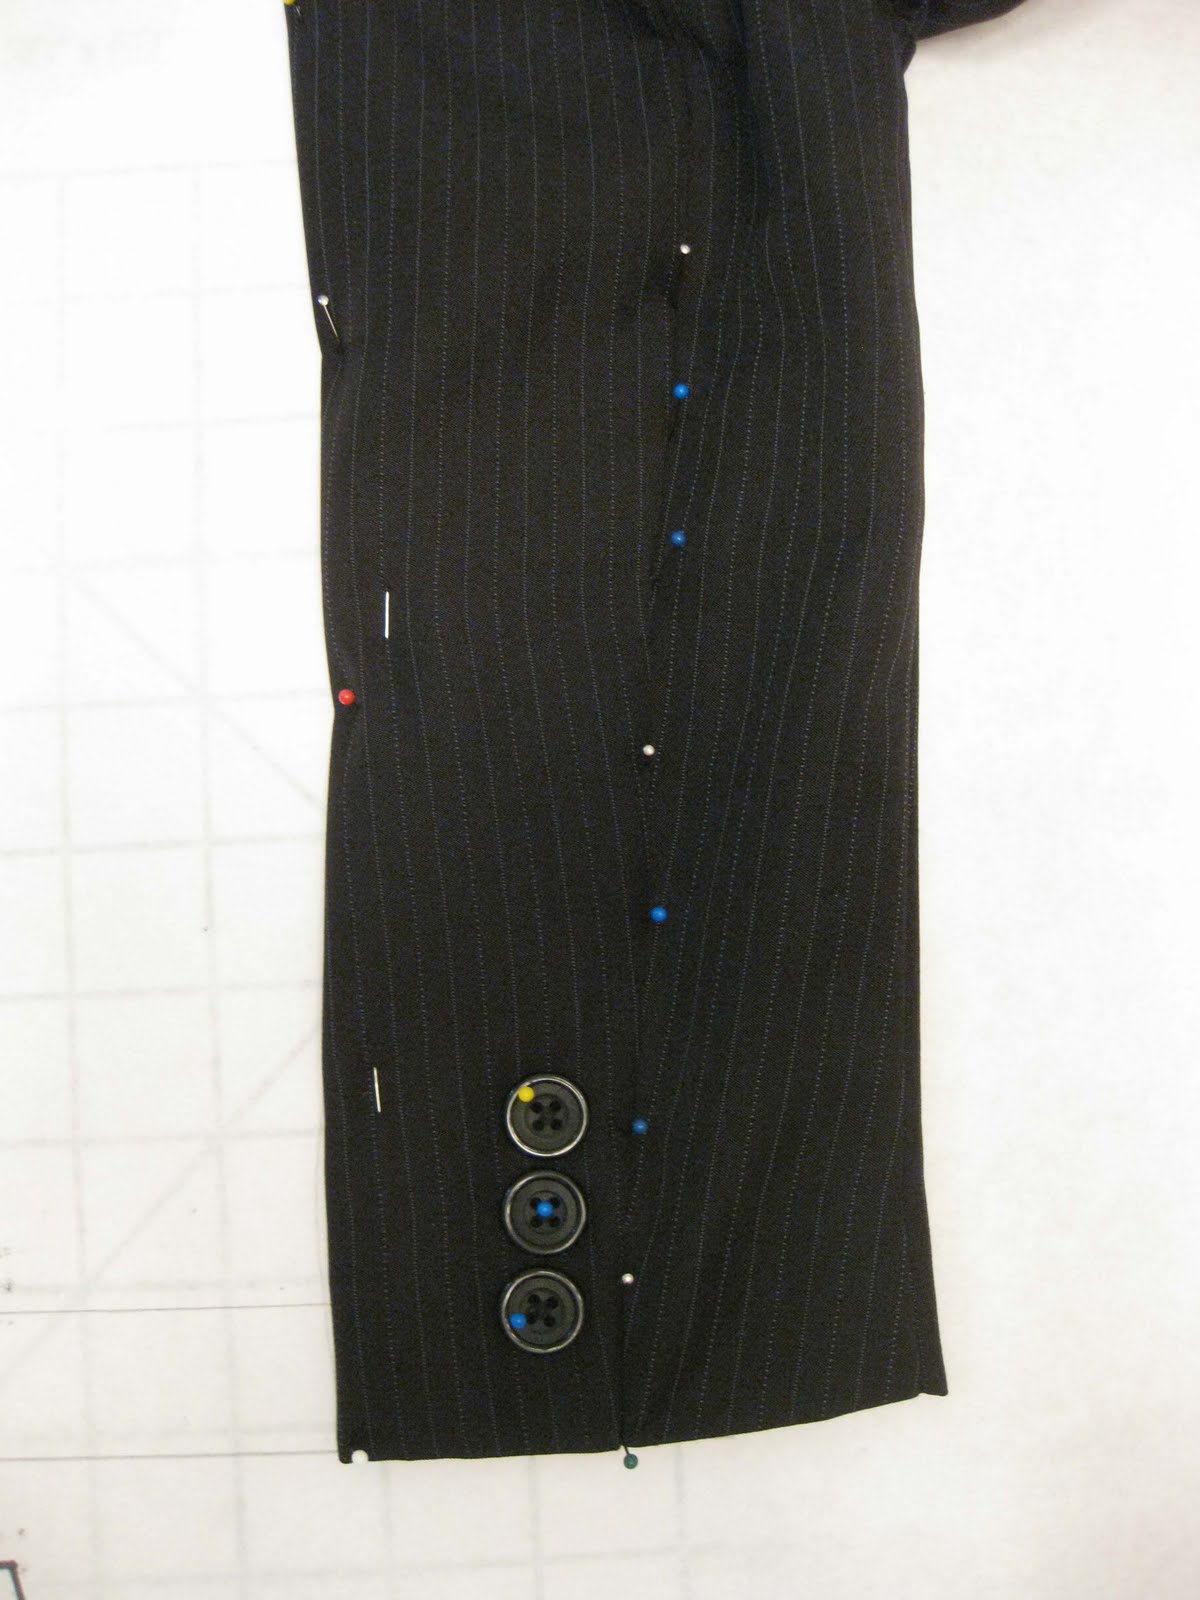
We’re going to start with the under sleeve, as it’s the easier. Simply line up the hem with your horizontal line, fold back to line up one side with your vertical line (I did this on the left, that’s why there are fewer pins on that side), and pin all around.
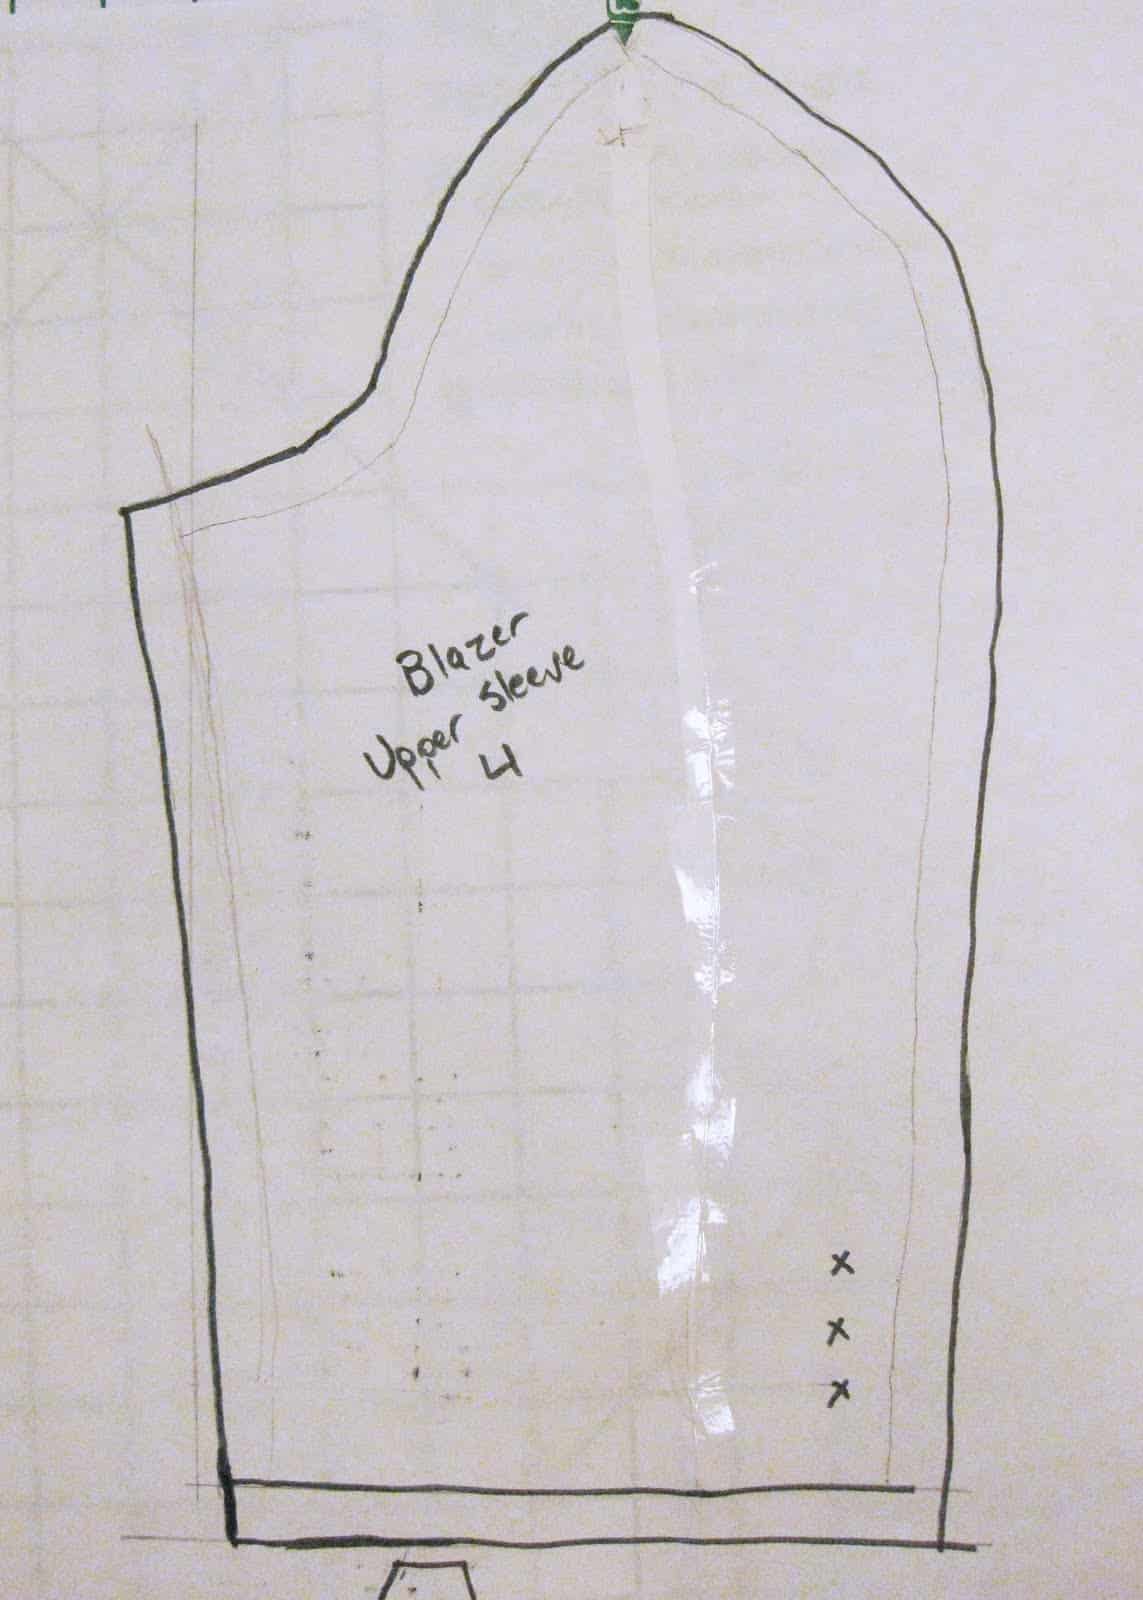
Now for the upper sleeve. This is tricky, as you can’t lay the whole sleeve flat at one time since it wraps around. Start with the L and line up the hem and the left edge. Pin around the armhole side, and trace the folded under edge.


Now, add some pins to keep the sleeve pinned shut. You’re about to flip the sleeve to trace the part that’s folded under, and you don’t want the fabric to shift on you when you do this.

Ok, now flip the whole jacket over, and line up what used to be the right side of your sleeve, and is now your left, with the vertical line you traced. You’ll probably notice the top won’t match up exactly because of the curve of the sleeve. That’s OK, get as close as you can and we’ll deal with the gap later. Pin what is now the seam on the right.
Close up of the armhole:

Now for the final piece! You need to have a piece for the facing on the front of the jacket, since the lapels will fold out and you want the fabric to match. The easy cheater way? Line it up with your already drawn front piece, and just pin the inside edge of the facing.

Maria
wow! that technique to draft a pattern is really clever. I had never seen it before! Thank you!
grace washuka
am studying fashion design n i must say that that method is quit helpful n easy its must try for me
Jennifer
That is awesome!!!!!
whosjaja/claudia
hello, thank you for sharing this! it was a good help for me right now 🙂
Susan
wow, thanks so much for this! my teacher showed my friend this technique years ago with a t-shirt during our lunch break and i didnt know how to do the sleeve. I’m trying to trace my sister’s jacket but it is way to thick! oh well. Thanks for this! : )
Chelle
I know this is an older post but I am catching up! 😉 I cant believe no one has mentioned this is just short of AMAZING!! i am sort of a beginner/interm seamstress & I have never heard of this technique! Thanks so much!! If I tried to read this or listen to someone try to explain the process I would have had them locked up or charged w/ being an alien!!
Thanks again, your pix are fabulous, easy to follow & I especially enjoy the way you tute w/o making the rest of us feel like dummies! You really should teach! Or do you? LOL I don’t even know!!! [email protected]
Vanessa@Designs By Sessa
Awesome! I’m going to check that book out! And copy this idea for future!
Anonymous
wow!!!!!! this idea is soooo awesome!cant wait to try it out
Christopher Clark
Great Tutorial! Very clearly explained and excellent pictures. Easy to follow the process. Thank You!
mimismae
Hello,
Thank you very much for sharing this! 🙂
Cheers,
Dorothee
emilia
Fyi… In the tutorials section of your blog, rubb off patterning is spelled incorrectly. The link that gets me here in the sewing tutorials. Ok!
Melody Eddy
Genius! Very helpful. But for the blazer, I will probably buy your pattern.:) Thanks for sharing.
Justine
Brilliant tutorial melissa. Pinning to my patternmaking board.
new girl episodes 16
Greetings! I’ve been following your blog for some time now and finally got the bravery to go ahead and give you a shout out from Huffman Tx! Just wanted to mention keep up the great work!
ratkin412
Great tutorial, thank you so much!
olly4meoutfit
I love that your pattern,it rely help me to know more about blazer cutting. keep up a good work. God bless
Chelin
Hi Melly,
I found this tutorial while reading about the Men’s shirt you recently made. This simply blows my mind away! I have tried a similar method before, which proved to be a bit difficult. Aw, I feel liberated! This is great, brilliant, fantastic! You are remarkably generous for sharing this with all of us.
Thank you!
Oh, by the way, I think you are awesome! 😉
wilson
hi
My self i just want to know how to cut the place that we can you show me videos for whatever in another way so i can pretend city cheats i really like to no how to cut places every pattern can you help me please
Het Machien
Love this post! I can’t wait to try this out on a few favourite pieces!
Boris
Hey there,
really great tutorial! Cheated me into believing this was gonna be easy, so I tried it with one of my own blazers – a vintage Dunn&Co. piece that I really like a lot despite the fact that it’s a bit too narrow around the shoulders.
Trouble is: it’s not quite as easy as it looks, especially since my blazer – of course – has darts. So my rub-off doesn’t look as clean as what you posted – I’m especially worried about the armholes, those don’t seem to work for me at all…
Guess, I need to… flatten it somehow?
Is there a way of making the rub-off technique work for a darted piece or am I just plain out of luck?
Sole Naicker
Thank you for sharing this. The step by step instructions make it super easy.
Asumpta
This was so well explained! I actually used this method to make my own jacket/blazer. Thank you so much.
mila
WONDERFULL…THAK U SO MUCH!!