
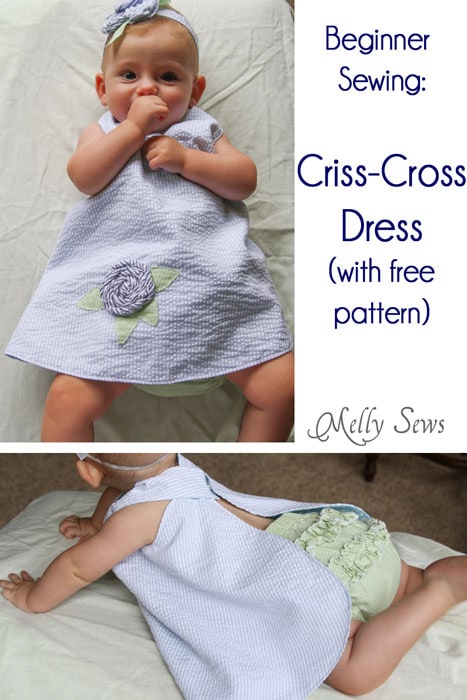

Today I’m sharing something like some of the first garments I ever sewed. I remember the criss-cross dress as a go to baby gift when I was in middle school and friends were getting new siblings. They’re still a great baby gift option today – as evidenced by this one that I gifted to my niece.
So to make the criss-cross dress that my adorable niece is wearing, you’ll need:
- 2 pieces of fabric, 2/3 of a yard each
- Any embellishements you want to add
- 2 snaps – I used the kind you apply with a hammer, but you can also use the sew on kind.
- The pattern, see below
How to Get the Pattern
The free pattern is in size 0-3 month size. If you need a different size, the full digital pattern (NB-3T) plus the bloomer pattern is available for purchase below.
To get it, click your preferred option below to get the free pattern only as a newsletter subscriber, or to buy the full digital pattern + printable instructions.
 |  |  |
Please note that all my free patterns are licensed for personal use only (no selling items made from this unless you purchase it) and by downloading you are agreeing to this license.
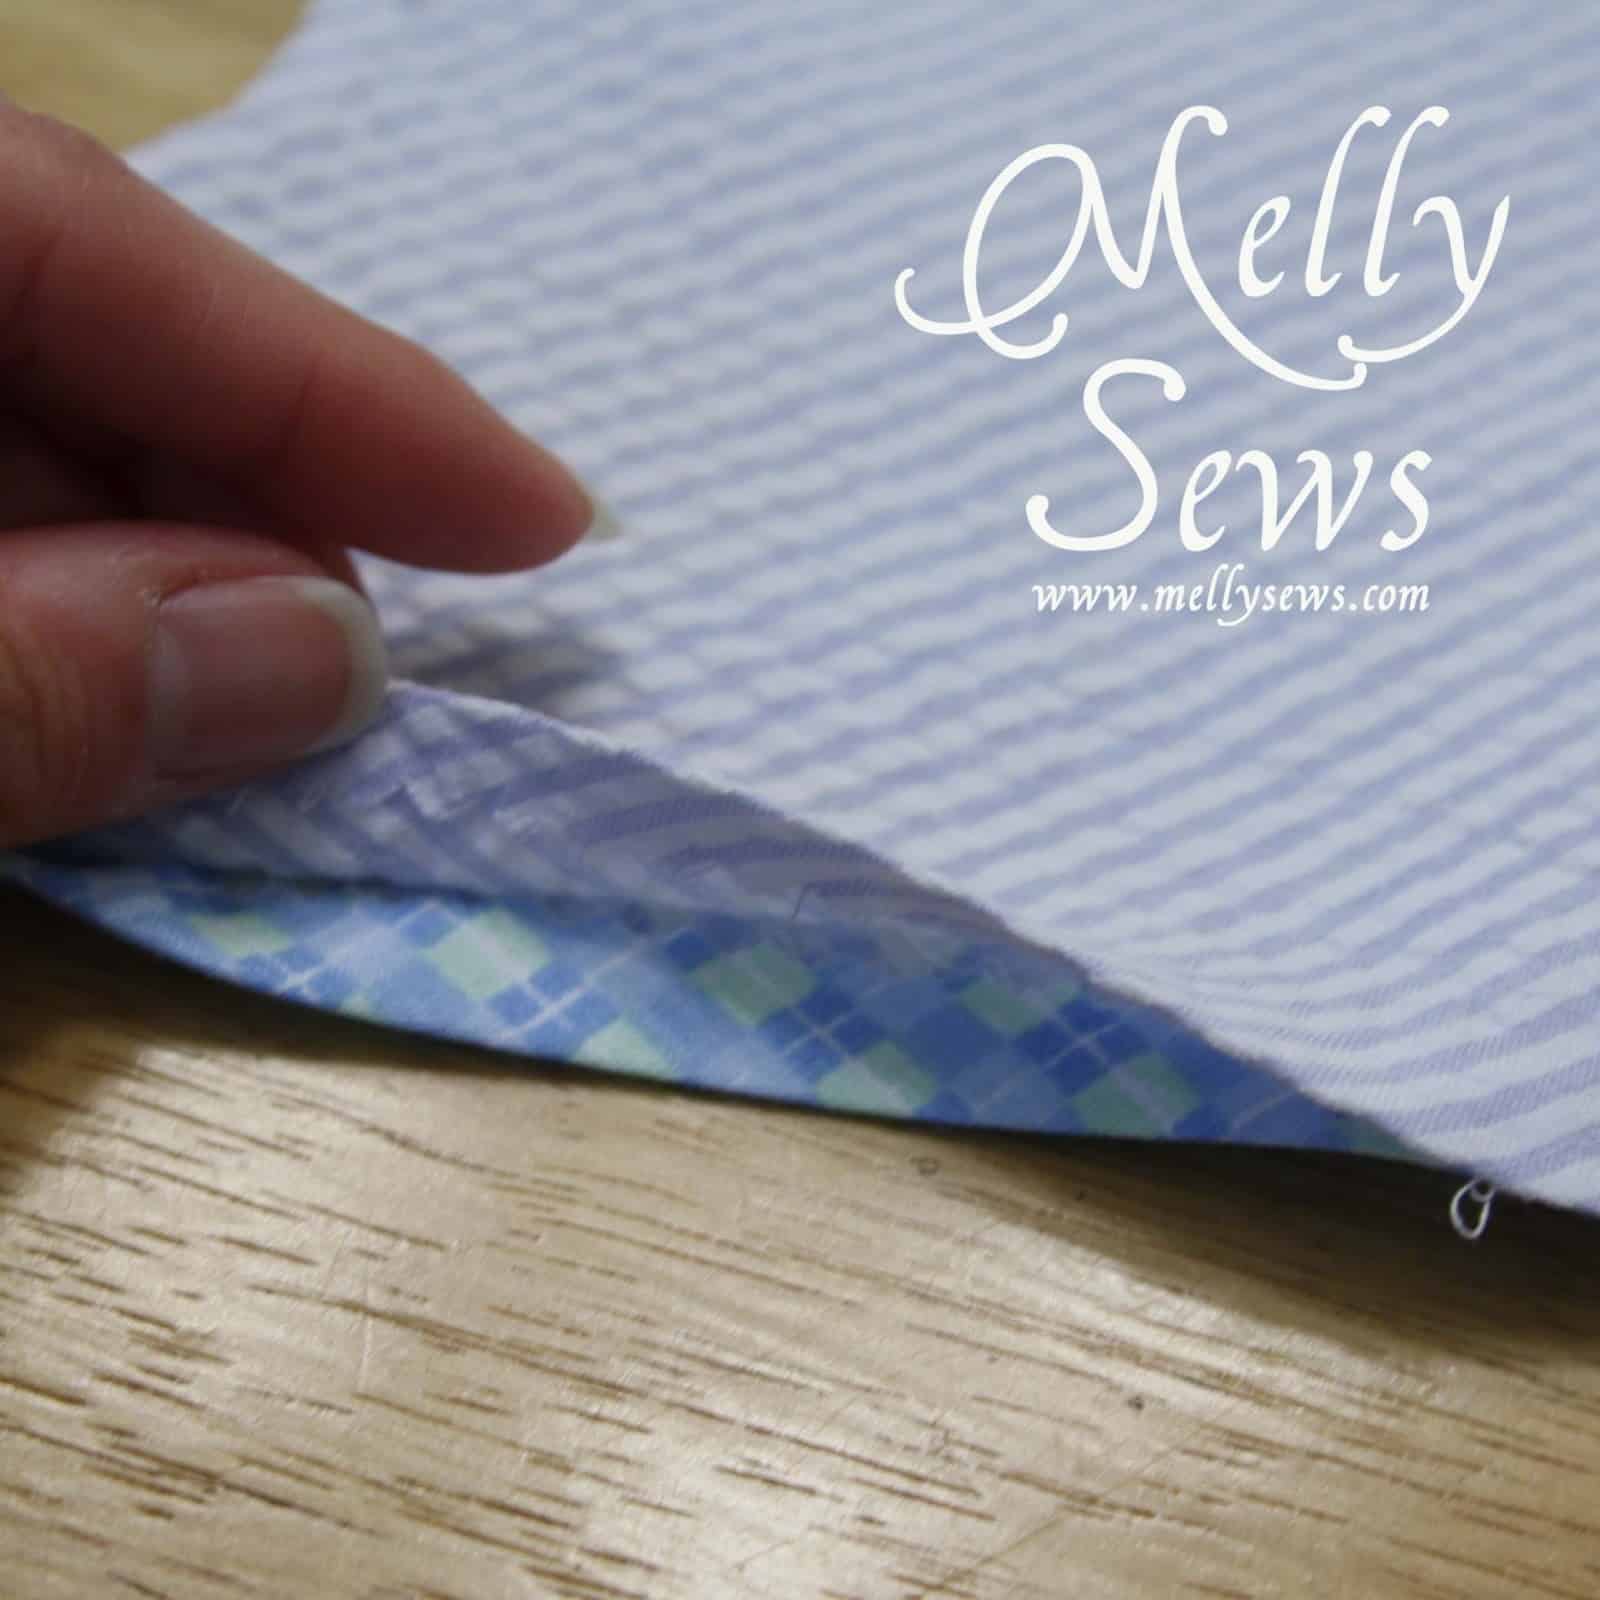
So if you have the pattern and are ready to begin, pin it to the fold of your fabric and cut. Do this twice, so you have an outside and a lining (you can make this dress reversible). They should look like this when openend out:

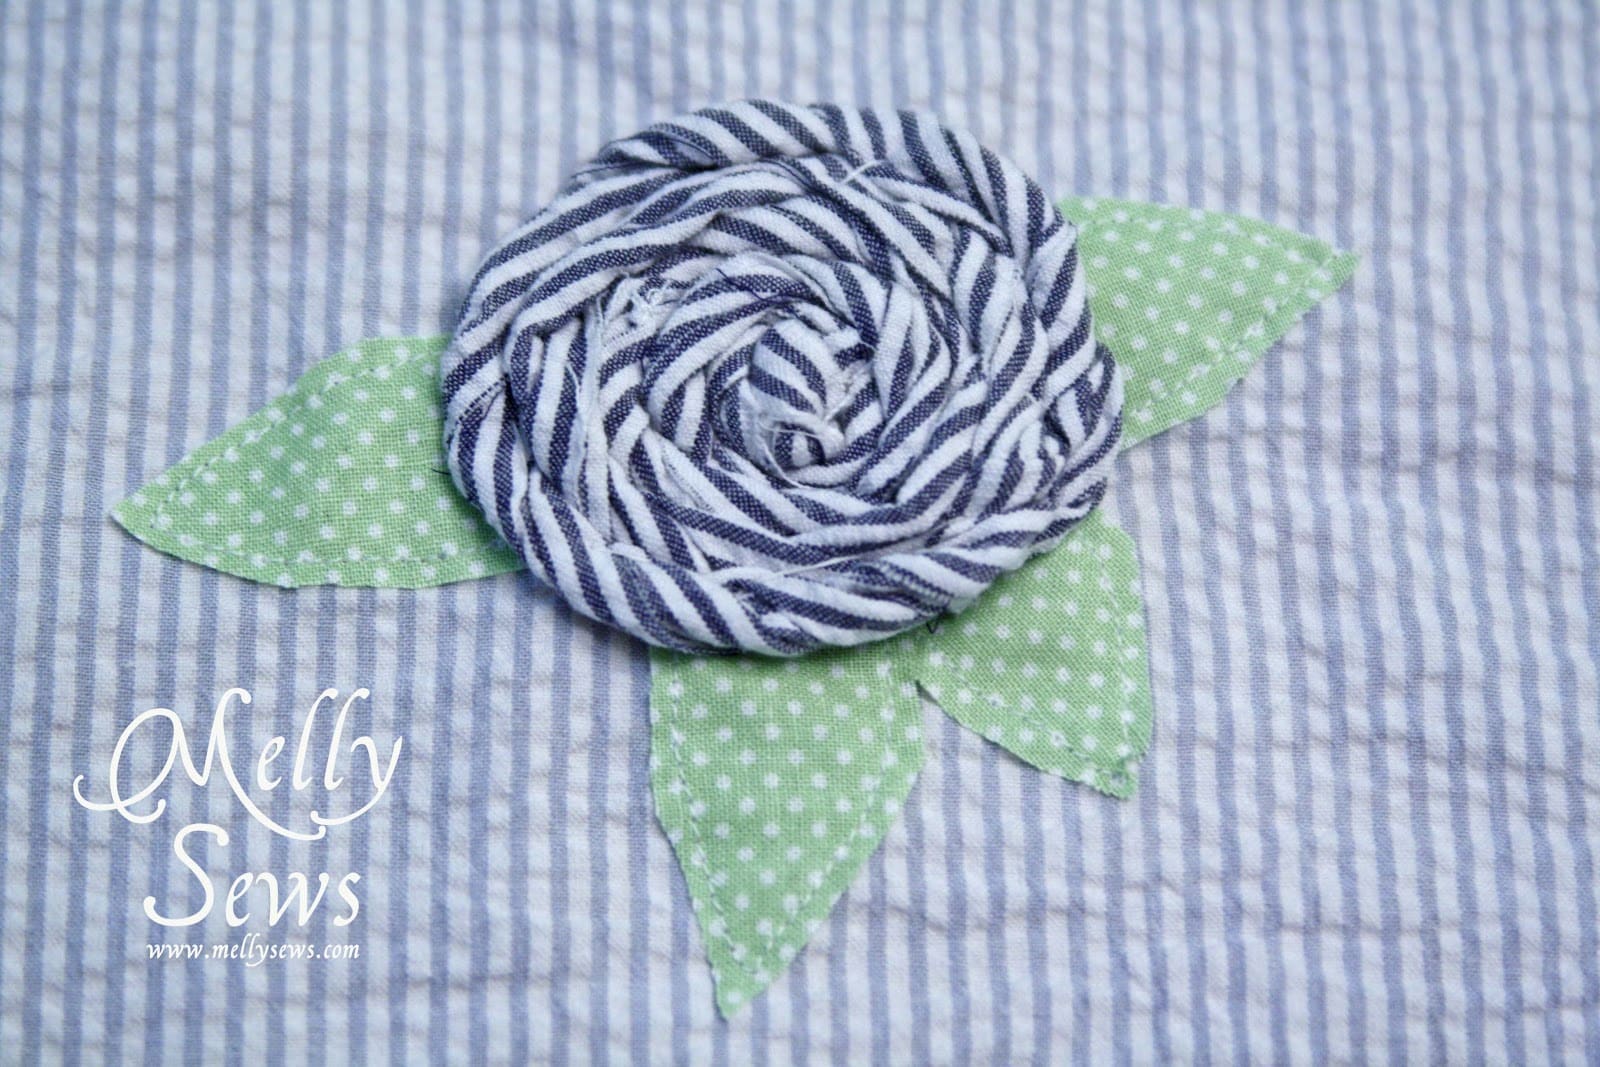
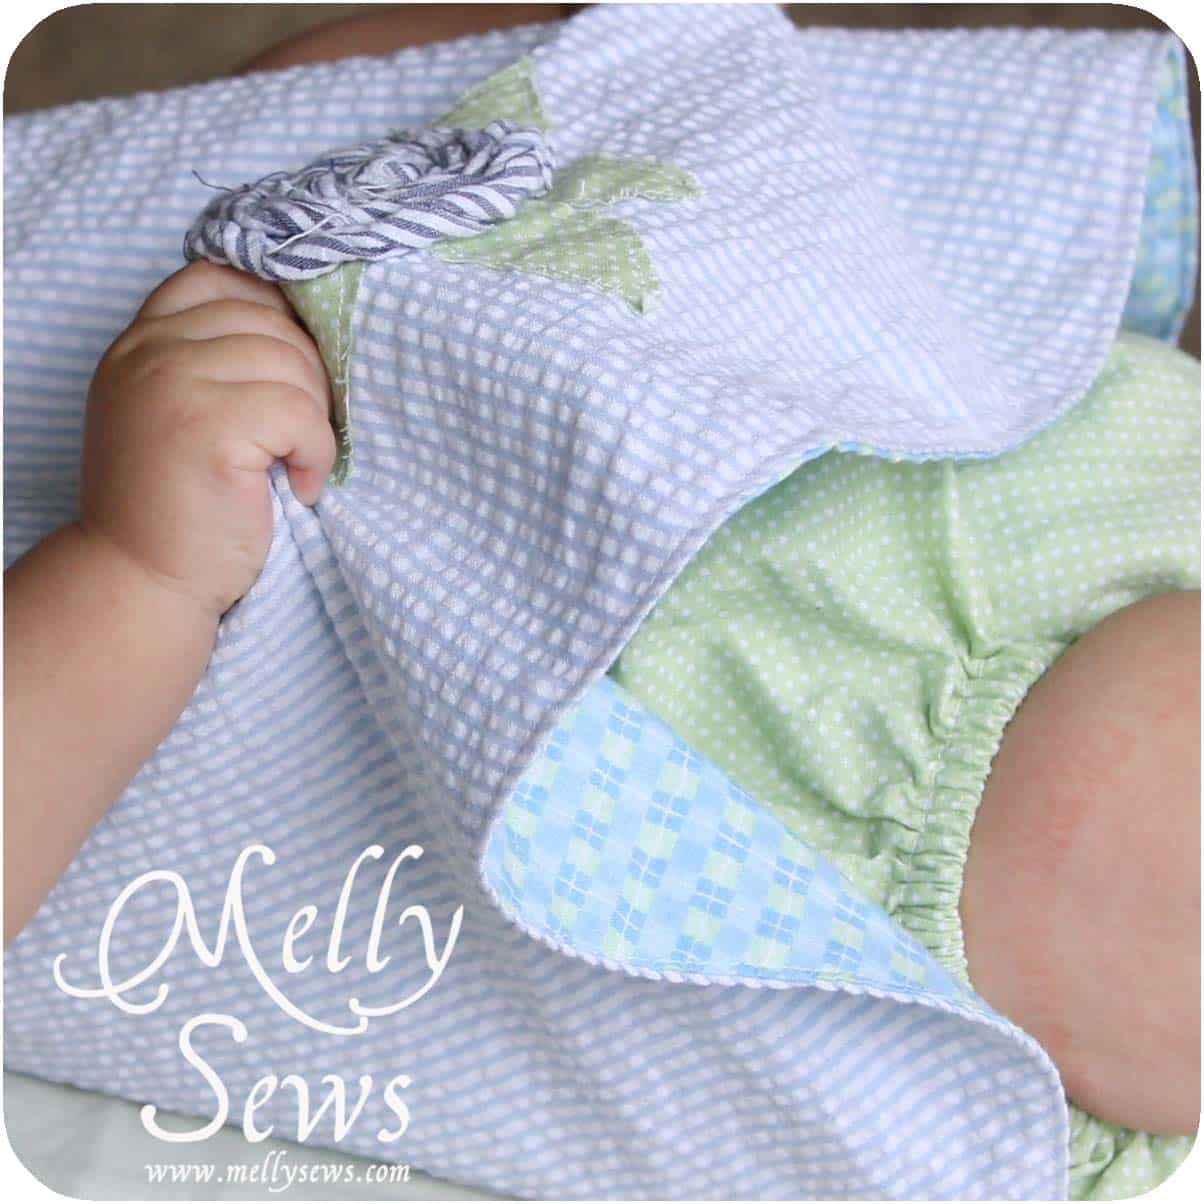
Next add any embellishment you want to the front of the dress. I sewed on a rolled fabric rosette and some leaves.
Now lay the dress front and the lining on top of each other, right sides together. Sew all the way around the dress edges BUT LEAVE AN OPENING FOR YOUR HAND so that you can turn it right side out later. This pattern has a 5/8″ seam. Go slowly around the curves.
Next, trim the seams down. I prefer to do this with pinking shears. If you don’t have pinking shears, you can sew another seam about 1/4″ towards the edge from the first seam and then trim. Be careful not to trim too much at the opening.

Now turn the dress right side out. Press the edge so it’s nice and crisp. At the opening, press the edges under towards the inside.
Topstitch all around the edge, closing up your opening in the process. Now you just sew or apply snaps at the end of the long straps and on the top of the back piece. You can see in the picture below how the dress goes on the baby.
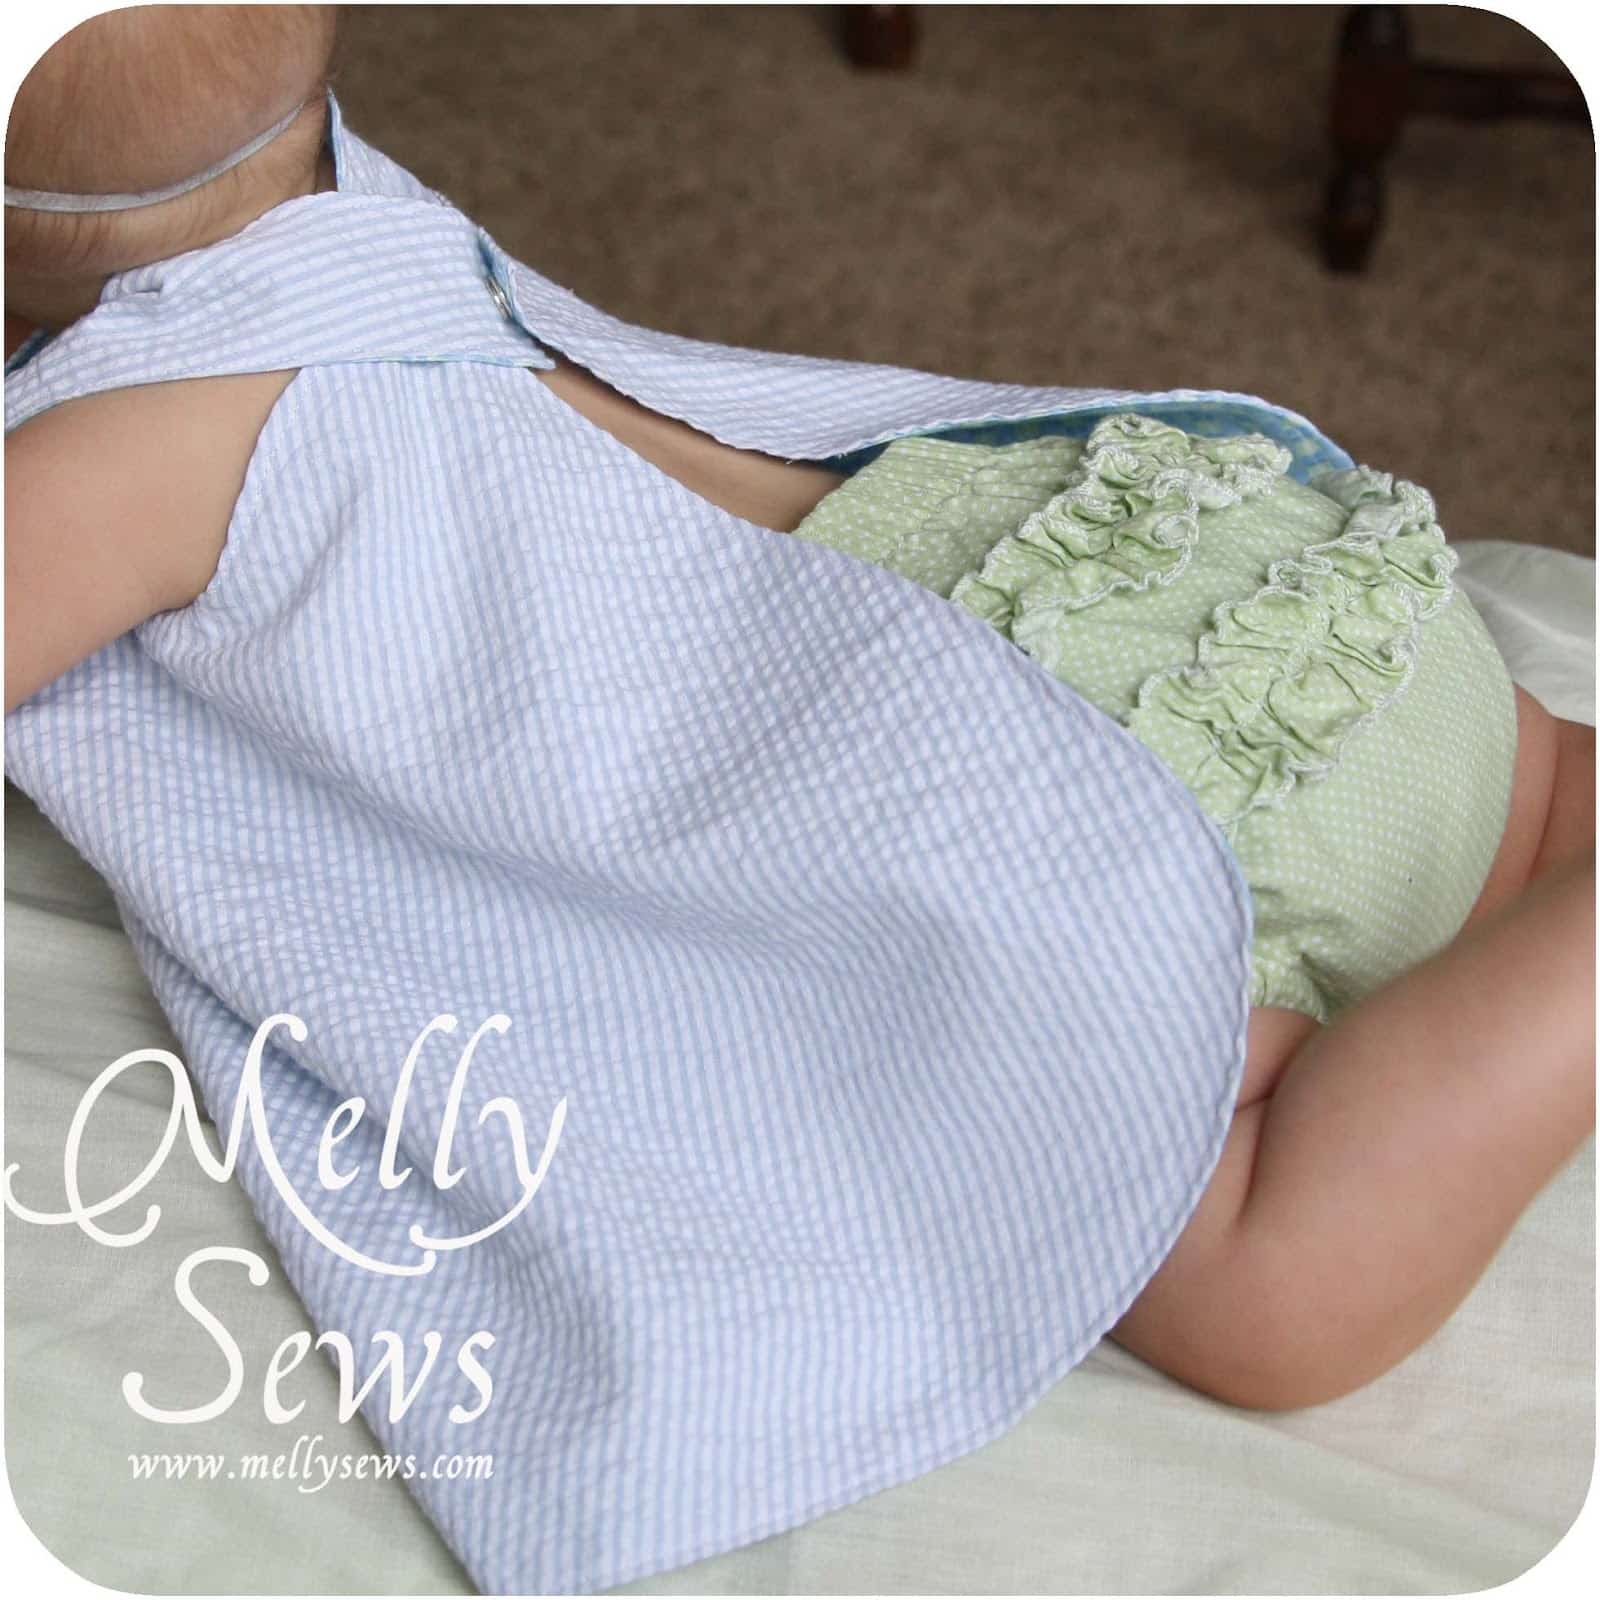

These are so easy to whip out, and the combination of fabrics and embellishments are endless. They also make great gifts.


For the pattern and tutorial on how to make the bloomers, click HERE
Pinafores and Pinwheels
Perfect for my friend who just had a baby girl! Thanks! ~Stephanie
Sandy
used to mae the for my daughter 33 years ago. So simple and so cute!
by Michelle
Beautiful and simple! Learning to sew is on my bucket list of things to learn in the next five years.
Bridgette
Super cute! The dress too! 🙂
Anne Maskell
Your niece is a real sweetheart! Thank you for sharing the pattern and tutorial. I’d like to make it for my granddaughter. (and I’m looking forward to the bloomers tutorial!)
Jenilyn
Love this!! Especially the seersucker. I would love for you to link this up to “I Made This” at Grits & Giggles! http://gritsandgiggles.blogspot.com/2012/05/i-made-this-5.html
Apsolutely Me!
Oh my! She looks adorable in that dress! Great job!
Connie
This is so cute.. I downloaded the pattern. Can’t wait to see the bloomers.
Hi, I’m Connie at http://hotflashncraftn.blogspot.com/, a new GFC friend. I hope you will stop by and be mine, too.
Thanks so much for sharing.
Anonymous
Cute!Very CUTE!I would love to try something like this.And i would like to do for my brother kid who is just 2 month old.This is my blog id http://blissfulsewing.blogspot.com/
Firehousecrafts
This is so cute! If I had girls I would make this in a second. I would love it if you would link this up to my linky party at http://www.firehousecrafts.com/whats-hot-in-the-firehouse-linky-party-1/. Hope to see you there!
Anonymous
I’m just starting out sewing and want to make this for my daughter but she is 12 months. How would I alter the pattern for a 12 to 18 month fit? Thanks!!
Melissa
I would place the pattern about 1/4″ in from the folded edge, make the straps longer, and possibly add an inch or more to the bottom edge. I would err towards adding more length than I needed on the bottom and the straps, then kind of fit to your daughter to make sure you’ve got the measurements right.
JULIE
I’m also making this for my 12m daughter– LOVE IT!! Thanks for sharing this cute pattern! I found it when you linked up to Sugar Bee with the cute bloomers~ I’m making those too. This hot weather begs for light dresses!
Wendy
I made this dress for my daughter about 30ish years ago! It all comes back in style, lol It is a great “tut” I may have to dig around in some boxes and see what else I have !
Mel
No kdding! I wore these back.in the early -mid 70s from probably birth to 5 years old! Such fond memories if opening packages from my great grandparents with these little sun suits inside!
Going to have to make one or a dozen for my little niece!
Jamie Pate
Did you ever get a response to this or find out how to change the size? I have someone wanting a 12 mo and I have no clue how to change the size – unless I just guesstimate and trace the pattern a little larger…??
Melissa Mora
There’s a comment above that explains what I would do.
Kirstin @ Hello Kirsti
I made one and the matching bloomers, they were super easy and turned out darling! I blogged my little changes and how I used buttons as the clasp here: http://www.hellokirsti.com/2012/07/baby-dress-bloomers.html
Thanks taking the time to post the pattern and tutorial Melly!
Charlotte
I have a very similar pattern for this little dress that I wore 68 years ago. I still have the pattern cut from a page of the Wichita Eagle Newspaper. I made one for my daughter when she was little (almost 37 now). Mine had longer straps that crossed in the back and it was fastened with safety pins. When I made my daughters dress I figured out how to close it with buttons and button holes. Yours is very sweet. Guess I’m not going to be lucky enough to have a granddaughter and so far no great granddaughter to make another one for.
Anonymous
a d o r a b l e!
Lynne Hearn
How adorable! I’m having trouble downloading the pattern, could you please send it to me? Thanks,
Melissa
I’d need an e-mail address to be able to do that.
donna hollin
My download shuts Explorer down everytime. If you could email it to me, too, I would so appreciate it
donna hollin
Got it to print on different computer. Thanks
donna
Turned out adorable….starting second one today. Took an idea from Charlotte…closing it with colored diaper pins to make it easily reversible…so easy for a newbie sewer.
Aletea
Oh my! She looks adorable in that dress! Great job!
Thais Wever
Great, thanks for sharing. I will for my new niece. Greetings from Panama
JAMIE LAWSON
Thank you for the pattern I have the dress made waiting on the snaps. On the bloomers, it printed out a front and a back, but in the tutorial it seems like you are only using the piece cut on the fold the back??? Help am I totally confused? it did say beginner 🙂 is there a lower level for me, I will appreciate help for anyone in case you know and Melly is too busy
thanks Jamie
Sandy
Sorry if this is a repeat comment, wasn’t sure if it took my first one!
I absolutely love this dress and had to make it. I blogged about it here if you would like to check it out:
http://sandysewz.blogspot.com/2013/07/cutest-baby-dress-ever.html
claudia
Hola, esta hermoso el vestidito pinafore, me encanto muy buen trabajo
yvonne
Melly, Your are such a super duper cool Auntie, the kind that every little kid would love to grow up having. The dress, bloomers, and headband are absolutely beautiful!. You did a wonderful job on these. How do I get the patterns in PDF to download? I am signed up to your newsletter.
Great job!
Mel
I whipped up a dress last night for my new niece who’ll be 3mo in the middle of summer. I realised by putting coloured snap backs on both sides it becomes reversible so I made bloomers to match both sides 🙂
Blogged here: http://whilehenrynaps.blogspot.com.au/2013/10/baby-crossover-pinafore-and-bloomers.html
Judy
I subscribed, but I did not get a link to the pattern and don’t see one in the post. Has it been moved?
Judy
Oh, now I see. It came in a different email. Thank you!
stacid
I found you on Pinterest 😀
This is adorable (but not as adorable as that *perfect and sweet* baby!) and don’t laugh, but I want
to make this in adult size for an apron.
Thank you for sharing the instructions and the pattern.
stacid
LOl, as cute as they are, I think I’ll pass on making matching bloomers…
🙂
Marissa
Loooove this!!! Making this tmr x
Marissa
Can someone help me? I cant seem to download this? where is the link?
chandra
I can’t locate the second email either… help
Marissa
no worries, got the second email…sorry thanx xx
Jeanne
I have just made this for our grand daughter, she will be born at the end of March 2014!
Instead of ruffles I used lace on the back of the bloomers and I put bias binding around the legs to put the elastic in, I did start to do what you did around the legs but I got into a mess, it was much easier with the bias binding.
I made the dress in pink on one side and mauve on the other and made two bloomers, one pink and one mauve.
Thanks so much I love what I have made.
Laura
I can’t wait to make this for my friend’s granddaughters. I’m going to be sizing it up to fit 9 mo. and 2T. I think these are the cutest most adaptable dresses!!
Carolyn Hagerman
I can’t seem to find a link to the pattern. Is it still available? I would sure like to get it.
Thanks
amy
I can not get the criss cross pattern pulled up to print…any suggestions? I have confirmed my subscription
Neusa
Hello
I loved this dress, it´s wonderful and I realy like to do that, but I couldn´t find the pattern. Is it possible you send it to me?
I realy appreciate it.
Thank you so much and sorry for my pour english.
Neusa
Vanessa
Hi there, love your patterns, I was wondering if I am able to sell a finished product at a market stall that has been made with a pattern? If not thats fine.
Thank you 🙂
Vanessa
Gina York
Is the criss cross pattern still available? I confirmed my email. I have been looking for this pattern for quite a while now. Thanks!
Suzanne Raiford
Such a cute outfit. Thanks so much for sharing your tutorial with us!
Katie
Hi, I’ve tried to subscribe so I can follow your posts and would really like the pattern and tutorial for the criss cross dress but it is not allowing me too and I have tried a couple times. If it is an issue with your site could you fix and let us know or e-mail me privately my issue? Thank you!
clarissa
very cute outfit and you have a very beautiful model!
thank you for sharing
Brandi
Hi! I have subscribed and confirmed my email but I have not recieved the welcome email with the pattern, is it still available?
Linda Abbott
Would love to have this pattern! Thanks
Linda Abbott
Would love to have this pattern!
Rita McDonald
I’ve tried several times to subscribe but never get an email to confirm so that I can get the criss cross pattern. Would love to receive this and start following you.
Thanks,
Rita
Dana
Rita, i also tryed, but was pressed for time. So i had an extra piece of fabric and cut in a simular shape till i got it. I used another kind outfit, in the size i needed to compare for size. Now i have a pattern to use.
Emily
Did you do a finished stitch around the dress? It kind of looks like it, but I don’t see it in your instructions.
Dana
Just made this, oh so cute dress for my premi granddaughter. Im using velcro dots instead of the snaps, so it can be easy to put on and take off. Thanks for sharing the pattern, I’ve been looking for it. My mother made them for me, now i can pass it on. Priceless…:)
Dawn
Thanks