

Hey y’all, welcome to February! This month’s theme is Rest, and so we’re kicking that off with a tutorial and pattern for these scalloped pajama shorts. I have been OBSESSED with vintage sheets lately – the pretty prints and the washed a thousand times softness. Plus you get a lot of fabric in each one; this project (including the top, which I’ll share next week) used barely half of this full sized sheet.
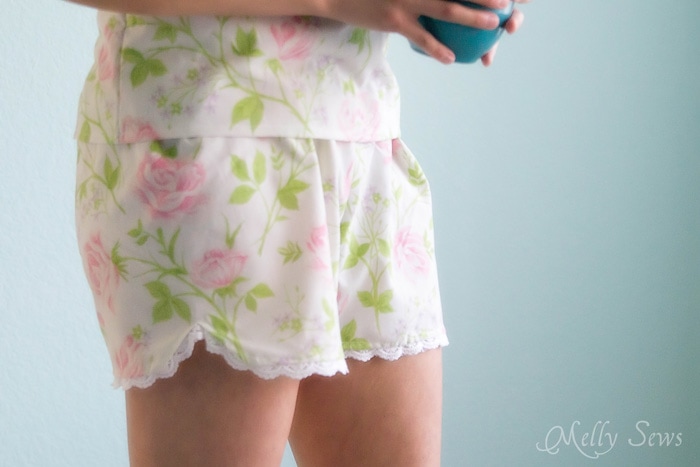
And what better way to use a super soft sheet than to make pajamas? I realize I make a lot of pajamas on this site, but 1) I really like to sleep and 2) with the unpredictable Texas weather, it’s important to me to have lots of pajama variations so I can be at the right sleeping temperature every night.

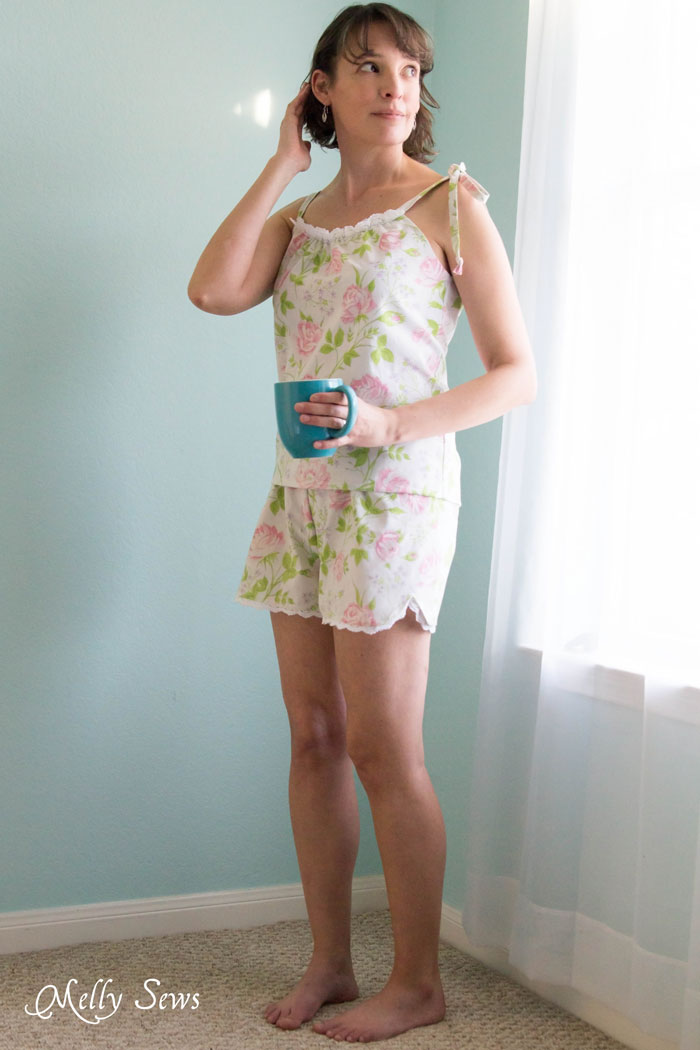
And I just love pretty details like that scallop edge and the lace peeking out.
To sew your own scalloped shorts you’ll need:
- The pattern
- Fabric – these shorts take about 1 yard of fabric
- About 1 yard of 1″ wide elastic – you’ll need enough to go around where you want the shorts to sit, which will probably be around 1″ below your belly button
- 1 1/2 yards of lace (optional)
How to Get the Pattern
This pattern is in a women’s size small, for hips up to 36″ and waist 28″. If you need to make the pattern bigger or smaller, check out this post. To get this pattern, click your preferred option from the buttons below as a newsletter subscriber or gallery access pass purchaser. Note that the free version of the pattern does not have printable instructions.
 |  |  |
Please note that all my free patterns are licensed for personal use only (no selling items made from this unless you purchase it) and by downloading you are agreeing to this license.
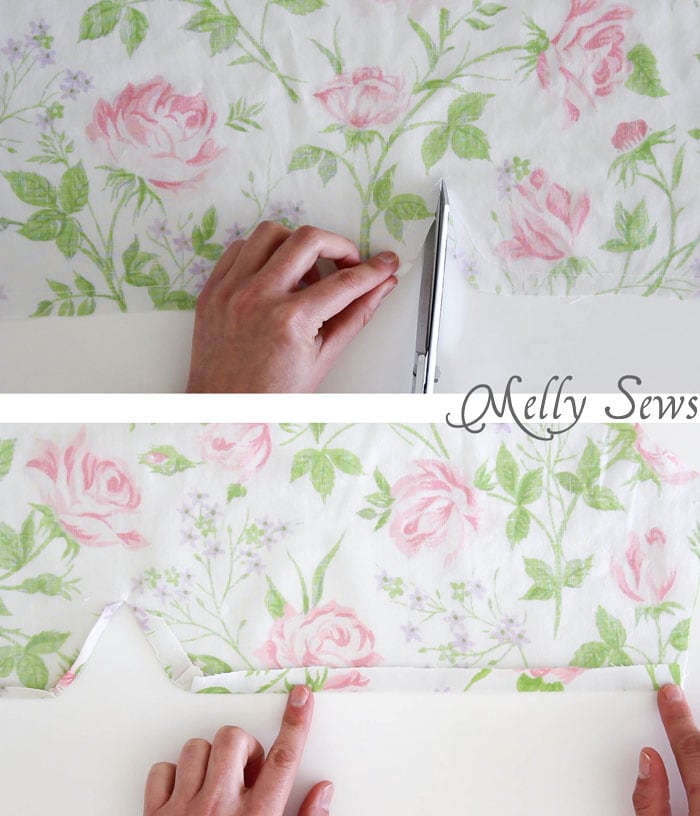
Cut your shorts pattern out, making sure to have 2 mirrored pieces so that you have a right and left leg.
I’ve got the video here to show you how to sew these, and if for some reason it doesn’t load you can also watch it on YouTube here. If you prefer the written tutorial, keep scrolling past the video to see it.
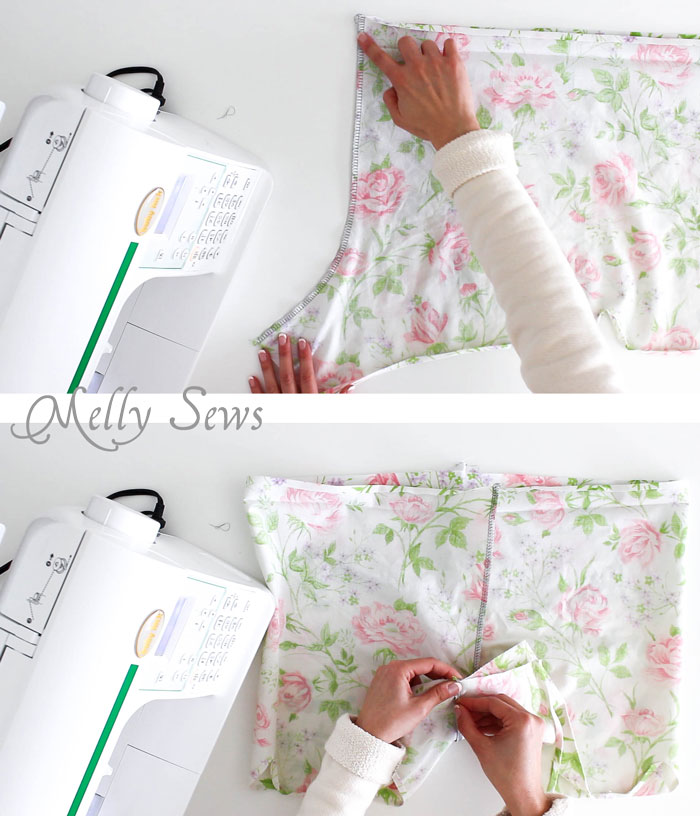
Before you start sewing pieces together, let’s do a little pre-prep. First, sew along the bottom edge of the shorts, 1/2 inch away from the bottom raw edge with a basting stitch. Then, cut the corner of the scallop up to, but not through, the stitching line.
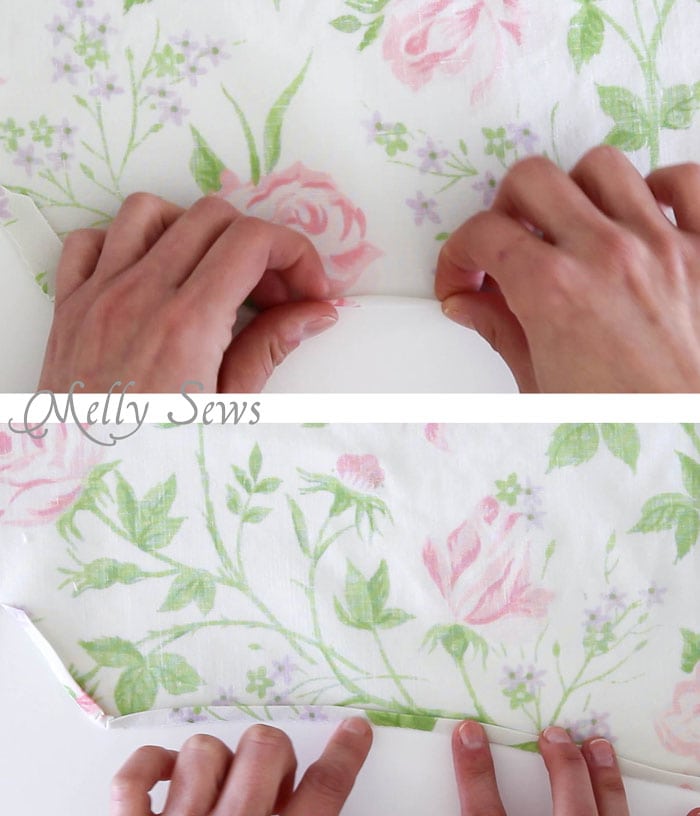
Press the edge up to the wrong side along the basting line as shown above. The fabric will pucker/wrinkle along the curve of the scallop – and that’s OK as long as the front side looks smooth.
Next, fold the raw edge in toward the basting line to create a very narrow hem.
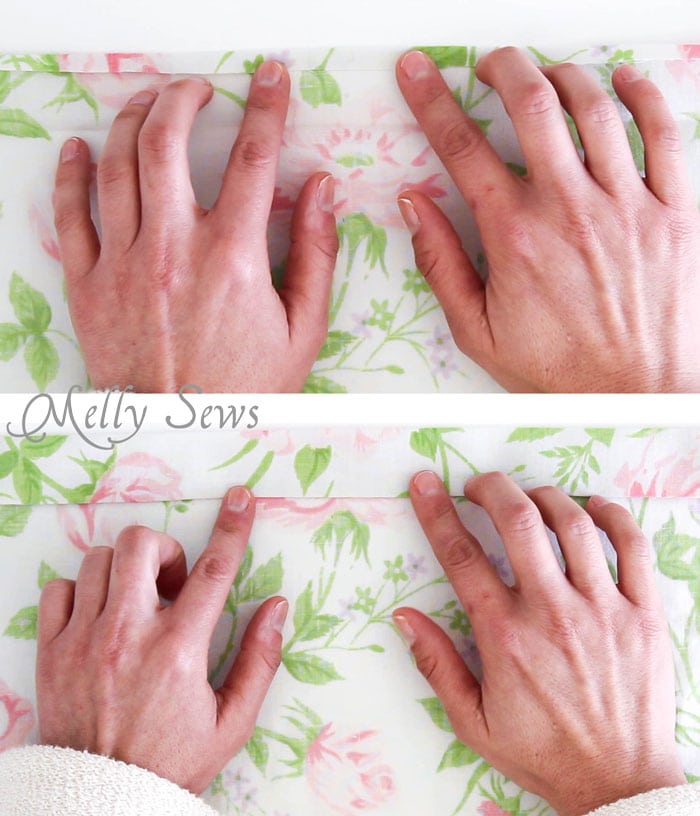
Press again to set your hem as shown above. Repeat this process on the other shorts piece.
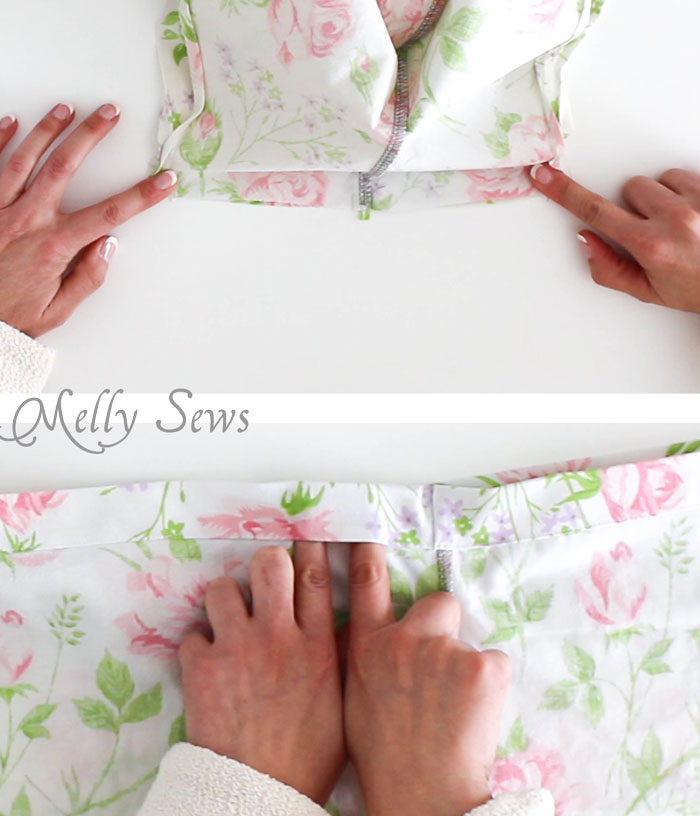
Now let’s pay attention to the top edge of the shorts. Press the top edge down 1/4 inch to the wrong side as shown below.
Then press the edge down again 1 1/4 inch. This pre-pressing will help you easily fold the casing later. Make sure to repeat on the other piece.
Place the two shorts pieces right sides together and sew the front and back rise, unfolding the pressed top edge. The back rise is shown below. Finish this seam. (Need help with seam finishes? Check this post.)
Fold the shorts so that the seams are on top of each other. This will allow you to match the seams at the inseam as show above. Press the seam allowances on one side one way, and the seam allowances on the other side the other way as you match them.
Stitch across the inseam, unfolding the pre-pressed edges. Finish this seam.
Fold the casing back down, making sure that all seam allowances are folded in the same direction (see the video for clarification if this doesn’t make sense). Pin, then sew close to the bottom folded edge, leaving a gap to insert the elastic.
Measure around your waist where you want the shorts to sit and cut the elastic to that length. Insert through the casing, using a safety pin.
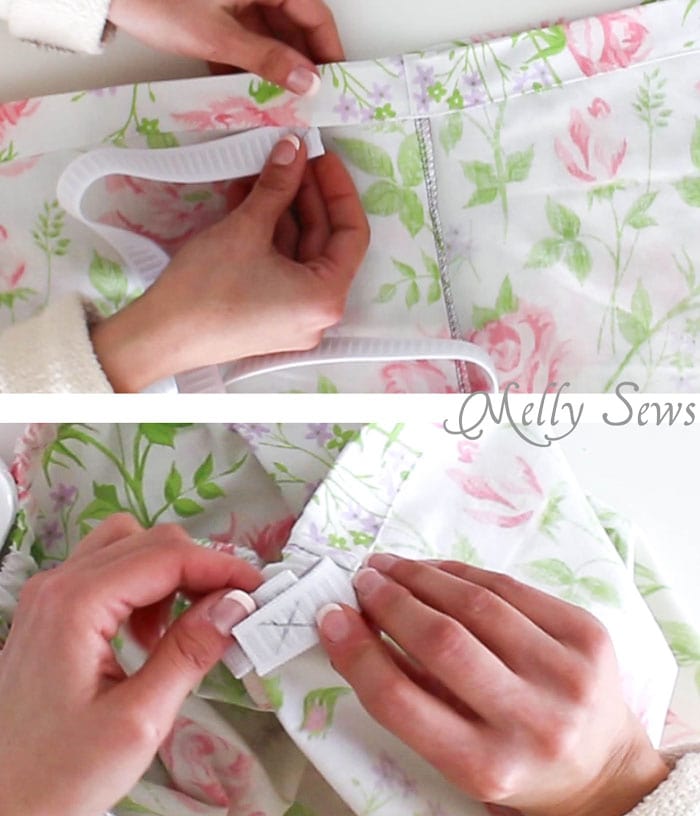
Make sure not to twist the elastic (I like to mark Xs on the side that should be facing up to make it easy to tell) and then place one end on top of the other. Sew a box shape to secure the two ends together, then sew the gap in the casing closed.
Pull the waistband to distribute the elastic evenly.

Pin lace to the wrong side of each leg, starting at the inseam. At the scallop, pin to the point, then fold the lace so that you can start pinning down the next edge. (This may make more sense if you see it in the video.)
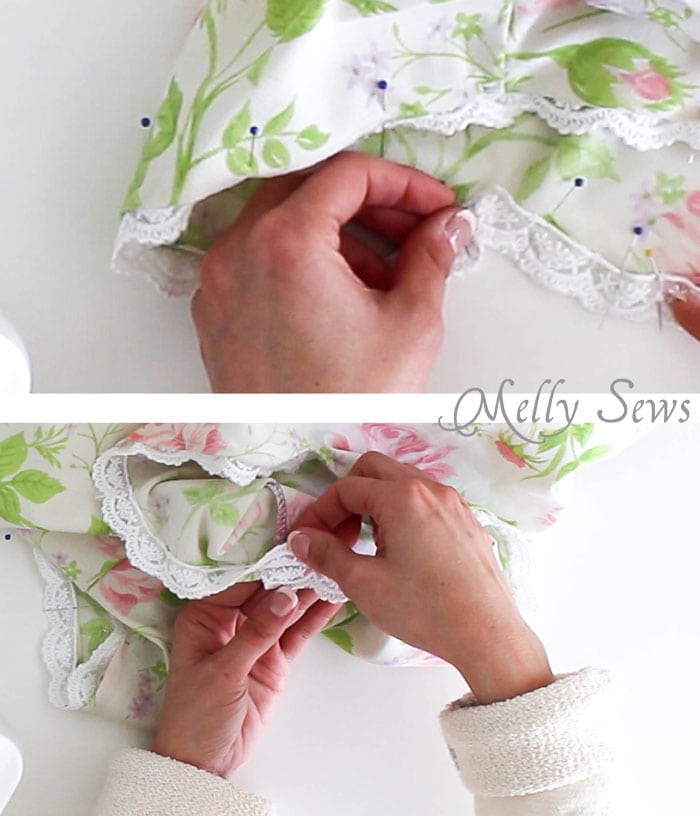
When you get back around to the inseam, overlap the lace before cutting. Then stitch the lace in place, securing the lace and the hem at the same time.

Make the top that I’m wearing with these shorts! Click below for more!

Kristie
Way cute! Now if there wasn’t a foot of snow on the ground. And if I was a size small. Thanks for sharing!
Myasmom
I LOVE THIS! Definitely making a set for myself! And a set for my sister and daughter!
Chelle
You have the CUTEST legs!! I’m going to make a set! I will NOT look as cutesy in mine but they WILL be comfy, I’m sure! Wish me luck in finding an awesome vintage sheet!
I’m off to the Goodwill to search now! TFS a bit of your AWESOMNESS!!!
Elizabeth
Easy and beautiful!! Thanks for this post. Lovely fabric by the way….
Lynn
Melly, you’ve done it again! These are so cute and feminine… Thanks! 🙂 Happy Valentines <3 <3
Karen
Hi Melissa, thank you so much for sharing this lovely pattern. I sized it up to a medium and made the shorts from a pretty white fabric. Your video was so helpful and they turned out beautifully.
Lauren
Thanks for the great tutorial and pattern. I came across the pattern again after making these several years ago and they are still a quick and easy make!