
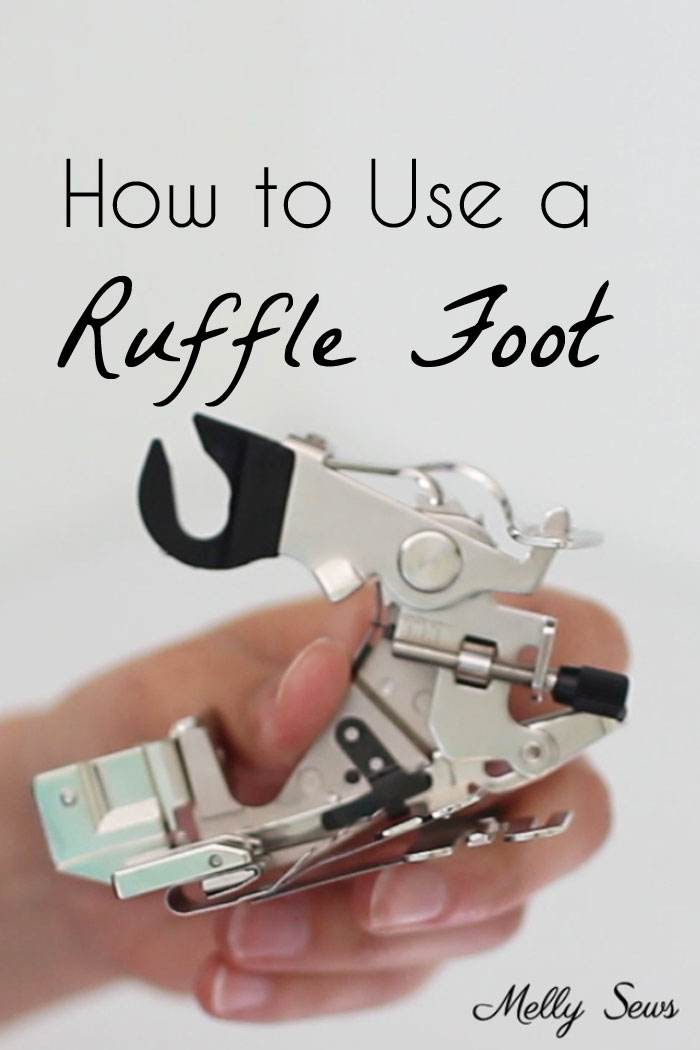
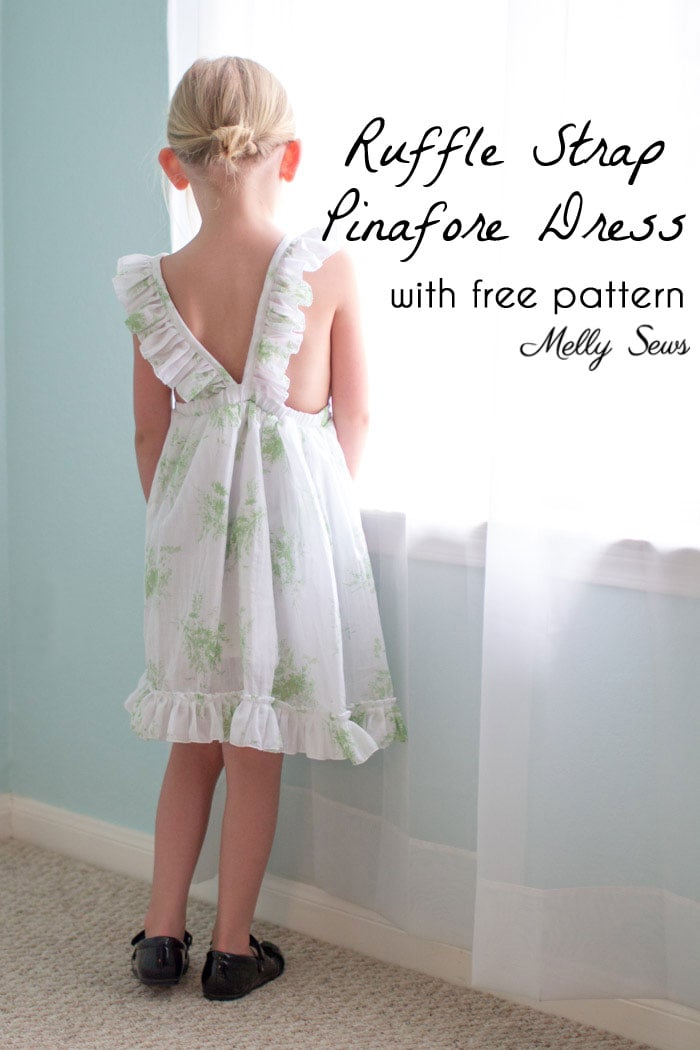
Hey y’all – today we’re going to take a brief departure from specific sundress posts, so that I can instead cover a specific technique that I used on the Ruffle Strap Pinafore dress shown below, and is useful on so many other dresses, and that is how to use a ruffle foot to make your own ruffle trim.
Ruffle feet typically have notches on the end than indicate different frequency of tucks to create the ruffles. The star symbol usually means that no ruffles will be created. The other numbers refer to how many stitches between tucks. So for example, 12 means that every 12 stitches there will be a tuck.
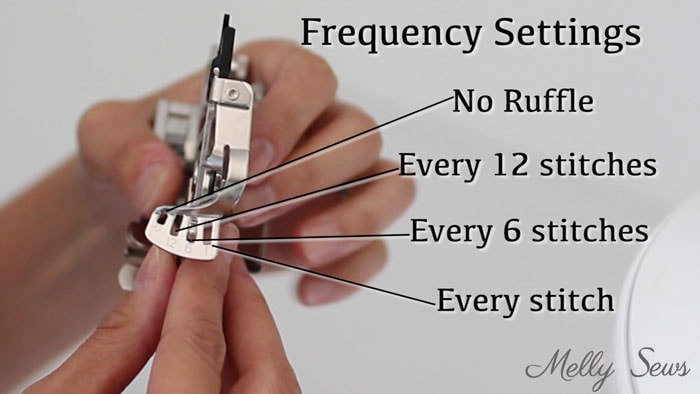
One of the questions I get is how to figure out how much fabric you need to have before ruffling to get the length of ruffle you want. These frequency numbers are the key to figuring that out. So for example, if it tucks 1/2 inch every 12 stitches, and your stitches are 4mm long, you just need to know your desired finished length and you have all the numbers you need to figure out how much fabric to start with. Or you could just do what I do, which is cut 2-3 times more fabric than I think I’ll need, and start ruffling, so that I can cut off the ruffle to size and save the rest for another project.
When you install the ruffle foot, the claw looking piece goes around the screw that holds the needle in. Because of this, it can easily accidentally loosen a needle, so make sure your needle is on really tightly when you put the ruffle foot on. Also hand crank it without fabric to check the alignment and make sure your needle is not going to hit the plate on the ruffle foot when stitching.
The fabric goes through the foot where the red line is below, between the bottom plate and the tuck claw. You can actually ruffle and stitch your ruffle to your garment at the same time, if you place your garment on bottom below the plate, but I never do this because of the math mentioned above.
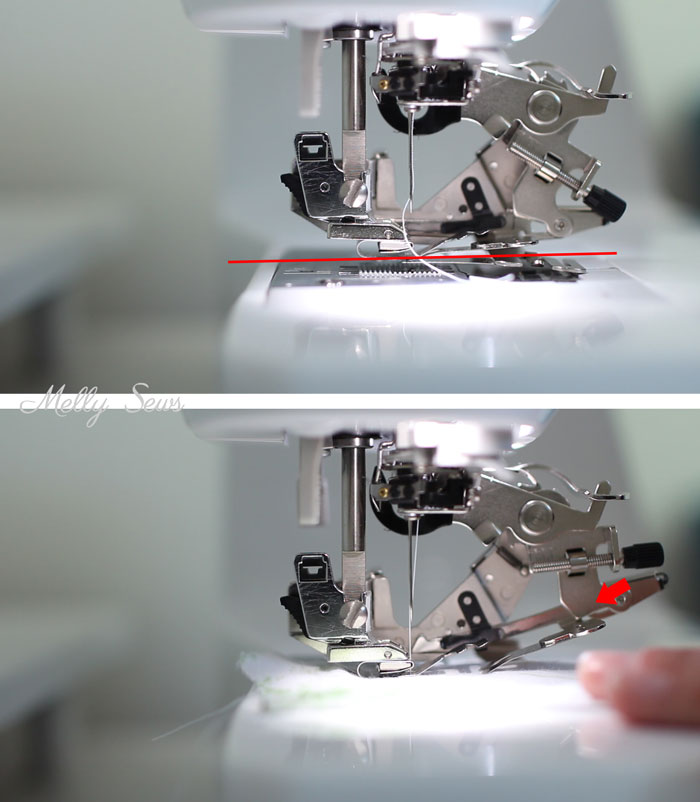
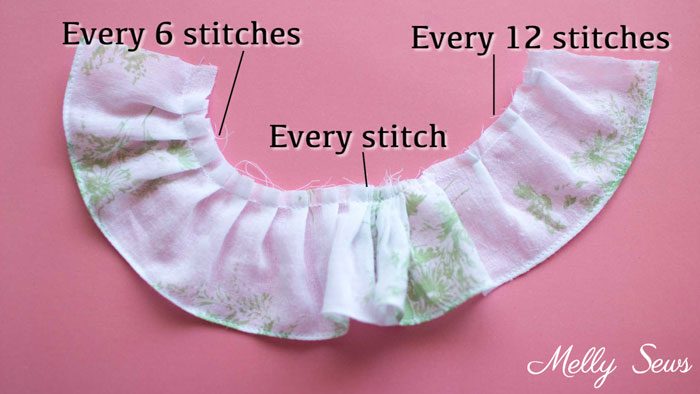
The tuck claw moves in the direction of the red arrow every however many stitches you have it set for. Below I’ve got a piece of ruffle that I ran with 3.5mm stitches and different settings on the foot. Generally I prefer the every 6 stitches setting, but there are times when every stitch or every 12 stitches makes more sense.
Here’s a video of the ruffle foot in action; if it won’t load below you can also watch on YouTube here
One final tip – hem the edges of your ruffle before feeding it through the ruffle foot. Usually I prefer a rolled hem for this.
Kristie
Thanks for the last picture. I need to make up a sample to help me wrap my head around that frequency idea. I really appreciate this post!
Sam J
We have a Singer machine for the last 32 years. Ever since we subscribed to your newsletter, we have used it more in a week than we ever had!!! Your instructions are very illustrative and clear. Please keep up the great work.
Mrs. & Mr. Big Fans 😊😊
Jane
You are incredibly generous with your knowledge and skills – Thank you so very much. I have about 4 ruffle makers – and am absolutely afraid to use them. I will take one out and give it a try.
Ellen
Thank you for these instructions. I’ve had a ruffler for years and never knew about the spacing, or even how to insert the fabric. Time to get it out & experiment!
Jane D'Alfonso
Thanks so much! Gonna invest in a ruffler.