
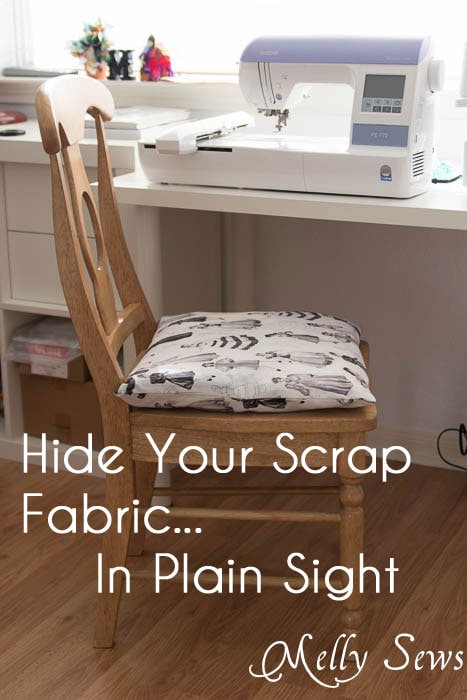
Hey y’all, today I’m sharing tips on how to optimize your images for Pinterest and make them more pinnable. I learned most of this in a session at SNAP last year. And as I was sitting in the session taking notes, I kept experiencing what I call “duh” moments. Like why didn’t I think of that? But the truth is, I didn’t analyze what was right in front of me until someone pointed it out. Many of you may already know these things, but I also see a lot of blogs I read not doing these things, so I want to give everyone an opportunity to have your own “duh” moment.
Make your images more pinnable in 5 easy steps:
-
Have a great image
-
Put it on top of the post
-
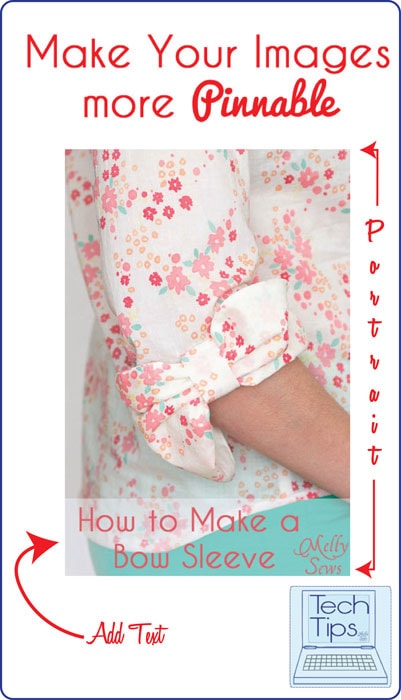
Make sure it’s portrait, not square or landscape
-
Add text
-
Optimize with alt tags
Let’s talk more about each of these steps.
Start with a great image
This one I expect you know if you write a blog at all – you’re striving to make your images the best they can be. So I’m not going to go into much detail here, but I will share this funny photo – this is what I had to do
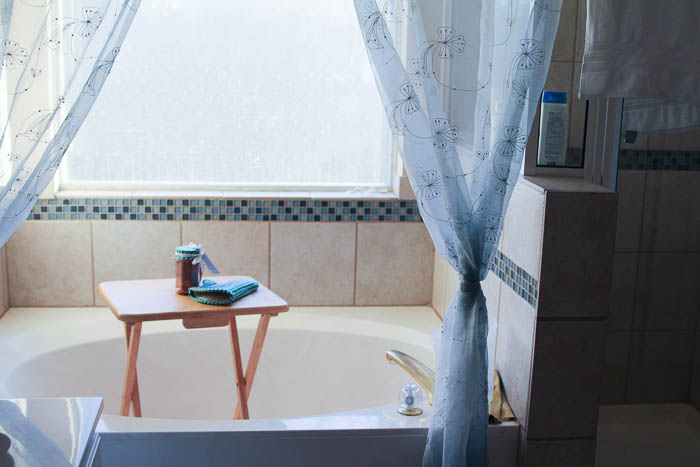
to get this image:

Yup, the only good light in my house at the point I had to take that photo was in my bathtub. Do what you gotta do.
And if you’re looking to improve your photography, I highly recommend both the Mamarazzi series on Delia Creates and the Photography posts by It’s Always Autumn.
Also, make sure your image is size optimized for the web – read this post on Image Sizes for more.
Put Your Pinnable Image at the Top of Your Post
When people use the Pin It button from their computer, they don’t want to look through tons of images. Make sure your pinnable image is at the top of your post so it shows up first or near first when they hit that Pin It button.
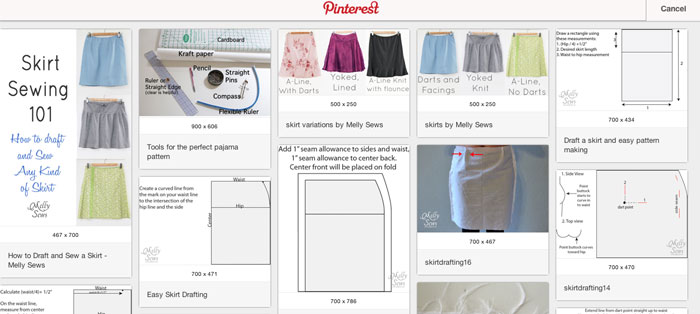
Make Sure Your Image is Portrait
This was my biggest “duh” moment. The way pins are formatted, a portrait style photo will take more visual space on the page. More visual space=more likely to be seen=more likely to be pinned. Here’s a screenshot from my Pinterest board so you can see what I mean.

What if you have an old post with square or landscape images? These are easy to update. Collage your images onto a portrait background, and voila! Pinterest optimized.
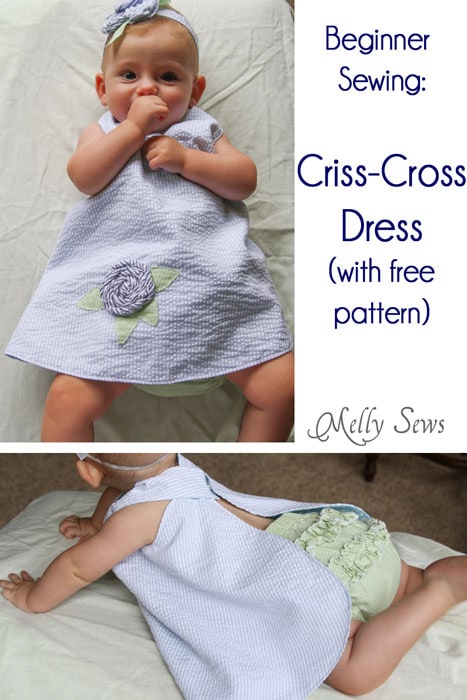
Add Text
When people are pinning tutorials, they like to know what the tutorial will show them how to do. If it has a free pattern or printable component, all the better. So add text to your top photo that tells them what your tutorial will share.
Optimize Your Images with Alt Tags
Alt tags allow you to customize the text that appears when someone uses the Pin It button on their computer to pin an image from your site. I have a whole tutorial here on how to do this in both Blogger and WordPress.
Follow those 5 easy steps and watch your images get repinned more!
Annika
Thanks Melly, used your tips right away for my post for the roots sewing series tomorrow…
Christie
Thanks for these! I have a problem with the vertical pics because if I size them as big as I’d like them to, blogger publishes them blurry which is really frustrating to me. But the tips is great, nonetheless. Switching to WP might be in order :).
Christie
Oy, the tips *ARE* great. Sorry about that!
Tasha
Great tips! I’ve been working on some of this (need to check into the alt tags) and have already seen a jump in Pinterest traffic.
Laura J.
You’re so smart. I don’t blog, but I read a lot of blogs and pin a lot of projects. It is just so much easier to actually USE pins when bloggers put their name & the name of the project on the actual picture.
Ajaire
Thanks for the tips! I definitely hadn’t thought of the portrait one 🙂
Stephanie
Thanks for these! I didn’t know that about the alt text, going back and fixing my photos now 🙂
justine
Thanks for the great tips Melissa!
Patricia
Thank you for the tips! 🙂 going to use some!
Rachel
I always love the “want to know what was really happening” pull back on a picture. It makes me feel less crazy when I’m taking pictures in my own tub haha