
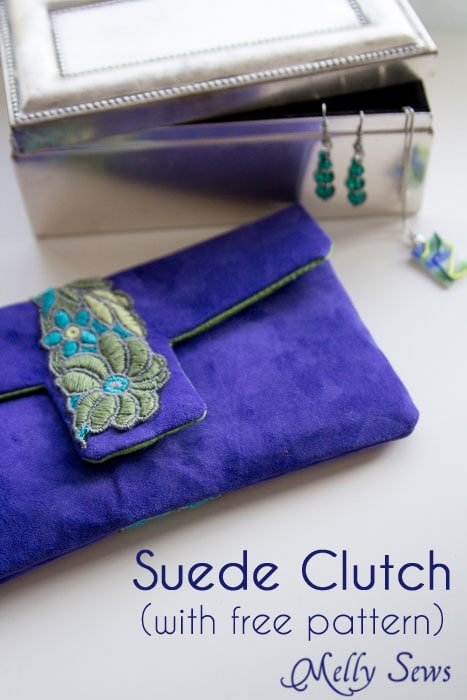
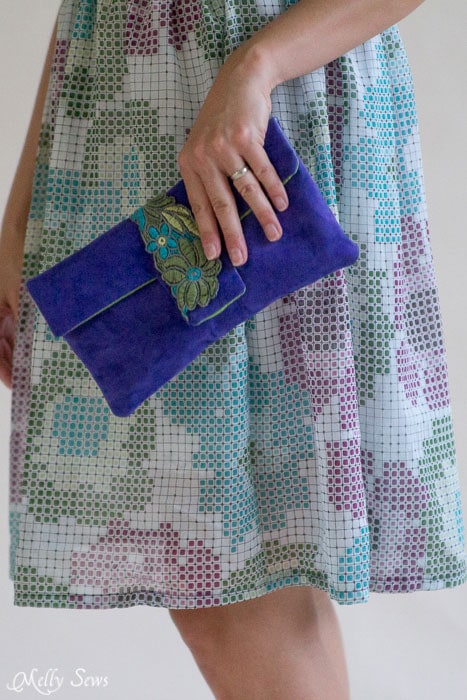
Hey y’all – this is my last tutorial for Accessories Month here on the blog, and I’m sharing this suede clutch tutorial with a FREE PATTERN! If you’re a subscriber to my weekly newsletter you got your pattern email this morning.
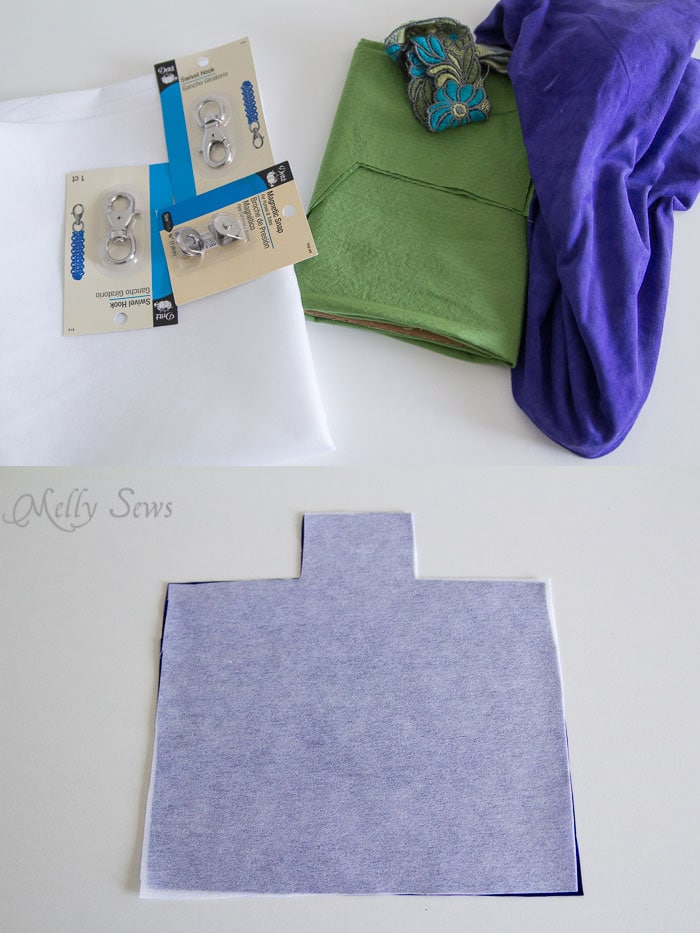
Alright, so let’s sew this clutch up. I have had this suede on hand (ordered from Michael Levine Low Price Fabric) for quite a while, but you don’t have to use suede to make this. Your complete materials list:
- Outer fabric (10″ wide by 17″ long minimum – which means you can use a fat quarter!)
- Inner fabric (same measurements as outer)
- Medium to heavy fusible interfacing (same measurements as inner and outer)
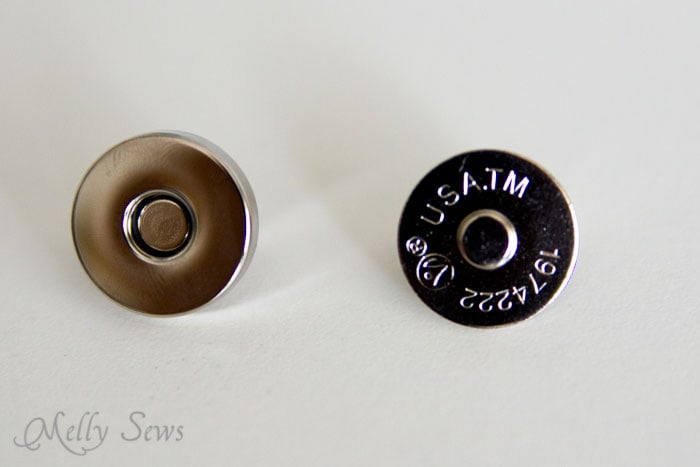
- A magnetic purse snap (affiliate link)
- Two swivel hooks (affiliate link)
- Trim to embellish (I got this trim at Joann Fabrics)
- Invisible Thread (optional)
- The pattern, see below
How to Get the Clutch Pattern
To get this pattern, click your preferred option from the buttons below as a newsletter subscriber or gallery access pass purchaser. Note that the free version of the pattern does not have printable instructions.
 |  |  |
Please note that all my free patterns are licensed for personal use only (no selling items made from this unless you purchase it) and by downloading you are agreeing to this license.
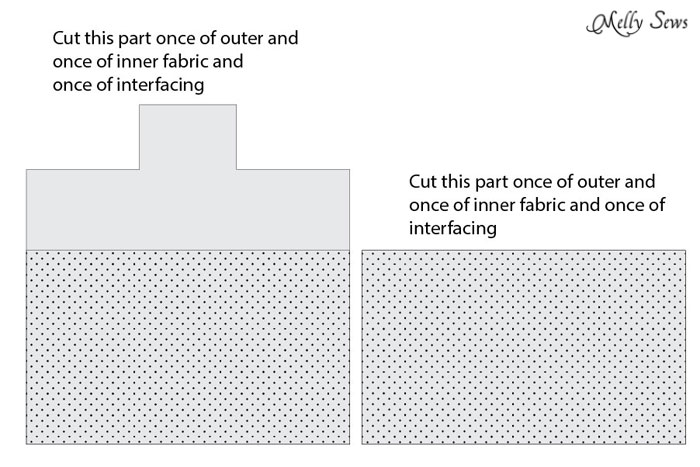
Assemble your pattern by taping the two sheets of paper together so that the gray parts bump against each other. And just in case you’re confused about the cutting directions, here’s another explanation:
And one more thing – if you’re using a fabric that frays, cut your loops 2″ wide instead of 3/4″ wide.
Now – I fused my interfacing directly to the back of my suede (outer fabric) pieces. DON’T DO THIS WITHOUT TESTING ON A SCRAP FIRST! It worked fine to do this with my suede on medium heat with no steam, but I tested on a scrap first. Obviously if you’re using fabric instead of suede, this is not an issue.
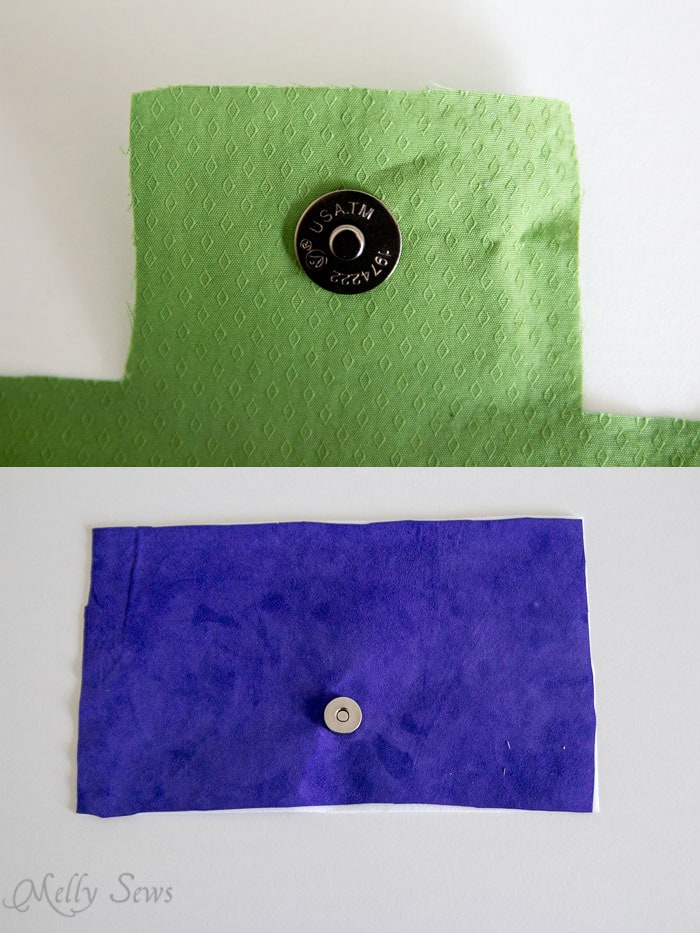
Next we need to install the snap. You’ll notice when you take your snap out of its packaging that there is an “innie” (left) and an “outie” (right) side.
Start with the inner fabric and the outie side of the snap.
- Fuse some interfacing to the wrong side of the fabric behind where the clasp will go.
- Center the snap over the marking on the pattern and make two marks where the metal legs hit. Cut tiny slits, then push the legs of the clasp through.
- Place the metal piece over the clasp legs on the back side and bend the legs to hold this side of the clasp in place.
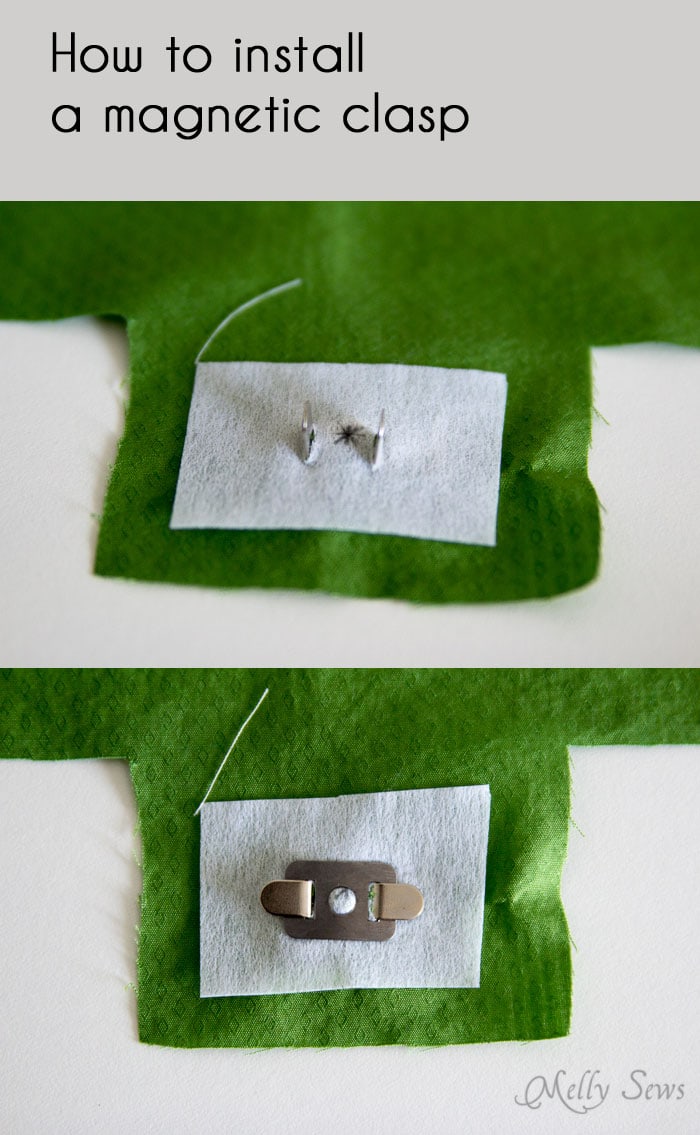
Repeat these instructions with the outer side of the fabric and the innie side of the clasp.
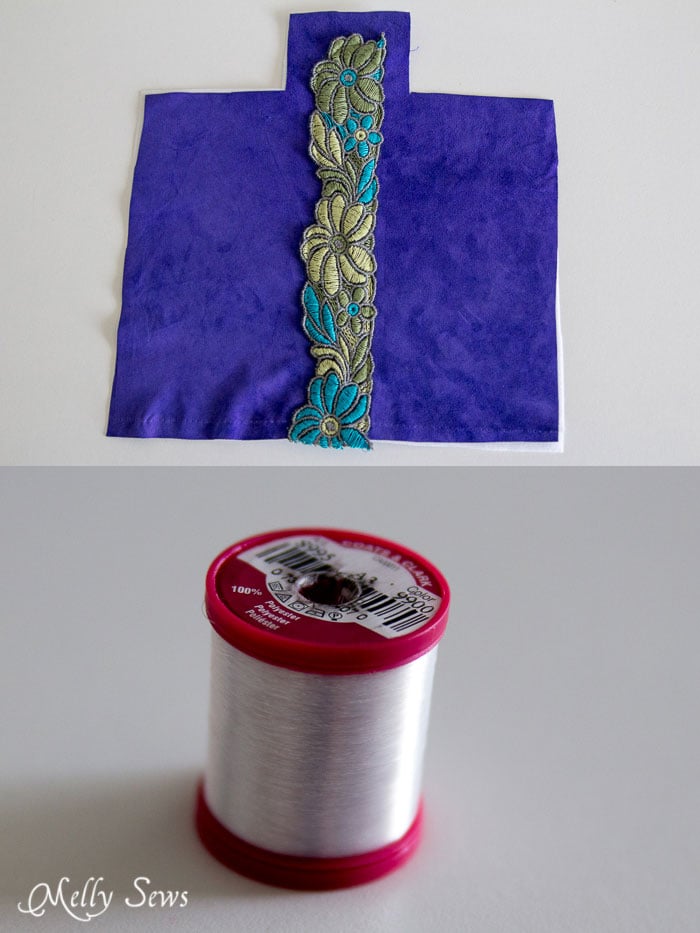
Next, sew your trim to the outer fabric as shown below. I used invisible thread in the upper thread and regular bobbin thread and just sewed the trim right on.
Next, fold your loops in half and stitch them to the outer fabric. They should be positioned 3 inches down from the corner and 3/4″ in from the edge. If you are sewing with fabric that frays, you’ll need to stitch your loops into tubes using a 1/4″ seam and then turning. Fold in half matching raw edges and then zig-zag to over those raw edges to attach the loops to the outer fabric.

Sew your two outer fabric pieces right sides together as shown above, using a 1/2″ seam allowance.
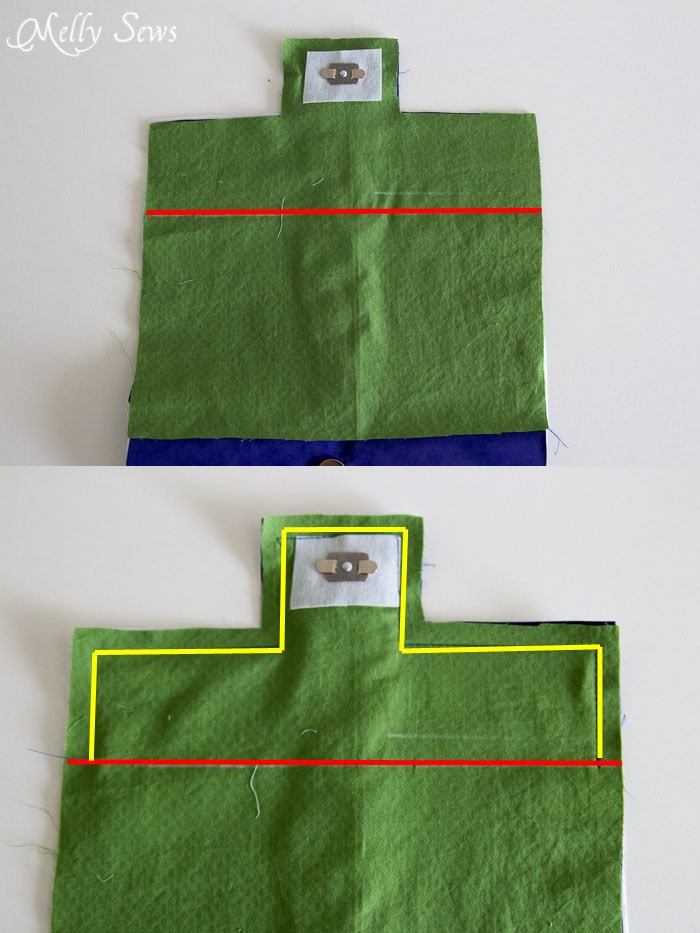
On your inner fabric piece, mark the flap fold line 2 1/2″ down from the outermost corners (red line below). Place your inner and outer fabric right sides together and stitch around the flap just to the flap fold line, backstitching at the beginning and end and stopping with the needle down at the corners to turn (yellow lines below)
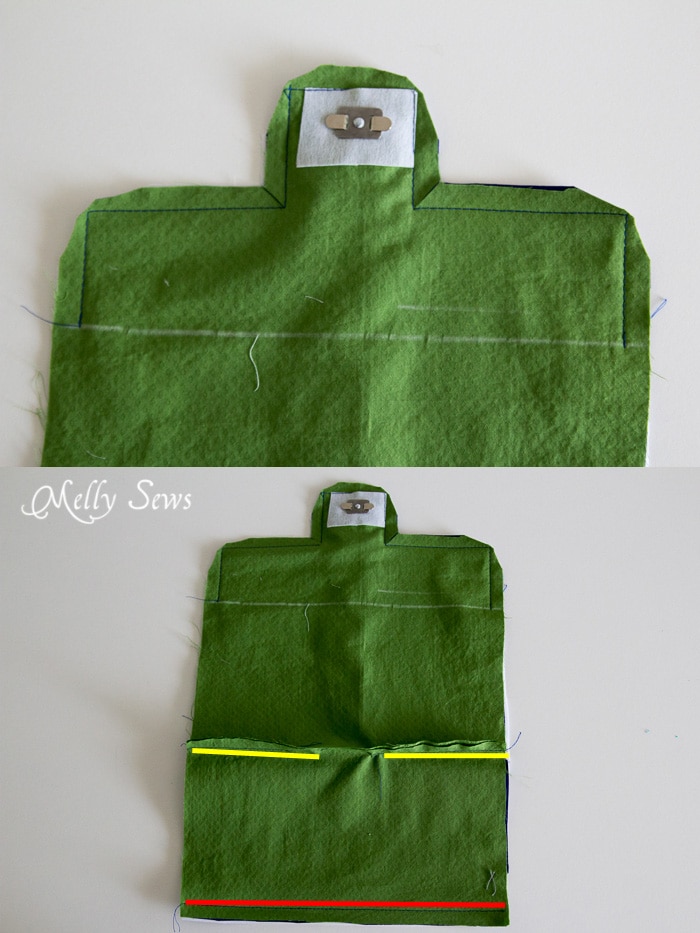
Clip the corners. Stitch the other inner fabric piece right sides together to the bottom of the one you just attached, but leave an opening in the middle (yellow line below). This will be used to turn the clutch right side out later.
Next, stitch the outer fabric to the inner lining across the bottommost edge – the red line below.
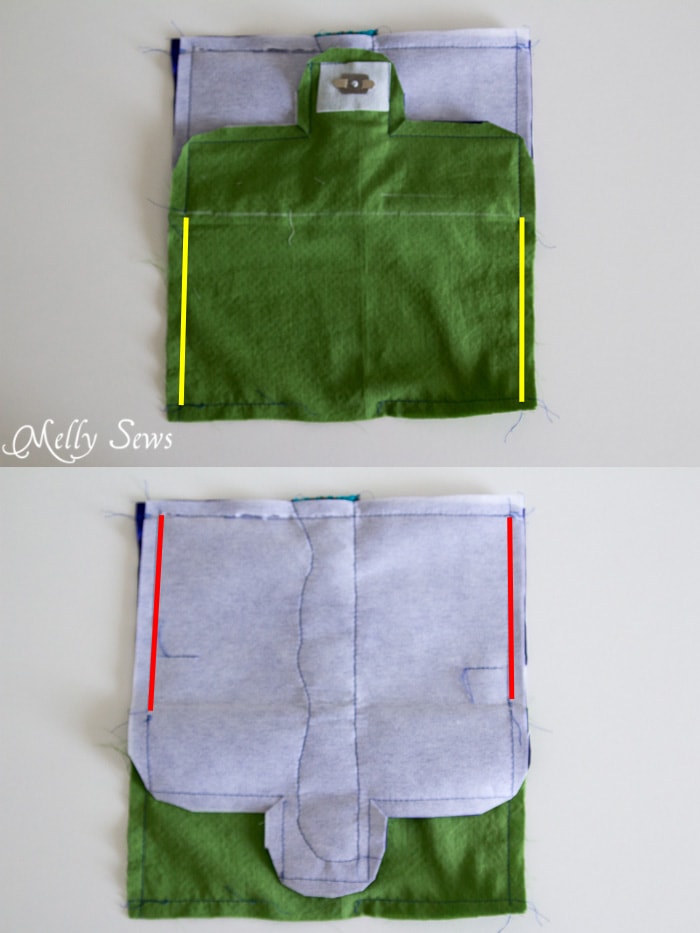
Now this is the trickiest part. Fold your clutch so that the inner fabric pieces are right sides together and the outer fabric pieces are right sides together, with the flap sticking out in the middle.
Sew the inner fabric pieces together across the side seams just to the flap (yellow lines below). Then fold the flap the other way and sew the side seams of the outer fabric just to the flap (red lines below).
Clip corners.
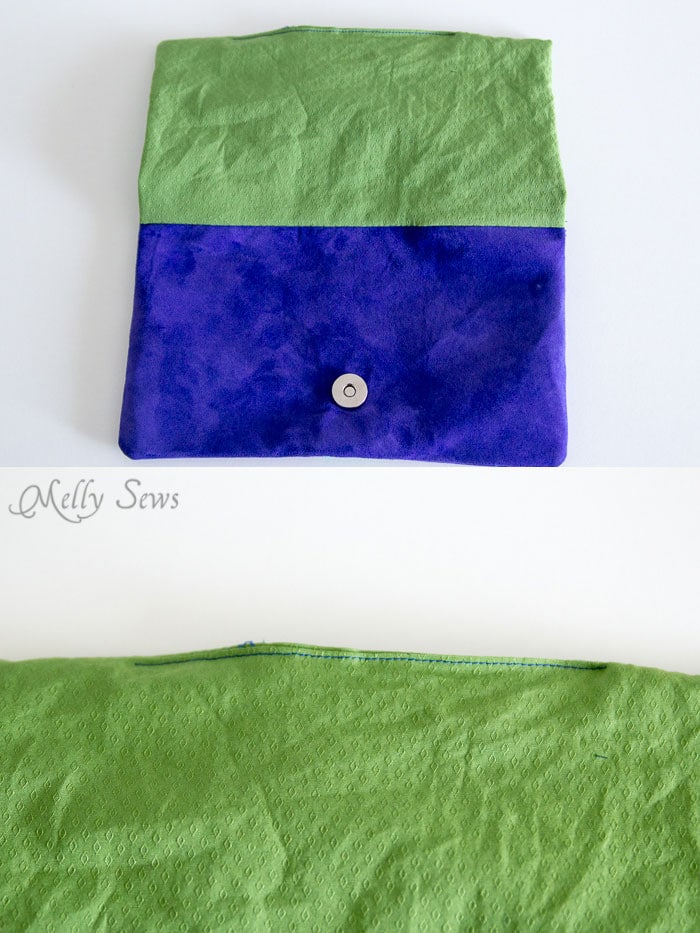
Turn your clutch right side out through the opening you left in the inner fabric. Stitch the opening closed. You can use a blind stitch, or you can just fold the raw edges to the inside and sew very close to the edge like I did. Because who’s really going to see that besides me? (Okay, and everyone reading this tutorial).
Tuck the inner fabric to the inside of the clutch. Press (if you’re using suede you may not need to press, and definitely don’t press suede without testing on a scrap and using a pressing cloth).
To make the strap, if you’re using suede press the two long edges 1/2″ in to the wrong side and stitch down each long edge, so all raw edges are enclosed. If you’re used regular fabric, fold right sides together matching the long edges and sew down the long edge to make a tube, then turn. Press and topstitch down each edge.
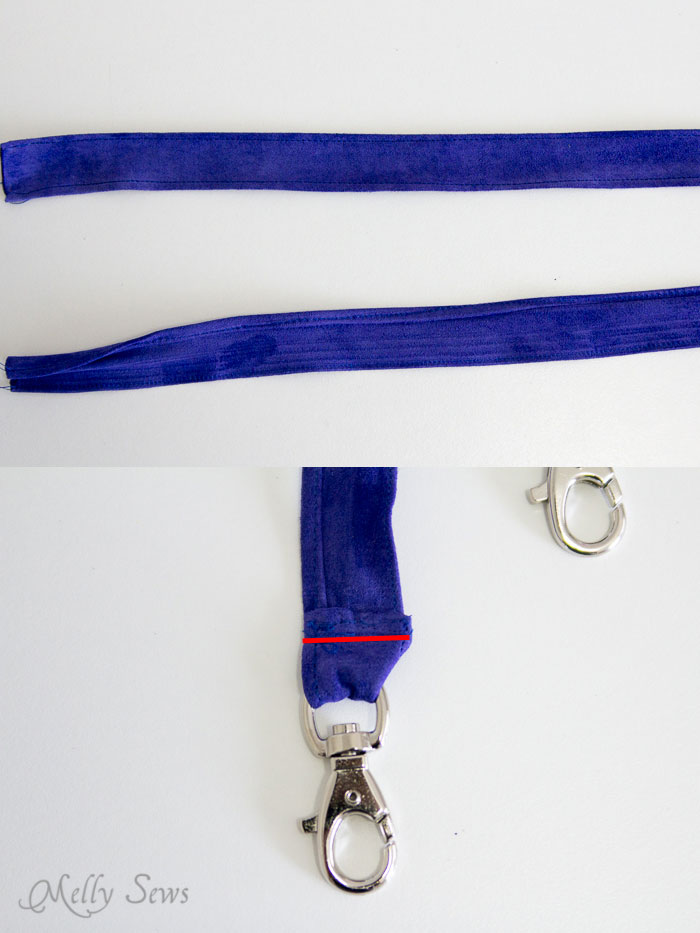
Thread the straps through the swivel hooks and stitch in place (red line). Tip: it might be easier to use a zipper foot here so your presser foot isn’t running into the swivel hook.
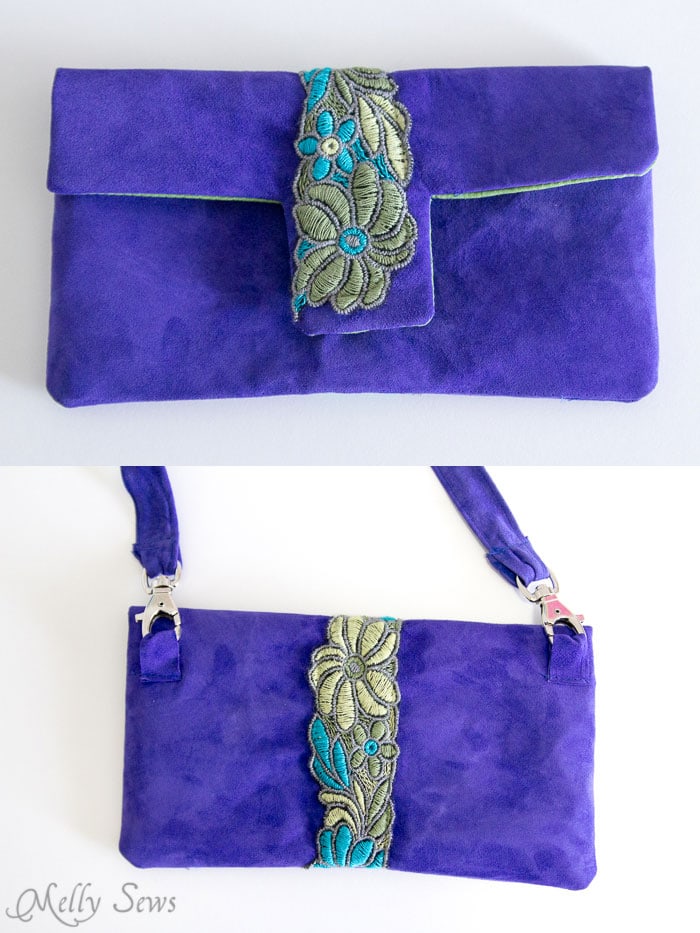
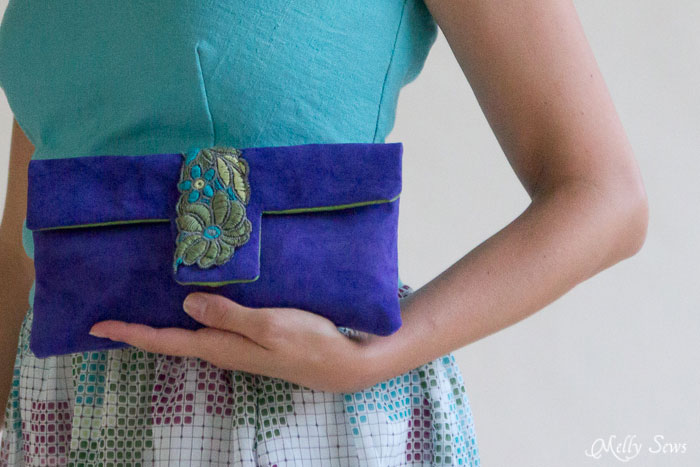
Tuck your straps in when you want to carry this like a clutch, or hook through the loops on the back side when you want to go hands free.
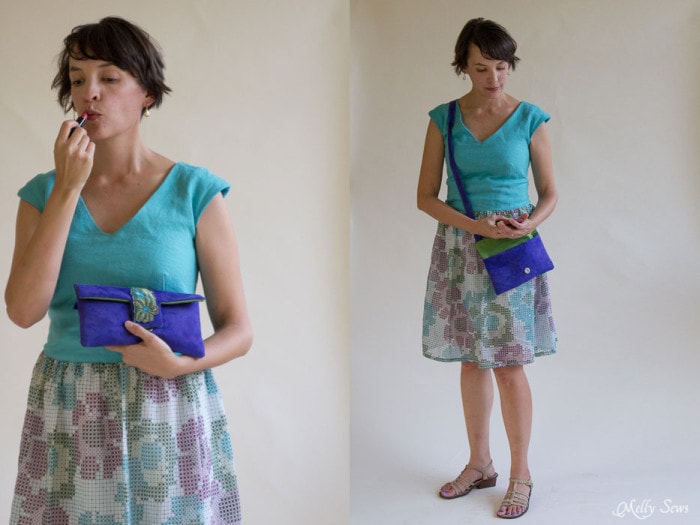
Incidentally, I’m wearing a Stepford Dress in these photos. Pattern by the Sewing Rabbit, available here.
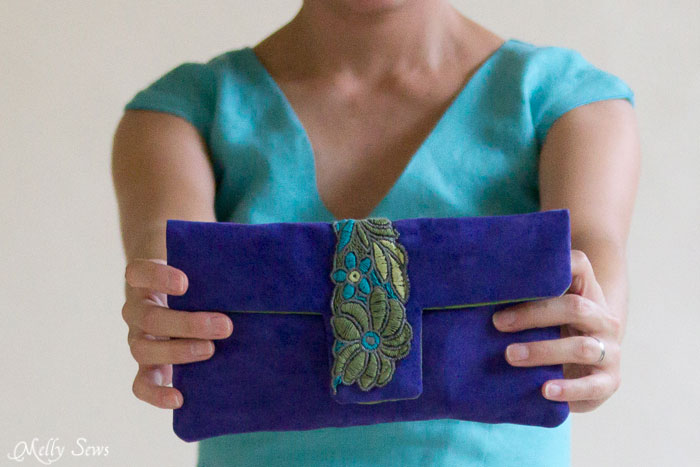
And use your clutch for all the essentials – you know, lipstick, your phone…
yvonne
This is so cute!!!!! And you look so cute carrying it. I love the colors, two of my favorites. I can’t wait to make this one. I’m not sure if I can get suede here, but I’m thinking, dupioni silk in those colors, I think that would be awesome! Thanks for sharing.
Dale
thank you so much for this little gift. So funny, i was just thinking yesterday how i needed a little clutch just like this 😀
Astrid
Its cute and simple…..thanks.
I will make it a whole lot bigger though.
Thanks so much!
Kristie
Thanks for sharing this. I am getting a new sister in law in a month, and this just might be the perfect wedding gift!
LOVE your dress, it is so pretty!
mellysue
this is so pretty! also love your skirt! if I owned it I would be tempted to stitch it,lol 😀 just followed you on instagram!
Christinawang
Such a cute clutch! Thankyou for sharing the pattern!
irene marie martinez
HI. thanks for the clutch pattern, its going to make a great holiday gift. Also, would you mind telling us what fabric you used for the dress. I ordered the patterns today, and want to make the dress soon. ( did you use knit for the bodice, and voile/silk/lawn?? for the skirt part?) many many thanks.. marie
Kay
Thanks for sharing this pattern and tutorial — I am going to make these for Christmas gifts for my daughters and friends! What type of needle did you use to sew the suede?
Melissa Mora
It was a regular 80/12 Universal needle. The suede was very thin, so it handled pretty much just like fabric.
Ginger
Cute!
Emily
very cute! thanks for the free pattern. I love the color of yours!
Danita
Thank you for this beautiful clutch! I have never tried suede before, but with your direction, I think I will!!!! 🙂 Thanks so much for sharing! Love your blog!!!
Anne
Beautiful!! I like the shape of the flap. I’ve linked to your free pattern on Craft Gossip:
http://sewing.craftgossip.com/free-pattern-suede-clutch-with-removable-straps/2014/09/05/
–Anne
Heather
Cute clutch! I’m going to make one for my cousin as a gift 🙂 I have a question about the strap though…. How long should I make it? And how long should the loops be for the hooks? This really wasn’t explained in the tutorial. Width yes, length no.
Melissa Mora
The dimensions for the loops and the strap are in the pattern when you print the pieces.
Heather
…. And now that you say that I looked & they are there. I’m blind! Thanks for pointing that out 🙂
Barbara
Waauw, this looks really Nice!! Thanks fot sharing!!