
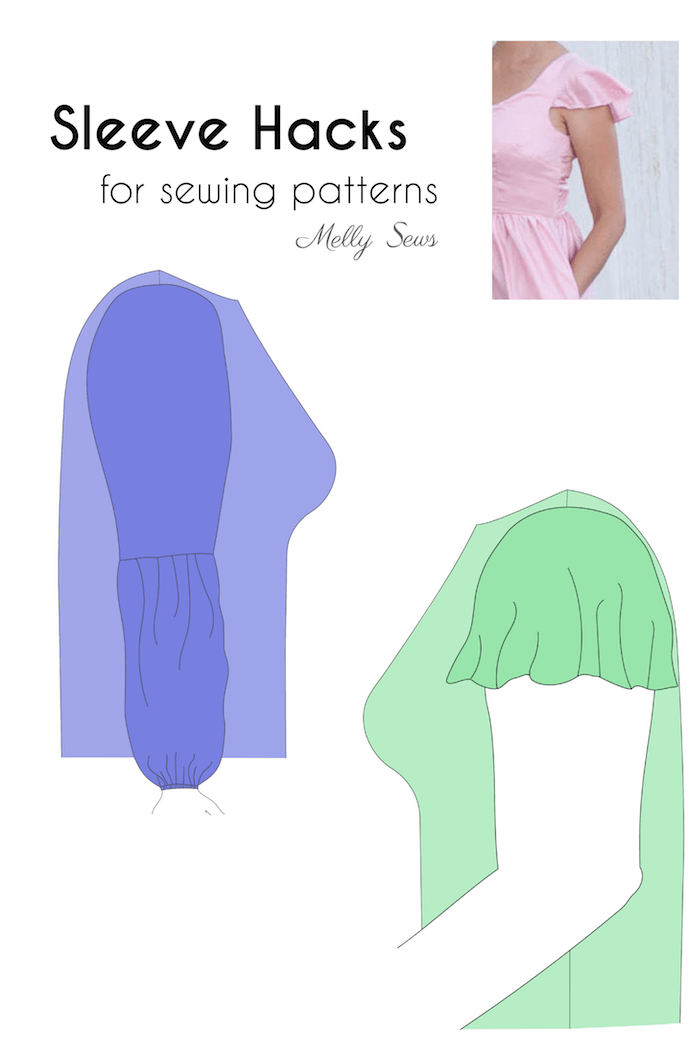
If you have a pattern for a top, t-shirt, or dress with a set-in sleeve, changing up the sleeve style is a really easy way to make it look completely different. And there are tons of different options. Today I’ll show you a couple of them.
First up we have the full short sleeve. I’ve seen this sleeve called a dozen different things, including a butterfly, flounce, circular, bell… I call it a butterfly sleeve. It works in either woven or knit. I like it best on a fabric with nice drape.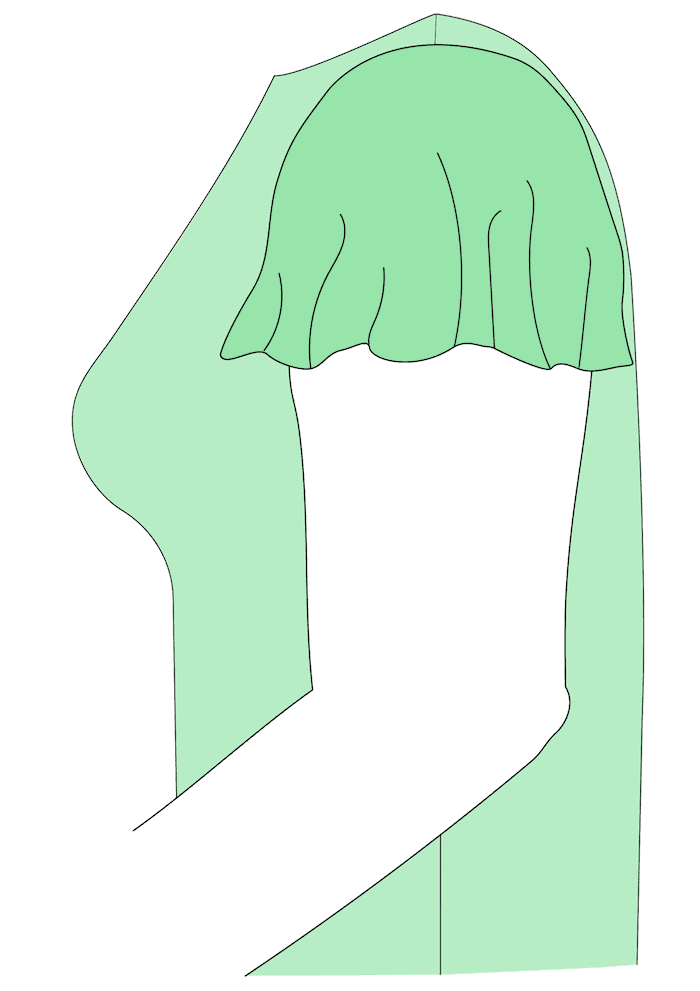
One important note on this first hack. These graphics assume no seam allowance on the sleeve pattern piece that’s being altered. You can either cut the seam allowance off first, or you can “hinge” from the seamline, instead of from the edge of the piece as shown. This is important because if you make these changes and ignore any seam allowances that are already there, your sleeve cap seamline will end up way too big for your armscye.
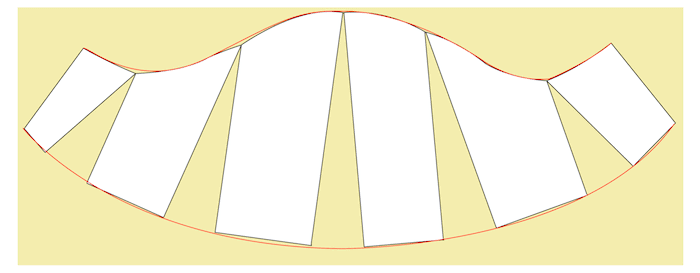
Start with the pattern piece for a short set-in sleeve, and draw 5 lines (parallel to the grainline) as shown below.
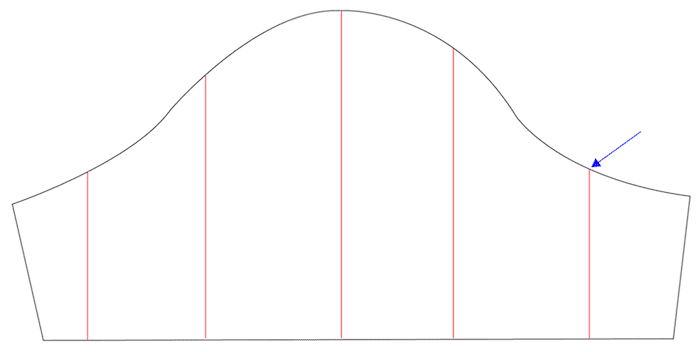
Cut along the lines, but not all the way through. Leave a small bit attached as a hinge at the top of each line (where the blue arrow is).
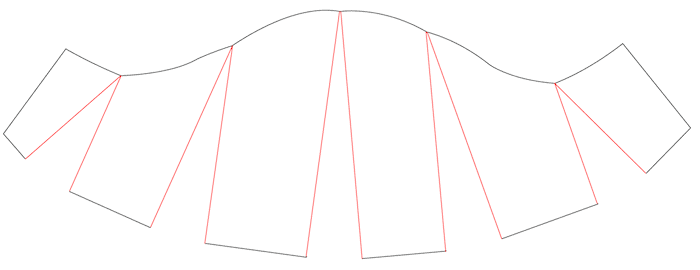
Decide how much flare you want your sleeve to have, then divide that by 5. Spread each of the 5 slashes evenly by this amount.
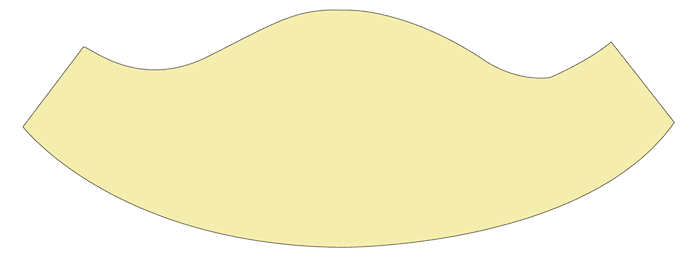
Put tracing or scrap paper underneath the pattern piece and tape it in place. True up the edges of the curves by smoothing them out, as shown with the red lines here. If you removed your seam allowances, add them back now before cutting out your pattern piece.
Your finished pattern piece will look similar to this. Don’t forget to mark the front/back of your sleeve. Install the sleeve into the armscye just as you would normally. When you hem a rounded edge like this, it can be helpful to make a basting stitch along the outside edge of the fabric so that you can ease it in when it’s pressed under.
Now let’s take a look at another sleeve style that goes by even more names, but we’ll call it a statement sleeve. This one is beautiful in a chiffon, rayon challis, or floaty gauze. In addition to your fabric, you’ll need about 1/2 yard of 1/4″-wide elastic.
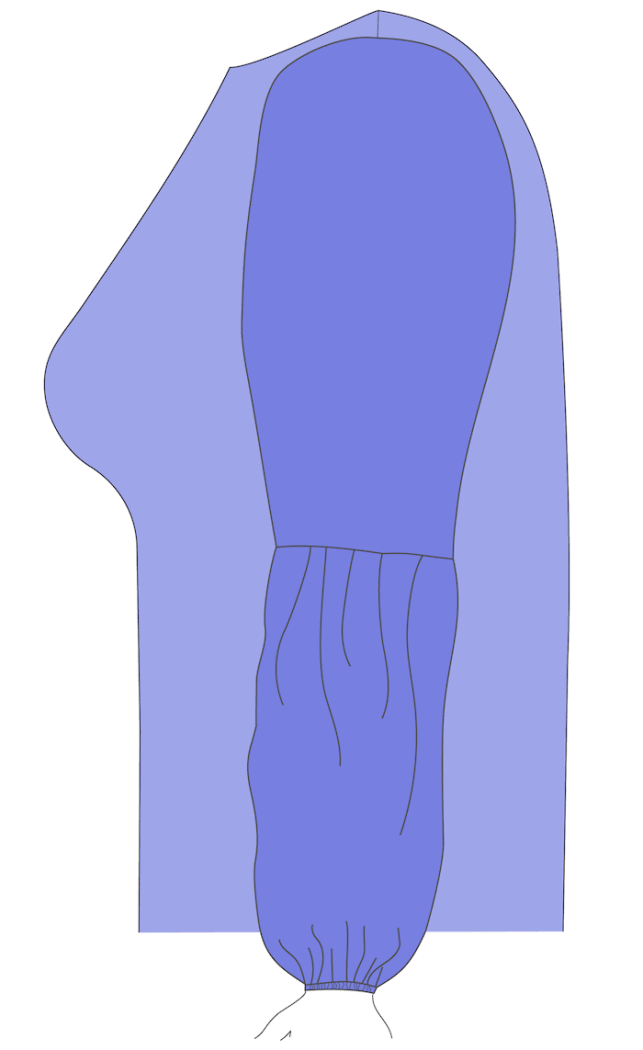
To start with, take your set-in sleeve pattern and trim or lengthen it to end right at your elbow.
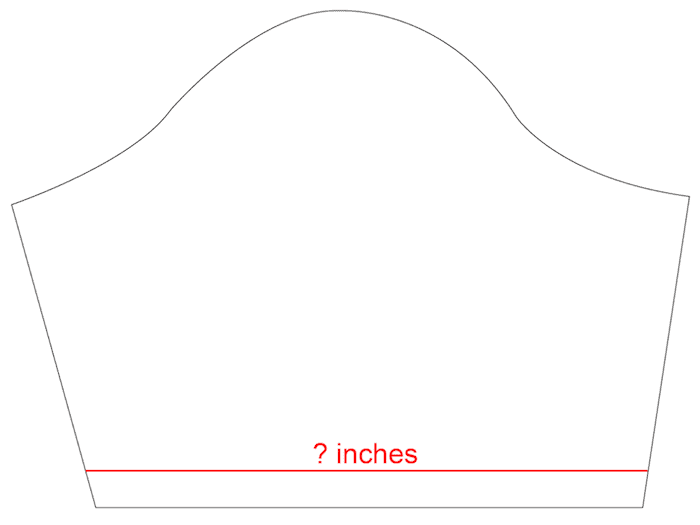
Measure the seamline at the bottom and make note of that amount.
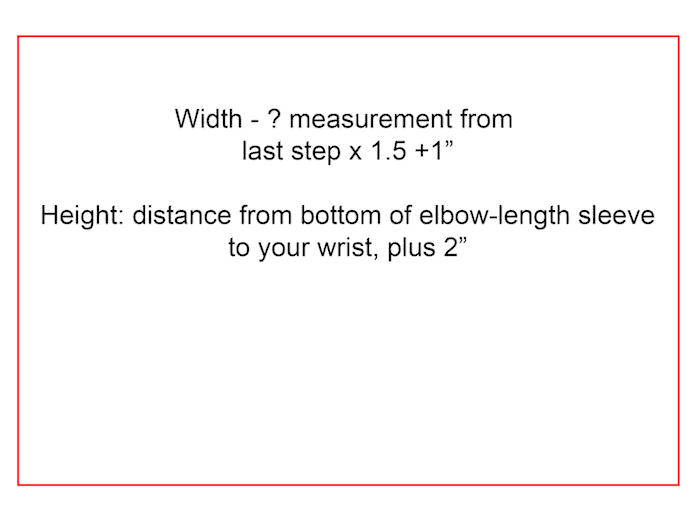
Cut a panel of fabric according to the formula above. I’m using a lower panel that’s 1.5 times the sleeve width, but you can make it however full you’d like. The 2″ added to the length will allow for your seam and hem allowances plus a little for “blousing.”
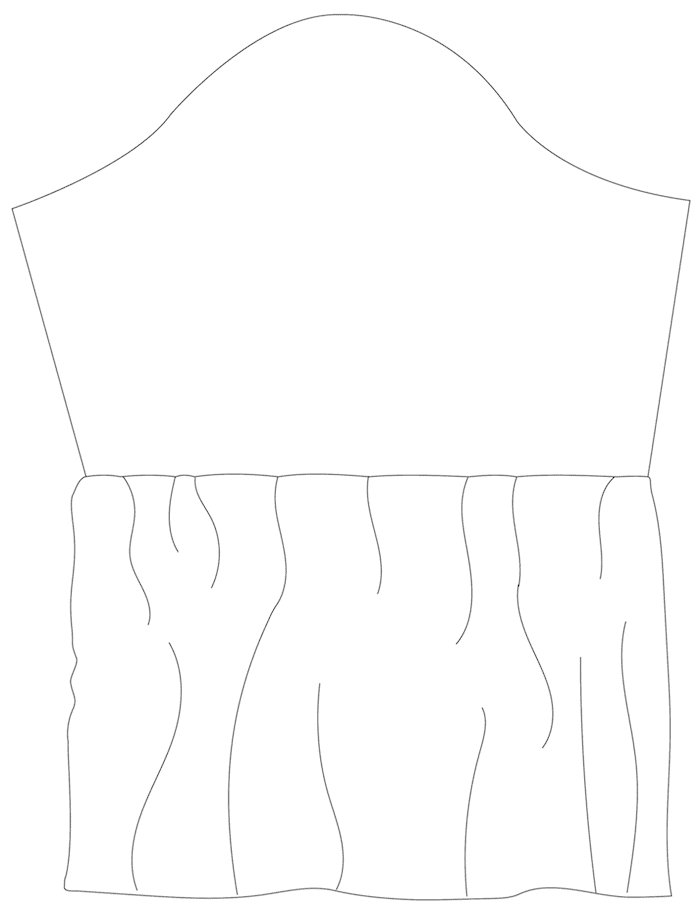
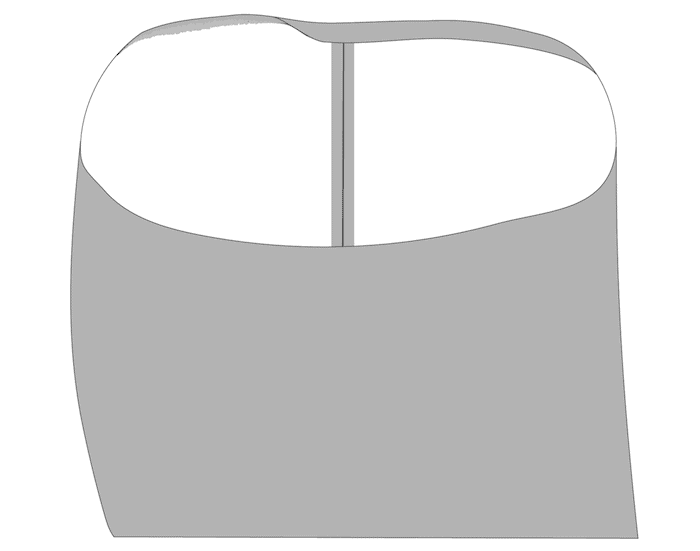
Stitch this panel to the lower edge of your sleeve and finish the seam. Set the sleeve into the armscye and stitch the underarm/side seam.
At the bottom of the assembled sleeve, turn under and press the fabric 1/4″ to the wrong side. Turn under and press another 1/2″.
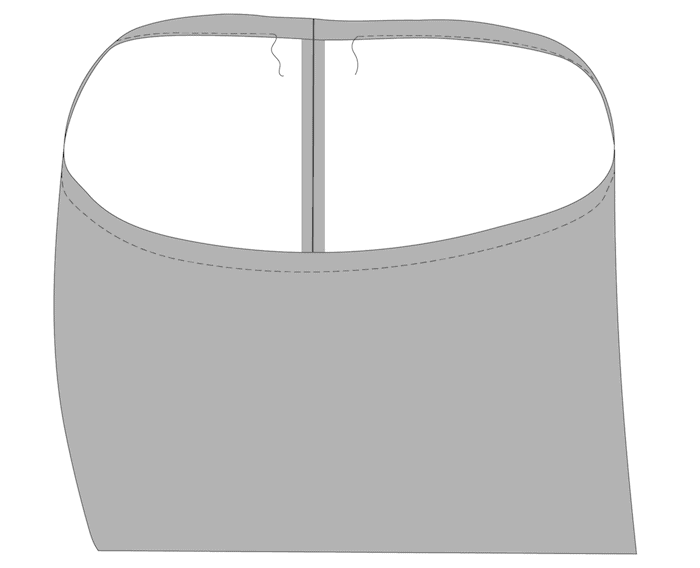
Stitch around close to the inside fold to form the casing, being sure to leave a couple-inch gap. Cut a piece of 1/4″ wide elastic the length of your wrist circumference + 1/2″. Thread your elastic through, overlap the ends 1/2″ and stitch together, then sew the casing gap closed.
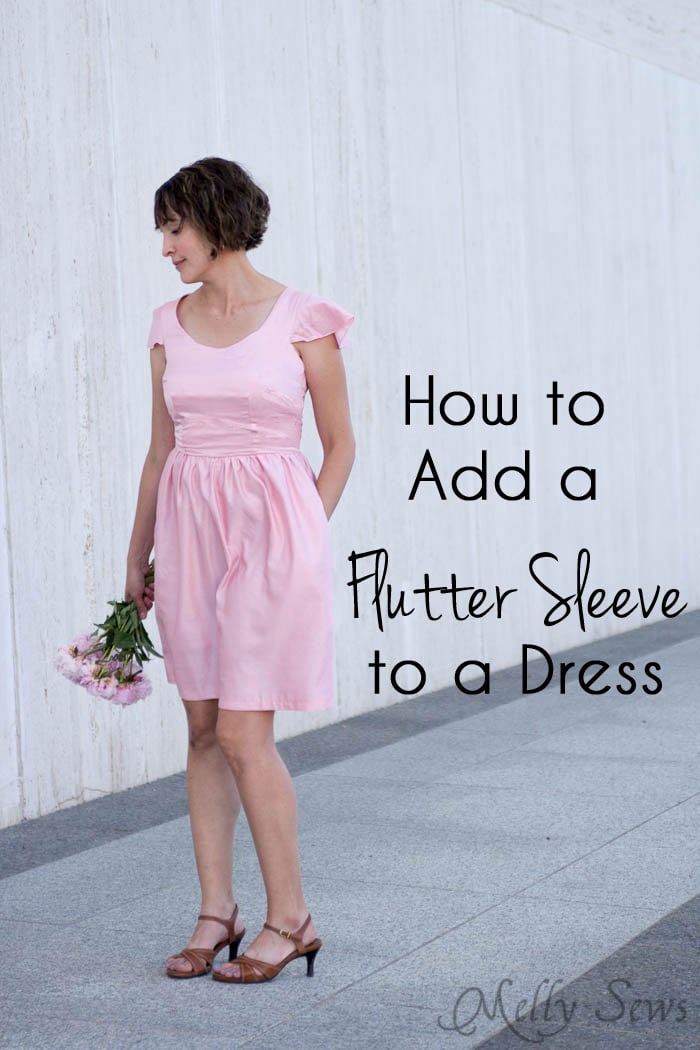
For another sleeve hack – adding a flutter sleeve to a sleeveless dress – check out this post.
Ann
What a great idea! I will be searching through my wardrobe to see which items I can bring back to life.