
See a detailed explanation of how thread tension works and how to get it right when sewing. Learn how to adjust your machine’s thread tension here.
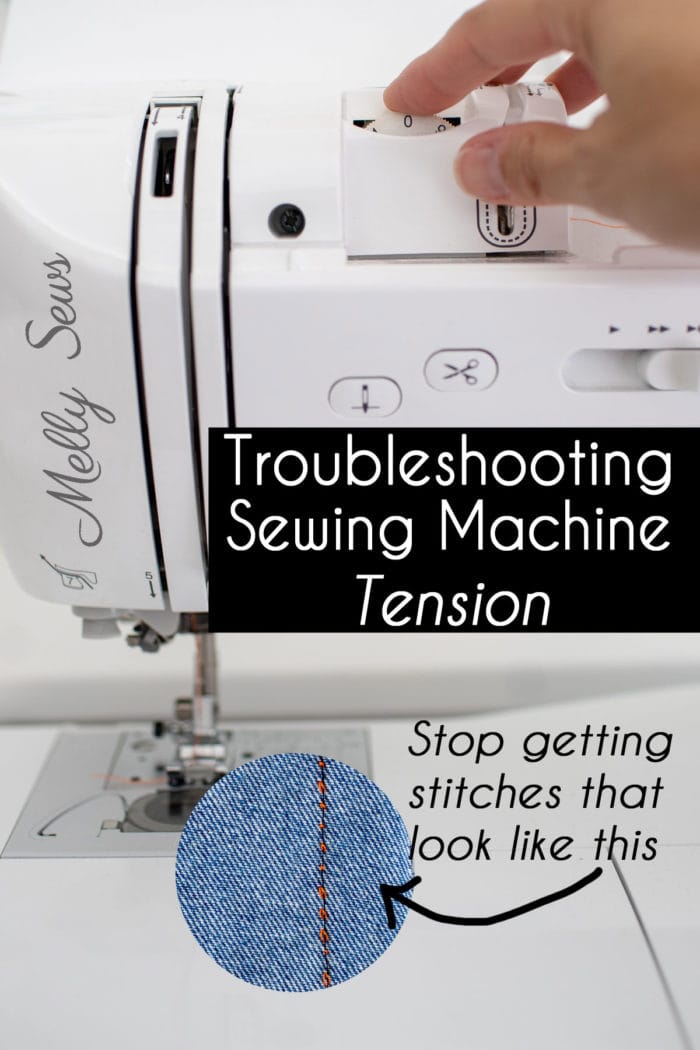
Hey y’all, today we’re going to talk about sewing machine tension. I’ll also discuss how to fix the tension on your sewing machine. If you’re getting messy stitches or tangled thread, tension might be the reason. So this article will define tension, how it works, and how to troubleshoot and fix any thread tension issue you might run across.
I got a reader question about what tension to set a machine on for a project. The reader asking wanted me to tell them the tension dial number to set their machine on. But the truth is, I can’t give you a number and be sure that would work. What I can do is show you what balanced (good) tension looks like. And I can show to identify the solution when your sewing tension is unbalanced and it’s making your stitches messed up.
Thread Tension
Tension is defined as “the state of being stretched tight”. When we’re talking about sewing, tension is a balancing act to make strong stitches that create a strong seam. But you want to do this without stretching the thread so tight that it breaks. Any tension adjustments are made with that goal in mind.
First – did you know that the reason that your thread does not go in a straight line from your needle to your thread spool is tension? Your sewing machine has to be able to keep a consistent tension in order to form stitches, and the inventors and improvers of sewing machines quickly learned that having the thread go in a winding path toward the needle made it easier to control the tension and keep it consistent.
While the top thread takes a circuitous path from the spool to the needle and has a dial for tension settings, the bobbin thread tension is generally set in the bobbin case.
How Does Tension Work?
Your sewing machine has a top thread and a bottom thread, and both the top tension and the bobbin tension work together to create strong stitches. Think of them as playing a game of tug of war – they have to be equally matched so that the game isn’t immediately over.
I made a video with some visual demonstrations of machine stitches and how they’re formed, you can watch it below or on YouTube here. I highly recommend watching this one, as I think it really helps show you what to look for and how to fix your sewing tension when it’s messed up.
I will add a disclaimer I wish I had said in the video – please, if nothing is working, make sure to unthread and then rethread your machine from scratch. If your machine wasn’t properly threaded to begin with, adjusting your tension won’t work either. If the thread is not properly in the tension disks, the tension screw can’t adjust the tension. You can also check for lint – lint in the tension assembly can throw your tension off.
Fixing Tension Problems
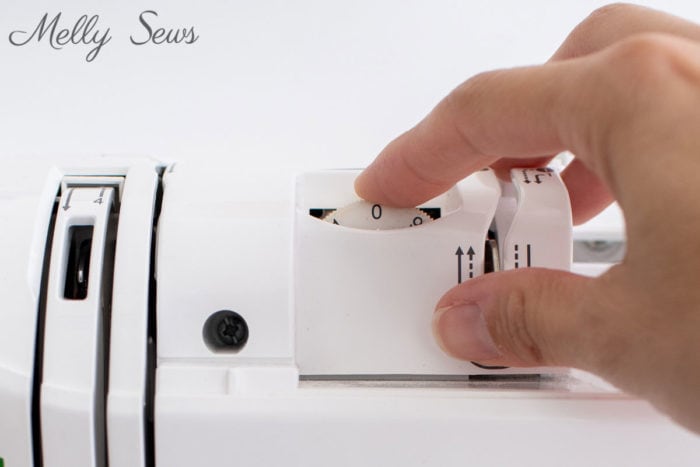
You should always first try to fix tension issues by adjusting the thread tension dials for the upper thread. As you can see in the video demonstration above, though it may appear the bobbin thread is the unbalanced culprit, issues can often be fixed by using the tension discs to change the amount of pull on the upper thread. Remember that a lower number means less tension and higher numbers mean more tension.
A good way to check your tension is to use different thread colors in the needle and bobbin, then test sew on scrap fabric from your project. This will help you see whether your top thread tension is too tight or too loose.
Tighten or Loosen?
Here are some close ups of balanced and unbalanced tensions. I’ve used different colors of thread to help you see which tension needs adjusting. You can refer to these when you’re troubleshooting a problem with your sewing machine. First, let’s take a look at balanced tension below.
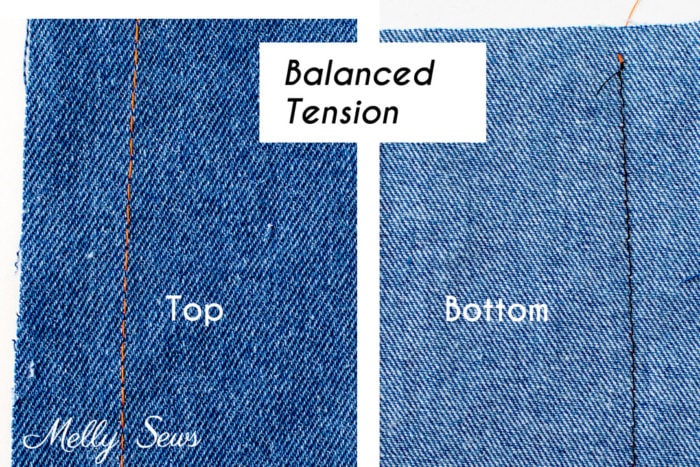
In these images the top thread is orange and the bobbin thread is black. Balanced sewing machine tension looks like distinct stitches on the right side and wrong side. This is true whether you are sewing a straight stitch or another stitch. Stitches are stable on both the top of the fabric and the back of the fabric, lay flat against the fabric, and do not pull out easily.
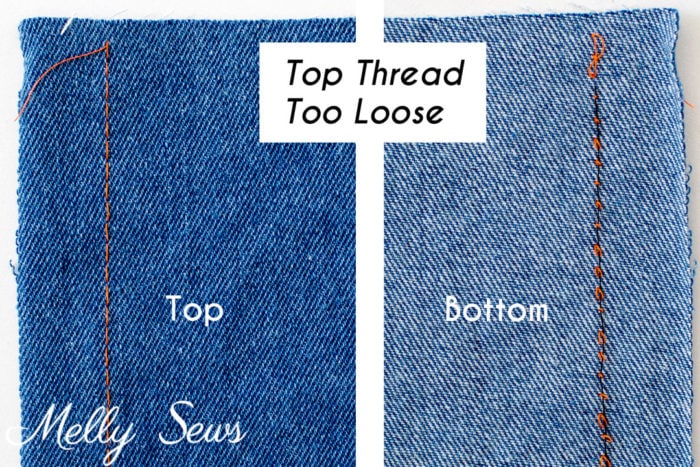
The picture above shows upper tension that is too loose. In other words, there is not enough tension to pull the top thread fully back onto the right side of the fabric. This is why it is clearly visible on the wrong side, you can see both color threads there. The black bobbin thread runs in a straight line and does not form stitches. It is also extremely easy to pull this thread out. To fix this problem, increase the tension on the top thread until it is balanced.
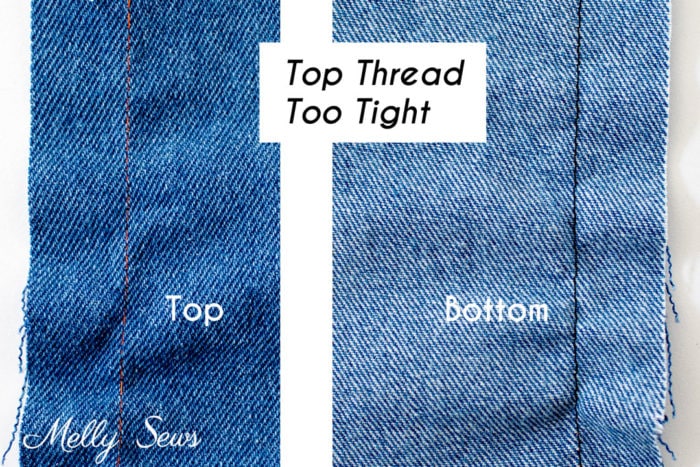
The picture above shows what happens when you have too much tension on your top thread. You can see that the top thread is running in almost a straight line, and even disappearing into the fabric. Compare this to the balanced tension sample. In addition, the fabric is puckering under all that tension – this is a red flag that you might get broken stitches.
When to Adjust the Bobbin Tension
If you have tried every tension setting on your sewing machine for the needle thread’s tension and the problem still persists, then you can look at the bobbin tension. Consult your sewing machine manual for instructions. Generally bobbin thread tension is adjusted by turning a small screw in the bobbin casing. You want to change this is very small increments – like a quarter turn at a time – using a small screwdriver.
When to Check Your Sewing Tension
- If you change to a fabric that is much thicker/thinner than you were sewing previously
- When you change to a different size needle
- If your machine is new
- When your stitches don’t look right
- If your fabric is puckering as you sew
- When your bobbin thread and top thread aren’t evenly balanced
- If you change stitch length
All of the things in the list above can cause sewing machine tension problems. Refer to the section above this one to figure out how to fix your tension.
Remember, I can’t tell you what tension to use for any particular project. The correct tension setting can vary due to fabric, needle, thread, and machine – even between machines of the same model! The best way to determine the correct tension for your project is to check tension with the same variables you’ll use in your projcet. This means using scraps of your project fabric and the same needle, thread and machine.
Also, remember tension is just one reason your thread might be looping under the throat plate. A bird’s nest on the wrong side of your fabric can be caused by other things too. If it’s not your tension, here are some other issues your machine might be having and what to do about them.
Suzy
Can’t tell you how grateful I am for this post!
Raylene
I with Suzy… I am so grateful for this information and visual!!!
Sherry Agar
Thank you for clearing up tension. I suppose I should read the manual but I hate doing that, as I’m a visual person.
Marilyn Burke
This is an excellent, clear article. Thanks so much!
Marilyn
Nancy A
Thank you so much excellent information.