

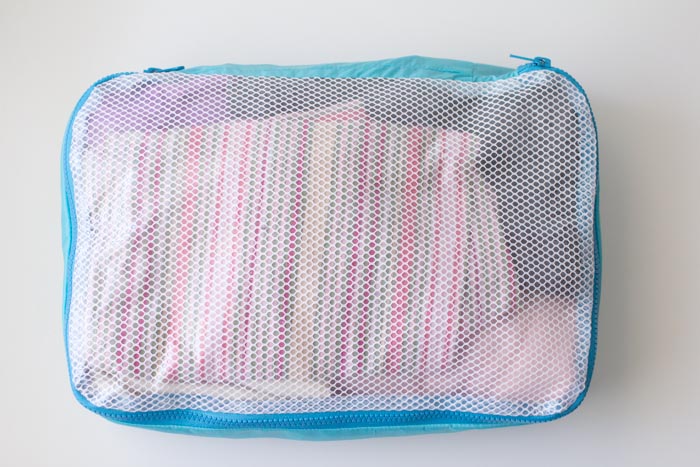
Hey y’all, today I’m sharing how to sew and use packing cubes. Packing cubes are a recent discovery of mine. And you might be a skeptic (like the Coach) about why and how they’re even useful. Like why pack your things in one bag just to pack them in another?
I am a famously light packer among my friends. Like not just carry on only, but carry on sized for under the seat for 2-3 day trips. And packing cubes are one of my tricks. They’re useful for compressing your clothing, as well as keeping it separate from other carry on items – for example, I use this in the bottom of my bag, with my laptop and makeup bag on top. That makes it easier to go through security when I have to take out my laptop or liquids. They’re also useful if you have several family members sharing luggage; you can give each person their own packing cube, which makes unpacking at the hotel a breeze.
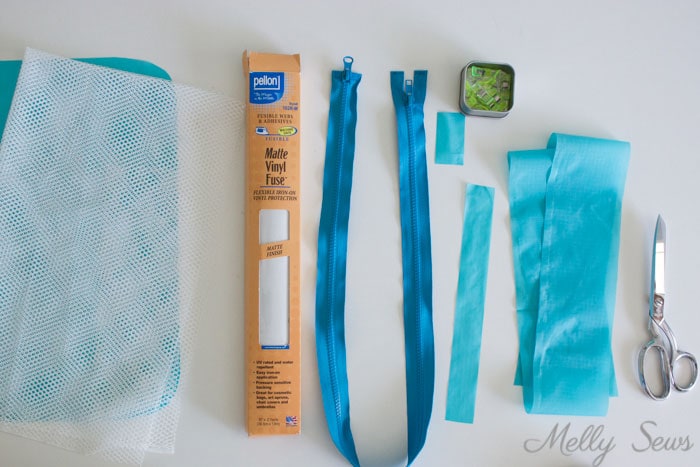
Want to make your own? I’ve got a supply list below, which contains affiliate links. You’ll need:
- Rip stop nylon, 1/2 a yard.
- Mesh fabric, 1/3 yard
- Iron on vinyl
- 36″ Zipper
Here’s a list of the piece sizes you’ll need:
- Top (mesh and vinyl) and bottom – 16 inches by 10 1/2 inches
- Side 46 1/2 inches by 2 1/2 inches
- Side tab 1 – 2 inches by 1 1/4 inches
- Side tab 2 – 9 1/2 inches by 1 1/4 inches
I’ve got a video tutorial that shows how to construct this below, and if it won’t load you can also watch it on YouTube here. If you prefer the written tutorial, scroll past the video to see it.
Start by fusing the vinyl to one side of the mesh, following the package instructions.
Note: I’ve had a lot of questions about why I used the mesh/vinyl combo. This is softer, more flexible and easier to sew than the roll vinyl sold in the stores, and it maintains both the transparency and water resistance which are practical things for my purposes. But you can use fabric, or just vinyl, or whatever you want on top of yours. That’s the beauty of sewing, you get to make it your way.
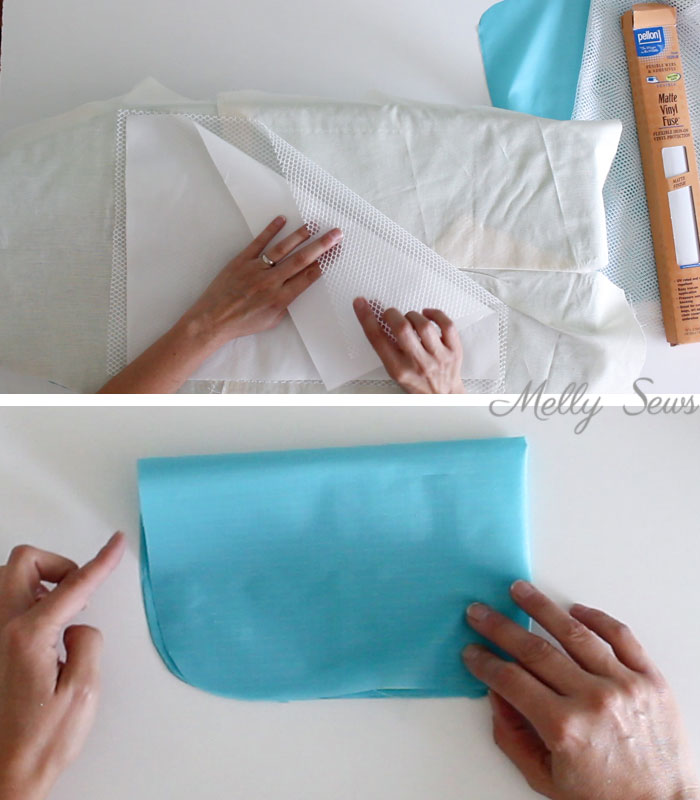
Round off the corners of the top and bottom by folding in half twice, so that all the corners match up, and rounding them off with scissors.
Fold one short end of tab 1 1/2 inch to the wrong side, then line it up with the short end of the side piece, folded edge up. Align the zipper over the tap, so that the folded edge of the tab touches the zipper pull.
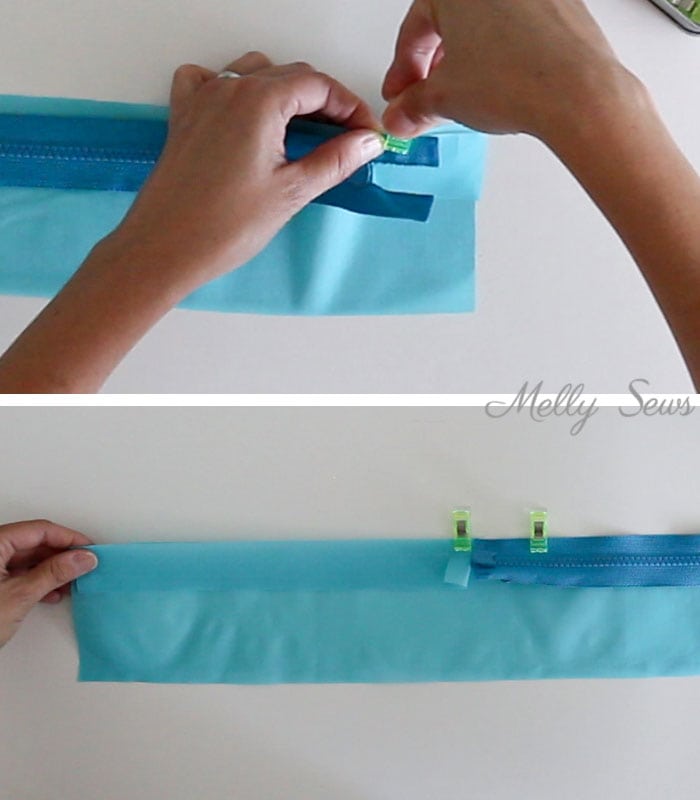
On the other end of the zipper, pin tab 2 at the with one short end folded 1/2 inch to the wrong side. Using a zipper foot, sew along the tabs and the zipper.
Baste the other side of tab 1 to the other side of the zipper as shown below.
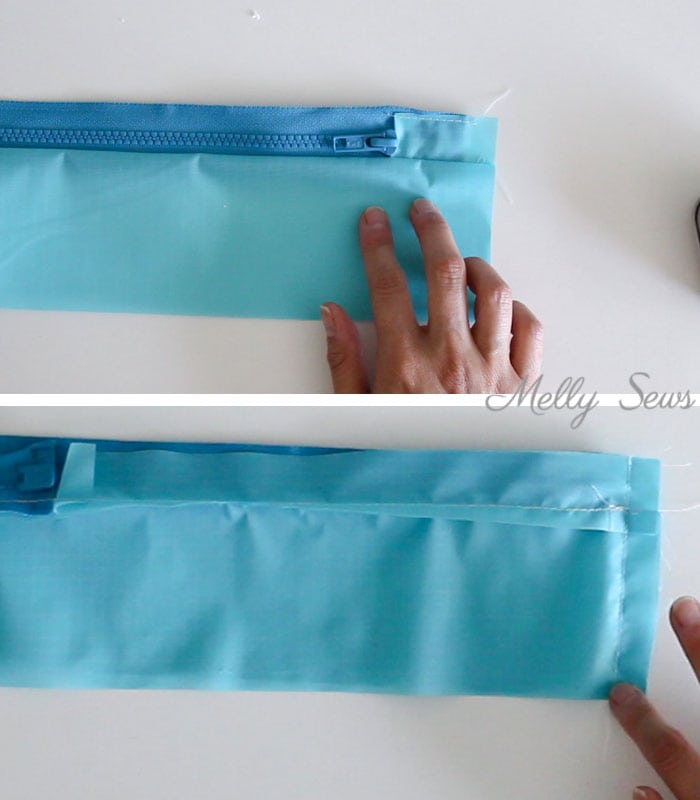
Fold the zipper/side in half, aligning the short ends. Stitch, using a 1/2″ seam allowance.
Place the mesh top of the cube rough side to the right side of the zipper/side and pin all around the sides. It can be helpful to mark quarters on the top and sides before you start pinning. Make sure that the zipper pulls are aligned near the corners on a long side of the top. Stitch around, using a zipper foot. Note that in the video I talk about how to add a bias finish to this seam if you don’t want the raw edges.
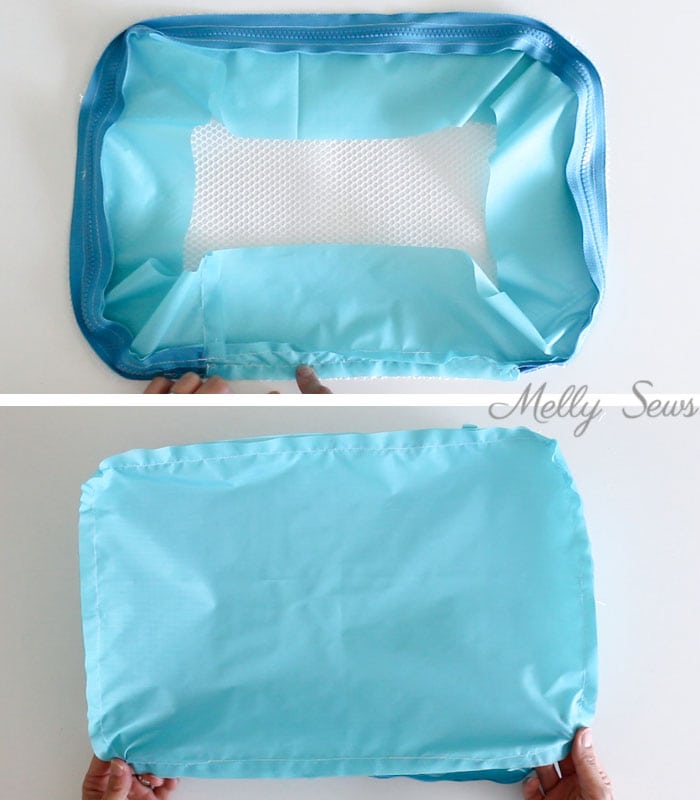
Pin the bottom to the side in the same manner, making sure to partially unzip the zipper first. Stitch around.
Turn the cube through the unzipped part of the zipper.
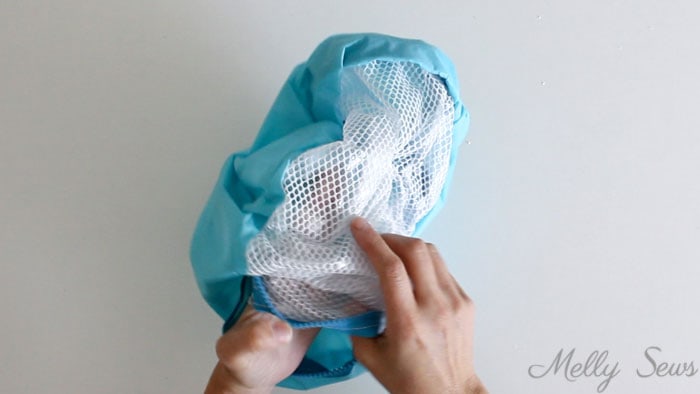
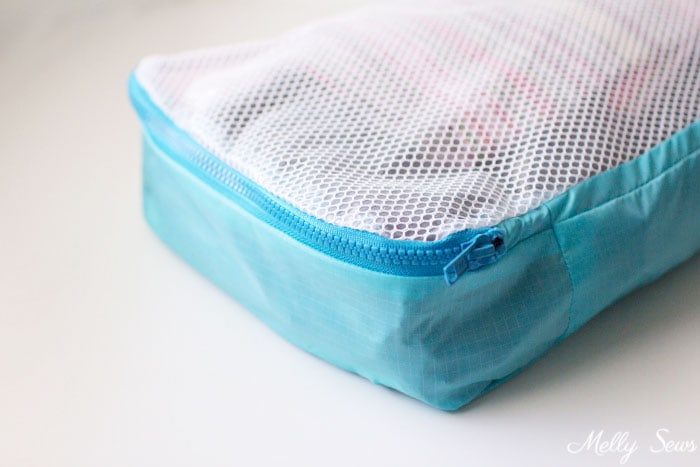
And you’ve got a packing cube!
pennyfp
If Coach ever had to travel with my SIL he would immediately be SOOO thankful for your skills in packing light! 🙂 I think she takes one suitcase JUST for shoes! I just donated one of the kids’ old school backpacks to a Girl Scout garage sale. I told the troop leader, “If no one buys this backpack, please do not throw it away before I get a chance to cut out the zipper!” Ah ha! Now I can show her why I said that!
Kristie
This is awesome. I can make each kid a different color! Thanks for sharing this!
Kristin Spirek
This is great, and so timely! I hope you don’t mind that I linked back to this post on my own blog- I had just written written a post about how I use packing cubes and other color-coding strategies for packing for family trips.
Lynette
So glad you shared this post! I’ve often flirted with buying these packing cubes, but now I can make them! Brilliant!
Leanna Levine
Hi Melly, this is great! My students will love the easy to follow instructions. Thanks for sharing!
– Leanna
Kim
Thank you so much for this! I was going to buy a couple for an upcoming trip and now I don’t have to! These little gems are expensive in the stores! I have quite a bit of sewing to do for my travel gear thanks to all of your posts. They have been extremely valuable, Thanks again. Kim in Round Rock, Tx
Colleen Patterson
You and I are clearly two peas in a pod-my husband was career military, so I can pack ridiculously light as well! Love this cube! Definitely going to employ that for a couple of really big handbags I’ve got, just do a custom fit sized to fit in the bottom and I’ve got a new weekend bag! Thanks!
Lisa G
Awesome!! I have one set of 3 different-sized packing cubes and I love them. Now I can make more!! 🙂
Melissa
I use packing cubes, but I love that I can now make my own!! Thank you for the awesome tutorial.
Emily
So cool! Somehow my suitcase/bag is always the one holding 3 peoples’ worth of clothing (while hubby has his own bag). This is going to be so helpful! What are the little clips you’re using instead of pins?
Sara
Thank you for sharing this!! I take frequent short road trips, and having these will make packing so much easier!
Rachel Kirk
This is awesome!! Your instructions and video make it so easy to understand each step!
Laurene Shewan
I actually bought some a year ago and gave a set to my daughter for Christmas. They are wonderful esp. when security goes through your things at the airport. They make it easier to find things, as I pack like items together and also are great for layering fragile items (like gifts) between soft items. Thanks for this tutorial as I’ll be making some for gifts.
Aura
I used your pattern to make a bag to put over our coffee machine to keep bugs out of it when we weren’t using it (we live in the south). I just adjusted for the size of my machine and the materials (didn’t use the mesh or vinyl). It turned out perfect- thank you!
Barbara Gilbert
I LOVE these! I bought a set for $6 (AliExpress), but I want to make some more in custom sizes. I want a set for Hubs, too. We recently had a one-day vacay on the Gulf coast, and I packed everything I needed in my cubes which went into a duffle. EASY to find what you need, when you need it without messing up everything else. Hubs and I are planning to moving into a large 5th wheel and become full-time RVers, and I want these to use in it. In the past 1.5 years I have spent a year in cancer treatment, had a broken leg, a heart attack, and had my gall bladder removed. I was hospitalized 9 times. How I wish I’d had packing cubes to grab and go when I need to. I will soon be having another surgery, and I have just lost the sight in one eye from the wet form of AMD. (my retinas bleed) A least I can still sew and read and thus save my sanity. If Hubs has to bring things to the hospital, I will have everything I wear in packing cubes, and labeled with my Brother Embellish label maker. For anyone who has to “grab and go” anywhere, I recommend labeled cases for their things. They aren’t just for travel necessarily. A case for Epi-Pens, for instance; labeled, is a life-saver. Items in the car for instant needs – labeled and easily found when the need arises. There are so many reasons for cases and a label maker that I don’t know how I lived this long without them! (And don’t forget gifts!) Melly, thanks for your tutorial; it will be heavily used!
Nana K
What a fabulous tutorial ! Thank you so much for posting. It is so awesome I have included your link in my 10 Awesome Travel Accessories to Sew post. You can check it out here! https://whatsnanamaking.com/travel-accessories-to-sew/
Linda Leary
I did not have any 36” zippers in my stash. Instead I used (2) 18” zippers. I made them so the “top” of the zippers met in the center of the cube’s long edge. They seem to work very well. I like that the opening starts in the center front of the packing cube.
David Sr.
48″ side length works better for me.
This is a really great tutorial and well done. Thank you
I have made 2 of these and find the length of the side panel works better at 48″ rather than the stated 46-1/2. I use black fiberglass window screen for the mesh. I make lots of “screen bags” – I like to see whats in them… ie: Machine attachments, AA batteries or AAA batteries, Magic clips, safety pins. etc. etc.